
Related Manuals for Zeiss GeminiSEM Series


Summary of Contents for Zeiss GeminiSEM Series
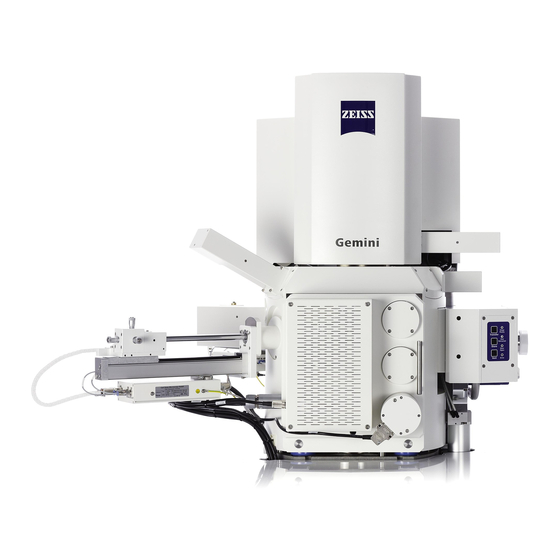
- Page 1 Instruction Manual ZEISS GeminiSEM series Field Emission Scanning Electron Microscope...
- Page 2 Effective from: 11/2020 © 2020 Without the prior written consent of ZEISS, this document or any part of it must neither be translated nor reproduced or transmitted in any form or by any means - including electronic or mechanic methods, by photocopying, recording or by any in- formation or filing system.
-
Page 3: Table Of Contents
Detectors ....................40 3.2.8 Specimen Stage ..................44 3.2.9 Dual Joystick ..................45 Optional Components and Accessories..............46 3.3.1 Optional Detectors ................46 3.3.2 Control Panel ..................60 Instruction Manual ZEISS GeminiSEM series | en-US | Rev. 2 | 349500-8138-000... - Page 4 Using Nano VP or XVP Mode ..............105 5.8.3 Returning to HV Mode ................111 Shutting down the System ..................112 5.9.1 Finishing the Work Session..............112 5.9.2 De-energizing the Microscope............... 112 Instruction Manual ZEISS GeminiSEM series | en-US | Rev. 2 | 349500-8138-000...
- Page 5 Performance Data and Specifications | GeminiSEM 360........133 Performance Data and Specifications | GeminiSEM 460........139 Performance Data and Specifications | GeminiSEM 560........145 Installation Requirements ..................151 9.5.1 Layout and Connections................ 153 Applicable Standards and Regulations..............154 Instruction Manual ZEISS GeminiSEM series | en-US | Rev. 2 | 349500-8138-000...
- Page 6 Table of Contents ZEISS 10 Parts and Tools ................1 55 10.1 Tools and Accessories ..................155 Glossary ..................1 57 Index....................1 61 Instruction Manual ZEISS GeminiSEM series | en-US | Rev. 2 | 349500-8138-000...
-
Page 7: General Information
Press <Ctrl+Alt+Del> Press several keys on the keyboard simultane- ously. Select Tools > Goto Control Panel > Air- Follow a path in the software. lock. Instruction Manual ZEISS GeminiSEM series | en-US | Rev. 2 | 349500-8138-000... -
Page 8: Explanation On Warnings And Additional Information
CAUTION indicates a potentially hazardous situation which, if not avoided, may result in minor or moderate injury. NOTICE Type and source of danger NOTICE indicates a potentially harmful situation which, if not avoided, may result in property damage. Instruction Manual ZEISS GeminiSEM series | en-US | Rev. 2 | 349500-8138-000... -
Page 9: Further Applicable Documents
ZEISS Sales & Service Partner. Accessories Also refer to the 3rd Party documentation of the manufacturer. 1.4 Contact If you have any questions or problems, please contact your local ZEISS Sales & Service Partner or one of the following addresses: Headquarter Phone:... -
Page 10: Safety
The SmartSEM software is intended for the operation of scanning electron microscopes (SEMs). Software The SmartSEM software has to be run exclusively on a personal computer delivered by ZEISS. Any other applications are not allowed. Regarding the operation of the microscope, the following regulations must be met: §... -
Page 11: General Safety Information
2 Safety | 2.2 General Safety Information § The microscope is only to be used by operators who have been trained by a ZEISS service rep- resentative. Basic operator training and safety instructions will be provided within the scope of the initial start-up by ZEISS. Make sure that everyone who operates the microscope only performs the tasks for which he/she is trained. -
Page 12: Preventive Maintenance
Moreover, it is recommended that you conclude a service contract with your local ZEISS service representative or organization. 2.2.4 Safe Handling of Spare Parts Using spare parts that are not provided by ZEISS can be hazardous or can lead to property dam- age: §... -
Page 13: Burn Hazards
Do not remove a reservoir from the gas injection system. Contact your ZEISS service representative to have an empty reservoir replaced. Never try to open a reservoir. For further information, refer to the GIS instruction manual. Instruction Manual ZEISS GeminiSEM series | en-US | Rev. 2 | 349500-8138-000... -
Page 14: Electrical Hazards
Always operate gas cylinders in an upright position and secure them so they will not tip over. Before transporting gas cylinders, place protective caps on them. Instruction Manual ZEISS GeminiSEM series | en-US | Rev. 2 | 349500-8138-000... -
Page 15: Magnetic Field Hazards
Always retract any retractable detectors before opening the chamber door. However, in NanoVP and XVP mode, the beamsleeve should stay inserted. Always move the specimen stage to a long working distance before opening the chamber door. Instruction Manual ZEISS GeminiSEM series | en-US | Rev. 2 | 349500-8138-000... -
Page 16: Radiation Hazards
Outside the EU, the user of the microscope has to comply with the local regulations of the coun- try where the microscope is operated. Contact Radiation For questions regarding radiation protection, contact the ZEISS Radiation Safety Officer, Carl Zeiss Protection AG, 73447 Oberkochen, Germany phone: +49 (0) 7364 20 0 2.3.9 Suffocation Hazards... -
Page 17: Warning Labels And Lights
Appropriate safety labels on the microscope warn operators of hazards. Each safety label is af- fixed close to the point where a particular hazard exists. Several labels also provide legal informa- tion. Front Side of Microscope Instruction Manual ZEISS GeminiSEM series | en-US | Rev. 2 | 349500-8138-000... - Page 18 Make sure you have read and understood the in- CAUTION struction manual before operating this product. Avoid injury Reorder no. 347800-0033-000-01en Make sure you have read and understood the instruction manual before operating this product. 347800-0033-000-01en Instruction Manual ZEISS GeminiSEM series | en-US | Rev. 2 | 349500-8138-000...
- Page 19 Do not remove any parts. Use genuine ZEISS parts Observe local safety and X-ray protection regula- exclusively. Observe local safety and X-ray tions. protection regulations. 347800-0033-000-06en Reorder no. 347800-0033-000-06en Instruction Manual ZEISS GeminiSEM series | en-US | Rev. 2 | 349500-8138-000...
-
Page 20: Safety Devices And Interlocks
Reorder no. 347800-0033-000-09en Underneath the cover panels of the microscope, there are some more safety labels, which are ad- dressed to authorized ZEISS service representatives. These safety labels are described in the docu- ments for ZEISS service representatives. Position and Figure of the Type Plate... -
Page 21: Main Switch
The Main Switch guarantees an ampere interrupting capacity (AIC) of at least 1,500 A rms. The Main Switch is located at the rear side of the plinth. Fig. 2: Main Switch Instruction Manual ZEISS GeminiSEM series | en-US | Rev. 2 | 349500-8138-000... -
Page 22: Circuit Breaker
Fig. 4: Emergency Off (EMO) Circuit With the optional Emergency Off Circuit, the microscope is equipped with the following additional safety equipment. Instruction Manual ZEISS GeminiSEM series | en-US | Rev. 2 | 349500-8138-000... -
Page 23: Emergency Off (Emo) Option Internal
After the MAIN switch has been set to the ON position, or § After the EMO button has been released. Fig. 6: S2 (Start) button below the MAIN switch Instruction Manual ZEISS GeminiSEM series | en-US | Rev. 2 | 349500-8138-000... -
Page 24: Locking Devices
The EHT (Extra high tension) is off. § The column chamber valve is closed. This is to prevent any risk of damaging the airlock rod or the gate valve. Instruction Manual ZEISS GeminiSEM series | en-US | Rev. 2 | 349500-8138-000... -
Page 25: Lockout/Tagout Equipment
The following energy isolating devices are required: Devices § Branch circuit molded case circuit breaker § Main shut-off valves – Nitrogen supply – Compressed air supply – Cooling water supply Instruction Manual ZEISS GeminiSEM series | en-US | Rev. 2 | 349500-8138-000... -
Page 26: Product And Functional Description
36], or Electron Optical Column | Gemini 3 [ 38] Plinth with ON/STANDBY/OFF buttons Monitors Work desk Dual joystick Refer to Dual Joystick [ 45] Personal Computer (PC) Instruction Manual ZEISS GeminiSEM series | en-US | Rev. 2 | 349500-8138-000... - Page 27 § Plasma Cleaner Refer to the instruction manual Plasma Cleaner § Electrostatic Beam Blanker for SEM Refer to the instruction manual Beam Blanker § Further options on request Instruction Manual ZEISS GeminiSEM series | en-US | Rev. 2 | 349500-8138-000...
-
Page 28: Main Components
Fig. 10: Schematics of the vacuum system of a microscope with Gemini 1 and Gemini 3 columns Fig. 11: Schematics of the vacuum system of a microscope with Gemini 2 column Instruction Manual ZEISS GeminiSEM series | en-US | Rev. 2 | 349500-8138-000... -
Page 29: Vacuum System Pressure Modes
HV mode is the standard mode of a microscope. It offers the possibility of analyzing and mapping conducting specimens. In HV mode, the pressure in the specimen chamber is less than 2 × 10⁻⁶ mbar. Instruction Manual ZEISS GeminiSEM series | en-US | Rev. 2 | 349500-8138-000... - Page 30 20 mm and the beamsleeve is retracted. If not, the beamsleeve stays out. Then the column chamber valve opens and the acceleration voltage is turned on again. Instruction Manual ZEISS GeminiSEM series | en-US | Rev. 2 | 349500-8138-000...
- Page 31 Vent valve, flanged to TIV Turbo isolation valve (TIV) Turbo pump Ion getter pumps (IGP) Gas flow valve (GFV) Pirani gauge Penning gauge Vent valve Roughing backing valve (RBV) Pre-vacuum pump Instruction Manual ZEISS GeminiSEM series | en-US | Rev. 2 | 349500-8138-000...
- Page 32 As the booster voltage is off, beamsleeve bias is deactivated and al- ways zero. For working in XVP mode, refer to Using Nano VP or XVP Mode [ 105]. Instruction Manual ZEISS GeminiSEM series | en-US | Rev. 2 | 349500-8138-000...
-
Page 33: Technical Data And Conformity
WD minus length of the beamsleeve, which is 6.17 mm. NOTICE Short Beam Gas Path Length ( BGPL Risk of damaging the beamsleeve and/or the specimen. Do not use a BGPL of less than 1 mm. Instruction Manual ZEISS GeminiSEM series | en-US | Rev. 2 | 349500-8138-000... -
Page 34: Electron Optical Column | Gemini 1
This considerably reduces the sensitivity of the electron beam to magnetic stray fields and minimizes the beam broadening. Instruction Manual ZEISS GeminiSEM series | en-US | Rev. 2 | 349500-8138-000... - Page 35 Signal Detection When the primary electron beam hits the specimen, certain interaction products are released, which can be recorded by specific detectors, e.g. the InLens SE detector . For more informa- tion refer to Principle of Signal Detection [ 40]. Instruction Manual ZEISS GeminiSEM series | en-US | Rev. 2 | 349500-8138-000...
-
Page 36: Electron Optical Column | Gemini 2
This considerably re- duces the sensitivity of the electron beam to magnetic stray fields and minimizes the beam broad- ening. Instruction Manual ZEISS GeminiSEM series | en-US | Rev. 2 | 349500-8138-000... - Page 37 Signal Detection When the primary electron beam hits the specimen, certain interaction products are released, which can be recorded by specific detectors, e.g. the InLens SE detector . For more informa- tion refer to Principle of Signal Detection [ 40]. Instruction Manual ZEISS GeminiSEM series | en-US | Rev. 2 | 349500-8138-000...
-
Page 38: Electron Optical Column | Gemini 3
This considerably reduces the sensitivity of the electron beam to magnetic stray fields and minimizes the beam broadening. Instruction Manual ZEISS GeminiSEM series | en-US | Rev. 2 | 349500-8138-000... -
Page 39: Gun Modes
Normal gun mode. This leads to a reduction of the energy spread of the primary electrons. Overall, the probe current in Imaging gun mode is about half the probe cur- rent in Normal gun mode. Instruction Manual ZEISS GeminiSEM series | en-US | Rev. 2 | 349500-8138-000... -
Page 40: Detectors
The beam scans the specimen and initiates particles to be emitted. A detector collects the emis- sion and produces an electric signal with an amplitude proportional to the number of particles at any given time. Instruction Manual ZEISS GeminiSEM series | en-US | Rev. 2 | 349500-8138-000... - Page 41 Compositional con- HV, VP 57]* trast Topography Channeling contrast (crystal orientation) aSTEM Detector Transmitted elec- Diffraction contrast trons 58]* Compositional con- trast Light photons Mineralogy CL Detector [ 59] Instruction Manual ZEISS GeminiSEM series | en-US | Rev. 2 | 349500-8138-000...
- Page 42 Thus, the working distance (WD) is one of the most important factors affecting the signal-to-noise ratio of the InLens SE detector. As the tilt angle of the specimen surface affects the emission angle of the electrons, you should avoid strong specimen tilting. Instruction Manual ZEISS GeminiSEM series | en-US | Rev. 2 | 349500-8138-000...
- Page 43 A positive collector voltage generates an electrical field in front of the detector, thus directing the low energy SEs towards the scintillator. Info For all standard applications, the collector bias should be set to +300 V. Instruction Manual ZEISS GeminiSEM series | en-US | Rev. 2 | 349500-8138-000...
-
Page 44: Specimen Stage
Fig. 20: Chamber CCD camera disabled as indicated by a pause sign (e.g. if a diode detector is selected). 3.2.8 Specimen Stage Purpose The motorized eucentric specimen stage is used to navigate the specimen inside the specimen chamber. Instruction Manual ZEISS GeminiSEM series | en-US | Rev. 2 | 349500-8138-000... -
Page 45: Dual Joystick
3.2.9 Dual Joystick Purpose The dual joystick is used for stage control and specimen navigation. Position The dual joystick is placed on the microscope desk. Fig. 22: Dual joystick Instruction Manual ZEISS GeminiSEM series | en-US | Rev. 2 | 349500-8138-000... -
Page 46: Optional Components And Accessories
The cations that result from the charge cascade neutralize any negative charge on the specimen that may have been created by the primary electron beam. Instruction Manual ZEISS GeminiSEM series | en-US | Rev. 2 | 349500-8138-000... - Page 47 The degree of amplification is depending on the photomultiplier voltage, which regulates the contrast. The preamplifier amplifies the signal and regulates the brightness. Instruction Manual ZEISS GeminiSEM series | en-US | Rev. 2 | 349500-8138-000...
- Page 48 BSEs to enhance contrast and resolution. The combination of InLens SE detector and EsB detector allows simultaneous imaging and mixing of a high contrast topography (SE) and a compositional contrast (BSE). Instruction Manual ZEISS GeminiSEM series | en-US | Rev. 2 | 349500-8138-000...
- Page 49 The BSD detector has applications mainly in materials analysis and in the life sciences. Material analysis: § Metallurgical sections § Geological sections § Complex materials § Printed circuit boards § Semiconductors § Bond pads Instruction Manual ZEISS GeminiSEM series | en-US | Rev. 2 | 349500-8138-000...
- Page 50 Since the detector has a limited speed, it is recommended to use scan speed 6 or higher (slower), especially at small magnifications. The lower the gain is, the faster is the detector. Instruction Manual ZEISS GeminiSEM series | en-US | Rev. 2 | 349500-8138-000...
- Page 51 CCD Mode is set to Auto Detect, then the TV illumination is automatically switched off when a diode detector is used. The BSD detector has applications mainly in materials analysis and in the life sciences. Material analysis: § Metallurgical sections Instruction Manual ZEISS GeminiSEM series | en-US | Rev. 2 | 349500-8138-000...
- Page 52 Motorized specimen stage Risk of damaging the detector when operating the motorized specimen stage. Retract the detector head completely after you have finished the work with the detector. Instruction Manual ZEISS GeminiSEM series | en-US | Rev. 2 | 349500-8138-000...
- Page 53 Since the detector has a limited speed, it is recommended to use scan speed 6 or higher (slower), especially at small magnifications. The lower the gain is, the faster is the detector. Instruction Manual ZEISS GeminiSEM series | en-US | Rev. 2 | 349500-8138-000...
- Page 54 S3-S6 shows mainly topography (bottom left). The final image shows the combined signal of all segments (bottom right). At small magnifications, the field of view is limited by the hole inside the aBSD detector: Fig. 30: Central hole of the aBSD detector Instruction Manual ZEISS GeminiSEM series | en-US | Rev. 2 | 349500-8138-000...
- Page 55 In comparison to segment based BSD detectors, the YAG BSD detector has a faster response time. Fig. 31: YAG BSD detector Instruction Manual ZEISS GeminiSEM series | en-US | Rev. 2 | 349500-8138-000...
- Page 56 Function A highly sensitive amplifier is connected to the sample, measuring the sum of incoming PEs and outgoing SEs and BSEs for each image pixel. Fig. 33: Silicon chip Instruction Manual ZEISS GeminiSEM series | en-US | Rev. 2 | 349500-8138-000...
- Page 57 Compositional mode images show the atomic contrast of the specimen , whereas to- pography mode images show surface details. Info BSE imaging is only possible at acceleration voltages above 1.5 kV. Instruction Manual ZEISS GeminiSEM series | en-US | Rev. 2 | 349500-8138-000...
- Page 58 (S4), and one high angle annular dark field segment (S5). Two different models are available: § The aSTEM4 allows detection of four channels in parallel. § The aSTEM1 only collects one signal at a time. Instruction Manual ZEISS GeminiSEM series | en-US | Rev. 2 | 349500-8138-000...
- Page 59 Fig. 37: Schematics of the CL detector Preamplifier Photomultiplier Objective lens Light guide with collector electrode Instruction Manual ZEISS GeminiSEM series | en-US | Rev. 2 | 349500-8138-000...
-
Page 60: Control Panel
The control panel allows direct access to 14 of the most frequently used functions. It integrates a full sized keyboard, 11 turning knobs, and 8 push buttons. Position The control panel is placed on the work desk. Fig. 39: Control panel Instruction Manual ZEISS GeminiSEM series | en-US | Rev. 2 | 349500-8138-000... - Page 61 Changes the focal point of the column by adjusting the magnitude of the objective lens. § Scan Speed +/− Increases (+) or decreases (−) the scan speed by doubling or halving the beam dwell time with each click step. Instruction Manual ZEISS GeminiSEM series | en-US | Rev. 2 | 349500-8138-000...
-
Page 62: Software Description
Enables you to access to SmartSEM features via sub-menus. AVI Toolbar Contains the controls to set up, record, and playback video sequences of scanned images. Toolbar Provides quick access to SmartSEM tools. Instruction Manual ZEISS GeminiSEM series | en-US | Rev. 2 | 349500-8138-000... - Page 63 Check- Enables you to activate or deactivate a function. Drop- Enables you to select the desired element. down list Radio Enables you to activate the desired option. button Instruction Manual ZEISS GeminiSEM series | en-US | Rev. 2 | 349500-8138-000...
- Page 64 User Privilege Description Calibration Enables the user to perform instrument calibration operations. Change Image Di- Enables the user to change the location where all images are saved. rectory Instruction Manual ZEISS GeminiSEM series | en-US | Rev. 2 | 349500-8138-000...
- Page 65 Enables you to inspect the dimensions of all possible specimen holders Gallery as well as to set the dimensions of the custom specimen holders. Enables you to activate the available specimen holders for SmartSEM. Instruction Manual ZEISS GeminiSEM series | en-US | Rev. 2 | 349500-8138-000...
- Page 66 SmartBackup Tool Service activities, for ZEISS service representatives only Stage Administra- Service activities, for ZEISS service representatives only Upgrade Server Service activities, for ZEISS service representatives only Database Instruction Manual ZEISS GeminiSEM series | en-US | Rev. 2 | 349500-8138-000...
-
Page 67: Installation
4 Installation 4 Installation Installation and commissioning are carried out by authorized ZEISS service representative. The in- stallation requirements are to be observed and adhered to. After installation or retrofitting, thor- oughly check that the Microscope System is in a safe operational state, making sure in particular that all protective covers (e.g. -
Page 68: Commissioning And First Operating Steps
If you wear medical implants that are susceptible to magnetic fields (e.g. cardiac pacemakers), do the following: Keep a distance of at least 30 cm from the ion getter pumps. Follow the safety instructions provided by the pump manufacturer. Instruction Manual ZEISS GeminiSEM series | en-US | Rev. 2 | 349500-8138-000... -
Page 69: Prerequisites For Commissioning And Operation
Ensure that there is an appropriate exhaust gas line to remove the waste gas of the pre- vacuum pump and to transmit it to the outside. Wear lint-free gloves when touching the inner parts of the specimen chamber or the speci- men. Instruction Manual ZEISS GeminiSEM series | en-US | Rev. 2 | 349500-8138-000... - Page 70 1. Verify that the main shut-off valves for compressed air, nitrogen, and cooling water at the facility installation are operable. Otherwise open and unlock the main shut-off valves. 2. If the Emergency Off (EMO) option is installed, pull the button to release it. Instruction Manual ZEISS GeminiSEM series | en-US | Rev. 2 | 349500-8138-000...
-
Page 71: Starting The Microscope
Refer to Baking out the Gun Head [ 122]. Prerequisite ü The microscope is energized. Procedure 1. At the front of the plinth, press the button. à button blinks green while the system is activated. Instruction Manual ZEISS GeminiSEM series | en-US | Rev. 2 | 349500-8138-000... -
Page 72: Starting The Software
5.3 Starting the Software Procedure 1. Power up the computer and log in. 2. Start the SmartSEM user interface via the ZEISS SmartSEM icon on the desktop. Alternatively, select Windows start menu > SmartSEM > SmartSEM User Interface. à The EM Server opens while loading various drivers. The EM Server implements the inter- nal communication between software and hardware of the microscope. - Page 73 <CTRL + P> Performs the Print Image function <CTRL + S> Calls the Export TIFF dialog to save the image <CTRL + ALT + S> Performs Auto Astigmatism Correction Instruction Manual ZEISS GeminiSEM series | en-US | Rev. 2 | 349500-8138-000...
-
Page 74: Acquiring An Image
Specimen holder Delivered with the microscope If necessary: carbon tape, conductive carbon, – adhesive metal tape, or similar Appropriate specimen (with conducting prop- – erties, e.g. gold on carbon) Instruction Manual ZEISS GeminiSEM series | en-US | Rev. 2 | 349500-8138-000... - Page 75 1. To attach a specimen to the stub, use conduc- tive carbon, adhesive metal tape, carbon tape, or similar. Ensure that the specimen area that you want to analyze is in proper contact with the stub. Instruction Manual ZEISS GeminiSEM series | en-US | Rev. 2 | 349500-8138-000...
-
Page 76: Loading The Specimen Chamber
Always close the chamber door before moving the specimen stage. To remove parts fallen into or near to the stage use a tool (e.g. tweezers) instead of your fingers. Instruction Manual ZEISS GeminiSEM series | en-US | Rev. 2 | 349500-8138-000... - Page 77 If you begin to experience symptoms of asphyxia (for example: rapid breathing, loss of mental alertness and/or muscular coordination, depression of sensations, emotional insta- bility, fatigue) leave the room immediately and inform the facility’s safety officer. Instruction Manual ZEISS GeminiSEM series | en-US | Rev. 2 | 349500-8138-000...
- Page 78 Several vacuum status messages display the current vacuum levels. à As soon as the appropriate vacuum level is achieved, the vacuum status message Vac Status = Ready is displayed. This may take up to 5 minutes. Instruction Manual ZEISS GeminiSEM series | en-US | Rev. 2 | 349500-8138-000...
-
Page 79: Locating The Specimen
4. Use the dual joystick to carefully move up the stage so that the stub you are using is in the center of the upper schematic. NOTICE Observe the camera image in order not to crash into the pole piece. Instruction Manual ZEISS GeminiSEM series | en-US | Rev. 2 | 349500-8138-000... -
Page 80: Switching On The Gun
1. In the GeminiSEM Control panel, select the Control tab. 2. Double-click the EHT Target readout. à The EHT Target window is displayed. 3. In the input field, enter 10 and click OK. Instruction Manual ZEISS GeminiSEM series | en-US | Rev. 2 | 349500-8138-000... -
Page 81: Acquiring An Image
2. From the Scan Speed drop-down list, select Scan Speed = 2. INFO: The lower the scan speed number, the faster the electron beam scans across the specimen. Scan Speed = 2 allows you to get an image quickly. Instruction Manual ZEISS GeminiSEM series | en-US | Rev. 2 | 349500-8138-000... - Page 82 4. To adjust the focus, change the working distance. Hold down the mouse wheel and drag the mouse within the Image Area in left/right direction. à The current working distance is indicated in the Status Bar. 5. Adjust contrast and brightness again. Instruction Manual ZEISS GeminiSEM series | en-US | Rev. 2 | 349500-8138-000...
-
Page 83: Optimizing The Image
The image outside the scan frame is frozen. 2. To change the position of the scan frame, click on the green border line and use the mouse to drag and drop the frame. Instruction Manual ZEISS GeminiSEM series | en-US | Rev. 2 | 349500-8138-000... - Page 84 The specimen detail should just be pulsating without shifting. INFO: To obtain optimum results, alternately correct focus and astigmatism. 6. To deactivate the reduced raster, in the Toolbar, click the Reduced Raster/Column Control icon. Instruction Manual ZEISS GeminiSEM series | en-US | Rev. 2 | 349500-8138-000...
-
Page 85: Saving The Image
This leads to a higher probe current. Overall, the probe current in Analytic gun mode is about twice the probe current in Normal gun mode. The Analytic gun mode is especially useful for applications which require high intensities (e.g. WDX). Instruction Manual ZEISS GeminiSEM series | en-US | Rev. 2 | 349500-8138-000... -
Page 86: Setting The Probe Current
OptiProbe allows you to continuously adjust the probe current. The function automatically se- lects a suitable aperture and the current mode while the extractor voltage is adjusted to meet the probe current selected by the user. Instruction Manual ZEISS GeminiSEM series | en-US | Rev. 2 | 349500-8138-000... -
Page 87: Measuring The Probe Current
In some special cases (e.g. very low EHT values), it may be necessary to deactivate the Stage Bias option and set the stage potential close to zero. Instruction Manual ZEISS GeminiSEM series | en-US | Rev. 2 | 349500-8138-000... -
Page 88: Changing The Extractor Voltage
Specimen I readout. 5.5.5 Changing the Extractor Voltage The Extractor voltage is preset by the factory or by the ZEISS service representative. Within certain limits, the operator may carefully increase the extractor voltage in order to optimize the probe current for particular applications. -
Page 89: Working With Different Aperture Configurations And Beam Modes
6 pA to 100 nA High current * Calibration value: deviation of 10 % possible Info If you wish to change the installed configuration of your microscope, contact your local ZEISS service representative. Procedure 1. From the Menu Bar, select View > SEM Status. -
Page 90: Selecting The Aperture
Special high-current applica- tions * Calibration value: deviation of 10 % possible Info If you wish to change the installed configuration of your microscope, contact your local ZEISS service representative. Procedure 1. From the Menu Bar, select View > SEM Status. -
Page 91: Finding Appropriate Detector Settings
Setting up the CL Detector [ 103] Procedure 1. Select the Imaging tab of the GeminiSEM Control panel. 2. Select the detector from the Signal A drop- down list. Instruction Manual ZEISS GeminiSEM series | en-US | Rev. 2 | 349500-8138-000... -
Page 92: Setting Up The Inlens Se Detector
5.7.3 Setting up the SE Detector The SE detector collects the SE signal, highlighting the topography of the specimen. Fig. 42: An eledone tentacle Instruction Manual ZEISS GeminiSEM series | en-US | Rev. 2 | 349500-8138-000... -
Page 93: Setting Up The Vpse Detector
The microscope is operating in VP vacuum mode ü Procedure 1. In the GeminiSEM Control panel, select the Imaging tab. 2. From the Signal A drop-down list, select VPSE G4. Instruction Manual ZEISS GeminiSEM series | en-US | Rev. 2 | 349500-8138-000... -
Page 94: Setting Up The C2D Detector
4. Double-click C2D Control to open the C2D Control panel. 5. Select C2D Gain = Low. 6. Adjust the C2D Bias scroll bar to 80 %. This is usually a good start value. Instruction Manual ZEISS GeminiSEM series | en-US | Rev. 2 | 349500-8138-000... -
Page 95: Setting Up The Asb Detector
3. To open the Panel Configuration Bar, from the Menu Bar, select Tools > Goto Panel. à The Panel Configuration Bar is displayed. It contains an alphabetical list of functions. 4. Double-click BSD Control. à The BSD Control dialog is displayed. Instruction Manual ZEISS GeminiSEM series | en-US | Rev. 2 | 349500-8138-000... -
Page 96: Setting Up The Asb4 Detector
1. In the GeminiSEM Control panel, select the Imaging tab. 2. From the Signal A drop-down list, select AsB4 Ch1. 3. From the Tool Bar, select Quad Mode. Instruction Manual ZEISS GeminiSEM series | en-US | Rev. 2 | 349500-8138-000... - Page 97 8. If you want to change the default setting to BSD: TOPO, click BSD: Set TOPO. 9. From the BSD Gain drop-down list, select the appropriate BSD Gain: Low, Medium, High, or Very High. The BSD Gain depends on the signal strength. Instruction Manual ZEISS GeminiSEM series | en-US | Rev. 2 | 349500-8138-000...
-
Page 98: Setting Up The Absd/Absd-Lh/Vp-Bsd Detector
Use high or very high detector gain for low accelerating voltage and/or low beam current The EHT should be bigger than 2 kV to achieve a significant detection efficiency. Instruction Manual ZEISS GeminiSEM series | en-US | Rev. 2 | 349500-8138-000... -
Page 99: Setting Up The Yag Bsd Detector
If there is not enough space between the objective lens and the specimen, then lower the stage position before you insert the detector. Insert the YAG BSD detector carefully and observe the moving YAG BSD detector via the chamberscope. Instruction Manual ZEISS GeminiSEM series | en-US | Rev. 2 | 349500-8138-000... -
Page 100: Setting Up The Esb Detector
2. From the Signal A drop-down list, select ESB. 3. Adjust the EHT, working distance (WD), and EsB Grid according to the suggestions in the table in order to optimize the image. Instruction Manual ZEISS GeminiSEM series | en-US | Rev. 2 | 349500-8138-000... -
Page 101: Setting Up The Scd Detector
STEM Control panel. Fig. 49: Asbestos, oriented darkfield (ODF) image captured with an aSTEM4 detector (left), ODF image showing real information about bending and lattice defects within each fiber (right). Instruction Manual ZEISS GeminiSEM series | en-US | Rev. 2 | 349500-8138-000... - Page 102 Select between Low, Medium, High, or Very High. 7. For displaying several channels of a aSTEM detector simultaneously, repeat steps 3 to 6 for the other display zones. Instruction Manual ZEISS GeminiSEM series | en-US | Rev. 2 | 349500-8138-000...
-
Page 103: Setting Up The Cl Detector
When working with Nano VP mode or XVP mode, a beamsleeve aperture has to be inserted. Info In Standard VP mode and XVP mode, InLens SE, EsB, and SE detector cannot be used. Info In NanoVP mode, the SE detector cannot be used. Instruction Manual ZEISS GeminiSEM series | en-US | Rev. 2 | 349500-8138-000... -
Page 104: Changing To Standard Vp Mode
4. To change the chamber pressure, use the VP Target scroll bar. Alternatively double-click into the VP Target field, enter desired pressure value and click Refer to Working with Variable Pressure [ 103] to determine the correct pressure value. Instruction Manual ZEISS GeminiSEM series | en-US | Rev. 2 | 349500-8138-000... -
Page 105: Using Nano Vp Or Xvp Mode
Part no. Beamsleeve Accessory Kit 349553-8012-000 included with VP option Plastic tweezers Fig. 51: Beamsleeve aperture kit, 350 µm beamsleeve aperture (black O-ring ), 800 µm beam- sleeve aperture (green O-ring). Instruction Manual ZEISS GeminiSEM series | en-US | Rev. 2 | 349500-8138-000... - Page 106 The Beamsleeve Configuration wizard is displayed where you have to set the aperture size. 3. Follow the instructions of the Beamsleeve Configuration wizard. 4. Insert the pneumatic stop onto the beamsleeve slide. Instruction Manual ZEISS GeminiSEM series | en-US | Rev. 2 | 349500-8138-000...
- Page 107 The procedure consists of the following steps: § Inserting the Beamsleeve Aperture [ 108] § Measuring the Size of the Beamsleeve Aperture [ 108] § Centering the Beamsleeve Aperture [ 108] Instruction Manual ZEISS GeminiSEM series | en-US | Rev. 2 | 349500-8138-000...
- Page 108 VPSE/C2D detector. Beamsleeve bias may limit your VPSE/C2D detector efficiency. In case you would like to optimize VPSE/C2D efficiency, set the beamsleeve bias to 0 V. Instruction Manual ZEISS GeminiSEM series | en-US | Rev. 2 | 349500-8138-000...
- Page 109 At WD > 12 mm In- Lens efficiency de- creases Beam Gas Path 1 mm – 3 mm 0.3 mm – Z Below BGPL of Length (BGPL) 1 mm incomplete charge compensa- tion BGPL > 2 mm in- creasing skirt effect Instruction Manual ZEISS GeminiSEM series | en-US | Rev. 2 | 349500-8138-000...
- Page 110 2. In the Variable Pressure section, click Nano VP or XVP to start the pre-defined macro. The macro automatically performs the following actions: à If EHT is on, it is turned off. à The column chamber valve is closed. Instruction Manual ZEISS GeminiSEM series | en-US | Rev. 2 | 349500-8138-000...
-
Page 111: Returning To Hv Mode
The transition is indicated in the status bar of the SmartSEM software. This takes approximately 60 s. If the chamber pressure was really high before, then it takes a little bit longer. Instruction Manual ZEISS GeminiSEM series | en-US | Rev. 2 | 349500-8138-000... -
Page 112: Shutting Down The System
3. To cut off the nitrogen supply, close the nitrogen main shut-off valve. 4. To cut off the cooling water supply, close the main shut-off valve for water. 5. Set the MAIN switch to the Off position. Instruction Manual ZEISS GeminiSEM series | en-US | Rev. 2 | 349500-8138-000... -
Page 113: Performing A Lockout/Tagout
If the EMO option is not installed, set the MAIN switch at the rear side of the plinth to the OFF position. Instruction Manual ZEISS GeminiSEM series | en-US | Rev. 2 | 349500-8138-000... -
Page 114: Safety During Cleaning And Maintenance
6.3 Maintenance Work Only conduct maintenance work described in this document. All pursuing tasks of maintenance, service and repair not described here must only be performed by an authorized ZEISS service rep- resentative. 6.3.1 Change of Consumables and Chemicals The change of consumables and chemicals has to be performed by a ZEISS service representative at mandatory intervals. -
Page 115: Care And Cleaning Work
* There is no warranty on field emission guns; manufacturers do not guarantee any lifetime. Tab. 4: Schedule for the change of consumables 6.4 Care and Cleaning Work All care and cleaning work not described here must only be performed by an authorized ZEISS ser- vice representative. NOTICE Functional impairment due to dirt and moisture Dirt, dust and moisture can impair the Microscope System’s functionality and can cause short-... - Page 116 Covers of the microscope which have been secured by a screw must not be removed. Please con- tact the Zeiss service in case cleaning is necessary below these covers. Instruction Manual ZEISS GeminiSEM series | en-US | Rev. 2 | 349500-8138-000...
- Page 117 7 Troubleshooting | 7 Troubleshooting The following table provides hints for solving common problems. If you cannot solve the problem or if you are unsure about a certain technical difficulty, contact your local ZEISS service represen- tative. Symptom Cause Measure §...
-
Page 118: Overall System
3. If this does not help, reset the workstation as described in the instruction manual of the mi- croscope. INFO: If the problem persists, contact your ZEISS service representative. Instruction Manual ZEISS GeminiSEM series | en-US | Rev. 2 | 349500-8138-000... -
Page 119: Chamber
Alternatively, use the dual joystick to navigate to the desired position and click Set to cur- rent position. 6. To activate the function, activate the Post Init. Posn Valid checkbox. Instruction Manual ZEISS GeminiSEM series | en-US | Rev. 2 | 349500-8138-000... -
Page 120: Changing The Joystick Tv Angle
Bad chamber vacuum The procedure consists of the following steps: § Venting the Specimen Chamber [ 77] § Replacing the O-ring [ 121] § Evacuating the Specimen Chamber [ 78] Instruction Manual ZEISS GeminiSEM series | en-US | Rev. 2 | 349500-8138-000... - Page 121 If necessary, then only use a plastic or wooden tool to remove the O-ring. 3. Inspect the groove that holds the O-ring and remove any contamination. 4. Insert the new chamber door O-ring. Instruction Manual ZEISS GeminiSEM series | en-US | Rev. 2 | 349500-8138-000...
-
Page 122: Resetting The Touch Alarm
The pop-up menu for Vacuum, Gun and EHT activation is displayed. 2. Click Shutdown Gun. 3. Wait until the gun has ramped down. à This may take up to 5 minutes. Instruction Manual ZEISS GeminiSEM series | en-US | Rev. 2 | 349500-8138-000... -
Page 123: Calibrating The Probe Current
4. Set a magnification that allows transmission of the complete electron beam into the cavity of the Faraday cup through the aperture orifice. 5. In the Panel Configuration Bar, double-click Probe Current Calibration. Instruction Manual ZEISS GeminiSEM series | en-US | Rev. 2 | 349500-8138-000... -
Page 124: Calibrating The Stigmator
Pre-Vacuum pump (X25) & Yellow (X22) ac- cessories Aux 1-2 + 2 Spare labeled FIB,GIS (Crossbeam relevant only) 10 A Internal heaters 10 A Circuit surge protection off Instruction Manual ZEISS GeminiSEM series | en-US | Rev. 2 | 349500-8138-000... -
Page 125: Detectors
Do not smoke. In case of contact with the eyes, rinse immediately with plenty of water and seek medical advice. Avoid contact with skin. Do not breathe vapor. Instruction Manual ZEISS GeminiSEM series | en-US | Rev. 2 | 349500-8138-000... -
Page 126: Apertures
4. Carefully take out the beamsleeve aperture with the plastic tweezers from the top side. NOTICE If you have a BSD diode installed: Do not touch the diode surface from bottom side, this will damage the diode. Instruction Manual ZEISS GeminiSEM series | en-US | Rev. 2 | 349500-8138-000... -
Page 127: Cleaning Up The Pc
5. Erase the original log files in the LOG folders. 6. Check that Windows updates are applied and that service packs are applied. INFO: Each service pack includes all the patches since the last major release. Instruction Manual ZEISS GeminiSEM series | en-US | Rev. 2 | 349500-8138-000... -
Page 128: Decommissioning
Use genuine ZEISS parts exclusively. Ensure that all local safety and X-ray protection regulations are met. Only authorized ZEISS service representatives are allowed to service the microscope. Instruction Manual ZEISS GeminiSEM series | en-US | Rev. 2 | 349500-8138-000... -
Page 129: Transport And Storage
Maintain a safe distance. Do not walk or place your hands or feet under the load while it is being lowered. Wear safety shoes and gloves. Instruction Manual ZEISS GeminiSEM series | en-US | Rev. 2 | 349500-8138-000... - Page 130 If a gas injection system (GIS) is used, the precursors may be explosive, reactive, toxic or irritant when they come into contact with the environment or a person. Do not remove or install a GIS reservoir. Contact your local ZEISS service representative to have a reservoir removed or installed.
- Page 131 Microscope System during installation and test- ing. Instruction Manual ZEISS GeminiSEM series | en-US | Rev. 2 | 349500-8138-000...
-
Page 132: Disposal
Info Detailed information on disposal and recycling is available from your ZEISS Sales & Service Part- ner. 8.4 Decontamination A decontamination statement must be submitted before returning any used objects to the ZEISS location. -
Page 133: System Layout
The Microscope System must be plugged into a properly installed power socket with protective earth contact using the supplied mains cable. The protective earth connection must not be im- paired by the use of extension cables. Instruction Manual ZEISS GeminiSEM series | en-US | Rev. 2 | 349500-8138-000... - Page 134 9 Technical Data and Conformity | 9.2 Performance Data and Specifications | GeminiSEM 360 ZEISS Info Your ZEISS Sales & Service Partner will provide you with the detailed installation requirements. Weight and Sizes Main Components Length Width (mm) Height Weight (kg)
- Page 135 Probe current selection via seven apertures (six apertures in case of 100 nA configuration) with electromagnetic selection and precise alignment Optional OptiProbe module for continuous probe current adjust- ment Instruction Manual ZEISS GeminiSEM series | en-US | Rev. 2 | 349500-8138-000...
- Page 136 5-axes motorized eucentric, controlled via the SmartSEM user interface, operated by a dual joystick control box Mounting: Drawer-type door Movements: § X/Y = 130 mm § Z = 50 mm § T = −4° to 70° Instruction Manual ZEISS GeminiSEM series | en-US | Rev. 2 | 349500-8138-000...
- Page 137 Pneumatically retractable 5 segment multi-mode solid state BSE de- tector integrated into the beamsleeve aperture; enables materials con- trast, crystal orientation, and topographic imaging. Enables in-situ 3D surface reconstruction and quantitative 3D metrology. Instruction Manual ZEISS GeminiSEM series | en-US | Rev. 2 | 349500-8138-000...
- Page 138 YAG detector (optional): Manual retractable, high speed 1 sector scintillator based BSE detec- tor. Chamber camera Color CCD camera with white-light illumination and IR illumination. Instruction Manual ZEISS GeminiSEM series | en-US | Rev. 2 | 349500-8138-000...
-
Page 139: Performance Data And Specifications | Geminisem 460
The protective earth connection must not be im- paired by the use of extension cables. Info Your ZEISS Sales & Service Partner will provide you with the detailed installation requirements. Weight and Sizes Main Components... - Page 140 Minimum cross section of an additional PE is 10 mm² Cu or 16 mm² Al An exclusive grounding connection to earth must be provided, i.e. the grounding terminal must not be common to other electrical equipment. Instruction Manual ZEISS GeminiSEM series | en-US | Rev. 2 | 349500-8138-000...
- Page 141 Column: Compact column design, integrated Mu-metal shielding to limit sensitivity to stray fields. Factory aligned column for minimum astigmatism and beam shift. Instruction Manual ZEISS GeminiSEM series | en-US | Rev. 2 | 349500-8138-000...
- Page 142 Two accessory ports on the stage door are pro- vided Specimen weight: Up to 0.5 kg Specimen current monitor with integrated Touch Alarm (Audible touch alarm warning with on-screen message) Instruction Manual ZEISS GeminiSEM series | en-US | Rev. 2 | 349500-8138-000...
- Page 143 Gemini objective lens for the detection of angular selec- tive backscattered (AsB) electrons. BSD imaging is possible at accelera- tion voltages above 1 kV. Allows operation at short working distance. Instruction Manual ZEISS GeminiSEM series | en-US | Rev. 2 | 349500-8138-000...
- Page 144 Chamber camera Color CCD camera with white-light illumination and IR illumination. Specimen current 6 range auto ranging for precise current measurement in the range of monitor 1 pA to 10 μA Instruction Manual ZEISS GeminiSEM series | en-US | Rev. 2 | 349500-8138-000...
-
Page 145: Performance Data And Specifications | Geminisem 560
The protective earth connection must not be im- paired by the use of extension cables. Info Your ZEISS Sales & Service Partner will provide you with the detailed installation requirements. Weight and Sizes Main Components... - Page 146 Minimum cross section of an additional PE is 10 mm² Cu or 16 mm² Al An exclusive grounding connection to earth must be provided, i.e. the grounding terminal must not be common to other electrical equipment. Instruction Manual ZEISS GeminiSEM series | en-US | Rev. 2 | 349500-8138-000...
- Page 147 Dynamic focus: For correction of focus on tilted specimens Focus wobble: For assistance in aperture alignment, with adjustable amplitude and speed Instruction Manual ZEISS GeminiSEM series | en-US | Rev. 2 | 349500-8138-000...
- Page 148 Chamber mounted plasma cleaner for (optional) removal of hydrocarbon contamination from both specimen and chamber; integrated software control for user defined cleaning cycles without user interaction after starting the cleaning process Instruction Manual ZEISS GeminiSEM series | en-US | Rev. 2 | 349500-8138-000...
- Page 149 Enhanced signal-to-noise ration versus VPSE detector. CL detector (optional): Cathodoluminiscence (CL) chamber detector SCD detector (optional): The specimen current detector (SCD) detects the current absorbed by the specimen. Instruction Manual ZEISS GeminiSEM series | en-US | Rev. 2 | 349500-8138-000...
- Page 150 Vacuum range from 5 Pa to 500 Pa, adjustable in steps of 1 Pa VP detection Additional to the detectors selected in standard VP option, the VP- BSD detector is available in NanoVP mode. Instruction Manual ZEISS GeminiSEM series | en-US | Rev. 2 | 349500-8138-000...
-
Page 151: Installation Requirements
Approx. 40 l/min for ventilation of specimen chamber with chamber door open Pressure 0.30–0.35 MPa (3.0–3.5 bar) Quality 4.6 with nitrogen content > 99.996 % Connection hose 6 mm inside diameter. 10 m are delivered with the microscope. Instruction Manual ZEISS GeminiSEM series | en-US | Rev. 2 | 349500-8138-000... - Page 152 AC component: less than 1 mG peak to peak between 10 Hz and 1 kHz Acoustic noise Up to 120 Hz: less than 52 dB 120–450 Hz: less than 43 dB Above 450 Hz: less than 47 dB Instruction Manual ZEISS GeminiSEM series | en-US | Rev. 2 | 349500-8138-000...
-
Page 153: Layout And Connections
Pre-vacuum pump Pressure reducer (water, nitrogen, Computer workplace compressed air) Main shut-off valves Emergency Off (EMO) button (optional) Water supply Water runback Nitrogen supply Compressed air supply Exhaust line Instruction Manual ZEISS GeminiSEM series | en-US | Rev. 2 | 349500-8138-000... -
Page 154: Applicable Standards And Regulations
로합니다. European and International Directives / Standards: For more information on ISO, CSA, SEMI certifi- cates or CE Declarations of Conformity, contact your ZEISS Sales & Service Partner. ZEISS works according to a certified Environment Management System according to ISO 14001. - Page 155 10 Parts and Tools NOTICE Spare parts and consumables Using spare parts or consumables that are not provided by ZEISS can lead to property damage. Only genuine spare parts and consumables supplied by ZEISS are to be used in servicing the microscope.
- Page 156 Storage container with 8 bores for the beamsleeve apertures Plastic tweezers for handling the beamsleeves Dust blower for cleaning the beamsleeve apertures from dust particles Black spare O-rings Green spare O-rings Instruction Manual ZEISS GeminiSEM series | en-US | Rev. 2 | 349500-8138-000...
- Page 157 Sec- Energy Dispersive X-ray Spectroscopy ondly, the beam booster technique en- hances protection against external stray fields. Instruction Manual ZEISS GeminiSEM series | en-US | Rev. 2 | 349500-8138-000Instruction Manual...
- Page 158 Function that sweeps the focus of the objective lens backwards and forward R-axis (Rotation) through the focus on the specimen plane. When the aperture is misaligned a lateral shift is observed. Radio Frequency Instruction Manual ZEISS GeminiSEM series | en-US | Rev. 2 | 349500-8138-000...
- Page 159 Suppressor eration of electron microscopes. Electrode (anode) that suppresses un- wanted thermionic emission from the shank of the Schottky field emitter. Extended Variable Pressure T-axis (Tilt) Y-axis Instruction Manual ZEISS GeminiSEM series | en-US | Rev. 2 | 349500-8138-000Instruction Manual...
- Page 160 / or a clearly defined cus- tomer group. ZEISS service representative Specially trained service expert, either ZEISS staff or authorized service partner of ZEISS. Instruction Manual ZEISS GeminiSEM series | en-US | Rev. 2 | 349500-8138-000...
- Page 161 39, 85 Comissioning 69 Normal 39, 85 Consumable and chemical 114 Consumables 114 Contamination 132 Control panel 60 Hazard Cover panel, protective 20 Decontamination 132 Detector 40, 91 Instruction Manual ZEISS GeminiSEM series | en-US | Rev. 2 | 349500-8138-000Instruction Manual...
- Page 162 70, 71 SmartSEM User interface 62 SmartSEM program suite 65 Normal gun mode 39, 85 SmartSEM user interface 62 Software 9, 62 Software manual 9 Spare parts 12 Instruction Manual ZEISS GeminiSEM series | en-US | Rev. 2 | 349500-8138-000...
- Page 163 VP-BSD detector 51, 98 VPSE detector 47, 93 Warning labels 17 lights 17 Weight and Sizes 134, 139, 145 YAG BSD detector 55, 100 ZEISS Service agreements 114 Instruction Manual ZEISS GeminiSEM series | en-US | Rev. 2 | 349500-8138-000Instruction Manual...
- Page 164 Carl Zeiss Microscopy GmbH Carl-Zeiss-Promenade 10 phone: +49 1803 33 63 34 07745 Jena fax: +49 3641 64 3439 Germany info.microscopy.de@zeiss.com www.zeiss.com/microscopy...
Need help?
Do you have a question about the GeminiSEM Series and is the answer not in the manual?
Questions and answers