
Subscribe to Our Youtube Channel
Related Manuals for SPRT SP-L52


Summary of Contents for SPRT SP-L52
- Page 1 SPRT ® SP-L52 Portable Thermal Printer User’s Manual VER 1.01 Beijing Spirit Technology Development Co., Ltd www.sprt-printer.com...
-
Page 2: Table Of Contents
CONTENTS NOTICE........................1 Notice of Safety....................1 Notice of Using..................... 1 Notice of Storing ....................2 Chapter 1 Outer Appearance and Model No............3 1.1 Outer Appearance..................3 1.2 Model No......................4 Chapter 2 Characteristic Specification..............4 2.1 Printing Specification..................4 2.2 Physical Parameters..................4 2.3 Environment Parameters................5 2.4 Other Specification.................. -
Page 3: Notice
NOTICE Please read this manual carefully before using the printer! Notice of Safety Be sure to use the specified battery and power supply provided by our company. Otherwise it may cause fire, explosion or damage printer, meanwhile, the battery also may be damaged. Don’t put battery into the fire, don’t disassemble or heat the battery, don’t be short circuit, it may cause fire, explosion or damage printer;... -
Page 4: Notice Of Storing
pre-printed black mark is accordant with the printing rule of black mark (please refer to details in Chapter 4.2), otherwise the black mark can not be detected correctly. Be sure to use up the power of the battery before charge up it, as it can ensure the using life of the battery. -
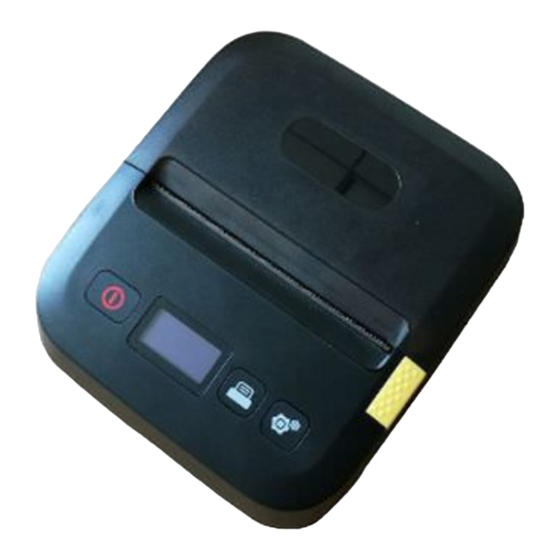
Page 5: Chapter 1 Outer Appearance And Model No
Chapter 1 Outer Appearance and Model No. 1.1 Outer Appearance S P L52 便携打 印机 纸 仓 盖 Printer cover 控 制 面板 C ont r ol pa nel 充 电 接口 Po wer co nnec to r USB接 口 Inter fac e connect or 纸... -
Page 6: Model No
1.2 Model No. SP-L52 Support USB and Bluetooth Interface as default Model Interface SP-L52US Serial and USB SP-L52BTM Bluetooth (one to many) and USB SP-L52BTD Bluetooth (Two mould) and USB SP-L52i Apple bluetooth 2.0 and USB SP-L52U Chapter 2 Characteristic Specification 2.1 Printing Specification... -
Page 7: Environment Parameters
2.3 Environment Parameters Operating Temp: 0℃~50℃ Operating Humidity: 10%~80% Storage Temp: -20℃~60℃ Storage Humidity: 10%~90% 2.4 Other Specification ● Paper Loading Method: drop-in easy paper loading ( please refer to details in 3.1.2 Paper Roll Installation). ● Black Mark Location: available(details please see 4.2 pre-printed black mark manual). -
Page 8: Paper Roll Installation
3.1.2 Paper Roll Installation Installation Steps: Press the open door button to open the pape case. (Pic. 1) ◆ ◆Stir the gear toward the front, and put one new paper roll. (Pic. 2) ◆Stir the gear toward the back,to make the paper plate to next to the paper side closely, then close the paper case cover. -
Page 9: Switch Off
tone, loose the 【POWER】 button. The LCD shows “Loading...”, then the printer enters into the working mode. The LCD shows printer parameter. 3.2.2 Switch Off Under status of switch on, the printer will send out the prompt tone of ‘one high one low ’ after pressed the 【POWER】 button, the LCD turns off, then loosen the【POWER】... -
Page 10: Printer Parameters Setting
【MODE】button and 【FEED】 button. The printer turns into the hexadecimal printing mode and print the presentation. Quit hexadecimal printing :The way to quit hexadecimal printing mode is switch off the printer or press the 【FEED】 button for three times and to enter the normal working mode. The printer will also print the presentation which shows that the printer have quit hexadecimal printing mode. -
Page 11: Set Into Upgrading Mode
3.4 Printer Interface Connection and Printing 3.4.1 Serial Connection The optional part of SP-L52 has one cable with 9femal pin/Mini USB 8P (the end with MINI USB 8P connects with the printer.) The printer is Uart asynchronous serial communication. It’s RS232. -
Page 12: Usb Connection
7,8 Signal Ground. Battery negative pole. 3.4.2 USB Connection The standard accessories of SP-L52 printer includes Mini USB cable which connects printer and main device. The USB type belongs to the slave device type. Pins description of Mini-USB as below:... - Page 13 Android devices and one IOS device connect printer simultaneously. Notice: 1, When pairing, please make SP-L52 printer switch on. 2. Once the Bluetooth of SP-L52 has paired with the host Bluetooth device successfully, it can’t be paired with other Bluetooth device until it unconnected with the host device.
-
Page 14: Buzzer
3. Bluetooth Icon on printer LCD shows the connection status after paired successfully. 3.5 Buzzer There is also a buzzer to indicate various status of the printer. The meanings are as below: One low one high: power on; One high one low: power off; Circulation continuous two lows: printer at error status 3.6 LCD indication Turn on the printer, the LCD shows “Loading...”, and shows the... -
Page 15: Chapter 4 Other Information
Bluetooth connection. Chapter 4 Other Information 4.1 Command Programming Manual <SP-L52 Technical Manual> is a technical manual for engineer to develop printer utility, and users can claim our company for it. 4.2 Description of pre-printed Black Mark If user use pre-printed black mark to locate the receipt, please be sure to abide by the following pre-printed black mark regulation when print the black mark paper. - Page 16 HPS: It is the distance between edges of black mark and loading position. 4.5mm≤Hps≤6.5mm...
- Page 17 Appendix A Setting introduction: Press【MODE】button to choose setting,when press it once , the set become the next one and it will print the present set value; use 【 FEED】 button to set the set value, when press it once , the set become the next one and it will print the present set value.
- Page 18 Paper sensor sensitivity setting: 112mm/100mm/80mm/58mm Paper type Setting Power off Setting: Printing Direction Setting:...
- Page 19 Appendix B Setting introduction:Press【MODE】button to choose setting, when press it once, the set become the next one and it will shows the present set value; use 【 FEED】 button to set the set value, when press it once , the set become the next one and it will print the present set value.
- Page 20 Visible Bluetooth Setting: Label Sensor Setting: Under standard mode, set as label paper under paper mode. Press 【MODE】 button, adjust the setting items to label sensor setting, then press【FEED】 button, the printer will feed paper by 260mm, and print out the self-test paper for max power voltage, min voltage, set threshold voltage and the voltage difference value between the max and min voltage.
Need help?
Do you have a question about the SP-L52 and is the answer not in the manual?
Questions and answers