
Related Manuals for SPRT SP-D10


Summary of Contents for SPRT SP-D10
- Page 1 SPRT ® SP-D10 Dot Matrix Printer User’s Manual V1.05 Beijing Spirit Technology Development Co., Ltd www.sprt-printer.com...
-
Page 2: Table Of Contents
Chapter 3 Operating Instructions ..........8 3.1 Interface connection......................8 3.1.1 Serial interface connection................... 8 SP-D10 serial interface is RS-232 serial interface and 485 serial interface..8 3.1.2 Parallel interface connection................10 3.1.3 The printer parameters setting................11 3.2 Self-test and HEX printing....................14 3.4 Printer Initialization...................... -
Page 3: Brief Introduction
SP-D10 dot matrix mini printer with full product line, standard installation size. It is the best replacement used in medical equipment, fire control station, industrial control and other instruments and apparatus. -
Page 4: Contents
Chapter1 Characteristics and performan 1.1 Main Features ◇Using dot matrix printing method ◇Integrating the print head and circuit with one body, easy to be installed ◇Comes with a single chip processor, with standard parallel interface or serial interface, facilitate with various mini machines or online using intelligent instruments ◇With the real-time print command of Chinese, characters and graphics, which can print all of the standard 5x7 dots ASCII characters and 16x16 or 12x12 dots Chinese characters. - Page 5 ◇ Power supply: DC5V±5% , 1.5A ◇ Working Temp: 0~50℃, Humidity: 10~80% ◇ Storage temp and humidity: -20~60℃, 10%~90% ◇ Installation dimensions: 103mm×57mm(W×H) Embedded depth: 51mm ◇ Outline dimensions: 107mm×61.5mm×55.5mm(W×H×D) Main parameters of SP-D10 series dot mini printer Model character/line (5×7) Character size(mm) Dot/line...
-
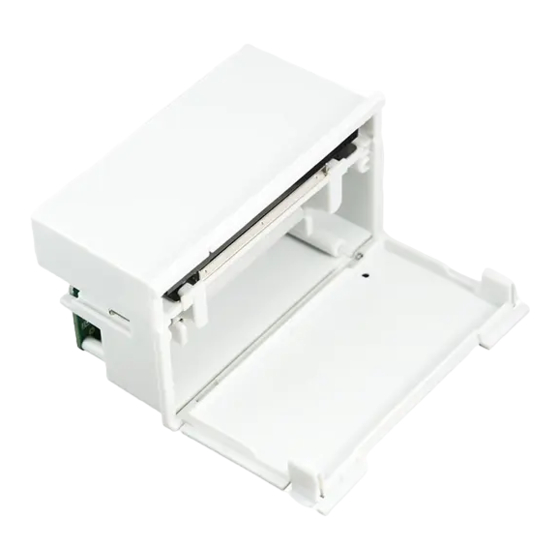
Page 6: Chapter 2 Printer Installation
Chapter 2 Printer Installation 2.1 Installation Dimension SP-D10 series dot mini printer outline dimension shown as figure 2-1: Figure 2-1 2.2 Paper Loading SP series dot mini printer use the paper with 44.5mm±0.5mm or 57.5mm±0.5mm width plain paper. It has installed paper roll before out of factory, but the paper isn’t inserted into the printer head in order to avoid the damage of printer head during transport or long time storage. - Page 7 Figure 2-2 (2)Holding the both ends of the paper shaft shown as below, take out the reel. Handing position 2-3 (3)Install the paper to the reel as shown the figure of 2- 4, holding the both ends of the reel, put the paper roll into the paper storehouse, release the reel. Paper roll Reel 2-4...
- Page 8 (4)Power on, press the 【FEED】 button, put the paper into the entrance, press the 【FEED】button to stop feeding paper after the paper come out from the exit. Shown as figure of 2--5: Feed button 2-5 (5)Push-in the inner shell completely, chucking with the outer shell to finish the paper loading, shown as figure of 2--6: 2-6 Attention:...
-
Page 9: Power Supply Connection
2.3 Power supply connection SP-D10 dot matrix printer use single DC +5 power. SP-D10 dot matrix printer supply a socket which with two lines power cable. The socket has polarity protection agency, which can insert the dot PCB board directly. -
Page 10: Chapter 3 Operating Instructions
Chapter 3 Operating Instructions 3.1 Interface connection 3.1.1 Serial interface connection SP-D10 serial interface is RS-232 serial interface and 485 serial interface. 1, RS-232 Serial interface 232 interface levels for both EIA and TTL, support RTS/CTS and XON/XOFF handshaking protocol, the interface types are IDC10 PIN socket and 5 PIN single socket. - Page 11 PCB board Printer receive data from computer Printer send data computer,when use X-ON/X-OFF printer handshaking protocol agreement, the printer will send control code X-ON/X-OFF to computer When the signal show “MARK”, it means the printer is busy and can not receive data, when the signal printer show “...
-
Page 12: Parallel Interface Connection
Data allowable Send X-ON code 11H on signal line 2 X-ON/ Send X-OFF code 13H on signal line X-OFF control Data disallowed 3-2 Tow types of handshaking 2, 485 Serial interface 485 interface is IDC10 pin socket, socket pin number refer to figure of 3--1, every pin definitions are different with interface RS-232. -
Page 13: The Printer Parameters Setting
DATA3 Input high level, logic shows ”0” means low level. DATA4 Input DATA5 Input DATA6 Input DATA7 Input DATA8 input Pulse reply,” low” level means the date has /ACK output been received and printer is already to receive next date. “high”... - Page 14 2, Via SEL and LF Combination set SP–D10 series mini printer has two buttons, feed button 【LF】 is in front panel, Setting button【SET】is in PCB which is on the behind. SP–D10 series mini printer only have one green online indicator light. Indicator lights up means the printer is on-line, otherwise it means off-line or busy.
- Page 15 2.2, Data bit / Handshaking / Parity (connect through serial interface) Instructions: Data Bit: 8bit or 7 Handshaking: RTS/CTS or XON/XOFF Parity: None or Odd or Even 2.3, Language Status: 2.4, Printing Font (Chinese setting) : Instruction: Chinese characters font is only effective in Chinese mode. Under English model, only font 6*8 is available.
-
Page 16: Self-Test And Hex Printing
3.2 Self-test and HEX printing Printing self-test can check if the printer works well or not. If it can print out the self-test receipt correctly means everything is okay ( except the interface with the computer). Otherwise it need an overhaul. Self-test receipt and analysis Self-test shows software version, interface forms, characters and other configuration information. - Page 17 3, Above pictures are only for SP-D10-24XH self-test receipt, the content of SP-D10-16XH or SP-D10-40XH self-test receipt is more or lest the same as the above one. But in different font size. The specific content can be subject to actual receipt.
-
Page 18: Printer Initialization
HEX printing method Press【LF】button (The button on the front panel) and turn on the power, the green indicator light will flash with the frequency of 1s, after the indicator light flashes three times, release the【LF】button. After that the green light will continue flash three times then off. Printer will print out “Hexadecimal Dump”, now the printer enter into HEX DUMP mode. -
Page 19: Chapter 4 Print Commands
Chapter 4 Print Commands 4.1 Summary The printing commands provided by dot matrix printers are fully compatible with traditional ESC print command. Each command description form as below: Control code name Function Form: ASCII: standard ASCII character sequence Decimal: decimal number sequence HEX : hexadecimal digit sequences Note: The command functions and instructions... - Page 20 ESC J Execute “n” dot feed paper Form: ASCII: Decimal: HEX: Explain: Printer prints forward with “n” point line. The value of n should be within the range of 1 to 255 points. This command is not issued a carriage returns. It will not affect the change line command later.
-
Page 21: Format Setup Command
4.2.2 Format setup command ESC B Set the vertical tabulation values Form: ASCII: n3…NUL Decimal: 66 n1 n3…0 HEX: 42 n1 n3…00 Explain: Vertical tabulation location input n1, n2, etc. NUL character is added at the last to indicate the end of this command. All input vertical tab positions can be deleted by using this command in ESC B NUL format. - Page 22 Carry out Vertical Tab Value Format: ASCII: Decimal: Hexadecimal: Explanation: Feed paper to the next vertical tab position which is set by ESC B command. Notice: if there is no vertical tab value setting, or the current position equals or is beyond the last vertical tab position, VT command is to feed paper one line only (same to LF command).
- Page 23 LPRINT CHR$(27); CHR$(68);CHR$(2);CHR$(9);CHR$(14); CHR$(0); ’ESC command LPRINT CHR$(9); ‘HT command LPRIN “HT1”; ‘print character string LPRINT CHR$(9); ‘HT command LPRINT “HT2”; ‘print character string LPRINT CHR$(9); ‘HT command LPRINT “HT3”; ‘print character string LPRINT CHR$(13); The print result of the above program is as following: Carry out Horizontal Tab Value Format: ASCII:...
- Page 24 Hexadecimal: 1B Explanation: When m=0, ESC f NUL n will command to print n blank characters. The value of “n” is in the range of the line width value of dot matrix series printers. When m=1, ESC f SOH n will command to print n blank lines. n=0~255. Remark: When m=0, if the value of n is beyond the current line width value, the printer will continue to print blank in the next line.
- Page 25 ASCII: Decimal: Hexadecimal: The BASIC programs for this example are as below: LPRINT “1234567890123456” ’Ruler LPRINT CHR$(27); CHR$(108);CHR$(12); ’ESC 1 command LPRINT “123456789012345678901234567890” The print result is as following: ESC Q Set Right Margin Format: ASCII: Decimal: Hexadecimal: Explanation: The value of “n” is in the range of the line width value of dot matrix series printers. Default n=0, that means no right margin.
-
Page 26: Character Set Command
LPRINT CHR$(27); CHR$(81);CHR$(12); ’ESC Q command LPRINT “123456789012345678901234567890”; LPRINT “1234567890123456789 0” The print result is as following: 4.2.3 Character set command ESC U Enlarge Width Format: ASCII: Decimal: Hexadecimal: Explanation: After inputting this command, the characters, graphics and Chinese characters are printed at n times of normal width, n=1~4. - Page 27 ESC V Enlarge Height Form: ASCII: Decimal: HEX: Explain: After inputting this command, the characters, graphics and Chinese characters are printed at n times of normal height, n=1~4. Default n=1. This command should be sent out at the beginning of one line, otherwise, only the last set is effective. The BASIC programs for observing the enlarging effect of this command are as below: FOR I=1 TO 3...
- Page 28 LPRINT CHR$(27); CHR$(87); CHR$(I); ‘ESC W command Print a string LPRINT “SPRM” ‘ NEXT I This process print out from dot matrix printer as below: ESC - Allow/prohibit Underline Print Form: ASCII: Decimal: HEX: Explain: N = 1, allow the underline print; N = 0, underline print is prohibited. The default n = 0.
- Page 29 ESC + Select/prohibit over-line Print Form: ASCII: Decimal: HEX: Explain: When n=1, allow over-line print; when n=0, prohibit over-line print. Default n=0 All characters including spaces will be printed out with over-line after allowing over-line print. This command is also valid for Chinese characters. The BASIC programs for observing the effect of this command are as below: LPRINT CHR$ (27);...
- Page 30 Explain: All characters in character set 1 of ANK mode are used after this command. For dot matrix series printers, there are two character sets available in ANK mode. Character set 1 is selected when printer is on or receives command ESC @. ESC 7 Select the character set 2 Form: ASCII:...
-
Page 31: User-Defined Character Set Command
film of photography. The normal printing is that printing black characters in white background. The default is prohibiting reverse white print. BASIC process as follow: LPRINT CHR$(27); CHR$(105); CHR$(1), ‘allow highlighting Print LPRINT “SPRD” This process print out from dot matrix printer as below: Select/prohibit Reverse Print Form: ASCII: Decimal:... - Page 32 User defined characters stored in RAM, will be lost when the power is cut off, if many ESC & command using the same m value, only the last valid. 32 most can define user-defined character. See the ESC % and ESC: command. ESC % Replace User-defined Character Form: ASCII:...
-
Page 33: Graphics Printing Command
The BASIC programs to observing the effect of ESC &, ESC % and ESC : commands are as below: LPRINT CHR$(27); “W”; CHR$(8); 8 times horizontal and vertical size 20 LPRINT CHR$(27); “&”; CHR$(65); ‘ESC &command 30 LPRINT CHR$(&H02); CHR$(&H7C); CHR$(&H40); 40 LPRINT CHR$(&HC0);... - Page 34 dot-matrix graphics for the two Chinese is as the below figure shows. Each character is composed by 7 × 8 dots to 7 columns, there is a space between the two characters, so totally there are 15 columns, then n1=15, n2=0, the 15-byte data showed in hexadecimal are as follows: 7C, 44, 44, FF, 44, 44, 7C, 00, 41, 62, 54, C8, 54, 62, 41 The BASIC process about this example as follow:...
-
Page 35: Initialization Commands
of these m curves. The numbers of nm should equal to m. Each dot should be within the largest dots numbers of printer. The last CR (“enter”) is used to print out this dot line. The whole m curves are printed out through each dot line by n1, n2, ……nm data. 4.2.6 Initialization Commands Initialize Printer Form: ASCII:... -
Page 36: Chinese Printing Control Command
ESC 'are used together, are used to represent the end of the command. Single NUL command is not valid. 4.2.8 Chinese printing control command & Set Chinese printing type Form: ASCII: & Decimal: HEX: Explain: After the command is input printer, printer will print from ANK characters to the Chinese printing type. - Page 37 Set the magnification of Chinese Character Form: ASCII: Decimal: HEX: Explain: After this command, the character will be printed at 1 time enlarging from width and height. This command is valid when n=1 and cancel when n=0. Set Vertical Print Form: ASCII: Decimal: HEX:...
- Page 38 180° 270° Chinese Character with Underline Print Form: ASCII: Decimal: HEX: Explain: The specified Chinese characters after this command are printed with underline. N = 1, the underline; N = 0, underline the end. Choice the superscript and subscript printing Form: ASCII: Decimal: HEX:...
-
Page 39: Chapter 5 Operation And Maintenance
Decimal: HEX: Explain: This command can cancel the dislocation printing of Chinese characters and return to normal single print Chinese characters. Chapter 5 Operation and maintenance 5.1 The print head maintenance In order to make sure the printer working as normal, especially not to tear down the print head. -
Page 40: Appendix 1 Effective Code Table
Appendix 1 Effective code table The serial number of valid code table is from 00H - 0FFH arrangement, during which 00H-1FH is used for control code and 20H - 0FFH for character code. The character code has two sets totally. Each character set is the character code in the 20H- 0FFH arrangement. - Page 41 Character set 2:...
-
Page 42: Appendix 2 Print Command Table
Appendix 2 Print command table Decimal Symbols and format Function Page End mark Level clock Change line Vertical tabulation Enter Setting times width of characters Cancel times width setting ESC % m1 n1…mk nk 27 37 1B 25 Change NK to MK 27 38 1B 26 ESC &... - Page 43 27 85 n 1B 55 n ESC U n Lateral magnification n times 27 86 n 1B 56 n ESC V n Longitudinal magnification n times Transverse longitudinal 27 87 n 1B 57 n ESC W n magnification n times Allow/reverse printing is 27 99 n 1B 63 n...
-
Page 44: Appendix 3 Single Chip Microcomputer Interface Instance
Appendix 3 Single chip microcomputer interface instance Each pin signal is defined as shown Signal IDC10 5PIN Source Explain name socket pin socket pin computer Printer receive data from computer printer Printer send control code XON/XOFF data... - Page 45 computer. printer When the signal show “MARK”, it is means the printer is busy and can not receive data, when the signal show “ SPACE”, it is mean the printer get ready and can receive data.. printer Signal show “ SPACE” means printer online Signal ground printer...
- Page 47 Parallel interface each cords number define shown as below: Cords No. Signal Direction Instruction /STB input Gate trigger, rising along the read data. DATA1 Input DATA2 Input DATA3 Input Those signals represent the message from DATA4 Input 1 to 8, when the logic is “1” of each signal,it DATA5 Input is high level, logic show”0”mean low level.
- Page 48 Pulse reply,” low” level mean the date has /ACK output been received and printer already to receive next date. “high” level mean printer is “ busy” can not BUSY output receive data Via resistance drop down to “ low” level output mean have paper Via resistance pull up to “...
- Page 49 DATA7 Input DATA8 input Pulse reply,” low” level mean the date has /ACK output been received and printer already to receive next date. “high” level mean printer is “ busy” can not BUSY output receive data Via resistance drop down to “ low” level output mean have paper Via resistance pull up to “...
- Page 50 DATA7 Input DATA8 input Pulse reply,” low” level mean the date has /ACK output been received and printer already to receive next date. “high” level mean printer is “ busy” can not BUSY output receive data Via resistance drop down to “ low” level output mean have paper Via resistance pull up to “...
Need help?
Do you have a question about the SP-D10 and is the answer not in the manual?
Questions and answers