Table of Contents
Advertisement
Quick Links
Advertisement
Table of Contents
Troubleshooting

Subscribe to Our Youtube Channel
Related Manuals for BestCode NExT 8 Series


Summary of Contents for BestCode NExT 8 Series
- Page 1 A complete range of small and large character printing systems. Series 8 Continuous Ink Jet Printers print high speed, reliable lot/date, sell-by date and other identifying marks and codes on a wide range of substrates, including plastic, glass, paper and more. Version 01.06.00+ October 2022...
- Page 5 Copyright October 19th, 2022 by BestCode LLC (henceforth referred to as BestCode). All rights reserved. The information in this document is confidential, and the sole property of BestCode. It may not be reproduced in whole, or in part, nor may any of the information contained therein be disclosed without the prior consent of BestCode. A recipient may not solicit, directly or indirectly (whether through an agent or otherwise) the participation of another institution or person without the prior approval of BestCode.
- Page 6 Product Safety and Compliance Information The BestCode Next Series 8 Printer is tested and certified to the following standards: European Directive(s) Low Voltage Equipment Directive (2014/35/EU) BestCode Side Label Electromagnetic Compatibility Directive (2014/30/EU) European Standard(s) EN 62368-1:2018 (3rd Edition) EN 60950 1:2006/A11:2009/A1:2010/...
-
Page 7: Bestcode Distributor Training Information
How to use this manual This manual is intended to be used by BestCode trained distributors. The purpose of this manual is to supplement BestCode provided training on how to correctly use the Next Series 8 Printer. This manual contains information on how to select the... -
Page 8: Safety Information
This information contained in this manual is not intended for end users and should never be used by untrained individuals. Only BestCode trained individuals should perform service or maintenance on any of the BestCode Next Series 8 CIJ Printers. Work performed by unauthorized individuals will damaged and void the warranty of the Printer. -
Page 9: Supply Power
PERSONAL INJURY & EQUIPMENT DAMAGE: When connected to Supply Power, this Printer produces Lethal Voltages. Only BestCode trained individuals should service or maintain the Printer. Follow all local safety codes and regulations. Unless necessary, always disconnect the Printer from Supply Power when performing maintenance. -
Page 10: System Cables
PERSONAL INJURY & EQUIPMENT DAMAGE: Do not use any power cord that is not provided by BestCode. Power cords must have 3 prongs, live, neutral, and ground provided. Power socket-outlet must provide reliable earth ground. Power cord and outlet must remain clean and dry. The socket- outlet shall be installed near the equipment and shall be easily accessible. - Page 11 Printer and can potentially cause serious injury or death. See SDS for proper vapor handling instructions. ™ CodeProtect BestCode Warranty and Support BestCode products are delivered with a 2 Year Manufacturer’s Limited Warranty. Call or email for detailed warranty information. Distributors should email support@bestcode.co for all warranty questions.
-
Page 12: Table Of Contents
Table of Contents HOW TO USE THIS MANUAL ............................... III BestCode Distributor Training Information ........................iii SAFETY INFORMATION ............................... IV ..............................ENERAL AFETY NFORMATION ..............................LECTRICAL AFETY NFORMATION Earth Grounding ................................. iv Supply Power ..................................v System Cables ..................................vi ................................ - Page 13 ................................... 53 ETUP CREEN Date / Time ..................................53 Peripherals ..................................57 Network .................................... 63 Password ................................... 65 ..................................65 ERVICE CREEN Calibrate .................................... 66 Tools ....................................67 Status ....................................74 Event Log ................................... 75 MAINTAINING THE NEXT SERIES 8 SYSTEM ........................76 ................................
- Page 14 ..........................187 ROUBLESHOOTING LUIDIC YSTEM ROBLEMS Flow Diagram .................................. 187 Flow tests for troubleshooting ............................196 CIJ I : ................................206 OMMON SSUES Common Fluidic Issues ..............................206 Common Printhead Issues ............................... 208 SOFTWARE TOOLS ................................212 USB S ..............................212 ETUP AND ORMATTING Format the USB to FAT32 ..............................
-
Page 15: System Overview
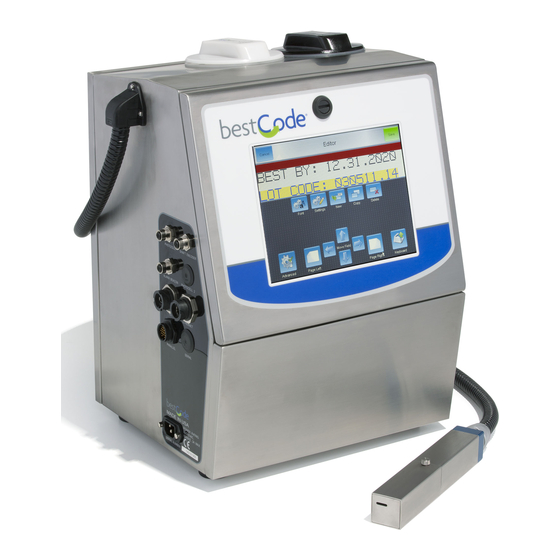
BestCode Next Series 8 System The BestCode Next Series 8 CIJ printers are technologically innovative systems for providing state-of-the art tracking and coding information. The Next Series 8 consists of a family of CIJs, each with a range of special features. -
Page 16: Controller
27-0005-04W Ink Fill cap 27-0005-04B *This part is non-replaceable † Varies by cord-set Height: 19.4” (493mm) Width: 15.4” (392mm) Depth: 12.5” (318mm) Dry Weight: 45 lbs (20.4 kg) BestCode Next Series 8 Technical Manual October 2022 Page 2 of 290... - Page 17 SmartFill Makeup Cup 20-0025-01 Ink Pump 32-0001-01 or 32-5005-01 for Standard Systems 32-0015-01 for Opaque Valve Manifold Assembly 20-0040-01 Varies by Generation Viscometer Assembly 20-0015-01 Makeup Tank 20-0013-01 BestCode Next Series 8 Technical Manual October 2022 Page 3 of 290...
-
Page 18: Printhead
*This part is non-replaceable Length: 9” (227.7mm) Height: 1.5” (38.1mm) Width: 1.5” (38.1mm) Umbilical Length: 9’ 10” (3m) Available in 15ft (4.5m) Micro printhead is same length as shown above. BestCode Next Series 8 Technical Manual October 2022 Page 4 of 290... - Page 19 90° Printhead Length: 7.47” (189.7mm) Width: 6.29” (159.7mm) Height: 1.5” (38.1mm) Umbilical Length: 9’ 10” (3m) Available in 15ft (4.5m) BestCode Next Series 8 Technical Manual October 2022 Page 5 of 290...
-
Page 20: Model Selection Guide
This is a maximum of 2080.5 printed 5*5 characters per second. Maximum conveyor speed to print at 50 DPI print is 1040.3 feet per minute (fpm) or 6.6 meters per second (m/s). BestCode Next Series 8 Technical Manual October 2022... -
Page 21: Speed Selection
/ minute mm/s is the maximum conveyor speed in millimeters / second Resolution is the number of rasters in 1 inch of print. BestCode Next Series 8 Technical Manual October 2022 Page 7 of 290... - Page 22 On the 81 Printer, the 25 Template only supports 12,16,19, and 25 Fonts On multiline templates (2L7, 2L9, 2L12) the C/s value is expressed in characters produced on all lines per second. BestCode Next Series 8 Technical Manual October 2022...
- Page 23 Resolution is the number of rasters in 1 inch of print. On multiline templates (3L7, 3L9, 4L7, 5L5) the C/s value is expressed in characters produced on all lines per second. BestCode Next Series 8 Technical Manual October 2022 Page 9 of 290...
-
Page 24: Environment Selection
Cooling system runs on compressed air and prevents all dust and water from entering into the electronics area of the cabinet. Includes air drier attached to system. -POSAIR Add on air pump for prevent dust, dirt, or water build up in the printhead. BestCode Next Series 8 Technical Manual October 2022 Page 10 of 290... -
Page 25: System Setup
PERSONAL INJURY & EQUIPMENT DAMAGE: Do not use any power cord that is not provided by BestCode. Power cords must have 3 prongs, live, neutral, and ground provided. Power socket-outlet must provide reliable earth ground. Power cord and outlet must remain clean and dry. The socket- outlet shall be installed near the equipment and shall be easily accessible. - Page 26 PERSONAL INJURY & EQUIPMENT DAMAGE: When connected to Supply Power, this Printer produces Lethal Voltages. Only BestCode trained individuals should service or maintain the Printer. Follow all local safety codes and regulations. Unless necessary, always disconnect the Printer from Supply Power when performing maintenance.
-
Page 27: Printhead Mounting
WARNING EQUIPMENT DAMAGE: The printhead should never be submerged in Cleaner. This can cause un-repairable damage to the printhead. The printhead must be dry before starting the Printer. BestCode Next Series 8 Technical Manual October 2022 Page 13 of 290... - Page 28 1/16”-1/2” inch. 4. Keep printhead square to the product to prevent print distortion. A 5°-10° angle between head and product may be necessary in high static environments. BestCode Next Series 8 Technical Manual October 2022 Page 14 of 290...
-
Page 29: Pre-Power Up Guide
The red tube is on the pressure side of the pump, and flows into the main ink filter. Verify the tube connects directly to the main BestCode Ink Filter. 3. Remove the Black cap from the tube. 4. Wet the pump fitting o’ring with cleaner and firmly press the black tube into the rear fitting on the pump. - Page 30 6. Remove the Nozzle Shipping Gasket. The gasket is highly elastic and should be stretched outwards and then lifted up from between the nozzle and charge electrode. BestCode Next Series 8 Technical Manual October 2022 Page 16 of 290...
-
Page 31: Commissioning
2. Select the ink type that matches the ink to be installed and save 3. Press the Commission System button to Save 4. Check the Help Screen to confirm BestCode Next Series 8 Technical Manual October 2022 Page 17 of 290... -
Page 32: Adding Fluids
5. After the Success prompt, remove the cap and press the bottle firmly into the Makeup Smart Fill Cup. 6. Press OK after the bottle has completely drained. BestCode Next Series 8 Technical Manual October 2022 Page 18 of 290... -
Page 33: First Time Jet Start
5. Stop the Jet, then perform the backflush nozzle routine up to 6 times. 6. Dry the printhead, then start the Jet normally with Errors, High Voltage and Phase enabled. BestCode Next Series 8 Technical Manual October 2022 Page 19 of 290... -
Page 34: Verify The Modulation
If the print is not acceptable, perform a modulation calibration: Guide Here 5. Return the Modulation to the set point and inspect the drop breakup. BestCode Next Series 8 Technical Manual October 2022 Page 20 of 290... -
Page 35: Basic Operations
Clean Start or Stop. The system will intelligenty switch the Clean Start & Stop method to quick start to prevent the operator from adding too much makeup. Video Link for Start / Stop Jet here: https://youtu.be/YVJEsJ4pCc8 BestCode Next Series 8 Technical Manual October 2022 Page 21 of 290... -
Page 36: Selecting A Message For Print
3. Press the Select button 4. The selected message will now be the actively printed message Note: The BESTCODE and BESTCODE-AUTO are calibration messages. They cannot be edited or deleted. BestCode Next Series 8 Technical Manual October 2022 Page 22 of 290... -
Page 37: Navigating The Next Series 8 User Interface
Contact information on this screen be configured in the Setup can be translated using the window. translator tool to give on screen distributor contact information to the operator. BestCode Next Series 8 Technical Manual October 2022 Page 23 of 290... - Page 38 Keyboards, Date/Time, modify operating parameters and Networking, Operator Passwords, gives access to Technician features and Peripheral options when logged in with the Technician Level Password. BestCode Next Series 8 Technical Manual October 2022 Page 24 of 290...
-
Page 39: Message Creation
1. Create a new message. Name it, and press confirm. Text Field Enters directly into the Message Editor and allows characters to be typed directly into the message. BestCode Next Series 8 Technical Manual October 2022 Page 25 of 290... -
Page 40: Autocode Field
Program Time Guide Date Codes Add automatically updating Date codes to the message. Anything to do with Years, Months, Weeks, or Days. Video Guide for Date Codes: https://youtu.be/tQP9Z1Vem5g?t=136 BestCode Next Series 8 Technical Manual October 2022 Page 26 of 290... - Page 41 Product Count Counts the total number of times the print trigger is activated. Print Count Counts the number of times the message has been printed. Counter 1-4 Programmable counters. BestCode Next Series 8 Technical Manual October 2022 Page 27 of 290...
-
Page 42: User Define
Video Guide for Block Fields: https://youtu.be/hnQj71DZ-qo Example Block Length:5 Gap: 2 Block Length Specifies the number of rows of full vertical print Specifies the number of blank rows after the print BestCode Next Series 8 Technical Manual October 2022 Page 28 of 290... -
Page 43: Barcode Field
Brings up the on screen keyboard for typing in text to the barcode. AutoCode Field Insert Autocode data into the barcode User Define Insert a User Define field into the barcode. BestCode Next Series 8 Technical Manual October 2022 Page 29 of 290... - Page 44 Select a Function or Press the Shift Key to access additional Functions. • Select the Desired Function. For more information on the Functions and how they work, visit https://en.wikipedia.org/wiki/Code_128 BestCode Next Series 8 Technical Manual October 2022 Page 30 of 290...
- Page 45 Depth, thickness, height, or 3rd Electronic serial number for cellular 8002 dimension, meters telephones Area, square meters FACT identifiers (internal applications) Internal use (raw materials, packaging, Volume, liters components BestCode Next Series 8 Technical Manual October 2022 Page 31 of 290...
- Page 46 QR Code Sizes are expressed as Versions. The Next Series 8 features Version 1, Version 2, and Version 3. Size / Version Matrix Size Max Numeric Max Alphanumeric Max Binary Max Kanji 21x21 25x25 29x29 BestCode Next Series 8 Technical Manual October 2022 Page 32 of 290...
- Page 47 Insert a User Define field into the barcode. DateCode Mask Normally set to Auto. Allows specific masking to increase processing time vs. ease of readability between varying data codes or to meet specialized application setups. BestCode Next Series 8 Technical Manual October 2022 Page 33 of 290...
-
Page 48: Graphic Field
Exit out of the message editor. Does not save any the message Save Saves the message and exits the Editor Moves the cursor in the selected field. Use to jump to specific characters. BestCode Next Series 8 Technical Manual October 2022 Page 34 of 290... - Page 49 Fastest Print, Readable Code Opens the New Field screen for adding more fields into the Message Editor. Copy Creates a duplicate of the selected field Delete Deletes the selected field BestCode Next Series 8 Technical Manual October 2022 Page 35 of 290...
- Page 50 Moves the selected field up. Fields can also be selected and moved using the drag Move Field and drop touch screen feature. Special Message Select Features Drag and Drop Start Location Single press screen on the “BESTCODE” Text BestCode Next Series 8 Technical Manual October 2022 Page 36 of 290...
- Page 51 Drag finger across screen to new location. Select Location inside of Text Cursor Start Field Cursor Select Touching the character T will move the cursor to this location BestCode Next Series 8 Technical Manual October 2022 Page 37 of 290...
- Page 52 Fields will remain in positional as exactly Fields overlap and also reduce spacing set by the operator. between fields to 0 rasters. A video guide for Auto Align Fields can be found here: https://youtu.be/ifn1iT4TBxg BestCode Next Series 8 Technical Manual October 2022 Page 38 of 290...
- Page 53 Leap Year day (Feb 29) is set to day 366, with all days Switch all subsequent days are shifted +1, with remaining in non-leap year order, with December being December 31 being 366. 365. BestCode Next Series 8 Technical Manual October 2022 Page 39 of 290...
- Page 54 The Printer High Voltage will disable when the counter reachers the End Count value. Then Print Off will prevent the printer from coding any more product until the counter is reset. BestCode Next Series 8 Technical Manual October 2022 Page 40 of 290...
- Page 55 AutoCode data would be repeat printed in AutoPrint Repeat Mode. In Auto-Select Mode, the code could be Disabled / Enabled 1-32000 repeated a set number of times for a single Print Trigger. BestCode Next Series 8 Technical Manual October 2022 Page 41 of 290...
- Page 56 MESSAGE SELECT 5 MESSAGE SELECT 6 MESSAGE SELECT 7 GROUND BCD Table for 0-25 X means shorted to Pin 14, O means open to Pin 14. ID Number ID Number BestCode Next Series 8 Technical Manual October 2022 Page 42 of 290...
-
Page 57: Count Screen
Counter 1-4 These are setup in the message editor. See 0-999,999,999 here Counters can be reset OR manually typed in using the buttons next to each counter. BestCode Next Series 8 Technical Manual October 2022 Page 43 of 290... -
Page 58: Message Screen
Shows the currently selected message. Select the highlighted message Edit the currently selected message Deleted the currently selected message. Opens a preview page of all Graphics loaded onto the printer. BestCode Next Series 8 Technical Manual October 2022 Page 44 of 290... -
Page 59: Adjust Screen
Faster Faster than Fast, Good Quality Ultra-Fast Fastest Print, Readable Code Increases the space between characters in the selected field. Pitch Specifies the delay between repeated prints. 0-4,000,000,000 BestCode Next Series 8 Technical Manual October 2022 Page 45 of 290... -
Page 60: Speed Screen
Faster than Fast, Good Quality Ultra-Fast Fastest Print, Readable Code Short cut to the Status screen. Useful when setting up print to ensure no sensor bounce or missed prints are occuring. BestCode Next Series 8 Technical Manual October 2022 Page 46 of 290... - Page 61 Check on the Status screen to see if Missed Prints, Missed Encoder, or Missed Photo Eye are increasing. Continue to increase width and selecting faster print speed until these values stop incrementing. BestCode Next Series 8 Technical Manual October 2022...
- Page 62 If the delay is not set to greater than this value, the print will not be accurate between high and low speed. Delay should be set to a value greater than the Delay Needed Value. BestCode Next Series 8 Technical Manual October 2022 Page 48 of 290...
-
Page 63: Auto-Encoding Adjust Screen
Faster than Fast, Fastest Print, Faster Ultra-Fast Good Quality Readable Code Increases the space between characters in the selected field. Specifies the delay between repeated Pitch 0-4,000,000,000 prints. BestCode Next Series 8 Technical Manual October 2022 Page 49 of 290... - Page 64 The amount of delay time in milliseconds to achieve the desired print location Drop Production Total number of drops used to generate the printing message Print Rasters Message Length in Rasters. Used for internal calculations BestCode Next Series 8 Technical Manual October 2022 Page 50 of 290...
- Page 65 The amount of delay time in milliseconds to achieve the desired print location Drop Production Total number of drops used to generate the printing message Print Rasters Used for internal calculations BestCode Next Series 8 Technical Manual October 2022 Page 51 of 290...
-
Page 66: Clean Screen
Auto Clean Disable Enabled Default setting. Autoclean Enables autoclean function. function not enabled See Cleaning section in Maintaining the Next Series 8 System for more info. BestCode Next Series 8 Technical Manual October 2022 Page 52 of 290... -
Page 67: Setup Screen
Sets the time Week Start Sets the day of the week to associate week codes to (I.E Sunday = 1, Monday =2, or Monday =1, Tuesday = 2) BestCode Next Series 8 Technical Manual October 2022 Page 53 of 290... - Page 68 Sunday = 1, Monday = 2, Tuesday = 3… etc are Week standard. Select Current Day Returns all of the Program Pages back to todays date. Does not reset the values to default. BestCode Next Series 8 Technical Manual October 2022 Page 54 of 290...
- Page 69 Setting up Program Time Codes Program Hour Allows for custom coded Hour Codes. 0-23 Program Minute Allows for custom coded Minute Codes 0-59 Program Second Allows for custom coded Second codes. 0-59 BestCode Next Series 8 Technical Manual October 2022 Page 55 of 290...
- Page 70 The Top Right Window says “Code” on every Program Page. This area allows for inputting the alternative code that will coorespond to the currently selected value in the Top Left Window. _AutoCode_Field Return to AutoCode Fields BestCode Next Series 8 Technical Manual October 2022 Page 56 of 290...
-
Page 71: Peripherals
Print begins when the Photoeye state is down PE 1 Always ON Option PE 1 Setup Choose which counters should or should not increment when PE 1 is triggered. BestCode Next Series 8 Technical Manual October 2022 Page 57 of 290... - Page 72 Delay 2 Disabled Enabled There is no delay value after a There is a delay value after a print trigger print trigger provided on PE2 provided on PE2 BestCode Next Series 8 Technical Manual October 2022 Page 58 of 290...
- Page 73 Loads the Default values set for the printer (normally all 0), unless a profile is Defaults created and saved using the Save Defaults button. Save Saves the currently selected values on this page for quick setup on future Defaults messages. BestCode Next Series 8 Technical Manual October 2022 Page 59 of 290...
- Page 74 When a Warning (yellow) occurs on screen, the Relay will be closed circuit. Fault When a Fault (Red) occurs on screen, the Relay will be closed circuit. Relay wiring information can be found here BestCode Next Series 8 Technical Manual October 2022 Page 60 of 290...
- Page 75 Lights the coorsponding Alarm when the printer is not ready or Ready unable to print. Power Lights the coorsponding Alarm when the printer is powered on. None The cooresponding Alarm will never be in use. BestCode Next Series 8 Technical Manual October 2022 Page 61 of 290...
- Page 76 Reports or sets the oscillator frequency. Unicode Enable or disable usage of Unicode characters Echo Characters Enable or disable the echo of sent characters back to the MOBA device for error checking. BestCode Next Series 8 Technical Manual October 2022 Page 62 of 290...
-
Page 77: Network
Offset corrections and manual time changes Winter (+/- 720 minutes) Restore Resets the page to the Default Values IP: 216.239.358.12 Defaults Update Interval: 3600s Receive Timeout: 3000 ms BestCode Next Series 8 Technical Manual October 2022 Page 63 of 290... - Page 78 Network button again will open the Network – 2 Page for remote communication input method control Command Mode Switches between BestCode Remote communication protocol and serial communication mode for MOBA devices. Automatic Enabled Disabled Output Prompts and warnings will...
-
Page 79: Password
This name will need to be entered to login Password checkbox menu. to access the checked features. Service Screen The service screen is for the operator to adjust machine settings and perform service on the machine. BestCode Next Series 8 Technical Manual October 2022 Page 65 of 290... -
Page 80: Calibrate
20.8 +/- 1.5 m/s (65u) must be configured. Calibrating the Modulation Quality 90-100% Phase Threshold 13-39 Viscometer See Status Screen Target 4.5 cP Actual 0.0cP, 0.0s 2.5-6.0cP, 45.0-115s Printhead 0-60C Electric 0-60C BestCode Next Series 8 Technical Manual October 2022 Page 66 of 290... -
Page 81: Tools
Restores up all system files from a USB stick. Stick must be FAT32 format. Used for restoring messages, graphics, keyboards, translations, and system files from another system. A video Guide for Backup and Restore can be found here: https://youtu.be/iQyzcH09Ub4 BestCode Next Series 8 Technical Manual October 2022 Page 67 of 290... - Page 82 Adjustment will be necessary to get print perfect between low and high speeds. Encoder is required. The recommendations provided will need fine adjustment based on the printhead setup. These are good starting points based on your setup distance. BestCode Next Series 8 Technical Manual October 2022 Page 68 of 290...
- Page 83 BestCode Next Series 8 Technical Manual October 2022 Page 69 of 290...
- Page 84 Fluid-o-Tech pump MicroPump pump. See resource here: https://en.wikipedia.org/wiki/MAC_address Address: Backlight Adjusts the Frequency of the Backlight for the Display. Used to reduce display flicker. 10 is standard. Frequency BestCode Next Series 8 Technical Manual October 2022 Page 70 of 290...
- Page 85 Resets the time the Printer has been powered on. Time: Restore Factory Restore the machine to Factory Default. BestCode USB stick with correct Firmware Version must be Defaults installed. Resets the Calibration values (Modulation, Pressure, Charge), Deletes all Messages and Graphics, Resets the Setup (Date/Time, Name, Keyboards, Language, Peripheral Settings, Network, and Passwords), Sets all Technician Features.
- Page 86 Helpful for quickly creating editors, allows row by row positioning on the multi-line print. Font. Print auto snaps to BestCode recommended Print can move up and down 1 drop at a time. location. Maximum flexibility. Delete All Deletes all of the graphics on the printer.
- Page 87 Displays the permissible Makeups to me used with this ink. Most Inks allow for 1 unique Makeup. System Flush These are tools for the automatic BestCode flushing process used in house. Instructions for manual field flushing can be found here.
-
Page 88: Status
Partial Prints Missed Missed Photo Missed 1-1 Total Prints Encoder Data 999999999999 Temperature Electric Printhead 0-60C 0-60C System Power On Run Time Filter Select 0-175200.0 Hrs 0-175200.0 Hrs 0-10000.00 BestCode Next Series 8 Technical Manual October 2022 Page 74 of 290... -
Page 89: Event Log
Save Saves all of the Log files to a USB thumbdrive. See the troubleshooting section here for information on the Event Codes. Video Guide is available here: https://youtu.be/NkP4lz9J9v0 BestCode Next Series 8 Technical Manual October 2022 Page 75 of 290... -
Page 90: Maintaining The Next Series 8 System
Makeup Tank can hold 2 bottles of Makeup. Makeup Overfilling of the tank will cause an error and requires that the tanks be completely emptied, and fresh ink be installed. BestCode Next Series 8 Technical Manual October 2022 Page 76 of 290... - Page 91 When to Add Ink The BestCode Next Series 8 CIJ will begin requesting an Ink bottle be added when the Float switch in the Ink Tank is in the low state. An on-screen prompt, Ink Warning, 10-0003 will occur every 6 minutes while the Ink Tank is in this State.
- Page 92 11. Press OK on the Success screen prompt (10-0001). When to Add Makeup The BestCode Next Series 8 CIJ will allow a Makeup bottle to be added when the Float switch in the Makeup Tank is in the OK state.
- Page 93 8. Insert the bottle and press firmly to break the foil seal. 9. Wait for 1-2 minutes for the bottle to drain. 10. Discard the empty Makeup bottle in accordance with local regulation. BestCode Next Series 8 Technical Manual October 2022 Page 79 of 290...
-
Page 94: Cleaning The Printhead
Backflush nozzle should be performed if the print looks bad. How to wash the Printhead Be familiar with proper safety information for handling fluids. 1. Place the Printhead into the Printhead Clean Station (P/N 40- 0020-01) BestCode Next Series 8 Technical Manual October 2022 Page 80 of 290... -
Page 95: Back Flushing The Nozzle
Be familiar with proper safety information for handling fluids. 1. Place the Printhead into the Printhead Clean Station (P/N 40-0020-01). 2. Press the Back Flush button (Service screen OR Clean screen). BestCode Next Series 8 Technical Manual October 2022 Page 81 of 290... -
Page 96: Advanced Nozzle Cleaning
NOTE: The Cleaner, Nozzle Pigment is not compatible with inks or makeup solvents. The Cleaner, Nozzle Pigment is particularly incompatible with the plastics used in BestCode pumps, so contact should be avoided. Nozzle Cleaning instructions (Using 47-0053-01 or 47-0056-01) Remove nozzle from drop generator and place into a small jar. -
Page 97: Printhead Clean Routine
Notes: The device must remain powered on for the Auto Clean routine to operate correctly. Auto Clean Enabled Auto Clean Interval 0:45 (H:MM) Auto Clean Stop 4 Days Auto Clean Refresh BestCode Next Series 8 Technical Manual October 2022 Page 83 of 290... - Page 98 Use only the Home Screen Start and Stops when logged in as technician, and teach operators that after a fault, the system should be cleaned, started, and then stopped normally for the Auto Clean cycle to start correctly. BestCode Next Series 8 Technical Manual October 2022...
-
Page 99: Servicing The Next Series 8 System
Hinge Leaf Filter Frame Lifetime Included with new machines. 31-0021-01 Filter, Solvent 20000 hours 31-0023-01 Filter, Pre-Pump 20000 hours 31-0054-01 Dampener Printhead Assembly 20000 hours 31-5049-01 Printhead Filter Assembly 20000 hours BestCode Next Series 8 Technical Manual October 2022 Page 85 of 290... - Page 100 10000 hours or 24 months *Used in Factory Air Dry kit: See here † Filter life heavily depends on air quality. Oily air will rapidly deteriorate the filter. BestCode Next Series 8 Technical Manual October 2022 Page 86 of 290...
- Page 101 (use 5/8” open end wrench) 7. Allow the filter to drain, then dispose of the filter and waste ink in accordance with local regulation. BestCode Next Series 8 Technical Manual October 2022 Page 87 of 290...
- Page 102 SmartFill screen 11. Press Read SmartFilter Label 12. Confirm on the Status screen that the new filter was installed correctly. 13. Start the Jet and check for leaks. BestCode Next Series 8 Technical Manual October 2022 Page 88 of 290...
- Page 103 The inlet should be 4” and the outlet tube should be 17”. If the Pre-Pump filter is not mounted vertically, Phase Faults will occur. 4. Follow directions from Filter Maintenance, Step 3-8. Instructions here BestCode Next Series 8 Technical Manual October 2022 Page 89 of 290...
- Page 104 2. Locate the Solvent Filter (31-0021-01) Remove the Makeup Tank form the fluidic compartment Remove the Makeup pickup from the Makeup Tank Disconnect the Makeup feed tube from the Main Ink Manifold BestCode Next Series 8 Technical Manual October 2022 Page 90 of 290...
- Page 105 2. Remove the Main Ink Filter from the Filter Housing 3. Remove the SmartFilter Housing by removed the 2 M4 screws from the SmartFilter bracket 4. Locate the Dampener Printhead Assembly (31-0054-01) BestCode Next Series 8 Technical Manual October 2022 Page 91 of 290...
- Page 106 Filter in the same orientation as shown. The arrow be pointing in the direction of the ink flow. Inlet Side Outlet Side From Main To Printhead Ink manifold manifold BestCode Next Series 8 Technical Manual October 2022 Page 92 of 290...
- Page 107 Procedure Time: 15 minutes 1. Remove the Ink & Makeup SmartFill cup Instructions here 2. Locate the Filter install location a) There are 2 options depending on machine age. BestCode Next Series 8 Technical Manual October 2022 Page 93 of 290...
- Page 108 2. Remove the Main Ink manifold 3. Remove the Filter using a 12mm wrench. Discard the used filter and waste fluid in accordance with local regulation BestCode Next Series 8 Technical Manual October 2022 Page 94 of 290...
- Page 109 1. Review Safety Instructions on Page 2 and 3 of this manual. 2. Power off the Next Series 8 CIJ Printer. 3. Open the Air Filter access door. BestCode Next Series 8 Technical Manual October 2022 Page 95 of 290...
- Page 110 4. Review Safety Warning in door 5. Push down on Spring Wire clip. 6. Pull Spring Wire clip forward, then 7. Re move the filter edge support bracket. BestCode Next Series 8 Technical Manual October 2022 Page 96 of 290...
- Page 111 WHILE THE DEVICE IS OPERATING TO PROTECT THE DEVICE FROM EXTERNAL IGNITION SOURCES. THIS DOOR FORMS PART OF THE FIRE BARRIER THAT PREVENTS FLAMES FROM EXITING THE DEVICE. BestCode Next Series 8 Technical Manual October 2022 Page 97 of 290...
-
Page 112: Fluidic Service Routines
3. Locate and disconnect the SmartFill Cup Assembly antenna coax cables. Color Codes: Black = Ink SmartFill Cup Assembly Blue = SmartFilter Reader Assembly White = Makeup SmartFill Cup Assembly BestCode Next Series 8 Technical Manual October 2022 Page 98 of 290... -
Page 113: Venturi Replacement
1. Remove SmartFill Ink Cup and Ink tank 2. Remove the Venturi inlet tube 3. Remove the venturi from the Ink Tank and place it into a beaker. BestCode Next Series 8 Technical Manual October 2022 Page 99 of 290... - Page 114 5. Install the Tubes from the old venturi into the new venturi. Tube plumbing is critical to the system operation. Pay close attention to the correct inlet for each color coded tube. BestCode Next Series 8 Technical Manual October 2022 Page 100 of 290...
-
Page 115: Venturi Cleaning
Procedure Time: 5 minutes 1. Remove the Venturi from the Ink Tank 2. Remove the Venturi Return Tube 3. Clean the venturi through each port BestCode Next Series 8 Technical Manual October 2022 Page 101 of 290... - Page 116 Some staining is normal. If side ports cannot be cleaned with Cleaner, replace the entire Venturi. 6. Re-assemble the Venturi. The venturi may now be re-installed into the machine. BestCode Next Series 8 Technical Manual October 2022 Page 102 of 290...
-
Page 117: Pump Replacement
3. Locate and remove the 2 Pump mounting screws. 4. Remove the pump from the back of the machine and disconnect the tubes. BestCode Next Series 8 Technical Manual October 2022 Page 103 of 290... - Page 118 6. Install the new pump, paying close attention to the pump fitting orientation. Pre-pump filter side connects to the black marked fitting (pump inlet). BestCode Next Series 8 Technical Manual October 2022 Page 104 of 290...
- Page 119 Red side fitting connects to the main ink filter tube (pump outlet). 7. Mount the Pump and make the electrical connection to the main board. BestCode Next Series 8 Technical Manual October 2022 Page 105 of 290...
-
Page 120: Viscometer Replacement
The BestCode Next Series 8 Features various pumps based on the machine type. The install instructions are the same. Review the Configure Section for properly setting the Pump Type here. Pump Diener Fluid-o-Tech MicroPump (88SOP & 88SHSOP only) Sets the printer for usage with... - Page 121 6. Connect the Purple, Brown, and Grey tubes to the new Viscometer Brown Violet 7. Mount the viscometer to the Makeup Tank 8. Install the viscometer cable to the machine. BestCode Next Series 8 Technical Manual October 2022 Page 107 of 290...
-
Page 122: Cleaning The Viscometer
2. Remove the Valve from the Viscometer 3. Remove the drain screw from the Viscometer. 4. Use Cleaner to clean out the Viscometer. 5. Ensure viscometer restrictor is free of debris. BestCode Next Series 8 Technical Manual October 2022 Page 108 of 290... -
Page 123: Ink Manifold Replacement
Be familiar with proper safety information for handling fluids. Procedure Time: 15 minutes 1. Remove the Makeup SmartFill 2. Remove the valve cable connections and Pressure transducer cable connection BestCode Next Series 8 Technical Manual October 2022 Page 109 of 290... - Page 124 3. Remove the 2 manifold mounting screws 4. Disconnect the tubes and install into the new manifold 1 at a time. 5. Install the remaining tubes into the new manifold BestCode Next Series 8 Technical Manual October 2022 Page 110 of 290...
-
Page 125: Ink Valve Replacement
9. Start the Jet & inspect for leaks Ink Valve Replacement Be familiar with proper safety information for handling fluids. Procedure Time: 5 minutes 1. Remove the valve cable connection. 2. Remove the mounting screws BestCode Next Series 8 Technical Manual October 2022 Page 111 of 290... -
Page 126: Ink Valve Cleaning
This routine is for trained personnel only. Servicing the system while powered on can cause damage. Do not wet any cable connections. Use caution to prevent spillage in the fluidic compartment. 1. Remove the Ink Valve from the Manifold 2. Clean the valve ports BestCode Next Series 8 Technical Manual October 2022 Page 112 of 290... - Page 127 8. With the Valve Open, spray Cleaner through the valve until it runs clean. 9. Re-install the valve. See installation guide here BestCode Next Series 8 Technical Manual October 2022 Page 113 of 290...
-
Page 128: Replacing The Ink Tank
Spraying cleaner on the O-rings will help with inserting them into the tank. 5. Replace the Main Ink Filter See Instructions here. This is critical to prevent re-contamination of the ink tank. BestCode Next Series 8 Technical Manual October 2022 Page 114 of 290... -
Page 129: Flushing The Ink System
Do no-reuse ink. 8. Install SmartFill Ink bottle Flushing the Ink System A Video for a fully manual Full System Flush can be found here: https://youtu.be/nLZc207_j6w BestCode Next Series 8 Technical Manual October 2022 Page 115 of 290... -
Page 130: Electronic Service Routines
3. Remove all of the cable connections Be careful to pull coax connections straight out from the board. Pulling at an angle can damage the center pin on the connector and on the board. BestCode Next Series 8 Technical Manual October 2022 Page 116 of 290... - Page 131 Static safe cartons are included with each spare Circuit Board. Do not discard them! 6. Install the New Circuit board by aligning the board onto the plastic standoffs. BestCode Next Series 8 Technical Manual October 2022 Page 117 of 290...
- Page 132 9. Power on the system and setup the Ink here for Ink Commissioning Commission Type, Calibrate the here for Modulation Calibration Modulation, set the fluidic system type. here for Fluidic System type BestCode Next Series 8 Technical Manual October 2022 Page 118 of 290...
- Page 133 2. Lift the Ink and Makeup tanks, along with the main ink filter out of the back of the system. 3. Locate and remove the 4 PSU mounting screws BestCode Next Series 8 Technical Manual October 2022 Page 119 of 290...
- Page 134 Pulling at an angle can damage the center pin on the connector and on the board. 6. Lift up the power supply 7. Remove the mains power. BestCode Next Series 8 Technical Manual October 2022 Page 120 of 290...
- Page 135 8. Remove the HV Jacks 9. Complete the removal of the PSU 10. Install new power supply in reverse order of removal. BestCode Next Series 8 Technical Manual October 2022 Page 121 of 290...
-
Page 136: Display Replacement
0031-02) and the LCD Ribbon Cable (16- 0032-01) 4. Remove the M5 lock nuts that secure the LCD Display into the Electronics Door using an 8mm nut driver. BestCode Next Series 8 Technical Manual October 2022 Page 122 of 290... - Page 137 8. Place the washer over the LCD Display Bracket, and then thread on the M5 Locknut. Leave the nut slightly loose for adjustment of the LCD Display assembly. BestCode Next Series 8 Technical Manual October 2022 Page 123 of 290...
- Page 138 10. Position the display so that none of the black display edging is visible through the Electronic Door graphic overlay. 11. Tighten the Display Mounting Nuts and secure the Electronic Door Lanyard. BestCode Next Series 8 Technical Manual October 2022 Page 124 of 290...
-
Page 139: Integrating External Peripheral Devices
Integrating External Peripheral devices Alarm Beacon Shaft Encoder Ethernet BestCode Next Series 8 Technical Manual October 2022 Page 125 of 290... - Page 140 5) Repeat the process for the device side, matching device features to the corresponding pins. Use the provided seal and grommet to ensure cable maintains IP 67 Rating. BestCode Next Series 8 Technical Manual October 2022 Page 126 of 290...
- Page 141 220 V DC, 250 V AC Max. carrying current Min. switching capacity (Reference 10µA 10mV DC value) Nominal operating power Single side stable (M type: 400 mW, S type: 200 mW); BestCode Next Series 8 Technical Manual October 2022 Page 127 of 290...
- Page 142 Photocell Auxiliary Serial BestCode Next Series 8 Technical Manual October 2022 Page 128 of 290...
- Page 143 BestCode Next Series 8 Technical Manual October 2022 Page 129 of 290...
- Page 144 Collector Information BestCode Next Series 8 Technical Manual October 2022 Page 130 of 290...
-
Page 145: Printhead Service Routines
Procedure Time: 5 minutes 1. Remove the 2 drop generator side mounting screws. 2. Remove the 2 nozzle screws. 3. Remove the nozzle. BestCode Next Series 8 Technical Manual October 2022 Page 131 of 290... - Page 146 Nozzle seals are 1 time use. 6. Install a new or the cleaned nozzle. 7. Perform jet alignment and modulation Jet Alignment Guide calibration to complete. Modulation Calibration Guide BestCode Next Series 8 Technical Manual October 2022 Page 132 of 290...
-
Page 147: Jet Alignment
2. Use a flathead screwdriver to move the jet up and down in the gutter hole. 3. Tighten the drop generator side mounting screws once this position is achieved. Side View IDEAL VERTICAL ALIGNMENT BestCode Next Series 8 Technical Manual October 2022 Page 133 of 290... - Page 148 This moves the jet towards and away from the print slot. 3. Tighten the drop generator adjuster screw once this position is achieved. Top View IDEAL HORIZONTAL ALIGNMENT BestCode Next Series 8 Technical Manual October 2022 Page 134 of 290...
-
Page 149: Drop Generator Replacement
4. Confirm jet placement Drop Generator Replacement Be familiar with proper safety information for handling fluids. Procedure Time: 5 minutes 1. Remove the 2 drop generator side mounting screws BestCode Next Series 8 Technical Manual October 2022 Page 135 of 290... - Page 150 4. Remove the drop generator Before Cutting 5. Cut back half of the swaged yellow tube. Cut location Failure to steps 5-8 will result in leaks from the barb and tube. BestCode Next Series 8 Technical Manual October 2022 Page 136 of 290...
- Page 151 9. Connect the blue coax cable and heat shrink with the included heatshrink. 10. Perform jet alignment and Jet Alignment Guide modulation calibration to complete Modulation Calibration Guide BestCode Next Series 8 Technical Manual October 2022 Page 137 of 290...
-
Page 152: Modulation Calibration
55-65% 45-50 PSI – all acceptable. 88SHSOP (<40% causes Charge Fault) 88HS1 65µ 60-65% (<40% causes Charge Fault) 45-50 PSI 120V 88SM 40µ 50-55% (<40% causes Charge Fault) BestCode Next Series 8 Technical Manual October 2022 Page 138 of 290... - Page 153 Satellite Satellite drops are caused by the tail of the drop drop breaking off into a smaller drop. BestCode Next Series 8 Technical Manual October 2022 Page 139 of 290...
- Page 154 4. Repeat until a bad print in achieved. 5. Set the modulation point to 30V 30V over above the lowest acceptable print. 20V over Lowest Acceptable BestCode Next Series 8 Technical Manual October 2022 Page 140 of 290...
- Page 155 The best solution is to reduce the charge to and check the Modulation Window. You may have to select a new frequency range, but lower charge will work. BestCode Next Series 8 Technical Manual October 2022 Page 141 of 290...
- Page 156 If the issues shown are present on an 88HS, 88HS1, or 88SM, it may be necessary to reduce the charge % to as low as 40%. Use Height 10 in the adjust screen to increase the print height while maintaining good print quality at charge 40%. BestCode Next Series 8 Technical Manual October 2022...
-
Page 157: Gutter Replacement
2. Lift the gutter up and remove from the barb. 3. Clean or replace the gutter body and gutter gasket. 4. Perform jet alignment. Jet Alignment Guide BestCode Next Series 8 Technical Manual October 2022 Page 143 of 290... -
Page 158: Gutter Detect Replacement
Procedure Time: 15 minutes 1. Pull the gutter tube off of the gutter barb. 2. Remove the heatshrink from the black coax cable. 3. Lift out the gutter detect. BestCode Next Series 8 Technical Manual October 2022 Page 144 of 290... - Page 159 Cut location Failure to steps 5-8 will result in leaks from the barb and tube. After Cutting 6. Place the clipped back tube onto the new gutter detect tube. BestCode Next Series 8 Technical Manual October 2022 Page 145 of 290...
- Page 160 7. Swage tube open slightly with a screwdriver. 8. Install onto the gutter. 9. Apply the new heatshrink over the gutter detect and over the black coax cable connection. BestCode Next Series 8 Technical Manual October 2022 Page 146 of 290...
-
Page 161: Printhead Valve Manifold Replacement
2. Lift the Manifold. 3. Remove the 2 valve mounting screws. 4. Remove the tubes from the valve manifold. 5. Make sure the Valve gasket is in place. BestCode Next Series 8 Technical Manual October 2022 Page 147 of 290... -
Page 162: Printhead Valve Replacement
Procedure Time: 2 minutes 1. Remove the 2 Printhead manifold mounting screws. 2. Lift the manifold assembly. 3. Remove the 2 valve mounting screws BestCode Next Series 8 Technical Manual October 2022 Page 148 of 290... - Page 163 Wire colors for the Printhead Valve are White/Red/Orange stripe and White/Green/Yellow stripe. There is no wire polarity. 5. Make sure the Valve gasket is in place 6. Reinstall the valve. BestCode Next Series 8 Technical Manual October 2022 Page 149 of 290...
-
Page 164: Printhead Umbilical Replacement
Main CPU Board, the Power Supply, and from the Case ground stud. 2. Pull the printhead harness forward to ensure all of the cables are disconnected from the Main CPU Board. BestCode Next Series 8 Technical Manual October 2022 Page 150 of 290... - Page 165 3. Pull the electronics cables through the middle wall bulkhead knockout/ 4. Remove the umbilical bulkhead fitting from the side of the machine. BestCode Next Series 8 Technical Manual October 2022 Page 151 of 290...
- Page 166 6. Remove Red tube from the outlet of the Dampener or Printhead Filter. 7. Cap the tubes to reduce the mess. 8. Pull the umbilical hoses and cables out through the umbilical bulked fitting. BestCode Next Series 8 Technical Manual October 2022 Page 152 of 290...
- Page 167 9. Pull the new umbilical tube and wires through the bulkhead fitting. 10. Fasten the umbilical mounting hardware. BestCode Next Series 8 Technical Manual October 2022 Page 153 of 290...
- Page 168 13. Install the drop generator Drop generator installation shown here 14. Perform up the 6 back flushes 15. Calibrate the modulation Modulation Calibration instructions here 16. Align the jet. Jet Alignment here BestCode Next Series 8 Technical Manual October 2022 Page 154 of 290...
-
Page 169: Troubleshooting The Next Series 8 System
Gives a brief description of the fault Fault Resolution If possible, gives exact instructions to resolve the fault. QR Code Links to the BestCode Support page that matches the Prompt Code. BestCode Next Series 8 Technical Manual October 2022 Page 155 of 290... -
Page 170: Event Messages And Prompt Resolutions (01.06.00.00+)
Prompt Description 01-0003 Message The message will be erased. Are you sure? Solution 1: Press OK to delete the message Solution 2: Press Cancel to close the prompt. BestCode Next Series 8 Technical Manual October 2022 Page 156 of 290... - Page 171 Displayed to prompt the user to confirm the request to reset all Counters. Solution 1: Press OK to Reset all counters for the selected message Solution 2: Press Cancel to close the prompt. BestCode Next Series 8 Technical Manual October 2022 Page 157 of 290...
- Page 172 Prompt Code Prompt Name Prompt Description 01-0018 NO PROMPT OCCURS Reset Remote Command Log. Written to the event log to indicate that Remote Command Log was in fact reset. BestCode Next Series 8 Technical Manual October 2022 Page 158 of 290...
- Page 173 Press OK to Erase the RFID Log. Prompt Code Prompt Name Prompt Description 01-0027 NO PROMPT OCCURS Reset RFID Log. Written to the event log to indicate that RFID Log was in fact reset. BestCode Next Series 8 Technical Manual October 2022 Page 159 of 290...
- Page 174 Hardware on Main PCB is damaged. Replace the Main Board. Prompt Code Prompt Name Prompt Description 02-0001 NO PROMPT Fan speed set to %d." Reports set point of the Fan in Percentage (30%-100%) to the Event Log. BestCode Next Series 8 Technical Manual October 2022 Page 160 of 290...
- Page 175 "System time changed." Written to the event log to indicate that the time has been changed. Prompt Code Prompt Name Prompt Description 02-000D Not Used Not Used Update Firmware Version BestCode Next Series 8 Technical Manual October 2022 Page 161 of 290...
- Page 176 Solution 1: Erase USB and re-load firmware files to USB stick. Repeat Firmware Update. Solution 2: Perform J-Link Firmware Load. Solution 3: If issue persists, contact BestCode support or replace Main PCB. Prompt Code Prompt Name Prompt Description 03-0003 Firmware Update “Partially Successful”...
- Page 177 Solution 1: Erase USB and re-load correct firmware files to USB stick. Repeat Firmware Update. Solution 2: Perform J-Link Firmware Load. Solution 3: If issue persists, contact BestCode support or replace Main PCB. Prompt Code Prompt Name Prompt Description 03-8004 Firmware Fault Loading older software versions not permitted.
- Page 178 Displayed to indicate that the offset table could not be saved. Prompt Code Prompt Name Prompt Description 04-0010 "Error writing OFFSET.BIN" Displayed to indicate that the offset table could not be saved. BestCode Next Series 8 Technical Manual October 2022 Page 164 of 290...
- Page 179 "Print file not found: %ls" Indicates that the specified file could not be found. Scan external device to ensure USB is not corrupted. Perform “Erase and Reformat Memory.” Solution 1: BestCode Next Series 8 Technical Manual October 2022 Page 165 of 290...
- Page 180 Indicates that the version of software on the USB drive is less that the one currently installed. Load a valid version of Software onto the USB stick. Solution 1: BestCode Next Series 8 Technical Manual October 2022 Page 166 of 290...
- Page 181 Indicates that a file listed in the manifest exists on the USB drive but is not a regular file (probably a directory). Solution 1: Download new Firmware from Distributor portal and load onto the USB stick. Load Firmware. Do not edit the Manifest.txt file. BestCode Next Series 8 Technical Manual October 2022 Page 167 of 290...
- Page 182 Prompt Code Prompt Name Prompt Description 06-8001 SD Memory "Memory device not detected." Indicates a failure to mount an SD card. SD Card not valid. Contact BestCode for support. Solution 1: Prompt Code Prompt Name Prompt Description 07-0001 File Transfer...
- Page 183 Confirm black finned heatsink installed on Main Board near Fan Connector. Solution 3: Replace the Power Supply Solution 4: Replace the Main Circuit Board Solution 5: Solution 6: Replace the Printhead Umbilical BestCode Next Series 8 Technical Manual October 2022 Page 169 of 290...
- Page 184 Written to the event log to indicate that the phase threshold is outside the valid range (11-62) and will be reset to its midpoint (31). Solution 1: Self-resolving error. No action needed. BestCode Next Series 8 Technical Manual October 2022 Page 170 of 290...
- Page 185 Outside of phase range. Occurs when enabling Phase from the Service Screen. Solution 1: Check Ink Viscosity and Modulation Calibration. Solution 2: Perform Phase Threshold Reset function in the technician screen BestCode Next Series 8 Technical Manual October 2022 Page 171 of 290...
- Page 186 Prompt Name Prompt Description OD-0001 Success Indicates that a Pump SmartLabel was successfully scanned. Prompt Code Prompt Name Prompt Description 0D-8001 Not Used Solution 1: Load new Firmware. BestCode Next Series 8 Technical Manual October 2022 Page 172 of 290...
- Page 187 0D-8008 Pump Fault "Pump Rotation High %ls" Indicates that a pump rotation too high error occurred. Solution 1: Review steps for 0D-8004 Solution 2: Check for system leaks BestCode Next Series 8 Technical Manual October 2022 Page 173 of 290...
- Page 188 If the makeup flows, the Makeup Add valve is clogged open and should be cleaned or replaced. Solution 4: Replace the Viscometer If not using BestCode provided fluids, inspect ink for foaming. This can cause ink to become thin over Solution 5: time.
- Page 189 Solution 2: Try scanning new SmartFill label Solution 3: Check coax cable connections from the SmartFill cup. Solution 4: SmartFill label does not match the command label. Contact BestCode for correct command label. Prompt Code Prompt Name Prompt Description 0F-8002...
- Page 190 Prompt Name Prompt Description 10-8001 Ink Fault SmartFill label not valid for this machine. Solution 1: Label type cannot be used in the BestCode machine. Contact BestCode. Prompt Code Prompt Name Prompt Description 10-8002 Ink Fault SmartFill label not valid for this machine type.
- Page 191 Scan SmartFill Label only. Train operators on properly adding fluids. Prompt Code Prompt Name Prompt Description 10-800C Ink Empty "SmartFill ink label required." Solution 1: Same as 10-800A, except only occurs at Jet Start. BestCode Next Series 8 Technical Manual October 2022 Page 177 of 290...
- Page 192 Makeup "Makeup Life is at maximum." Occurs after trying to Scan a Makeup SmartFill label after very little Makeup usage since last scan. Helps prevent accidental SmartLabel destruction. BestCode Next Series 8 Technical Manual October 2022 Page 178 of 290...
- Page 193 Prompt Name Prompt Description 11-8001 Makeup Fault SmartFill label not valid for this machine. Solution 1: Label type cannot be used in the BestCode machine. Contact BestCode. Prompt Code Prompt Name Prompt Description 11-8002 Makeup Fault SmartFill label not valid for this machine setting.
- Page 194 Prompt Description 12-8003 Filter Fault SmartFilter replacement required. Indicates that the filter life is less than 24 hours until exhausted. Solution 1: Replace the Ink Filter. See Instructions here. BestCode Next Series 8 Technical Manual October 2022 Page 180 of 290...
- Page 195 Add debounce (Peripherals : Photocells screen) until issue resolves. Solution 2: Adjust gain on Photocell sensor to prevent double triggering. Solution 3: Move photocell closer to the Printhead. BestCode Next Series 8 Technical Manual October 2022 Page 181 of 290...
- Page 196 Indicates that a Telnet connection was lost due to a timeout or an error receiving data. Prompt Code Prompt Name Prompt Description 18-8001 Telnet "Fatal Error %ls" Indicates an internal Telnet error. Solution 1: Reattempt Telnet Connection. If failed, Contact BestCode for support. BestCode Next Series 8 Technical Manual October 2022 Page 182 of 290...
-
Page 197: Diagnosing Main Circuit Board Issues
Used for Positive Air accessory. Vacuum Unused Provides voltage and recieves photocell sensor signal Encoder Provides voltage and recieves encoder signal Provides voltage and recieves photocell sensor signal BestCode Next Series 8 Technical Manual October 2022 Page 183 of 290... -
Page 198: Fuses
If OFF, 24V supply is compromised. Determine if problem is interal Green (power supply issue) or external (peripheral). If LED is DIM, there is likely a partial short to one of the Peripheral Devices. BestCode Next Series 8 Technical Manual October 2022 Page 184 of 290... -
Page 199: Troubleshooting Cpu Problems
Check LED 2 & 5 for illumination. If dim, 24V supply to peripheral is compromised. Inspect cable connections from J11, J14, J15,J17, J19, P4, and P5 for shorts to ground BestCode Next Series 8 Technical Manual October 2022 Page 185 of 290... - Page 200 300V supply is compromised. Replace the PSU. Likely will have 0B-0003, 08-8001, 08-8002, or 08-8003 Fault. EHT Voltage Enabled (Enabled when Jet is on) Troubleshooting No LED Solution 1: Enable the HV on the Home Screen. BestCode Next Series 8 Technical Manual October 2022 Page 186 of 290...
-
Page 201: Troubleshooting Fluidic System Problems
31-0001-02 Filter, Model 88 Ink 31-0004-01 Filter, Model 88S Opaque Ink 20-5032-01, Venturi, Next Series 8 Assembly (GEN 2) 40psi 20-5033-01, Venturi, Next Series 8 Assembly (GEN 2) 50psi BestCode Next Series 8 Technical Manual October 2022 Page 187 of 290... - Page 202 Solvent Filter (31-0021-01) 33-0001-02, Valve, 2 Way Ink 34-0003-02, Sensor, Ink Pressure 20-0015-01, Viscometer Assy, Complete This image is rotated 90° BestCode Next Series 8 Technical Manual October 2022 Page 188 of 290...
- Page 203 When tubes lines are shown in this format, it means that the tubes cross but are not connected. Ink from the Red tube is not connected to the blue tube in this symbol. BestCode Next Series 8 Technical Manual October 2022...
- Page 204 8) The Purple Line is Split from the green line to Feed the Viscometer 9) Brown line is on the side opposite the Viscometer Restrictor, and returns Ink to the ink Tank. BestCode Next Series 8 Technical Manual October 2022...
- Page 205 4) A timer is started to measure how long until the Ball passes the Inductive Sensor. 5) The Time is captured and converted to a value in cP. 6) The Target Viscosity is ALWAYS 4.5 cP. BestCode Next Series 8 Technical Manual October 2022 Page 191 of 290...
- Page 206 3) Solvent Add Valve activates for 1 second, then de-activates. 4) This Solvent Add Valve on/off cycle occurs 5 to 6 times in succession depending on Ink thickness. BestCode Next Series 8 Technical Manual October 2022 Page 192 of 290...
- Page 207 6) The Flush Valve activates, and pushes clean solvent out of the drop generator into the gutter to clean the gutter and gutter sensor. 7) The Flush Valve and Gutter Valve de-activate. BestCode Next Series 8 Technical Manual October 2022 Page 193 of 290...
- Page 208 Solvent Add valve is not fully closed. This can steal vacuum from the gutter and prevent it from working correctly. Diagnostic 3 Test the Ink viscosity. Ink Below 2.0cP and Ink above 8.0cP can prevent the vacuum from working correctly. BestCode Next Series 8 Technical Manual October 2022 Page 194 of 290...
- Page 209 Test, then clean or replace the Bleed Valve and Solvent Tank Valve. Check all tube connections for the Orange, Blue and Yellow tubes. Make sure the tube is not clogged by testing each tube with a spray of cleaner. BestCode Next Series 8 Technical Manual October 2022 Page 195 of 290...
-
Page 210: Flow Tests For Troubleshooting
Measure out 50 to 100ml of makeup from the Makeup Tank and put it into a graduated beaker Step 2: Put the Orange Makeup Tank pickup into the beaker. BestCode Next Series 8 Technical Manual October 2022 Page 196 of 290... - Page 211 If the volume per add is less than 1.5ml, there is a fluidic problem and it should be diagnosed using the fluidic diagrams and troubleshooting help here. BestCode Next Series 8 Technical Manual October 2022 Page 197 of 290...
- Page 212 Step 1: With the Jet off, remove the Black marked tube from the venturi. Step 2: Plug the Vacuum input to the Venturi to prevent leakage in next step. BestCode Next Series 8 Technical Manual October 2022 Page 198 of 290...
- Page 213 40 PSI. Step 4: Inspect the Black tube outlet. There should be no flow. Flow at this point would indicate a faulty bleed valve. BestCode Next Series 8 Technical Manual October 2022 Page 199 of 290...
- Page 214 Flow Diagram and diagnose this restricted component. If flow is low, perform the Nozzle Flow test below to determine if issue is feed or bleed related. BestCode Next Series 8 Technical Manual October 2022 Page 200 of 290...
- Page 215 Remove the inlet tube from the Printhead Manifold to the Drop Generator. Set bypass into a graduated cylinder. Step 3: Open the gutter valve and set the pressure to 40 PSI. BestCode Next Series 8 Technical Manual October 2022 Page 201 of 290...
- Page 216 For all models, there should be atleast 55ml of Ink or about 2oz in the cylinder. Less than this indicates a flow restriction to the drop generator that must be resolved. BestCode Next Series 8 Technical Manual October 2022 Page 202 of 290...
- Page 217 With the jet off, insert the Brown tube from the Ink Tank into a graduated cylinder. Step 2: Run the pump to 40 PSI and Start a 60 second timer. BestCode Next Series 8 Technical Manual October 2022 Page 203 of 290...
- Page 218 The results of this test are only valid if the test one the Brown Tube resulted in a flow more than 35ml. Step 1: With the jet off, insert the Grey tube from the Ink Tank into a graduated cylinder. BestCode Next Series 8 Technical Manual October 2022 Page 204 of 290...
- Page 219 Step 2: Run the pump to 40 PSI Step 3: Activate the Viscometer Valve and Start a 60 second timer. BestCode Next Series 8 Technical Manual October 2022 Page 205 of 290...
-
Page 220: Common Cij Issues
Tube is not fully inserted into the tank pick. Remove tube, cut tubing square or Can be caused by dried ink or deformed replace tubing. Clean pickup push to tube connect and re-insert. BestCode Next Series 8 Technical Manual October 2022 Page 206 of 290... - Page 221 Printer, like consistency. This will gum up the viscometer preventing Install -DRY kit to reduce good reads. water ingress to the ink. BestCode Next Series 8 Technical Manual October 2022 Page 207 of 290...
-
Page 222: Common Printhead Issues
Bearding will cause fuzzy print. • Bearding will cause partial message printing. • Bearding can occur in minutes/hours. • Bearding can require the printhead to be cleaned hourly (or very often). BestCode Next Series 8 Technical Manual October 2022 Page 208 of 290... - Page 223 Makeup. Venturi Testing Instructions are here. Nozzle / Drop Generator Clog Either a clog in the nozzle or in the Venturi can cause BestCode Next Series 8 Technical Manual October 2022 Page 209 of 290...
- Page 224 Clean J34 Modulation with Isopropyl alcohol measured. Issue could be related to CPU 300V and dry thoroughly before reconnecting. circuitry, cabling, or Drop Generator Replace Coax Cable Replace Drop Generator BestCode Next Series 8 Technical Manual October 2022 Page 210 of 290...
- Page 225 If the flicking corresponds to finger contact on the phase, the issue is likely not with the Printhead. If the light is constantly On or Off, the issue is likely with the printhead. BestCode Next Series 8 Technical Manual October 2022 Page 211 of 290...
-
Page 226: Software Tools
USB Setup and Formatting For all of the USB interaction with the BestCode Next Series 8, the USB must be properly configured. The instructions below provide instructions for getting the USB ready to transfer data or load new Firmware onto the printer. -
Page 227: Retrieving And Unzipping Files
1. Download the newest Firmware file 2. Locate the File, and unzip the file 3. Copy the files onto the USB in accordance with the File Structure illustrated on the next page. BestCode Next Series 8 Technical Manual October 2022 Page 213 of 290... -
Page 228: Files Structure On The Usb
Fonts, translations, graphics, and keyboards must be manually moved from Firmware folder to a new firmware folder to restore them to a different Firmware version. The USB File Structure is as follows: BestCode Next Series 8 Technical Manual October 2022 Page 214 of 290... - Page 229 Necessary file for USB Firmware Load. Do not modify or replace. Loader.BCI Necessary file for USB Firmware Load. Do not modify or replace. bcTools Contains bestCode tools for keyboards, translations, fonts, and message review. bcMsgExam.exe Tool for viewing messages: Instructions here. bestCode Translator.exe Tool for creating language translations: Instructions here.
-
Page 230: Multiple Version Per Stick
Printer will create a folder for that version of firmware and save the files in the appropriate locations. Firmware Loading Process Procedure Time: 12 Minutes 1. Insert the Formatted USB into the USB socket on the main board at P4. BestCode Next Series 8 Technical Manual October 2022 Page 216 of 290... - Page 231 File Transfer prompt. 4. The system will automatically reboot and the Firmware loading process is complete. 5. Confirm the Ink Type and Pump Type are configured on the Help Screen BestCode Next Series 8 Technical Manual October 2022 Page 217 of 290...
-
Page 232: Firmware Load Troubleshooting
Delete it if it is present. 4. Previous BestCode Image Installer is now completely removed from the PC. Leaving old versions of the BestCode Image Installer may load the wrong version of Firmware BestCode Next Series 8 Technical Manual October 2022 Page 218 of 290... - Page 233 Destination Folder! This may corrupt the software loaded to the machine. Loading the Firmware Procedure Time: 30 Minutes 1. Run the BCImageInstaller executable file. 2. Power down the printer. BestCode Next Series 8 Technical Manual October 2022 Page 219 of 290...
- Page 234 4. Connect the J-Link USB cable to the computer that has the BestCode Image Installer. 5. Power up the Next Series 8 CIJ then Immediately type LA into the BestCode Image Installer to begin the Firmware Load. 6. Wait until the System has completed all of the Firmware Load.
- Page 235 7. The System will power off once the Firmware Load is Complete. 8. Disconnect the J-Link device. 9. Install the BestCode USB Stick containing the current Firmware Version Files. 10. Power on the Printer. BestCode Next Series 8 Technical Manual...
- Page 236 11. Screen calibration may be required. This is normal. 12. Wait for the printer to boot. 13. Confirm the Ink Type and Pump Type are configured on the Help Screen BestCode Next Series 8 Technical Manual October 2022 Page 222 of 290...
- Page 237 Single Image Loss Recovery Load 1. The BestCode has two copies of the Firmware image loaded onto the printer to provide a live backup. If one of the images is corrupted or lost, the prompt to the right will appear.
- Page 238 4. A Status Box will appear and give load results. If failure occurs, proceed to J- Link load process. When process is completed, Restart the Print to complete the recovery. BestCode Next Series 8 Technical Manual October 2022 Page 224 of 290...
- Page 239 No USB installed after J-Link install – 05-8001, 03-8005 1. The following prompt appear. 2. Install USB with correct firmware version. 3. Press OK Firmware files will load and issue will be resolved. BestCode Next Series 8 Technical Manual October 2022 Page 225 of 290...
- Page 240 4. Press OK on the File Transfer button. 5. Check that the Modulation, Pressure, and Charge have been reset to Factory default. These settings will vary by model. 6. Calibrate the modulation, pressure, and Charge. BestCode Next Series 8 Technical Manual October 2022 Page 226 of 290...
- Page 241 Format should be as follows >USB Drive (E:) > 01.04.00.11 (or most current version) >bcData >bcTools >Setup.exe Correct USB file format Wrong directory *Pay attention during unzip process BestCode Next Series 8 Technical Manual October 2022 Page 227 of 290...
- Page 242 01.04.01.15 folder Do not remove the BCmanifest file Do not copy bcData, bcTools, or Setup.exe files from previous software verions. This will cause the error 03-8006 Firmware Fault. BestCode Next Series 8 Technical Manual October 2022 Page 228 of 290...
- Page 243 3. Navigate to the Memory Screen Home>Service>Tools>Technician> Memory 4. Install the USB stick with Firmware version matching the version installed on the Printer. 5. Press the Erase and Reformat Memory button. BestCode Next Series 8 Technical Manual October 2022 Page 229 of 290...
-
Page 244: Bctools
The BestCode PC Tools are a collection of tools used to modify features of the Series 8 CIJ. The PC Tools allow modifications to be made to Keyboards, Fonts, Translations, and allows graphics to be created. bcMsgExam The BestCode Message Exam tool is used to quickly review message settings on a loaded message. It can also be used to identify erroneous message files. - Page 245 Exam tool. 2. Erroneous message files should be deleted from the Printer and recreated identically. If the new message is also corrupt, contact BestCode Support. BestCode Next Series 8 Technical Manual October 2022 Page 231 of 290...
- Page 246 BitFontEditor Fonts can be modified using the BestCode Font Editor. Fonts are then transferred to the machine using the USB drive and the “Restore Font” feature. Font Editor The font editor tool is used to create and edit printable fonts on the Series 8 CIJ. This can be used to customize individual characters to customer requirements.
- Page 247 Locale>bestCode>Fonts Note: Save the file OVER the original file. If you do not save over the original, the font cannot be loaded into the Printer. 10. Press Save BestCode Next Series 8 Technical Manual October 2022 Page 233 of 290...
- Page 248 4. After completing the Restore process, the Font is will now to be changed in all existing and future messages. Note: Custom fonts will not persist after Firmware Upgrade. BestCode Next Series 8 Technical Manual October 2022 Page 234 of 290...
- Page 249 Number Menu Menu 6. Press File > Save As 7. Navigate to USBDRIVE>01.XX.XX.XX>bcData> Locale>bestCode>Keyboards Note: Keyboard name should not have numbers or symbols in it. 8. Press Save BestCode Next Series 8 Technical Manual October 2022 Page 235 of 290...
- Page 250 Custom keyboards will not persist after Firmware Upgrade. 5. Navigate to the Setup screen and use the Keyboard up and down arrow to find and select the new keyboard for use. BestCode Next Series 8 Technical Manual October 2022 Page 236 of 290...
- Page 251 Name Number and 4. Populate the Right-Hand Column Character set with translation for the information on the matching row. Translated Text 5. Choose the Number and Character set. BestCode Next Series 8 Technical Manual October 2022 Page 237 of 290...
- Page 252 After Translation files are modified, the “Restore” feature is used inside the Series 8 system to install the Translation. 1. Install the USB with the modified Translation Files. BestCode Next Series 8 Technical Manual October 2022 Page 238 of 290...
- Page 253 Alpha code translations are included in the Translation file. Days of the week, months, DDMMYY formats, etc are all included in the translation file. Update these files are install the Translation to the BestCode Series 8. With desired language selected, all Alpha Codes will update to Translated Language.
- Page 254 These represent drops. 5. Proceed to drawing the graphic. 6. Draw graphic in only black color. 7. Press the file button, then “Save As”. 8. Navigate to the BestCode USB Graphic USB DRIVE>01.XX.XX.XX>bcData>Graphics 9. Save As XXXXXXXXX.bmp Must be monochrome Bitmap *.bmp...
- Page 255 Graphics will persist after Firmware Upgrade. Using Graphics in Messages Graphics are available to be added to messages from the Message editor immediately after performing the Restore Function BestCode Next Series 8 Technical Manual October 2022 Page 241 of 290...
-
Page 256: Remote Communication
The Remote Communication allows control over every feature on the Next Series 8 Printer outside of powering on and powering off. The Remote Communication Guide is available for download on the Distributor Portal. BestCode Next Series 8 Technical Manual October 2022 Page 242 of 290... -
Page 257: Appendix
PPENDIX PECIFIC UNCTION ESTING E – P PPENDIX RINT PPLICATIONS ETUP F - S PPENDIX YSTEM OOLING YPES AND NVIRONMENTAL ANAGEMENT DVICE Y – C PPENDIX OMPANION OCUMENTS BestCode Next Series 8 Technical Manual October 2022 Page 243 of 290... -
Page 258: Appendixa - Compliance Certificates
Appendix A – Compliance Certificates BestCode Next Series 8 Technical Manual October 2022 Page 244 of 290... - Page 259 BestCode Next Series 8 Technical Manual October 2022 Page 245 of 290...
-
Page 260: Appendixb - Fluid Range Fw Version 01.06.00.07
Best By Statement Beginning in 2019, BestCode has adopted the use of “Best By” date on fluids rather than a fixed “Use By” or expiration date. The “Best By” date is month by which BestCode commends the product be used. The “Best By” date means the fluid is guaranteed to meet the certified test specifications up to the end of the “Best By”... - Page 261 52-0001-01 Makeup, MEK 50-0001-01 Cleaner, MEK 51-0028-01 Ink, MEK Orange Soft Pigment 52-0001-01 Makeup, MEK 50-0001-01 Cleaner, MEK 51-0030-01 Ink, MEK Pink Opaque 52-0001-01 Makeup, MEK 50-0001-01 Cleaner, MEK BestCode Next Series 8 Technical Manual October 2022 Page 247 of 290...
- Page 262 52-0015-01 Makeup, Food Grade Red 51-0015-01 Ink, Food Grade Red 52-0015-01 Makeup, Food Grade Red 52-0016-01 Makeup, Food Grade Blue 51-0016-01 Ink, Food Grade Blue 52-0016-01 Makeup, Food Grade Blue BestCode Next Series 8 Technical Manual October 2022 Page 248 of 290...
-
Page 263: Appendix C - System, Stands, Brackets, And Peripheral Diagrams
Screw, M6x1x20 Hex SS 18-8 28-0137-02 Feet, Controller Stand 28-0138-01 Screw, M6x1x30 SS 28-0149-01 Nut, M6 Locking 28-0167-01 Cap, Insert/Glide, Stand Ships flat packaged Assembly Time: 10 minutes BestCode Next Series 8 Technical Manual October 2022 Page 249 of 290... - Page 264 BestCode Next Series 8 Technical Manual October 2022 Page 250 of 290...
- Page 265 22-0073-01, ROD, 30MM 2FT 25-0033-03, BRACKET, PH SHEET CLAMP G. 22-0069-03, BRACKET, SPUD Height: 24” (610mm) Armature Load: 10 lbs Width: 2” (51mm) Weight: 9lbs (4.1kg) Depth: 24” (610mm) BestCode Next Series 8 Technical Manual October 2022 Page 251 of 290...
- Page 266 Controller Stand with Conveyor Side Mount – 40-0019-01 & 40-0004-01 Ships flat packaged Assembly Time: 15 minutes BestCode Next Series 8 Technical Manual October 2022 Page 252 of 290...
- Page 267 Screw, Panhead Phillips, M6x1x8 SS 18-8 28-0126-01 Washer, M6 External Tooth 28-0149-01 Locknut, M6 with External Tooth Washer 40-0009-01 Clamp, 30mm Flange, Plastic 59-0010-01 Bottle, Makeup 33-400 Neck BestCode Next Series 8 Technical Manual October 2022 Page 253 of 290...
- Page 268 BestCode Next Series 8 Technical Manual October 2022 Page 254 of 290...
-
Page 269: Appendixd - Specific Function Testing
Stage 1:Empty Tank, Ready to Be Commissioned Stage 2, 1 Bottle Added Into the Tank Stage 3, Ink in Tank after 1 Priming Stage 4, 1 Low Warning BestCode Next Series 8 Technical Manual October 2022 Page 255 of 290... - Page 270 1346ml. It can be found that the time from 1 bottle added from a low condition to the next add will be in line with the listed consumption charts. BestCode Next Series 8 Technical Manual October 2022...
- Page 271 2492ml. It can be found that the time from 2 bottles added to the next Low Warning will be in line with the listed consumption charts. BestCode Next Series 8 Technical Manual October 2022 Page 257 of 290...
-
Page 272: Appendixe - Print Applications / Setup
2. Install the Photocell Cable. 3. Plug the Photocell cable into J14 on the board. 4. Lock the Electronic Compartment door 5. Install the M12 Cable on the Photocell Cable. BestCode Next Series 8 Technical Manual October 2022 Page 258 of 290... - Page 273 Teachable red, green, or blue contast sensor. 10mm max sensing distance. Can be used to detect minor changes in product, such as color changes on product. Works well with glass product and detecting optically clear products. BestCode Next Series 8 Technical Manual October 2022 Page 259 of 290...
- Page 274 2. Remove the rubber plug from the encoder 3. Mount the encoder as desired 4. Tension the encoder using the set screw under the rubber plug. 5. Connect the M12 cable to the encoder. BestCode Next Series 8 Technical Manual October 2022 Page 260 of 290...
- Page 275 Install the M12 cable on the Encoder cable. Wiring information The peripheral devices for the Series 8 BestCode system use an array of connectors. For the Shaft Encoder, Parallel, Photocell, and Auxiliary, Molex Microfit 3.0 ™ connectors and crimps are used.
- Page 276 Using the Molex Crimper BestCode Next Series 8 Technical Manual October 2022 Page 262 of 290...
- Page 277 BestCode Next Series 8 Technical Manual October 2022 Page 263 of 290...
- Page 278 Shaft Encoder mounted to the line, operate the line at maximum speed. For example, the image to the right shows a measured transport frequency of 46.53kHz (x1). BestCode Next Series 8 Technical Manual October 2022 Page 264 of 290...
- Page 279 If the print is too long, increase the Speed from Fast to Faster and recalculate the width. Then print again. Increase the Speed until print width is achieved. BestCode Next Series 8 Technical Manual October 2022 Page 265 of 290...
- Page 280 3. For unknown line speed, the Delay or Pitch should be tested, and adjusted until proper print length and spacing are achieved. As long as the Minimum Width value setup is not broken, the pitch and delay will be consistent BestCode Next Series 8 Technical Manual October 2022...
- Page 281 Missed Encoders, re-evaluate the Shaft Encoder coupling method to use a higher input frequency and use a larger width value to help smooth the encoder input speeds. BestCode Next Series 8 Technical Manual October 2022 Page 267 of 290...
- Page 282 Decrease Delay until issue resolves. 2. Adjust the gain up or down to ensure the sensor is not trigger on objects behind the product, or triggering twice when the object passes. BestCode Next Series 8 Technical Manual October 2022 Page 268 of 290...
- Page 283 Software Setup 1. Enable the Single Sensor AutoEncoding Mode 2. Set the PhotoEye PE1 Trigger to Rise *This mode requires the use of a PNP sensor. BestCode Next Series 8 Technical Manual October 2022 Page 269 of 290...
- Page 284 2 products do not pass the Print Sensor prior to the 1 being printed as there is no speed buffer to handle multiple unique measurements. Example Sensor 1 to Print Slot Distance: 4.5” BestCode Next Series 8 Technical Manual October 2022 Page 270 of 290...
- Page 285 Using these values, the proper setup on the Auto Encoding Print Speed Screen would be as shown Product Length: 3.25” Sensor 1 to Print Slot Distance: 4.5” Delay: 0.75” BestCode Next Series 8 Technical Manual October 2022 Page 271 of 290...
- Page 286 1. Enable the Dual Sensor AutoEncoding Mode 2. Set the PhotoEye PE1 and PE 2 Trigger to Rise *This mode requires the use of a 2 PNP sensors. BestCode Next Series 8 Technical Manual October 2022 Page 272 of 290...
- Page 287 A 3.25” product is moving on a conveyor where it will pass a Print Sensor, then pass in front of the Printhead. A delay of 1” is desired. Delay shown: 1” BestCode Next Series 8 Technical Manual October 2022 Page 273 of 290...
- Page 288 Using these values, the proper setup on the Auto Encoding Print Speed Screen would be as shown Product Length: 3.25” Sensor 1 to Print Slot Distance: 4.5” Delay: 0.75” BestCode Next Series 8 Technical Manual October 2022 Page 274 of 290...
- Page 289 Decrease the Print Resolution to Increase the message length. A message length Preview is Provided 30 DPI Example 50 DPI Example 80 DPI Example BestCode Next Series 8 Technical Manual October 2022 Page 275 of 290...
- Page 290 If the Actual Print Speed slightly exceeds the Max Print Speed, try reducing the Print Resolution by 5 to increase the print length and reduce the Actual Print speed. Scenario 2: Actual Print Speed is less than Max Print Speed Setup is OK. Ready to run product. BestCode Next Series 8 Technical Manual October 2022 Page 276 of 290...
-
Page 291: Appendixf - System Cooling Types And Environmental Management Advice
Cooling system runs on compressed air and prevents all dust and water from entering into the electronics area of the cabinet. Includes air drier attached to system. -POSAIR Add on air pump for prevent dust, dirt, or water build up in the printhead. BestCode Next Series 8 Technical Manual October 2022 Page 277 of 290... - Page 292 AirFlow™ Printhead Positive Air Kit • BestCode’s AirFlow™ Technology together with auto cleaning printhead delivers an extended operation time between manual printhead cleanings. • Up to 500 hours of operation between manual printhead cleanings. When to use an AirFlow™ Printhead Positive Air Kit: •...
- Page 293 PERSONAL INJURY & EQUIPMENT DAMAGE: When connected to Supply Power, this Printer produces Lethal Voltages. Only BestCode trained individuals should service or maintain the Printer. Follow all local safety codes and regulations. Unless necessary, always disconnect the Printer from Supply Power when performing maintenance.
- Page 294 3. Connect the Air Tube to the Output side of the Air Pump. 4. Install to CPU board – J11 “Air Pump”. 5. Air pump will automatically enable and disable with Jet On/Off. BestCode Next Series 8 Technical Manual October 2022 Page 280 of 290...
- Page 295 36-0008-02 Tubing, 1/4in X 3/16in M3x0.5 Lock Nut Air Distribution Manifold M3x0.5x12 Screw 34-0004-01 Pressure Switch, Air Dry 35-0022-01 Valve, Printhead Air Flow 46-0005-01 Filter, Air Dry Kit BestCode Next Series 8 Technical Manual October 2022 Page 281 of 290...
- Page 296 1. Remove the CPU board from the printer. 2. Remove the Makeup Fill cup 3. Remove the Fan by removing the 4 self-tapping screws. May require T25 or Phillips #2 BestCode Next Series 8 Technical Manual October 2022 Page 282 of 290...
- Page 297 M4 x 7 screws. Re-install the CPU board from the printer. DO NOT OMIT THE CLEAN AIR KIT BAFFLE. Remove the Front and Back umbilical side rubber feet from the system. BestCode Next Series 8 Technical Manual October 2022 Page 283 of 290...
- Page 298 7. Align the Air Dryer on the feet holes and re- install the feet to secure. BestCode Next Series 8 Technical Manual October 2022 Page 284 of 290...
- Page 299 Install the Air Dryer filter blank using the provided hardware. Older cabinets will require screws and nuts. Newer cabinets require only the provided screws be installed. BestCode Next Series 8 Technical Manual October 2022 Page 285 of 290...
- Page 300 13. Set the valve to ¼ turn open (90° only). EXCESS AIR FLOW WILL INTERUPT JET AND CAUSE POOR PRINT BestCode Next Series 8 Technical Manual October 2022 Page 286 of 290...
- Page 301 15. Connect the Air Dryer pressure transducer to J26 Air Cooler Power on the system, login as Technician, then navigate to Service>Tools>Technician>Configure and set the Cooling Method to Air Cooling. BestCode Next Series 8 Technical Manual October 2022 Page 287 of 290...
- Page 302 This will add to the overall air supply demand. BestCode Next Series 8 Technical Manual October 2022 Page 288 of 290...
- Page 303 The Air Manifold can be accessed by removing the 4 M3 Socket head screws inside the cabinet filter door. Per the included warning, this door must not be opened while the system is powered on. BestCode Next Series 8 Technical Manual October 2022...
-
Page 304: Appendixy - Companion Documents
For use in environments 0-45C. • Air temperature should not exceed 100F May require inline air-chiller or oil separator (not provided by BestCode) Special Notes: a. System will automatically shut off jet if electronic control temperature exceeds 60C. b. If air pressure drops below 40 PSI the Pressure sensor will state change and the system will automatically power off. - Page 305 BestCode Information 3034 SE Loop 820 Phone: (+1) 817-349-8555 For product questions email: Fort Worth TX Fax: 817-349-8480 info@bestcode.co 76140 USA All orders may be sent to: www.bestcode.co support@bestcode.co...
Need help?
Do you have a question about the NExT 8 Series and is the answer not in the manual?
Questions and answers