Advertisement
Quick Links
MW48
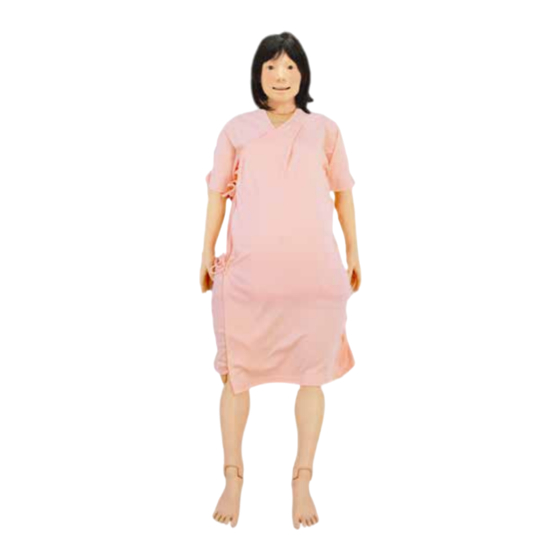
Full Perinatal Patient Care Simulator
HANA
Table of Contents
Introduction
■ Before you start・ ・・・・・ ・・・・
■ Safety precautions・・・・・・・・・・
■ Handling・・・・・・・・・・・・・・
■ Set includes・・・・・・・・・・・・・
■ Functions of each
part・・・・・・・・・
■ Training items・・・・・・・・・・・
Preparation
■ Wigs attachment and detachment ・
■ Detachment of mask・・・・・・
Training
■ Ultrasound Examination Module・・
■ Obstetric Examination Module・・・
■ Cervical Examination Module・・・
■ Delivery Assistance Module・・・・
■ Perineorraphy Module・・・・・・
■
■ Epidural Anethesia・・・・・・・・
■ Tube Feeding・・・・・・・・・・・・
■ Bedbathing・・・・・・・・・・・
■ Patient transfer and
positioning・・・・・・・・
■
■
■ Intravenous
injection・・・・・・・・・・・
■
compression
■
■
Intramuscular injection
Instruction
Manual
Uterine Involution Assessment Module
Oral care, oxygen management
Suction(nasal, oral , tracheostomy)
irway management/ intubation assistance/ Chest
A
Airway management/ intubation assistance
(Optional) Subcutaneous injection/
P.1
P.2
P.3
P.4-7
P.8
P.9-10
P.11
P.12
P.13-
P.17-
P.26-
P.32-
P.39-
P.42-
P.45
P.46
P.47
P.47
P.48
・・・・・
・・・
P.49
P.50
P.52
P.53
P.54
Advertisement

Related Manuals for Kyoto Kagaku HANA MW48


Summary of Contents for Kyoto Kagaku HANA MW48
- Page 1 MW48 Full Perinatal Patient Care Simulator HANA Instruction Manual Table of Contents Introduction ■ Before you start・ ・・・・・ ・・・・ ■ Safety precautions・・・・・・・・・・ ■ Handling・・・・・・・・・・・・・・ ■ Set includes・・・・・・・・・・・・・ P.4-7 ■ Functions of each part・・・・・・・・・ P.9-10 ■ Training items・・・・・・・・・・・ Preparation ■ Wigs attachment and detachment ・ P.11 ■...
- Page 2 Please use this product carefully and refrain from subjecting to any unnecessary stress or wear. Should you have any questions on this simulator, please feel free to contact our distributor in your area or KYOTO KAGAKU at any time. (Our contact address is on the back cover of this manual)
- Page 3 Introduction Before use...
- Page 4 Introduction Before use Caution Caution indicates that a failure to observe the specified instructions may result in minor injuries or material loss and equipment damage. Be sure to observe all the caution statements. ● Handle the manikin and the components ●Do not mark on the manikin or other with care. components with a pen or allow printed materials to come in contact with the Be sure not to drop the manikin and its compo- surface. Ink marks cannot be removed. nents, since the product uses special resins. ● Storing the manikin in a dark, cool and ● Never use organic solvents like paint dry space will help prevent the skin colors thinner or alcohol to clean the skin, from fading and product from becoming as this will damage the manikin. deformed. ● The manikin may be cleaned with a wet ● Even if the skin color of the manikin cloth if necessary, using mildly soapy water changes as it ages, the quality of the or diluted detergent. performance is not affected.
- Page 5 Before you start Set includes Set includes ■ Before you start, ensure that you have all components listed below. Main body A : Wig(young) B : Face mask (young) C : Teeth D : Injection pad (medial vein) E : Female genitalia F...
- Page 6 Before you start Set includes Delivery assistance module genitalia a a : fetus a b : placenta a c : umbilical cord a d : 5 velament sheet a e : 10 umbilical cords for omphalotomy a f : 3 lubricants a g : abdominal cover for delivery and a h :...
- Page 7 Before you start Set includes Ultrasound Examination Module Obstetric Examination Module Cervical Examination Module Ultrasound Examination Module Obstetric Examination Module ultrasound pregnant uterus phantom fetus model b a : c a : base for fetus ultrasound base for fetus b b : c b :...
- Page 8 Before you start Perineorrhaphy module Uterine Involution Assessment Module Perineorrhaphy module Uterine Involution Assessment Module genitalia with skin set of uterine inserts (4 variations) e a : f a : supporting base f b : abdominal cover for uterine f c : involution assessment module...
- Page 9 Before you start Name of each part and functions ■Model eye, elilid Mask ( young) tracheostomy chest Chest chest cover Connector Drainage connector to irragation bag waist genital unit...
- Page 10 Before you start Training Skills Skills ■ Intravenous injections and cannulation Normal breast and nipple assessment Genital care Chest compressions Check procedures in case of amniorrhexis, bleeding and lochia Tube feeding n a s a l / o r a l Airway management, intubation assistance Epidural placement Oral and denture care...
- Page 11 Before you start Training skills Skills ■ Intravenous injections and IV route care(dorsal vein of left hand) Bedbathing cannulation(left median vein) Partial bathing(h and/foot) Oxygen mask IM Injections(upp er arm) Subcutaneo us injectio ns (upp er ar m)
- Page 12 Preparation Setting of the wig Setting Set the wig by the magnets at the forehead and in front of right and left ears. 1. Put the wig on to the head noting the orientetion then fix it with the magnet at the forehead. 2.
- Page 13 How to change the mask (face) Preparation Removal 2. Remove one end of the band from the mask hole 1. Remove the cover for tracheostomy 3. Hold up the mask from the neck side and remove Attachment 1. Cover the mask from the head side. 2.
- Page 14 Training Ultrasound training Preparation 妊婦腹部触診トレーニング( 準備 Setup 1. Remove the abdominal cover from the model. The cover is fixed by four magnets. The cover can be removed by holding it upward. 2. Attach two nails of genitalia unit to two pits located under part of maternal body, and push on the top of the unit to fix Be careful not to pinch your finger between maternal body and the genitalia unit...
- Page 15 Training Ultrasound Training 超音波検査トレーニング( 準備) Setting of the module 1. Attached the supporting base for fetus ultrasound. Put protection cover on the top. Protection Cover 2. Attach ultrasound pregnant uterus phantom on the base. The phantom can be set in four positions.
- Page 16 Training Ultrasound Training Ultrasound Training Assessment of fetus and measurement ● Fetus assessment and measurement 1. Place the probe on the phantom unit. The keys for ultrasound unit are listed on the back of this manual Estimate of fetus weight After training 1.
- Page 17 Training Ultrasound Training...
- Page 18 Training Obstetric Examination Module Preparation Setup 1. Remove the abdominal cover from the model. The cover is fixed by four magnets. The cover can be removed by holding it upward. 2. Attach two nails of genitalia unit to two pits located under part of maternal body, and push on the top of the unit to fix Be careful not to pinch your finger between maternal body and the genitalia unit...
- Page 19 Training Obstetric Examination Module Module setting 3. Set the fetal base to the model. Depending on the position of the base, the fetus can be set either in cephalic presentation and head presentation Put the fetal head on this part 3.
- Page 20 Training Obstetric Examination Training 妊婦内診トレーニング( 実習) 触 Palpation Anatomically correct landmarks of maternal pelvis and fetal parts, and innovative material of the uterine unit allow realistic palpation of the fetus. The uterine units can be freely oriented to represent different lies, presentations and positions, also enables CPD assessment (Leopord's fifth maneuver) ■Leopold's maneuvers Palpate parts of the fetus such as head, buttocks and...
- Page 21 Training Obstetric Examination Setting of simulated doppler stethoscope Name of each part Switches Case ( 0~5) Case selection Fetal Heart Rate(60~180) Adjustment of HR Sound Volume(0~100) Adjustment of Sound volume Internal speaker Connector for probes Connector for Connector for AC Adapter external speaker...
- Page 22 Training Obstetric Examination ① Preparation Insert the connector for probes to the C probe connector. 2. Insert the AC adapter 3.Turn on the controller...
- Page 23 Training Obstetric Examination ②Training . Set the fetus training model to Hana 2.By putting the probe near fetal heart, the sound can be taken from internal speaker in simulated doppler stethoscope. (p19) ※Sound comes out when the sensor inside the fetus reacts.
- Page 24 Training Obstetric Examination How to change fetal heart rate Change the heart rate by pushing up and down buttons ※Setting can be changed between 60180bpm ※The value can be changed in 10bpm increments ※130bpm is the default value. ※applicable only in default case 0 up and down buttons Fetal Heart Rate(60~180)...
- Page 25 Training Cervical Examination...
- Page 26 Training Cervical Examination Setup 1. Remove the abdominal cover from the model. The cover is fixed by four magnets. The cover can be removed by holding it upward. 2. Attach two nails of genitalia unit to two pits located under part of maternal body, and push on the top of the unit to fix Be careful not to pinch your finger between maternal body and the genitalia unit...
- Page 27 Training Cervical Examination Setup 3. Attach genital unit to the main body. Make sure not to put it upside down. Lubricants 1. Apply lubricants inside the genital unit, genitalia and cervical dilatation modules.
- Page 28 Training Cervical Examination Attachment of cervical dilatation module 1. Attachment of cervical dilation module to the main body Set the model fixation base to the cervical dilation module. ※Note: Engage the edges on the holder and the holes on the maternal body, and push the holder until clicking sound is heard.
- Page 29 Training Cervical Examination...
- Page 30 Training Cervical Examination After the training ○ Disassembly of genital unit 1. Remove the abdominal cover from the maternal body Unlock the holder with pulling the black knob on right and left of holder, then remove the holder from the maternal body. Wipe off the lubricant which attached to cervical dilation module with wet wipes.
- Page 31 Training Vaginal Delivery Assistance Preparation Setup of the fetus 1. Setup Prepare the fetus, placenta, umbilical cord, umbilical cords for ompalotomy, velamen sheet, vat and lubricant Fetus Placenta Umbilical Cord Velamen Sheet Umbilical Cord for Ompalotomy Lubricant 2. Take out the placenta from the storage bag to attach umbilical cord. Connect the screw side of umbilical cord to the placenta and turn it clockwise to fix.
- Page 32 Training Vaginal Delivery Assistance Setup 5. Loosen the white screw to remove the plate on the fetal abdomen, and take out the clip from there 6. Pinch the tip of umbilical cords for omphalotomy with the clip. Put it back to the fetal abdomen, and fix umbilical cords for omphalotomy to the abdomen by the plate with the white screw ※Place the clip in the direction shown in above picturei 7.
- Page 33 Training Vaginal Delivery Assistance Lubrication Before training, apply lubricant to the genitalia unit, placenta, and umbilical cord for omphalotomy. 1. Put the assembled fetus in the vat included in the set. Apply lubricant to it entirely including the velamen sheet and the placenta ※The genitalia unit can be lubricated after 2.
- Page 34 Training Vaginal delivery assistance Assembly of the maternal body 2. Attach two nails of genitalia unit to two pits located under part of maternal body, and push on the top of the unit to fix * Be careful not to pinch your finger between maternal body and the genitalia unit 3.
- Page 35 Training Birth Positions Positioning Training can be done in three birth positions: dorsal position, lateral position, and all four position...
- Page 36 Training Vaginal Delivery Assistance Vaginal Delivery Assistance training ○ Perineal protection ○ Delivery assistance ○ Delivery of fetus ○ Clamping tying and cutting of umbilical cord ○ Delivery of placenta ○ Inspection of velamen and placenta...
- Page 37 Training Vaginal Delivery Assistance After Training ○ Removal of genitalia unit 2. Pull back the top of the genitalia unit frame 1. Lift the abdominal cover to remove to remove from the body from the maternal body ○ Disassembly of fetus Disengage the umbilical cord and placenta in reverse order to setup ○...
- Page 38 Training Perineorraphy Setup 1. . Remove the abdominal cover from the model. The cover is fixed by four magnets. The cover can be removed by holding it upward 2. Remove the genitalia unit for cervical assessment and delivery training. Hold the upper frame of the genitalia unit and pull it towards you.
- Page 39 Training Perineorraphy Exchange of genitalia unit 3. Attach two nails of genitalia unit to two pits located under part of maternal body, and push on the top of the unit to fix Be careful not to pinch your finger between maternal body and the genitalia unit 4.
- Page 40 Training Perineorraphy Training Suture training of the first-degree perineal tear. ・Single interrupted suture ・Vertical mattress suture After Training 1. Training can be continued by removing the suture thread. 2. In order to exchange the genitalia skin, Put the finger into the gap between the genitalia skin and the holder to remove it, and attach the new skin.
- Page 41 Training Uterine Involution Assessment Preparation Setup 1. Remove the abdominal cover from the model. The cover is fixed by four magnets. The cover can be removed by holding it upward. 2. Attach two nails of genitalia unit to two pits located under part of maternal body, and push on the top of the unit to fix Be careful not to pinch your finger between maternal body and the genitalia unit...
- Page 42 Training Uterine Involution Assessment 3. Setting of the module 1. Attached the supporting base for fetus 4. Attach the uterine unit to the hole ultrasound. Put protection cover on the top. 5. Attach the abdominal cover for uterine involution assessment to the model.
- Page 43 Training Uterine Involution Assessment Training Measurement of funtal height Palpation of uterine fundus After training 1. The dirt in the abdominal cover can be wiped by water or neutral detergent. After the cover is wiped, apply talcum power on the surface.
- Page 44 Training Epidural and Anesthesia Preparation Insert epidural pad on the back. (The pad is inserted at the time of delivery) Training Training in lateral position Only punctures and fixation of catheter are possible ※Water cannot be used...
- Page 45 Training Tube Feeding Training Training of tube insertion for feeding (NG, OG) with the fowler's position. Insertion of catheter(NG, OG) is possible. Training of tube fixation and dressing is possible. Spray the lubricant included in the catheter to nasal and oral cavity. Shortage of lubricant will make insertion difficult. 12Fr Catheter is recommended for training.
- Page 46 Bed bathing, partial bathing, position change, Training position holding, patient transfer, joint motion exercise Bed bathing, partial bathing Position change, position holding, patient transfer, joint motion exercise ・ Limbs, fingers and toes with full articulation allow various patient postures for nursing care training. ・...
- Page 47 Training Oral care and oxygen inhalation Oral Care Oral care training in various patient settings ・Brushing (with denture) ■ Detachment of denture Lift the molar side with both upper and lower dentures and take off. Raise the upper denture forward can remove it. ※Hole above area when holding the denture ■...
- Page 48 Training Suction(nasal/oral/tracheostomy) S u c t i o n nasal/ oral/ tracheostomy ※Simulated sputum cannot be used 1. Apply lubricants to catheter, nasal, oral, and tracheostomy parts. ・Use 1014Fr. suction catheter ・Use lubricant attached to the training model. Do not use the geltype lubricant as it can remain inside and coagulate.
- Page 49 Training Intravenous injection Preparation 2. Connection of drainage tube Among the connectors in the right side of the model, attach the irrigation bag(small) to the white drainage connector. Then open the tube cock. In case lots of water for injection was used, use drainage tube instead of irrigation bag(small).
- Page 50 Training Intravenous injection After Training Drainage Close the clamp of the irrigation bag which connnecting the body and detach the joint of the irrigation bag by pushing the button on at the end of the tube. Then Attach the drainage pump (small connector) to the tip of the tube which detach the irrigation bag.
- Page 51 Airway Opening Techniques Training Preparation and assistance of intraoral intubation Chest compression Training Training in assistance of tracheal intubation is possible, allowing training in perioperative or ICU scenarios -preparation of devices ‒oral airway intubation (laryngoscope, video laryngoscope), confirmation by auscultation, fixation of the tracheal tube ‒observation of the rise of chest compression Insertion of tracheal tubes For oral route airway, spray enough lubricant in the mouth and the tracheal tube before inserting the tracheal tube.
- Page 52 Airway Opening Techniques Training Preparation and assistance of intraoral intubation Chest compression Intubation by the video laryngoscope Spray enough lubricant to the video laryngoscope and the oral cavity before training. Use the lubricant included in the set Caution Securement of tracheal tube Do not leave the tapes on the model.
- Page 53 < Option > Training Intramuscular injection Hypodermic injection Preparation Attachment Position Attachment and detachment of Intramuscular pads ● Attachment The shape of each pad is the same. Open the attachment plate of an injection pad and fix it to the injection site as shown in the 固定用板...
- Page 54 < Option > Training Intramuscular injection Hypodermic injection After training Upper arm and femoral injectoin pads ● Detachment of pads Attachment plate Sponge skin 1. Push the attachment plate inward, pull out the edge of the skin between the attachment and transparent back plate.
- Page 55 MW48 Full Perinatal Patient Care Simulator HANA Replacement Parts Name Code 11406-040 lubricant for training models 11229-050 lubricant for MW35/36/40 11415-020 cervical dilation inserts 11415-010 11229-050 11229-050 11406-040 genitalia unit 11415-030 fetus model 11416-010 placenta 11416-020 10 umbilical codes for omphalotomy 11416-030 velamen sheets 11416-040...
Need help?
Do you have a question about the HANA MW48 and is the answer not in the manual?
Questions and answers