Advertisement
Quick Links
Advertisement

Related Manuals for Lippert Promaster


Summary of Contents for Lippert Promaster
- Page 1 Promaster Sliding Door OEM INSTALLATION MANUAL...
- Page 2 Installation Introduction This document outlines the procedure to install the Promaster Sliding Door for Class B RVs. NOTE: Images used in this document are for reference only when assembling, installing and/or operating this product. Actual appearance of provided and/or purchased parts and assemblies may differ.
-
Page 3: Required Resources
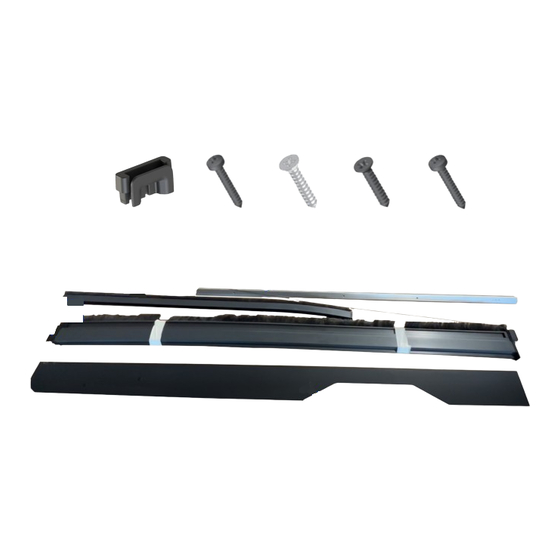
• Standard screw gun • Phillips screw driver • #8 x 1 screw Pre-Installation Remove Promaster Sliding Door assembly from box and place parts flat on a surface for easy assembly (Fig. 1). Fig. 1 Screws End Cap 3 x 30... -
Page 4: Installation
Installation Place the end of the lower sliding channel into the bottom of the side support (Fig. 2) and align the guide to feed the rope into the top channel. Fig. 2 Rope Rope Lower sliding channel Slide the lower sliding channel all the way through, leaving a little bit of rope loose at the end. Place the end cap on the end of the lower sliding channel (Fig. - Page 5 Slide the lower slide channel back to the screw holes (Fig. 5). Fig. 5 Align holes Stop Take the upper sliding channel (Fig. 6) and attach it to the top of the side support (Fig. 6). Fig. 6 Upper Slide Channel With standard screw gun place the screw in the upper part of the side support that is attached to the upper slide channel and tighten (Fig.
- Page 6 Remove any packing tape that is attached to the assembly. Insert the fill panel into the side support notch and work from the bottom up until it is secure (Fig. 8). NOTE: Be sure that the arch of the fill panel is at the bottom of the sliding door (Fig. 9). Fig.
- Page 7 12. Guide the right side end of the upper sliding channel inside the van behind the door seal (Fig. 11). Fig. 11 Door Seal Upper Sliding Channel 13. Once in place, take a standard screw gun and secure the three 3 X 20 screws into the lower sliding channel (Fig.
- Page 8 16. Step inside the van and slowly close the screen door. 17. Screw the left side of the upper sliding channel with the two 3.9 x 13 screws to the mounting back with the screw gun (Fig. 14). Fig. 14 Mounting Back 3.9 x 13 Screws...
- Page 9 20. Slowly remove the string from the fringe on the van screen door (Fig. 16). Fig. 16 String 21. Test the door by opening and closing the door (Fig. 17). Fig. 17 Page 9 Rev: 05.23.22 CCD-0006239...
- Page 10 The contents of this manual are proprietary and copyright protected by Lippert Components, Inc. (LCI). LCI prohibits the copying or dissemination of portions of this manual unless prior written consent from an authorized LCI representative has been provided. Any unauthorized use shall void any applicable warranty. ...
Need help?
Do you have a question about the Promaster and is the answer not in the manual?
Questions and answers