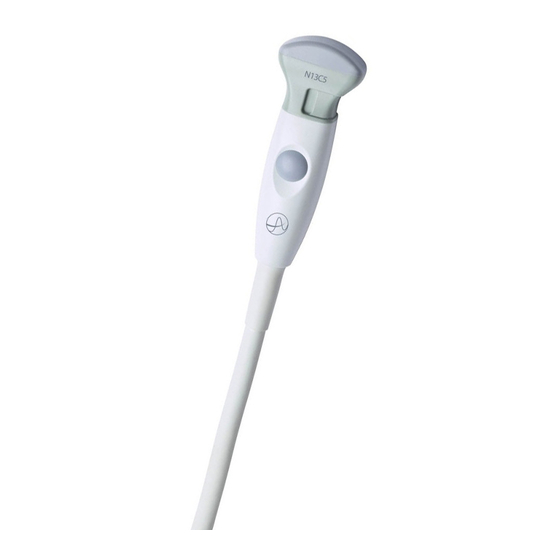
Summary of Contents for BK Medical N13C5
- Page 1 User Guide N13C5 Transducer 16-01270-EN-06 November 2018 For Professional Users Only...
- Page 2 The serial number of a BK Medical product contains information about the year of manufacture. To obtain the date of manufacture of a product, please contact your BK Medical representative or write to us at the email address above, including the product’s serial number (SN number).
-
Page 3: Table Of Contents
Neurosurgical Imaging with N13C5 ........9... -
Page 5: Introduction
Introduction This is the user guide for the N13C5 transducer and it must be used together with the Care and Cleaning user guide which contains important safety information. Caution Rx-c1 United States law restricts this device to sale by or on the order of a physician. -
Page 6: General Information
Figure 1. N13C5 transducer Contraindications WARNING T-w6 To avoid causing injury to the eye, do not use this transducer for ophthalmic use, or any application that causes the acoustic beam to pass through the eye. General Information Product specifications, acoustic output data and data about EMC (electromagnetic compatibility) for this transducer can be found in the Product Data Sheet and the Technical Data (BZ2100) that accompany this user guide. -
Page 7: Service And Repair
Cleaning. It should also be checked thoroughly once a month following the same procedure. Reprocessing To ensure the best results when using BK Medical equipment, it is important to maintain a strict cleaning routine. Complete details and procedures can be found in Care and Cleaning that accompanies this user guide. -
Page 8: Connecting The Transducer
This means that in the USA they must be market cleared by the FDA and in Europe they must be CE-marked. In Canada, they must be licensed by Health Canada. November 2018 N13C5 User Guide (16-01270-EN-06) -
Page 9: Using The Transducer Control Button
To change the orientation of the image on the monitor, refer to the applicable system user guide for instructions. Neurosurgical Imaging with N13C5 WARNING C-J-w1 Do not use a transducer for neurosurgical applications if the patient is suspected of having Creutzfeldt-Jakob disease. -
Page 10: Puncture And Biopsy Facilities
Puncture and Biopsy Facilities The N13C5 transducer can be used for puncture and biopsy. The appropriate puncture attachments are illustrated on the following pages with a brief description of their use and operating instructions. - Page 11 (step 5) Figure 3. Needle Guide UA1345 for N13C5; the numbered steps refer to the procedure on the following pages describing how to mount the needle guide. Single-use Needle Guide UA1345 (see Figure 3) is for use with N13C5 and is supplied together with two needle guide insert palettes (see Figure 2).
-
Page 12: Assembling And Mounting The Needle Guide
5 mm (0.2 in). Assembling and Mounting the Needle Guide To assemble and mount a needle guide on N13C5: Apply a small amount of imaging gel to the tip of the transducer and carefully cover the transducer with a sterile cover. -
Page 13: Attaching N13C5 And Ua1345 To A Leyla Arm
To avoid contamination, do not let the needle scrape the inside of the needle channel. Attaching N13C5 and UA1345 to a LEYLA Arm Needle guide UA1345 (for use with N13C5) has a tab that can be used to secure it to a LEYLA arm (see Figure 5). Use this tab to attach the... -
Page 14: Releasing The Needle During Biopsy
Hold the transducer with your left hand. With your right hand, carefully push the needle guide insert sideways until it opens up (see Figure 6). Figure 6. Push to release the needle guide on the N13C5. Carefully move the transducer and needle guide away from the needle. -
Page 15: Cleaning After Puncture And Biopsy
N13C5 & UA1345 Figure 7. Illustration of the puncture lines for single-use needle guide UA1345 when mounted on N13C5 transducer. You must take extra care when taking a free-angle biopsy because the expected needle path is not shown on the screen image. -
Page 16: Disposal
WARNING D-w1 For disposal of contaminated items such as transducer covers or needle guides or other disposable items, follow disposal control policies established for your office, department, or hospital. November 2018 N13C5 User Guide (16-01270-EN-06)


Need help?
Do you have a question about the N13C5 and is the answer not in the manual?
Questions and answers