
Subscribe to Our Youtube Channel
Related Manuals for RUKO F11GIM2


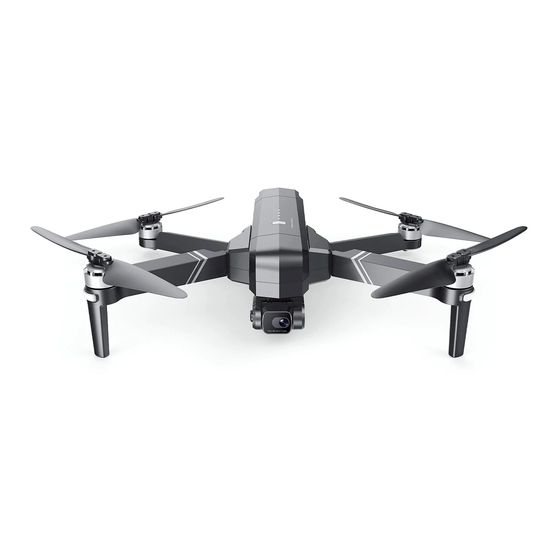
Summary of Contents for RUKO F11GIM2
- Page 1 for age User Manual v 2. 0 CONTACT US FOR MORE TECH SUPPORT + 1 949-394-4635 Mon-Sun 6PM-4AM(PST)
- Page 2 CONTACT US FOR MORE TECH SUPPORT + 1 949-394-4635 Mon-Sun 6PM-4AM(PST) +86 19129317359...
-
Page 3: Table Of Contents
6.2 Controlling the Drone 6.3 Optimal Transmission Zone 6.4 Emergency Stop 6.5 Charging the Controller 7 Drone 7.1 Preparing the Aircraft 7.2 Drone Diagram 7.3 Assemble the Propeller 7.4 Intelligent Flight Battery 7.5 Gimbal and Camera Copyright ©2022 Ruko All Rights Reserved. - Page 4 11.2 APP Icons Introduction 12 APP Setting 12.1 Setting 13 APP Functions 13.1 APP One Key Share Function 13.2 How to Download the Pictures and Videos 14 Flight 14.1 Take Off/Landing Procedures 14.2 Quick Start Copyright ©2022 Ruko All Rights Reserved.
- Page 5 15 Specifications 15.1 Drone 15.2 Gimbal Stabilization 15.3 Camera 15.4 5G Transmission 15.5 APP/Live View 15.6 Remote Controller 15.7 Intelligent Flight Battery 15.8 Charging Cable: Type-c 16 Common Problems 17 Accessories Support Copyright ©2022 Ruko All Rights Reserved.
-
Page 6: Using This Manual
1.4 Download the App "RUKO DRONE" app. Scan the QR code downlaod QR code of "RUKO DRONE" for Apple IOS system. QR code of "RUKO DRONE" for Android system. The IOS version of RUKO DRONE is The operation system version of RUKO DRONE compatible with IOS v9.0 and later. -
Page 7: Package Contents
F11GIM2 User Manual 2 Package Contents Drone Remote Controller Drone Battery Gimbal Cover Spare Propeller USB Charging Cable User Manual Allen Wrench Screw Copyright ©2022 Ruko All Rights Reserved. -
Page 8: Preface
F1 1 G IM 2 User Manual 3 Preface Thank you for purchasing the Ruko-Series GPS aircraft. Please read all instructions and warnings carefully before operating. Please also keep this instruction manual for future reference and maintenance. Important This product shoud be operated by the people who are over 14 years old. - Page 9 Only operate with included parts for intended use. Please use the original parts made by Ruko-Series for any re-equip- ping or maintenance to ensure flying safety. Please operate and use only under the scope of the product function permitted. Using un-approved parts will void warranty.
- Page 10 The R/C aircraft is composed of material such as metal, fiber, plastic, electronics, etc. Therefore, please keep it away from any heat source and avoid prolonged exposure to direct sunlight. Excessive heat exposure can cause distortion and damage. Copyright ©2022 Ruko All Rights Reserved.
- Page 11 Consult the dealer or an experienced radio/TV technician for help. Please note that changes or modifications not expressly approved by the party responsible for compliance could void the use's authority to operate the equipment. Copyright ©2022 Ruko All Rights Reserved.
-
Page 12: Warning
Please dispose of the packing material timely so as not to cause injury to children. Please DO NOT disassemble or re-equip the aircraft as it may cause a breakdown of the aircraft during flying. Copyright ©2022 Ruko All Rights Reserved. - Page 13 Please keep the safe distance from the high-speed rotating rotor so as not to cause twisted or danger of being wounded or being cut. Engine will heat up. Please DO NOT touch it to avoid being burned or injured. Copyright ©2022 Ruko All Rights Reserved.
- Page 14 Never fly over stadiums or sports events. Understand airspace restrictions and requirements. Product should only be used by adults and children 14 years and older. Adult supervision required for children under 14 years of age. Copyright ©2022 Ruko All Rights Reserved.
-
Page 15: Fly Safety
Avoid flying over or near obstacles, crowds, high voltage power lines, trees, airport or bodies of water. DO NOT fly near strong electromagnetic sources such as power lines and base stations as it may affect the onboard compass. Copyright ©2022 Ruko All Rights Reserved. - Page 16 Stay away from the rotating No Fly Zone propellers and motors. It's important to understand basic flight guidelines,for the safety of both you and those around you. Don't forget to read the Safety Guidelines before flight. Copyright ©2022 Ruko All Rights Reserved.
-
Page 17: Remote Controller
Return To Home Press once then press Press once check the again and hold for 3 battery level, press again seconds to activate power on.Press once and Emergency Stop then keep pressing power off Copyright ©2022 Ruko All Rights Reserved. -
Page 18: Controlling The Drone
Normal mode 29.53 ft/s, and Sport mode 39.37 ft/s. The default speed is Normal mode, higher speed will consume battery faster. 6.2 Controlling the Drone Remote Controller Stick Mode-Mode 1 (Default Mode) Throttle Joystick Direction Joystick Left Joystick Right Joystick Copyright ©2022 Ruko All Rights Reserved. - Page 19 LED screen indicates "RHAND MODE".) Note: Once restart, the controller will back to default mode - Mode 1. Direction Joystick Throttle Joystick Left Joystick Right Joystick Copyright ©2022 Ruko All Rights Reserved.
- Page 20 Push the stick to the left and the aircraft will rotatecounter- clockwise. Push the stick to the right and the aircraft rotates clockwise. In the neutral position, the angular veloc- ity of rotation is zero, and the aircraft does not rotate. Copyright ©2022 Ruko All Rights Reserved.
- Page 21 The joystick offset corresponds to the angle of the aircraft's front and rear tilt. The greater the offset, the greater the tilt angle and the faster the flight speed. Copyright ©2022 Ruko All Rights Reserved.
- Page 22 The joystick offset corresponds to the angle of the aircraft left and right tilt. The greater the offset, the greater the tilt angle and the faster the flight speed. Copyright ©2022 Ruko All Rights Reserved.
-
Page 23: Optimal Transmission Zone
By using this function the drone motor will stop working immediately thus fall to the ground, which might cause damage. Only use this feature when in emergency so as to reduce the risk of damage or injury. Copyright ©2022 Ruko All Rights Reserved. -
Page 24: Charging The Controller
7 Drone 7.1 Preparing the Aircraft All aircraft arms are folded before ship out of the factory. Please follow the steps below to unfold the arms. Take off the Gimbal Cover Unfold the front arms Copyright ©2022 Ruko All Rights Reserved. -
Page 25: Drone Diagram
USB-C port MicroSD card slot 7.3 Assemble the Propeller Please note that the letter "A" or "B" is printed on each propeller, and make sure all the propellers are attached in the correct motor position. Copyright ©2022 Ruko All Rights Reserved. -
Page 26: Intelligent Flight Battery
7.5 Gimbal and Camera The gimbal of F11GIM2 drone ensure the user can capture clear and stable impage and videos even when the drone is flying, the camera also equipped with electronic stabilization function. - Page 27 Do not interfere with the gimbal by putting external forces or ④ picking up the aircraft during calibration. Otherwise, the gimbal will stop to work. Picking up the Aircraft Touching the camera (during self-inspection) Copyright ©2022 Ruko All Rights Reserved.
- Page 28 Make sure to install the gimbal cover when the drone is not in use. If the gimbal get wet after flying in wet weather, temporary failure might occur, make the gimbal and the drone dry so as to get it recover to full function. Copyright ©2022 Ruko All Rights Reserved.
-
Page 29: Drone Status Indicators
F 11 G I M 2 User Manual 8 Drone Status Indicators F11GIM2 drone has front and back four LED lights. Back LED Back LED Front LED Front LED LED light Color Reason Action required indicator Charge the battery Low Power... -
Page 30: Product Functions Profile
Home point in straight line. The drone may link to the remote controller automatically during the RTH process, if connected successfully, the RTH process will stop. Copyright ©2022 Ruko All Rights Reserved. - Page 31 flies higher than any other objects surrounding. When flight distance further than 98 ft, make sure the drone has enough battery to fly back. The drone can NOT return to Home Point without a strong GPS signal. Copyright ©2022 Ruko All Rights Reserved.
-
Page 32: Waypoint Flight
flight function (16 points the most). Click to reset the points of flight route. Click , confirm to start Waypoint Flight. Push the Direction Joystick to cancel the Waypoint Flight . Copyright ©2022 Ruko All Rights Reserved. -
Page 33: Point Of Interest
If the drone have connectted with the contrtoller and the drone is in air, press the buttons at the same time, the Point of Interest function will be activated. This function will only be available when the GPS signal is strong. Copyright ©2022 Ruko All Rights Reserved. -
Page 34: Gps Follow Me
, tap on the object or person plans to track, tap to confirm the selection, drone rotates following the object's in circle movement. Make sure the size of the frame isn't too large, so as to ensure the recognization is acheiveable. Copyright ©2022 Ruko All Rights Reserved. -
Page 35: Hand Gesture
10 Connect the APP 10.1 Download the App QR code of "RUKO DRONE" for Apple IOS system. QR code of "RUKO DRONE" for Android system. 10.2 Connect the APP with Drone Once the drone and remote controller connected, access "SETTING"... -
Page 36: App Functions
LEARN TO FLY: tap to watch the guide video. GUIDE: tap in to read the manual, and watch instructional videoes. 11 APP Functions 11.1 Control Wait until the drone status says "Ready to Fly" before initiating flight, access to the control interface. Copyright ©2022 Ruko All Rights Reserved. -
Page 37: App Icons Introduction
SD card status (pls format the SD card Auto take off for the 1st time) GPS return home Photo/video switching More functions Shutter Media gallery (one key to share) Sound recording Altitude(meters) Distance(meters) Speed(meters/sec) Copyright ©2022 Ruko All Rights Reserved. -
Page 38: App Setting
Altitude is 20 meters; Follow below picture to turn off the Beginner Mode and set the proper flight setting in the app. The drone must be conneted with the app to save the setting. Copyright ©2022 Ruko All Rights Reserved. - Page 39 Access to "Track", click to open the map surface to search ① the drone. The last position of lost drone will be showed on the map. ② Current position of the mobile phone Copyright ©2022 Ruko All Rights Reserved.
-
Page 40: App Functions
How to change units This function enables to switch the units between Inch(MPH), Meter(m/s), Metric(km/h). 13 APP Functions 13.1 App One Key Share Function Open the app, click , enter into the file (Pic 1.) Copyright ©2022 Ruko All Rights Reserved. - Page 41 (Pic 3) Pic 2 Check all Share Delete Pic 3 It is only allow to share 9 pictures or 1 video the maximum at one time. Copyright ©2022 Ruko All Rights Reserved.
-
Page 42: How To Download The Pictures And Videos
Download the picture and video from SD card, click ,choose files ① and click save to the mobile album. Download the picture and video from app album, choose files and ② click to save to mobile album. Copyright ©2022 Ruko All Rights Reserved. - Page 43 SD Card(sold separately) Video be stored in the app album will be compressed, thus always suggest to download the video from the SD card to get the best resolution. Copyright ©2022 Ruko All Rights Reserved.
-
Page 44: Flight
All lights blinking red. Drone and remote controller connects success- fully, all lights flashing white and blue then turn to flashing white and pink. This connect process take around 40seconds. Copyright ©2022 Ruko All Rights Reserved. - Page 45 F1 1G I M2 User Manual Step 3: Connect the app Open the phone's WiFi list, connect the drone's WiFi which names "RUKO-GIM-XXXX", open the "RUKO DRONE" app. Stpe 4: Complete compass calibration Pick up the drone and hold it levelly, rotate the drone in one full circle (360°), until hear...
-
Page 46: Specifications
Operating Temperature Range: 32° to 104° F ( 0° to 40° C) Satellite Systems: GPS/GLONASS Dimensions (LxWxH): Unfolded: 45X40.5X8(cm) Folded: 17.6X10.5X8(cm) 15.2 Gimbal Stabilization Machanical Range: Tilt About -100°TO+70°, Roll About -35°TO+35° Controll Range: Adjusted angle of camera (up and down): About -80° TO+0° Copyright ©2022 Ruko All Rights Reserved. -
Page 47: Camera
Mobile App: RUKO DRONE Live View Quality: STORAGE TRANSMISSION CONFIGURATION RESOLUTION METHOD FRAME RATE Photo 3840X2160P Phone Video 1280X720P 30fps Photo 3840X2160P SD card Video 3840X2160P 30fps Required Operating System: IOS 9.0 or later/Android 5.0 or later Copyright ©2022 Ruko All Rights Reserved. -
Page 48: Remote Controller
Max Charging Time: About 4.5 hours (Depending on Charging Power) Charging Temperature Range: 32° to 104° F ( 0° to 40° C ) 15.8 Charging cable: Type-C Compatible Charger (not included): Output currency 5V/3A Rated Power: ≤15 W Copyright ©2022 Ruko All Rights Reserved. -
Page 49: Common Problems
GPS signal is Please fly the Aircraft in an unstable. Flying near open area free of obstacles buildings and in within the circle of radius obstructed places 32.81 ft(10 meters) Copyright ©2022 Ruko All Rights Reserved. - Page 50 After complete the compass The compass is in calibration, place the drone calibrating on a level ground Copyright ©2022 Ruko All Rights Reserved.
- Page 51 Please do keep the drone's Didn't keep the WiFi connectted when the drone's network when phone pop up reminder that trying to connect the "This network has no internet drone's WiFi access" Copyright ©2022 Ruko All Rights Reserved.
- Page 52 Cannot charge unstable voltage amperage output(2-3A) battery/Cannot fully output charge battery Please use the original Using inferior factory charging cable to charging cables charge Copyright ©2022 Ruko All Rights Reserved.
- Page 53 The product has slight We tested all Aircraft before shipping. Therefore, it marks before shipping is inevitable that there will be slight traces. However, it can be guaranteed that all Aircraft are 100% brand new Copyright ©2022 Ruko All Rights Reserved.
-
Page 54: Accessories Support
Transmitter All of the above accessories can be searched and purchased on Amazon, and you can enter the Ruko store to buy them yourself. Be sure to use original accessories. The use of non-original accessories may cause danger to the safe use of the aircraft. - Page 55 Ruko's official website https://rukotoy.com/support-drones If you have any questions or suggestions about the User Manual, please contact us via the following email: rukodrone@gmail.com Ruko is a trademark of Shenzhen Ruike Innovation Technology Co.,Ltd Copyright 2022 Ruko All Rights Reserved.
- Page 56 CONTACT US FOR MORE TECH SUPPORT + 1 949-394-4635 Mon-Sun 6PM-4AM(PST) rukodrone@gmail.com +86 19129317359...
Need help?
Do you have a question about the F11GIM2 and is the answer not in the manual?
Questions and answers