Table of Contents
Advertisement
Available languages
Available languages
Quick Links
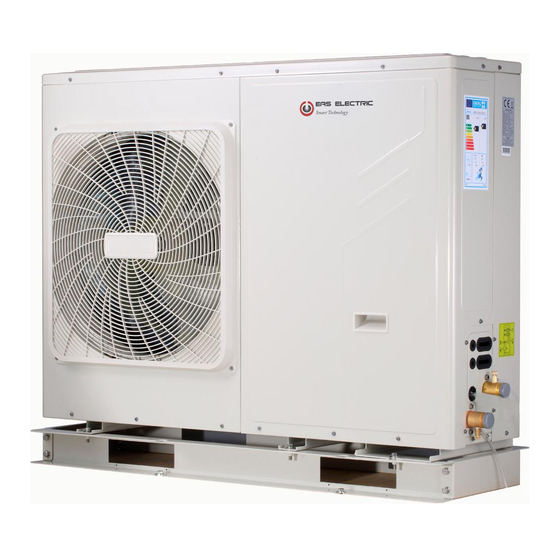
M-THERMAL 2 BIBLOCK
SPLIT M-THERMAL 2
ETH10VA
ETH12VA
ETH12VA-TRI
ETH16VA
ETH16VA-TRI
MANUAL DE
INSTRUCCIONES
INSTRUCTION MANUAL
Escanee para ver este manual en otros idiomas y actualizaciones
Scan for manual in other languages and further updates
Manuel dans d'autres langues et mis à jour
Manual em outras línguas e actualizações
V.2
Advertisement
Chapters
Table of Contents

Subscribe to Our Youtube Channel
Related Manuals for EAS Electric M-THERMAL 2 BIBLOCK


Summary of Contents for EAS Electric M-THERMAL 2 BIBLOCK
- Page 1 M-THERMAL 2 BIBLOCK SPLIT M-THERMAL 2 ETH10VA ETH12VA ETH12VA-TRI ETH16VA ETH16VA-TRI MANUAL DE INSTRUCCIONES INSTRUCTION MANUAL Escanee para ver este manual en otros idiomas y actualizaciones Scan for manual in other languages and further updates Manuel dans d'autres langues et mis à jour...
-
Page 2: Table Of Contents
CONTENIDO PRECAUCIONES DE SEGURIDAD ACCESORIOS 2.1 Accesorios proporcionados con la unidad ANTES DE LA INSTALACIÓN INFORMACIÓN IMPORTANTE SOBRE EL REFRIGERANTE LUGAR DE INSTALACIÓN Selección de ubicación en climas fríos Evitar la luz del sol PRECAUCIONES DE INSTALACIÓN Dimensiones Requisitos de instalación Posición del agujero de desagüe Dimensiones de instalación requeridas 7 INSTALACIÓN DE TUBERÍAS FRIGORÍFICAS... - Page 3 RESUMEN DE LA UNIDAD Desmontar la unidad Caja de control electrónico Unidades monofásicas 4~16kW Unidades trifásicas 12~16kW 10 PRUEBA DE FUNCIONAMIENTO 11 PRECAUCIONES SOBRE FUGAS DE REFRIGERANTE 12 ENTREGA AL USUARIO FUNCIONAMIENTO Y RENDIMIENTO Equipo de protección 13.1 Cortes de corriente 13.2 Capacidad de calefacción 13.3...
- Page 4 4/6 kW 8/10/12/14/16 kW Diagrama cableado: 8/10kW (ejemplo) Sistema control eléctrico 4/6 kW Sistema refrigerante Retire la chapa hueca después de la instalación 12/14/16 kW 8/10 kW Retire el soporte para el transporte 12/14/16 kW NOTA • Retire en primer lugar la tapa aislante de ruido del compresor. •...
- Page 5 1. ADVERTENCIAS DE SEGURIDAD Las advertencias aquí recogidas se dividen en las siguientes categorías. Son muy importantes, así que asegúrese de seguirlas atentamente. Significado de los símbolos de PELIGRO, ADVERTENCIA, ATENCIÓN y NOTA. INFORMACIÓN • Lea atentamente estas instrucciones antes de la instalación, y conserve el manual para futura referencia. •...
- Page 6 PELIGRO • Antes de tocar los bornes de conexión eléctrica, apague la corriente. • Al retirar los paneles, lleve cuidado de no tocar ningún cable por accidente. • Nunca deje la unidad desatendida durante la instalación o mantenimiento mientras no lleve los paneles protectores. •...
- Page 7 No instale la unidad en los siguientes sitios: - Donde pueda haber contacto con aceite mineral, salpicaduras de aceite o vapores. Esto puede deteriorar las partes de plástico y que se suelten o que haya goteo de agua. - Donde haya gases corrosivos (como gas de ácido sulfúrico): la corrosión de las tuberías de cobre o de las soldaduras puede conllevar una fuga de refrigerante.
-
Page 8: Accesorios
2. ACCESORIOS 2.1 Accesorios proporcionados con la unidad Piezas de instalación Forma Cantidad Nombre Manual de instalación y usuario (este libro) Manual de datos técnicos Junta de conexión de tubería de salida de agua Etiqueta de eficiencia energética 3. ANTES DE LA INSTALACIÓN Antes de la instalación Asegúrese de confirmar el nombre del modelo y el número de serie de la unidad. -
Page 9: Información Importante Sobre El Refrigerante
2. Al transportar la unidad, mantenga los dos lados de la cincha equilibrados y la espalda recta. 3. Tras colocar la unidad, retire la cincha tirando de uno de los lados. ATENCIÓN Para evitar lesiones, no toque la entrada de aire y las aletas de aluminio de la unidad. No sujete la unidad por la rejilla para evitar roturas. -
Page 10: Lugar De Instalación
Volumen de carga de refrigerante en la unidad de fábrica Modelo Refrigerante/kg Toneladas de equivalente CO Monofásica 12kW 1.84 1.24 Monofásica 14kW 1.84 1.24 Monofásica 16kW 1.84 1.24 Trifásica 12kW 1.84 1.24 Trifásica 14kW 1.84 1.24 Trifásica 16kW 1.84 1.24 ATENCIÓN Frecuencia de comprobaciones de fuga de refrigerante - Los equipos que contengan menos de 3kg de gases fluorados de efecto invernadero o que estén sellados... -
Page 11: Evitar La Luz Del Sol
5.1 Selección de ubicación en climas En condiciones normales, consulte las ilustraciones inferiores para la instalación de la unidad: fríos Consulte el apartado "Manipulación de la unidad" en la sección “4. Antes de instalar”. (Pared u obstáculo) NOTA Al utilizar la unidad en climas fríos, asegúrese Entrada de aire >300 de seguir las siguientes instrucciones:... -
Page 12: Dimensiones
6. ADVERTENCIAS DE INSTALACIÓN 6.1 Dimensiones 8/10/12/14/16 kW (unidad: mm) 4/6 kW (unidad: mm) Fig: 6-1 Fig: 6-2 Modelo 4/6kW 1008 8/10/12/14/16kW 1118 6.2 Requisitos de instalación Compruebe la resistencia y nivel de la base de instalación para que la unidad no cause ruidos ni vibración durante el funcionamiento. -
Page 13: Posición Del Agujero De Desagüe
6.3 Posición del agujero de desagüe Agujero de desagüe Agujero de desagüe El agujero de desagüe está cubierto El agujero de desagüe está cubierto con un tapón de goma. Si el agujero con un tapón de goma. Si un solo pequeño no cumple con los requisitos, agujero cumple... - Page 14 1/2 H Fig: 6-7 A(mm) B1(mm) B2(mm) C(mm) Unidad ≥3000 ≥2000 ≥150 ≥600 4~16kW 2) En caso de instalar varias unidades conectadas lateralmente por fila. 1/2 H ≥500mm ≥500mm Fig: 6-8 A(mm) B1(mm) B2(mm) C(mm) Unidad ≥3000 ≥2000 ≥300 ≥600 4~16kW 7 INSTALE LA TUBERÍA DE CONEXIÓN 7.1 Tuberías de refrigerante...
-
Page 15: Detección De Fugas
ATENCIÓN • Evite el contacto con los componentes cuando instale las tuberías de conexión • Para evitar que las tuberías de refrigerante se oxiden por dentro al soldarlas, debe cargarlas con nitrógeno o el óxido puede ahogar el sistema de circulación. 7.2 Detección de fugas Use agua jabonosa o un detector de fugas para comprobar cada una de las uniones y confirmar si tienen o no fugas (Consulte la Fig.7-2). -
Page 16: Método De Conexión
7.4 Método de conexión Unidad exterior Unidad interior Figura 7-5 Modelos 4~16 kW Longitud máx. tubería (H+L1) Diferencia máx. altura (H) 1) Tamaño de las tuberías de gas y líquido Tub. gas / Tub. líquido MODELO Refrigerante 5/8 - 1/4 4/6kW 5/8 - 3/8 8/10kW... -
Page 17: Limpieza De Suciedad O Agua De Las Tuberías
7.5 Limpieza de suciedad y agua de las tuberías 1) Compruebe que no quedan restos de suciedad o agua antes de conectar las tuberías a las unidades interiores y exteriores. 2) Limpie las tuberías con nitrógeno a alta presión, no use nunca refrigerante de la unidad exterior. 7.6 Prueba de estanqueidad Cargue nitrógeno a presión tras conectar las tuberías de las unidades para hacer una prueba de estanqueidad. -
Page 18: Cableado De La Unidad Exterior
8. CABLEADO DE LA UNIDAD INTERIOR ATENCIÓN • Se debe incorporar al cableado fijo un interruptor principal u otro medio de desconexión, con separación en todos los polos siguiendo la normativa local relevante en materia de electricidad. Apague la corriente antes de realizar ninguna conexión, y utilice sólo cables de cobre. - Page 19 8.3 Requisito de dispositivo de seguridad Seleccione los diámetros de cable (valor mínimo) individualmente para cada unidad siguiendo las tablas 8-1 y 8-2, donde la corriente nominal de la tabla 9-1 significa la MCA (ampacidad del circuito) en la tabla 9-2. Si la MCA excede 63A, la sección del cable se debe elegir según la nacional de cableado.
-
Page 20: Resumen De La Unidad
L2 L3 ALIMENTACIÓN DE LA ALIMENTACIÓN DE LA UNIDAD EXTERIOR UNIDAD EXTERIOR Monofásica Trifásica NOTA El diferencial debe ser un interruptor de alta velocidad de 30 mA (<0.1 s). Utilice cable de 3 hilos apantallado. 8.5 Finalizar la instalación de la unidad exterior Aísle y agrupe las tuberías de refrigerante y cables de interconexión de la siguiente manera: Tubería de gas Aislante de la tubería de gas... -
Page 21: Caja De Control Electrónico
4/6kW 8/10/12/14/16kW Para acceder al compresor y Para acceder al compresor y Panel 1 Panel 1 componentes eléctricos componentes eléctricos ADVERTENCIA Corte totalmente la corriente del aparato— es decir, la alimentación de la unidad, del calefactor auxiliar y del tanque de agua caliente sanitaria (si corresponde) — antes de retirar los paneles de la chapa. Las piezas del interior de la unidad pueden quemar. - Page 22 PCB A PCB B 12/14/16kW Monofásica (Parte trasera) CN30 PCB A PCB B PCB C 12/14/16kW Trifásica NOTA Esta imagen es sólo informativa, prevalece la del producto real.
- Page 23 9.3 4~16kW unidades monofásicas 1) PCB A 4-10kw módulo inverter Notas: para 4-6kw, dos compensadores CN20 Unidad de montaje Código Unidad de montaje Código Terminal U de conexión del compresor Reservado (CN302) Terminal V de conexión del compresor Terminal de comunicación con PCB B(CN32) Terminal W de conexión del compresor Terminal de entrada N para puente rectificador (CN502) Terminal de salida para +12V/9V(CN20)
- Page 24 3) PCB B, 4-16kw Placa electrónica CN10 CN27 CN11 CN22 CN24 CN17 CN26 CN28 CN13 CN55 CN18 CN14 CN29 CN7 CN5 CN6 CN16 CN19 CN21 CN33 CN2 CN30 CN36 CN37 CN38 CN20 26 25 24 Código Unidad de montaje Código Unidad de montaje Terminal de salida L a la PCB A(CN28) Terminal para interruptor baja presión (CN14)
- Page 25 9.4. 12~16kW unidades trifásicas 1) PCB A módulo inverter CN16 CN22 CN15 CN23 CN17 CN18 CN20 CN19 Código Unidad de montaje Unidad de montaje Código Terminal entrada P_in para módulo IPM (CN1) Terminal salida para +15V(CN20) Terminal W de conexión del compresor (CN19) Terminal de comunicación con PCB B (CN8) Terminal V de conexión del compresor (CN18) Placa PED (CN22)
- Page 26 2) PCB B, placa electrónica principal CN41 CN26 CN24 CN36 CN21 CN18 CN31 CN29 CN10 CN35 CN11 CN28 CN20 CN37 CN27 V i n CN22 CN30 CN38 CN53 CN109 Código Unidad de montaje Unidad de montaje Código Terminal de toma de tierra(CN38) Terminal para sonda temperatura Tp(CN8) Terminal para sonda temperatura ambiente y Terminal para válvula de 2 vías 6 (CN27)
- Page 27 3) PCB C, placa de filtro CN204 CN205 CN206 CN30 CN213 CN214 CN202 CN211 CN203 CN200 CN201 CN212 PCB C trifásica 12/14/16kW Código Unidad de montaje Código Unidad de montaje Filtro de energía L3(L3’) Alimentación L2 (CN201) Alimentación L3 (CN200) Filtro de energía L2(L2’) Alimentación N (CN203) Filtro de energía L1(L1’)
-
Page 28: Prueba De Funcionamiento
10. PRUEBAS DE FUNCIONAMIENTO Realícelas según las "claves para la prueba de funcionamiento" de la tapa de la caja de control eléctrico. ATENCIÓN ● La prueba no puede comenzarse hasta que la unidad exterior haya tenido corriente durante 12 horas. ●... -
Page 29: Entrega Al Usuario
Unidad exterior Unidad interior Sala llena de refrigerante fugado. (Se ha vertido todo el refrigerante.) 8/10/12/14/16 kW Fig.11-2 Unidad interior A. Orificio de ventilación B. Alarma de fuga conectada al ventilador (La alarma contra fugas debe instalarse en lugares donde pueda Fig.11-3 acumularse refrigerante fácilmente) 12. - Page 30 ADVERTENCIA Apague cualquier dispositivo de calefacción por • Solicite a su distribuidor la instalación del aparato. Una combustible, ventile la habitación y contacte con el instalación incompleta realizada por usted mismo puede distribuidor donde compró la unidad. resultar en fugas de agua, descarga eléctrica o incendio. No utilice la bomba hasta que un técnico le confirme que •...
-
Page 31: Funcionamiento Yrendimiento
NOTA • No exponga al flujo de aire a niños pequeños, plantas o Cuando el modo de protección se ponga en marcha, animales. apague la unidad con el control manual y retome el Puede tener una influencia negativa sobre ellos. funcionamiento después de que se resuelva el problema. -
Page 32: Códigos De Error
13.8 Códigos de error Cuando se activa el sistema de seguridad, se muestra un código de error en la interfaz de usuario. En la tabla inferior se describe una lista de todos los errores y de sus posibles soluciones. Reinicie el sistema de seguridad apagando la unidad y volviéndola a encender. En caso de que no pueda solucionar el error mostrado, contacte al servicio técnico oficial o a su distribuidor. - Page 33 CÓDIGO ERROR O CAUSA DEL ERROR Y ERROR PROTECCIÓN POSIBLE SOLUCIÓN 1. Si hay viento fuerte, puede impactar frontalmente contra el ventilador y hacerlo girar en la dirección contraria. Cambie la dirección de la instalación o cúbrala para evitar que el viento Fallo del motor ventilador DC afecte al ventilador.
- Page 34 CÓDIGO ERROR O CAUSA DEL FALLO Y ERROR PROTECCIÓN POSIBLE SOLUCIÓN Modo calor y modo ACS: 1. Si el caudal de agua es bajo y la temperatura del agua es alta, compruebe si hay aire en el sistema de agua y púrguelo. 2.
- Page 35 CÓDIGO ERROR O CAUSA DEL ERROR Y ERROR PROTECCIÓN POSIBLE SOLUCIÓN 1. La tapa del intercambiador de calor no se ha quitado. Retírela. Protección por alta 2. El intercambiador de calor está sucio o bloqueado. Límpielo temperatura de salida de y retire la obstrucción.
- Page 36 CÓDIGO ERROR O CAUSA DEL FALLO Y ERROR PROTECCIÓN POSIBLE SOLUCIÓN Protección del módulo Protección por bajo voltaje generatriz DC Protección por alta presión del sistema de la bomba de calor Protección por alto voltaje generatriz DC Protección por alta presión del sistema de la bomba de calor 1.
-
Page 37: Especificaciones Técnicas
14. ESPECIFICACIONES TÉCNICAS Modelo 10kW Alimentación 220-240V~ 50Hz Potencia nominal de entrada 3300W 3600W 2200W 2600W 10.5A 12.0A 14.5A Corriente nominal Consulte el manual técnico Capacidad nominal Dimensiones (An×Al×Fo)[mm] 1008*712*426 1118*865*523 Embalaje (An×Al×Fo)[mm] 1065*810*485 1190*970*560 Motor DC / Horizontal Motor ventilador Twin rotary Compresor Intercambiador de calor... - Page 38 12kW 14kW 16kW 12kW 14kW 16kW Modelo Trifásica Trifásica Trifásica Alimentación 380-415V 3N~ 50Hz 220-240V~ 50Hz Potencia nominal de entrada 6100W 5400W 5700W 6100W 5400W 5700W Corriente nominal 11.0A 24.5A 25.0A 26.0A 10.0A 9.0A Capacidad nominal Consulte el manual técnico Dimensiones (An×Al×Fo)[mm] 1118*865*523 1118*865*523...
-
Page 39: Información De Mantenimiento
15. INFORMACIÓN DE MANTENIMIENTO 1) Comprobaciones del área Antes de comenzar cualquier trabajo en sistemas que contengan refrigerantes inflamables, debe hacer comprobaciones de seguridad para minimizar el riesgo de incendio. Para hacer cualquier reparación en el sistema de refrigerante, se deben cumplir las siguientes precauciones antes de hacer cualquier trabajo en el sistema. - Page 40 b) Se debe prestar especial atención a las indicaciones siguientes para asegurar que la carcasa no se dañe al manipular los componentes eléctricos de forma que la protección pueda verse alterada. Esto incluye el daño a los cables, conexiones excesivas, terminales no conformes con las especificaciones originales, sellos dañados, montaje incorrecto de entradas de cable, etc.
- Page 41 • Los cilindros deben colocarse en vertical. • Compruebe que el sistema de refrigeración tiene toma de tierra antes de cargar el sistema de refrigerante. • Etiquete el sistema cuando la carga esté completa si no lo ha hecho ya. •...
- Page 42 ANEXO A: Ciclo de refrigerante Refrigeración Calefacción Descripción Descripción Núm. Núm. Sonda intercambiador exterior Compresor Válvula de 4 vías Válvula de cierre (gas) Separador gas-líquido Válvula de cierre (líquido) Intercambiador de calor Switch de alta presión Válvula de expansión electrónica Switch de baja presión Válvula electromagnética unidireccional Sonda de presión...
- Page 43 ANEXO B: Diagrama cableado control eléctrico 4/6/8/10kW CN20 CN19 Ventilador NEGRO PCB A, placa W(C) V(S) Inverter para monofásica U(R) AZUL ROJO CN501 CN502 COMP CN27 AZUL N-OUT CN28 MARRÓN CN17 CN26 12/9V CN24 CN24 L-OUT DEBUG PCB B, Placa control principal para monofásica P-SEN...
- Page 44 ANEXO C: Diagrama cableado control eléctrico 12/14/16kW CN20 CN32 VENTILADOR NEGRO PCB A, placa W(C) V(S) inverter para monofásica U(R) ROJO AZUL CN502 CN501 COMP CN27 N-OUT CN28 L-OUT CN17 CN26 12/9V CN24 CN24 DEBUG PCB B, placa de control para monofásica P-SEN P-SEN...
- Page 45 Anexo D: Diagrama cableado control eléctrico trifásico 12/14/16kW NEGRO NEGRO CN16 NEGRO H-SEN MARRÓN MARRÓN MARRÓN GRIS CN15 CN41 CN26 CN19 CN24 CN4 CN6 CN32 GRIS POWER H-SEN L-SEN CN17 GRIS O-COMP POWER-I CN36 CN18 CN21 CN20 CN19 DSP1 CN18 1 2 3 1 2 3 CN33...
- Page 46 Requisitos de calidad del agua en el circuito La calidad del agua debe cumplir los estándares de la Directiva Europea 98/83 CE y los criterios indicados en la Norma UNE 112.076. La calidad del agua se debe analizar antes de su uso; para evaluar criterios como el valor de pH, la conductividad, la concentración de iones de cloruro (Cl-), la concentración de iones de sulfuro (S2-), etc.
-
Page 47: Garantía
CONDICIONES DE LA GARANTÍA EAS ELECTRIC ofrece una garantía de reparación contra todo defecto de funcionamiento proveniente de la fabricación, incluyendo mano de obra y piezas de recambio, en los plazos y términos indicados a continuación: 3 años: Gama Doméstica, Gama Comercial, VRV de uso doméstico, M-Thermal Monoblock y Biblock, Fan Coils de uso doméstico, Acumuladores aerotérmicos de ACS, Bombas de Piscina, Minichillers de uso... - Page 48 Con base en la directiva europea 2012/19/UE de residuos de aparatos eléctricos y electrónicos (RAEE), los electrodomésticos no pueden ser arrojados en los contenedores municipales habituales; tienen que ser recogidos selectivamente para optimizar la recuperación y reciclado de los componentes y materiales que los constituyan y reducir el impacto en la salud humana y el medio ambiente.
- Page 50 CONTENTS SAFETY PRECAUTIONS ACCESSORIES Accessories supplied with the unit BEFORE INSTALLATION IMPORTANT INFORMATION FOR THE REFRIGERANT INSTALLATION SITE Selecting a location in cold climates Prevent sunshine INSTALLATION PRECAUTIONS Dimensions Installation requirements Drain hole position Installation space requirements 7 INSTALLATION THE CONNECTING PIPE Rrfrigerant piping Leakage detection Heat insulation...
- Page 51 OVERVIEW OF THE UNIT Disassambling the unit Electronic control box 4~16kW 1-phase units 12~16kW 3-phase units TEST RUNNING 11 PRECAUTIONS ON REFRIGERANT LEAKAGE TURN OVER TO CUSTOMER OPERATION AND PERFORMANCE 13.1 Protection equipment 13.2 About power cut Heating capcity 13.3 Compressor protection feature 13.4 13.5...
- Page 52 4/6 kW 8/10/12/14/16 kW Wiring diagram:8/10kW for example Electric Control System 4/6 kW Refrigerant System Please remove the hollow plate after installation. 12/14/16 kW 8/10 kW Remove the transportation support 12/14/16 kW NOTE Please remove the noise insulation cover of the compressor first. Please make sure the transportation support had be removed.
-
Page 53: Safety Precautions
1 SAFETY PRECAUTIONS The precautions listed here are divided into the following types.They are quite important, so be sure to follow them carefully. Meanings of DANGER, WARNING, CAUTION and NOTE symbols. INFORMATION Read these instructions carefully before installation. Keep this manual in a handy for future peference. Improper installation of equipment or accessories may result in electric shock, short-circuit, leakage, fire or other damage to the equipment. - Page 54 DANGER Before touching electric terminal parts, turn off power switch. When service panels are removed, live parts can be easily touched by accident. Never leave the unit unattended during installation or servicing when the service panel is removed. Do not touch water pipes during and immediately after operation as the pipes may be hot and could burn your hands.
- Page 55 Do not install the unit in the following places: - Where there is mist of mineral oil, oil spray or vapors. Plastic parts may deteriorate, and cause them to come loose or water to leak. - Where corrosive gases (such as sulphurous acid gas) are produced. Where corrosion of copper pipes or soldered parts may cause refrigerant to leak.
-
Page 56: Accessories
2 ACCESSORIES 2.1 Accessories supplied with the unit Installation Fittings Shape Quantity Name Outdoor unit installation & owners manual (this book) Technical data manual Water outlet connection pipe assembly Energy label 3 BEFORE INSTALLATION Before installation Be sure to confirm the model name and the serial number of the unit. Handling 1. -
Page 57: Important Information For The Refrigerant
2. While handling the unit keep both sides of the sling level. keep your back straight 3. After mounting the unit,remove the sling from the unit by pulling 1 side of the sling. CAUTION To avoid injury, do not touch the air inlet and aluminum fins of the unit. Do not use the grips in the fan grills to avoid damage. -
Page 58: Installation Site
Factory charged refrigerant volume in the unit Model Tonnes CO equivalent Refrigerant/kg 1-phase 12kW 1.84 1.24 1-phase 14kW 1.84 1.24 1-phase 16kW 1.84 1.24 3-phase 12kW 1.84 1.24 3-phase 14kW 1.84 1.24 3-phase 16kW 1.84 1.24 CAUTION Frequency of Refrigerant Leakage Checks - Equipment that contains less than 3 kg of fluorinated greenhouse gases or hermetically sealed equipment, which is labelled accordingly and contains less than 6 kg of fluorinated greenhouse gases shall not be subject to leak checks. -
Page 59: Selecting A Location In Cold Climates
5.1 Selecting a location in cold In normal condition,refer to the figures below for installation of the unit: climates Refer to "Handling" in section “4 Before installation” ( ) wall or obstacle NOTE When operating the unit in cold climates, be sure Air inlet >300 to follow the instructions described below. -
Page 60: Installation Precautions
6 INSTALLATION PRECAUTIONS 6.1 Dimensions 8/10/12/14/16 kW (unit: mm) 4/6 kW (unit: mm) Fig: 6-1 Fig: 6-2 Model 4/6kW 1008 8/10/12/14/16kW 1118 6.2 Installation requirements Check the strength and level of the installation ground so that the unit may not cause any vibrations or noise during the operation. -
Page 61: Drain Hole Position
6.3 Drain hole position Drain hole Drain hole This drain hole is covered by rubber This drain hole is covered by rubber plug. If the small drain hole can not plug. If one drain hole can not meet the meet the drainage requirements, the drainage requirements, the other one big one can be used at the same time. - Page 62 1/2 H Fig: 6-7 Unit A(mm) B1(mm) B2(mm) C(mm) ≥3000 ≥2000 ≥150 ≥600 4~16kW 2) In case of installing multiple units in lateral connection per row. 1/2 H ≥500mm ≥500mm Fig: 6-8 A(mm) B1(mm) B2(mm) C(mm) Unit ≥3000 ≥2000 ≥300 ≥600 4~16kW 7 INSTALL THE CONNECTING PIPE...
-
Page 63: Leakage Detection
CAUTION ● Please pay attention to avoid the components where it is connecting to the connecting pipes. ● To prevent the refrigerant piping from oxidizing inside when welding, it is necessary to charge nitrogen, or oxide will chock the circulation system. 7.2 Leakage detection Use soap water or leakage detector to check every joint whether leak or not (Refer to Fig.7-2 ).Note: A is high pressure side stop valve... -
Page 64: Connecting Method
7.4 Connecting method Outdoor Unit Indoor Unit Figure 7-5 Models 4~16 kW Max.piping length (H+L1) Max difference in height (H) 1) Size of pipes of Gas side and Liquid side MODEL Refrigerant Gas side/Liquid side Φ15.9/Φ6.35 4/6kW 8/10kW Φ15.9/Φ9.52 Φ15.9/Φ9.52 1-phase 12/14/16kW 3-phase 12/14/16kW Φ15.9/Φ9.52... -
Page 65: Remove Dirt Or Water In The Pipes
7.5 Remove dirt or water in the pipes 1) Make sure there is no any dirt or water before connectiong the piping to the outdoor and indoor units. 2) Wash the pipes with high pressure nitrogen, never use refrigerant of outdoor unit. 7.6 Airtight testing Charge pressured nitrogen after connecting indoor/outdoor unit pipes to do airtight testing. -
Page 66: Outdoor Unit Wiring
8 OUTDOOR UNIT WIRING WARNING A main switch or other means of disconnection, having a contact separation in all poles, must be incorporated in the fixed wiring in accordance with relevant local laws and regulations. Switch off the power supply before making any connections. -
Page 67: Safety Device Requirment
8.3 Safety device requirment 1. Select the wire diameters( minimum value) individually for each unit based on the table 8-1 and table 8-2 where the rated current in table 9-1 means MCA in table 9-2. In case the MCA exceeds 63A, the wire diameters should be selected according to the national wiring regulation. -
Page 68: Overview Of The Unit
L2 L3 OUTOOOR UNIT OUTOOOR UNIT POWER SUPPLY POWER SUPPLY 1-phase 3-phase NOTE The ground fault circuit interrupter must be a high-speed type breaker of 30 mA (<0.1 s). Please use 3-core shielded wire. 8.5 To finish the outdoor unit installation insulate and fix the refrigerant piping and interconnection cable as follows: Gas pipe Gas pipe insulation... -
Page 69: Electronic Control Box
4/6kW 8/10/12/14/16kW Door 1 To access to the compressor and Door 1 To access to the compressor and electrical parts. electrical parts WARNING Cut off all power supply— i.e. unit power supply and backup heater and domestic hot water tank power supply (if applicable) —... - Page 70 PCB A PCB B 12/14/16kW 1-phase (Back) CN30 PCB A PCB B PCB C 12/14/16kW 3-phase NOTE The picture is for reference only, please refer to the actual product.
-
Page 71: 16Kw 1-Phase Units
9.3 4~16kW 1-phase units 1) PCB A 4-10kw Inverter module Remarks: for 4-6kw, two capacitors CN20 Coding Assembly unit Assembly unit Coding Compressor connection port U Reserved(CN302) Compressor connection port V Port for communication with PCB B(CN32) Input port N for rectifier bridge(CN502) Compressor connection port W Output port for +12V/9V(CN20) Input port L for rectifier bridge(CN501) - Page 72 3) PCB B, 4-16kw Main control board CN10 CN27 CN11 CN22 CN24 CN17 CN26 CN28 CN13 CN55 CN18 CN14 CN29 CN7 CN5 CN6 CN16 CN19 CN21 CN33 CN2 CN30 CN36 CN37 CN38 CN20 26 25 24 Coding Assembly unit Coding Assembly unit Output port L to PCB A(CN28) Port for low pressure switch (CN14)
-
Page 73: 16Kw 3-Phase Units
9.4 12~16kW 3-phase units 1) PCB A Inverter module CN16 CN22 CN15 CN23 CN17 CN18 CN20 CN19 Coding Assembly unit Assembly unit Coding Output port for +15V(CN20) Input port P_in for IPM module (CN1) Compressor connection port W (CN19) Port for communication with PCB B (CN8) PED board(CN22) Compressor connection port V (CN18) Compressor connection port U (CN17) - Page 74 2) PCB B, Main control board CN41 CN26 CN24 CN36 CN21 CN18 CN31 CN29 CN10 CN35 CN11 CN28 CN20 CN37 CN27 V i n CN22 CN30 CN38 CN53 CN109 Coding Assembly unit Assembly unit Coding Port for ground wire(CN38) Port for temp.sensor Tp(CN8) Port for outdoor ambient temp.
- Page 75 3) PCB C, filter board CN204 CN205 CN206 CN30 CN213 CN214 CN202 CN211 CN203 CN200 CN201 CN212 PCB C 3-phase 12/14/16kW Coding Assembly unit Coding Assembly unit Power filtering L3(L3’) Power supply L2(CN201) Power filtering L2(L2’) Power supply L3(CN200) Power filtering L1(L1’) Power supply N(CN203) Power supply port of 310VDC(CN212) Power supply port for main control board(CN30)
-
Page 76: Test Running
10 TEST RUNNING Operate according to "key points for test running" on the electric control box cover. CAUTION ● Test running can not start until the outdoor unit has been connected to the power for 12 hours. ● Test running can not start until all the valves are affirmed open. ●... -
Page 77: Turn Over To Customer
Indoor Unit Outdoor Unit Room is filled of leakage refrigerant. (All refrigerant has leaked out.) 8/10/12/14/16 kW Fig.11-2 Indoor unit A. Ventilation peristome B. Leak alarm related to mechanical ventilator (Leak hunting siren should be installed in places easily keep refrigerant) Fig.11-3 12 TURN OVER TO CUSTOMER The owner's manual of indoor unit and owner's manual of outdoor unit must be turned over to the customer. - Page 78 WARNING Turn off any combustible heating devices, ventilate the Ask your dealer for installation of the heat pump. room, and contact the dealer where you purchased the Incomplete installation performed by yourself may result in a unit. water leakage, electric shock, and fire. Do not use the heat pump until a service person confirms that the portion where the refrigerant leaks is repaired.
-
Page 79: Operation And Performance
NOTE Never expose little children, plants or animals directly to the air flow. When the protection equipment starts, please shut down the Adverse influence to little children, animals and plants may manual power switch, and restart operation after problem is result. -
Page 80: Error Codes
13.8 Error codes When a safety device is activated, an error code will be displayed on the user interface. A list of all errors and corrective actions can be found in the table below. Reset the safety by turning the unit OFF and back ON. In case this procedure for resetting the safety is not successful, contact your local dealer. - Page 81 ERROR MALFUNCTION FAILURE CAUSE CODE OR PROTECTION AND CORRECTIVE ACTION 1. Strong wind or typhoon below toward to the fan, to make the fan running in the opposite direction. Change the unit direction or make shelter to avoid typhoon below to the fan. The DC fan failure 2.fan motor is broken, change a new fan motor.
- Page 82 ERROR MALFUNCTION FAILURE CAUSE CODE OR PROTECTION AND CORRECTIVE ACTION Heating mode, DHW mode: 1. The water flow is low; water temp is high, whether there is air in the water system. Release the air. 2. Water pressure is lower than 0.1Mpa, charge the water to let the pressure in the range of 0.15~0.2Mpa.
- Page 83 ERROR MALFUNCTION FAILURE CAUSE CODE OR PROTECTION AND CORRECTIVE ACTION 1. Heat exchanger cover is not removed. Remove it. 2. Heat exchanger is dirty or something is block on the surface. High temperature protection of Clean the heat exchanger or remove the obstruction. refrigerant outlet temp of 3.
- Page 84 ERROR MALFUNCTION FAILURE CAUSE CODE OR PROTECTION AND CORRECTIVE ACTION Module protection DC generatrix low voltage protection Heat pump syserm high pressure protection DC generatrix high voltage protection Heat pump syserm high pressure protection 1. Check the Heat pump system pressure; 2.
-
Page 85: Technical Specifications
14 TECHNICAL SPECIFICATIONS Model 10kW 220-240V~ 50Hz Power supply Rated power input 3300W 3600W 2200W 2600W Rated current 10.5A 12.0A 14.5A Refer to the technical data Norminal capacity Dimensions (W×H×D)[mm] 1008*712*426 1118*865*523 Packing (W×H×D)[mm] 1065*810*485 1190*970*560 DC motor / Horizontal Fan motor DC inverter dual rotary Compressor... - Page 86 Model 12kW 14kW 16kW 12kW 14kW 16kW 3-phase 3-phase 3-phase 380-415V 3N~ 50Hz Power supply 220-240V~ 50Hz Rated power input 6100W 5400W 5700W 6100W 5400W 5700W 11.0A Rated current 24.5A 25.0A 26.0A 10.0A 9.0A Refer to the technical data Norminal capacity Dimensions (W×H×D)[mm] 1118*865*523 1118*865*523...
-
Page 87: Information Servicing
15 INFORMATION SERVICING 1) Checks to the area Prior to beginning work on systems containing flammable refrigerants, safety checks are necessary to ensure that the risk of ignition is minmised. For repair to the refrigerating system, the following precautions shall be complied with prior to conducting work on the system. - Page 88 b) Particular attention shall be paid to the following to ensure that by working on electrical components, the casing is not altered in such a way that the level of protection is affected. This shall include damage to cables, excessive number of connections, terminals not made to original specification, damage to seals, incorrect fitting of glands, etc.
- Page 89 Cylinders shall be kept upright. Ensure that the refrigeration system is earthed prior to charging the system with refrigerant. Label the system when charging is complete(if not already). Extreme care shall be taken not to overfill the refrigeration system. Prior to recharging the system it shall be pressure tested with OFN. The system shall be leak tested on completion of charging but prior to commissioning.
- Page 90 ANNEX A: Refrigerant cycle Cooling Heating Description Description Item Item Compressor Outdoor exchanger sensor 4-Way Valve Stop valve (gas) Gas-liquid separator Stop valve (liquid) Air side heat exchanger High Pressure Switch Electronic expansion Valve Low Pressure Switch Single-way electromagnetic valve Pressure sensor Filter Capillary...
- Page 91 ANNEX B: Electrically controlled wiring diagram 4/6/8/10kW CN20 CN19 W(C) BLACK PCB A,Inverter V(S) board for 1phase U(R) BLUE CN501 CN502 COMP CN27 BLUE N-OUT CN28 BROWN CN17 CN26 12/9V CN24 CN24 L-OUT DEBUG PCB B,Main control board for 1phase P-SEN P-SEN H-PRO...
- Page 92 ANNEX C: Electrically controlled wiring diagram 12/14/16kW CN20 CN32 W(C) BLACK PCB A,Inverter V(S) board for 1phase U(R) BLUE CN502 CN501 COMP CN27 N-OUT CN28 L-OUT CN17 CN26 12/9V CN24 CN24 DEBUG PCB B,Main control board for 1phase P-SEN P-SEN H-PRO CN13 CN14...
- Page 93 Annex D: Electrically controlled wiring diagram 3-phase 12/14/16kW BLACK BLACK CN16 BLACK H-SEN BROWN BROWN BROWN GREW CN15 CN41 CN26 CN19 CN24 CN4 CN6 CN32 GREW POWER H-SEN L-SEN CN17 GREW O-COMP POWER-I CN36 CN18 CN21 CN20 CN19 DSP1 CN18 1 2 3 1 2 3 CN33...
- Page 94 Water quality requirements on the circuit Water quality must meet the standards of European Directive 98/83 EC and the criteria set out in UNE 112.076. Water quality should be analysed before use; to evaluate criteria such as concentration, pH value, conductivity, chloride ion concentration (Cl-), sulfide ion concentration (S2-), etc.
- Page 95 WARRANTY CONDITIONS EAS ELECTRIC offers a repair guarantee against all manufacturing defects, including labour and spare parts, within the terms and conditions indicated below: 3 years: Domestic Range, Commercial Range, Domestic VRF, M-Thermal Monoblock and Biblock, Domestic Fan Coils, DHW aerothermal storage heaters, Swimming Pool Heat Pumps, Domestic Minichillers, Compact solar heaters, Thermosiphons, Purifiers, Dehumidifiers and other air treatment appliances.
- Page 96 The european directive 2012/19 /UE on wasted electrical and electronic equipments (WEEE), requires that household electrical appliances must not be disposed of in the normal unsorted municipal waste stream. appliances must be collected separately in order to optimize the recovery and recycling of the materials they contain, and reduce the impact on human health and the environment.
- Page 97 Departamento técnico Gestión Asistencia Técnica Fecha: Email: satclima@easelectric.es PROTOCOLO DE ACTUACIÓN PUESTA EN MARCHA SISTEMAS DE AGUA Para la realización de la puesta en marcha, siempre dentro de los 30 días siguientes a la instalación de la máquina, dispone de dos formatos: ☐...
- Page 98 5. Si no hay depósito de inercia ni aguja, ¿está garantizado el volumen mínimo y el caudal en el circuito primario? SÍ ☐ NO ☐ (Se puede garantizar el volumen con un pulmón y caudal con válvulas sobrepresión) 6. ¿Hay instalado un vaso de expansión adicional en el circuito primario? SÍ...
- Page 99 17. ¿Hay vaso de expansión en ACS instalado? SÍ ☐ NO ☐ 18. ¿Hay válvula de seguridad instalada? SÍ ☐ NO ☐ 18.1 ¿Bares de la válvula? 19. Comprobación de funcionamiento de la válvula de 3 vías (se recomienda que sea de bola) 20.
- Page 100 3. ¿Está alimentada la resistencia de reserva? SÍ ☐ NO ☐ (Es aconsejable porque se puede usar como sistema de seguridad para evitar congelamiento intercambiador, desescarches, etc. No obstante, en caso de producirse avería por esta causa, no estaría cubierta por la garantía.) 4.
- Page 102 Toda la documentación del producto Complete documents about the product Documentation plus complète sur le produit Mais documentação do produto EAS ELECTRIC SMART TECHNOLOGY, S.L.U. P.I. San Carlos, Camino de la Sierra, S/N, Parcela 11 03370 Redován (Alicante) - ESPAÑA...
Need help?
Do you have a question about the M-THERMAL 2 BIBLOCK and is the answer not in the manual?
Questions and answers