Jura GIGA X8 Instructions For Use Manual
Hide thumbs
Also See for GIGA X8:
- User manual ,
- Original instructions for use (64 pages) ,
- Instructions for use manual (48 pages)

Related Manuals for Jura GIGA X8


Summary of Contents for Jura GIGA X8
- Page 1 GIGA X8 (NAA) Instructions for Use For your safety: read and understand manual before use. JURA Type 748...
-
Page 2: Table Of Contents
Your GIGA X8 IMPORTANT SAFEGUARDS Control elements 1 Preparing and using for the first time JURA on the Internet ............................10 Operation with touchscreen display and Rotary Switch ...............10 Setting up the machine ..........................11 Filling the bean container ..........................11 Determining the water hardness .......................11 First-time use ..............................12... - Page 3 8 Transport and environmentally friendly disposal Transport / Emptying the system ......................50 Disposal .................................50 9 Technical data 10 Index 11 JURA contact details / Legal information Symbol description Symbols used Prompt to take action. This symbol means that you are being prompted to perform some action.
-
Page 4: Important Safeguards
IMPORTANT SAFEGUARDS IMPORTANT SAFEGUARDS Comply with the Failure to observe the instructions for use may result in serious instructions for use injuries or damage to property. Safety information is therefore indicated as follows: This is the safety alert symbol. lt is used to alert you to potential personal injury hazards. - Page 5 It should only be used for coffee preparation and to heat milk and water. Use for any other purpose will be deemed improper. JURA Elektroapparate AG cannot accept any responsibility for the consequences of improper use.
- Page 6 Repair MUST be done by authorized personnel only. In the event of signs of damage, for example if there is a smell of burning, unplug the machine immediately from outlet and contact JURA customer service. J CAUTION This appliance is for household use. Any servicing other than...
- Page 7 When using the CLEARYL Smart filter cartridge or a JURA Smart Connect, wireless connections are established. Specific details on the frequency band used and the maximum transmission power can...
-
Page 8: Control Elements
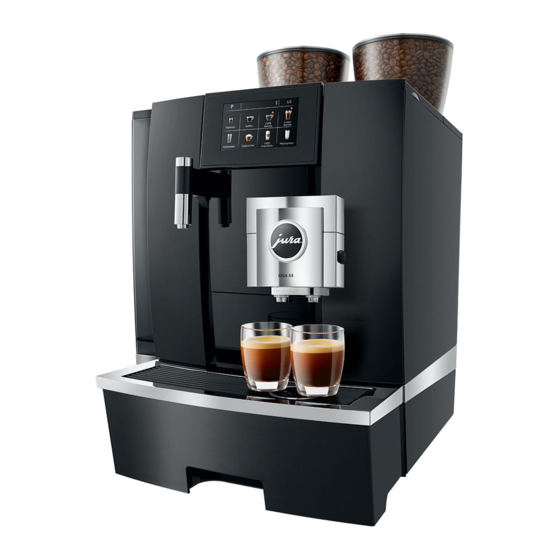
Control elements Control elements J HOT J HOT Bean container with aroma preservation cover Filler funnel for ground coffee Ventilation slats (Venti Ports) Water tank cover Water tank Storage compartment cover Power switch (back of the machine) Measuring spoon for ground coffee Plug-in power cord (back of the machine) Height-adjustable dual spout Coffee grounds container... - Page 9 On/Off button Q (under cover) Touchscreen display Back of the machine Locking device Service cover Sliding catch (open by pressing with your finger) Service socket with JURA Smart Connect Accessories Container for milk system cleaning Spanner with hexagonal hole (for milk system)
-
Page 10: Preparing And Using For The First Time
1 Preparing and using for the first time 1 Preparing and using for the first time JURA on the Internet Visit us on the Internet. On the JURA website (jura.com) you will find interesting and up-to-date information on your GIGA and on every aspect of coffee. -
Page 11: Setting Up The Machine
1 Preparing and using for the first time Setting up the machine When setting up your GIGA, please note the following: Place the GIGA on a horizontal surface that is not sensitive to water (minimum height of 31.5 in. (80 cm)). Choose a spot for your GIGA which protects the machine against overheating. -
Page 12: First-Time Use
1 Preparing and using for the first time Level Display German Degrees of general Parts per Indicator Strip number Degree (°dH) hardness (°dGH) million (ppm) of ‘reddish’ fields Not active – – – – Very soft water <3 <3 < 53.4 None Soft water >... - Page 13 1 Preparing and using for the first time T Touch ‘Save’. ‘Saved’ appears briefly on the display to confirm the setting. ‘Date’ T Enter the current date (format YYYY/MM/DD). T Touch ‘Save’. ‘Saved’ ‘Units’ T Select the time format (‘24 hrs.’ ‘AM / PM’).
-
Page 14: Connecting Milk
T Connect the other end of the milk pipe to a milk cooler. Settings by the service Your authorized JURA service technician can change various technician settings, e.g.: Codes: Four codes can be assigned. For each code, you can define which program items are available or disabled. -
Page 15: Preparation
– and impairs the taste. We therefore recommend prewarming the cups. The full coffee aroma can develop only in prewarmed cups. You can purchase a JURA cup warmer from your specialized dealer. You can make permanent settings for all products in programming mode (see Chapter 4 ‘Permanent settings in programming mode –... -
Page 16: Ways Of Preparing A Beverage
2 Preparation Ways of preparing a The GIGA offers various ways of preparing a specialty coffee, milk or beverage hot water. Preparation using the start screen: Simply touch the desired product. The following products are displayed as standard on the start screen: Page ‘1/2’... -
Page 17: Preparing Specialty Coffees
2 Preparation E The product selector view disappears automatically after 10 seconds if no preparation is started. E The last product selected always appears first in the product selector view. E You can move any of the standard products programed in your GIGA to your preferred position on the start screen and make it one of your favorites. -
Page 18: Preparing Specialty Coffees With Milk
Products with a bypass amount of water setting are marked with a red speedometer symbol in the start screen and in the product selector. E Your JURA service technician can set the machine so that the red speedometer symbol is not displayed next to these ‘speed specialty coffees’. -
Page 19: Ground Coffee
2 Preparation E For products with a set bypass amount of water, it is not possible to change the fill volume during the preparation process. Ground coffee You can choose to use another coffee variety, for example decaffeinated coffee, with the filter funnel for ground coffee. Basic information about ground coffee: Never add more than two level measuring spoons of ground coffee. -
Page 20: Activating The Grinder Selection
2 Preparation Activating the grinder You have the option of configuring the start screen such that the selection grinder selection (‘Beans à la carte’) is always displayed. Before each preparation, you can select which grinder is to be used and therefore which coffee beans are to be used. -
Page 21: Hot Water
2 Preparation T Touch ‘Espresso’. Preparation starts. The preset amount of water for espresso flows into the cup. Preparation stops automatically. Your GIGA is once more ready for use. Hot water The GIGA allows you to prepare different variants of hot water: ‘Hot water’... -
Page 22: Daily Operation
T Place a receptacle under the dual spout. T Open the cover of the On/Off button. T Press the On/Off button Q to switch the GIGA on. ‘Welcome to JURA’ ‘Machine is heating’ ‘Machine is rinsing’, the system is rinsed. The rinse stops... -
Page 23: Daily Maintenance
3 Daily operation Daily maintenance To ensure that you get many years of reliable service out of your GIGA and to guarantee the optimum coffee quality, the machine requires daily maintenance. T Pull out the drip tray. T Empty the coffee grounds container and the drip tray. Rinse them both with warm water. -
Page 24: Switching Off The Machine
3 Daily operation Clean the inside of the water tank, e.g. with a brush. Further information about the water tank is provided in these instructions for use (see Chapter 5 ‘Maintenance – Descaling the water tank’). Traces of milk and coffee may stick to the top and bottom of the cup platform. -
Page 25: Permanent Settings In Programming Mode
4 Permanent settings in programming mode 4 Permanent settings in programming mode J WARNING Hot coffee, hot steam and hot water can cause scalding. Scalding is a serious burn. T Use extreme care when handling hot liquid or steam. T Allow liquid to cool down before drinking. T ... -
Page 26: Product Settings
T You can set the water hardness of the water used. ‘Choose language’ T Select your language. ‘Connect accessory’, T Connect the GIGA wirelessly to a JURA ‘Disconnect accessories’ accessory or disconnect the connection (Only displayed if the JURA again. Smart Connect is being used.) ‘Empty system’... -
Page 27: Setting The Consistency Of Grind
4 Permanent settings in programming mode Adjusting the product settings J WARNING Hot coffee, hot steam and hot water can cause scalding. Scalding is a serious burn. T Use extreme care when handling hot liquid or steam. T Allow liquid to cool down before drinking. T ... -
Page 28: Automatic Switch-Off
4 Permanent settings in programming mode T Touch ‘ P ’. ‘Maintenance status’ T Turn the Rotary Switch until ‘Machine settings’ is displayed. T Press the Rotary Switch. ‘Machine settings’ T Press the Rotary Switch. ‘Switch off after’ T Turn the Rotary Switch until ‘Set consistency of grind’... -
Page 29: Time And Date
4 Permanent settings in programming mode T Touch ‘Save’. ‘Saved’ appears briefly on the display. ‘Switch off after’ T Touch ‘Back’ the number of times needed to display the start screen again. Time and date You already set the time and date during first-time use. You can change this setting in programming mode: ‘Machine settings’... -
Page 30: Setting The Water Hardness
4 Permanent settings in programming mode Example: Proceed as follows to set the GIGA to switch on on Mondays at a time defined by you. Precondition: The start screen is displayed. T Touch ‘ P ’. ‘Maintenance status’ T Turn the Rotary Switch until ‘Machine settings’... -
Page 31: Unit For Amount Of Water / Time Format
4 Permanent settings in programming mode T Move your finger across the display until ‘Water hardness’ displayed in the center. T Touch ‘Water hardness’. ‘Water hardness’ T Now move your finger to the left or right to change the setting. T ... -
Page 32: Energy-Saving Mode
4 Permanent settings in programming mode Energy-saving mode In the program item ‘Machine settings’ ‘Save energy’ you can set an energy-saving mode: ‘1’ Soon after the last preparation, the GIGA stops heating up. After approximately 5 minutes, the ‘ESM’ symbol (E.S.M. ©... -
Page 33: Language
4 Permanent settings in programming mode ‘Rotary Selection’: Product selector view with additional products can be started by turning the Rotary Switch. ‘Alarm displays’: The start screen displays messages such as ‘Clean machine’ ‘Clean the milk system’. Example: Proceed as follows to prevent one-off settings being made during preparation. -
Page 34: Display Brightness
4 Permanent settings in programming mode T Move your finger across the display until ‘Choose language’ is displayed in the center. T Touch ‘Choose language’. ‘Choose language’ T Move your finger across the display until the desired language, e.g. ‘Deutsch’, is displayed in the center. T ... -
Page 35: Querying Information
4 Permanent settings in programming mode Precondition: The start screen is displayed. T Touch ‘ P ’. ‘Maintenance status’ T Turn the Rotary Switch until ‘Machine settings’ is displayed. T Press the Rotary Switch. ‘Machine settings’ T Press the Rotary Switch. ‘Switch off after’... -
Page 36: Maintenance
5 Maintenance 5 Maintenance J WARNING Use of maintenance products that are harmful to health and discharge of liquids during maintenance program. Harmful if swallowed. Irritating to eyes and skin. T Keep children AWAY. T Keep children away from the machine while it is performing a maintenance program. -
Page 37: Automatic Milk System Rinsing
T If swallowed, rinse mouth immediately and drink large quantities of water. Do not induce vomiting. Seek medical advice immediately and show label. E JURA milk system cleaner is available from specialized dealers. E To clean the milk system, use the container supplied. Precondition: The start screen is displayed. -
Page 38: Dismantling And Rinsing The Dual Spout
5 Maintenance T Touch ‘Start’ again. ‘Milk system cleaner’ ‘Connect the milk tube’ T Remove the milk pipe from the milk container. T Pour one dosing unit of milk system cleaner to the rear part of the container. T Place the container under the dual spout and connect the milk pipe with the container. - Page 39 250 ml warm water and one dosing unit of JURA milk system cleaner. Then rinse the parts thoroughly. T Reassemble the milk system. T Fit the assembled individual parts back in the dual spout and press it firmly.
-
Page 40: Inserting/Changing The Filter
5 Maintenance T Connect the milk pipe to the dual spout. Inserting/changing the Your GIGA no longer must be descaled if you are using the CLEARYL filter Pro Smart filter cartridge. E Once the filter cartridge stops working (depending on the water hardness setting), the GIGA will prompt you to change the filter. -
Page 41: Cleaning The Machine
J WARNING Non-recommended (e.g. liquid) cleaning agents may contain substances that could damage the machine or leave residues. T Use only original JURA cleaning tablets. These are specially formulated for your machine. J WARNING Harmful and irritating cleaning agent. Harmful if swallowed. -
Page 42: Descaling The Machine
‘Add cleaning tablet’. T Open the cover of the filler funnel for ground coffee. T Insert a JURA cleaning tablet into the filler funnel. T Close the cover of the filler funnel. ‘Press the Rotary Switch’ T Press the Rotary Switch. - Page 43 T Allow the descaling program to run to the end. E The descaling program lasts approximately 45 minutes. E JURA descaling tablets are available from specialized dealers. E If the descaling agent comes into contact with sensitive surfaces (e.g. marble), damage cannot be ruled out. Clean up any splashes immediately.
-
Page 44: Cleaning The Bean Container
5 Maintenance T Completely dissolve 4 JURA descaling tablets in a receptacle holding 800 ml of water. This may take several minutes. T Pour the solution into the empty water tank and insert it into the machine. ‘Press the Rotary Switch’ T Place one receptacle under the dual spout and another under the hot-water spout. -
Page 45: Descaling The Water Tank
T Turn the blue locking device inwards. T Pull the red sliding catch completely forwards. T Refit the service cover and fix it by pressing above the JURA logo. It will click into place audibly. T Fill the bean container with coffee beans and close the aroma preservation cover. -
Page 46: Display Messages
6 Display messages 6 Display messages Message Cause/Result Action ‘Fill water tank’ The water tank is empty. You cannot T Fill the water tank (see Chapter 3 prepare any products. ‘Daily operation – Filling the water tank’). ‘Empty coffee The coffee grounds container is full. / T Empty the coffee grounds grounds container’... - Page 47 6 Display messages Message Cause/Result Action ‘Not enough ground There is insufficient ground coffee T The next time you prepare coffee’ in the machine; the GIGA stops the a beverage, add more ground operation. coffee (see Chapter 2 ‘Preparation – Ground coffee’). ‘Service cover is not The service cover on the back of the T Fit the service cover.
-
Page 48: Troubleshooting
7 Troubleshooting 7 Troubleshooting Problem Cause/Result Action Insufficient foam is The dual spout is dirty. T Clean the milk system in the dual produced when the milk spout (see Chapter 5 ‘Maintenance – is frothed or milk sprays Cleaning the milk system’). from the dual spout. - Page 49 Q. Contact customer support in your country (see Chapter 11 ‘JURA contact details / Legal information’). E If you were unable to solve the problem, contact customer support in your country (see Chapter 11 ‘JURA contact details / Legal information’).
-
Page 50: Transport And Environmentally Friendly Disposal
8 Transport and environmentally friendly disposal 8 Transport and environmentally friendly disposal Transport / Emptying the Keep the packaging for your GIGA. It should be used to protect the system machine during transport. In order to protect the GIGA from frost during transport, the system must be emptied. -
Page 51: Technical Data
CLEARYL Pro Smart filter cartridge Frequency band 13.56 MHz (RFID technology) Max. transmission power < 1 mW JURA Smart Connect (wireless connection) Frequency band 2.4 GHz Max. transmission power < 1 mW Directives The machine complies with the following directives: Standard UL 1082 Canadian Standard CSA C22.2 No. - Page 52 10 Index 10 Index Cover Service cover 9 Addresses 58 Storage compartment 8 Adjusting the product settings 27 Aroma preservation cover Water tank 8 Cup platform 8 Bean container with aroma preservation Customer support 58 cover 8 Automatic switch-off 28 Timer 29 Daily maintenance 23 Automatic switch-on...
- Page 53 Espresso 17 Ground coffee 19 Espresso macchiato 18 Internet 10 Flat white 18 Green tea 21 Ground coffee 19 JURA Hot water 21 Contact details 58 Latte macchiato 18 Internet 10 Lungo Barista 18 Pot of coffee 17 Language 33...
- Page 54 10 Index Energy-saving mode 32 Language 33 Technical data 51 Product settings 26 Tel 58 Querying information 35 Time 29 Time format Restore factory settings 34 Programming mode 31 Setting the consistency of grind 27 Timer 29 Setting the water hardness 30 Touchscreen display 9, 10 Time and date 29 Transport 50...
-
Page 58: Jura Contact Details / Legal Information
Some details of your GIGA may vary. Feedback Your opinion is important to us! Use the contact details at jura.com. Copyright The instructions for use contain information which is protected by copyright. It is not permitted to photocopy these instructions for use or translate them into another language without the prior written consent of JURA Elektroapparate AG.
Need help?
Do you have a question about the GIGA X8 and is the answer not in the manual?
Questions and answers