Table of Contents
Advertisement
Advertisement
Table of Contents

Subscribe to Our Youtube Channel
Related Manuals for Jura IMPRESSA S9/S7


Summary of Contents for Jura IMPRESSA S9/S7
- Page 1 IMPRESSA S9/S7 avantgarde Instructions for use 3/05...
- Page 2 IMPRESSA S9/S7 avantgarde Legend: DISPLAY: serves as information. DISPLAY: please follow the instructions shown. = Note = Important JURA Elektroapparate AG, CH-4626 Niederbuchsiten, = Tip Internet http://www.jura.com...
- Page 3 Fig. 1 Fig. 2 Fig. 5 Fig. 6 Fig. 9 Fig. 10 Fig. 13 Fig. 14 Fig. 3 Fig. 7 Fig. 11 Fig. 4 Fig. 8 Fig. 12...
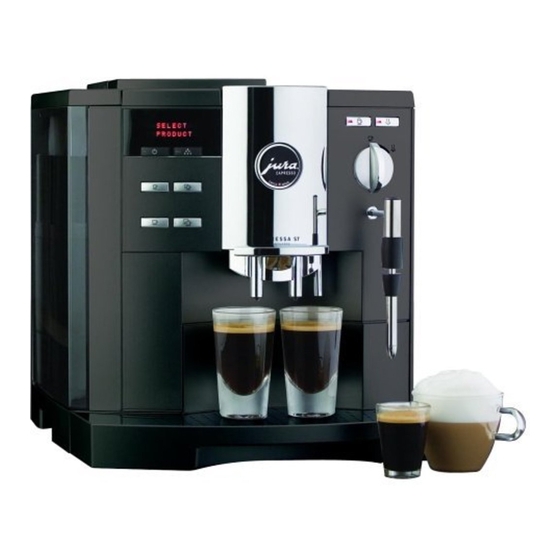
- Page 4 Description of the machine 1. Drip tray 2. Drip grate 3. Programming door 4. Rotary Switch 5. Selection key for pre-ground coffee 6. Coffee à la Carte key 7. 1 Coffee key 8. 2 Coffees key 9. 1 Espresso key 10.
-
Page 5: Table Of Contents
Contents 1. Safety information ...page 6 Warnings ...page 6 Precautions...page 6 2. Before you start using the IMPRESSA S9/S7 avantgarde ...page 6 Checking the mains voltage ...page 6 Checking electrical fuse...page 6 Filling the water tank ...page 7 Filling the bean tank...page 7 Adjusting the grinding gear ...page 7... -
Page 6: Before You Begin
Before you begin Congratulations on having bought this IMPRESSA S9/S7 avant- garde! In order to ensure perfect operation of your IMPRESSA, carefully read this operating manual and keep it for future reference. Should you need more information or meet with particular prob-... -
Page 7: Filling The Water Tank
2.3 Filling the water tank Only use fresh, cold water. Never fill the water tank with milk, mineral water or other liquids. Take out the water tank and thoroughly rinse it out with cold tap water (Fig. 1). Then fill it with water and place it back into the coffee machine. Make sure the tank is installed correctly and that it engages properly. -
Page 8: Cup Illumination
Place a receptacle under the 2-stage frothing jet (24) and press one of the Steam keys The system now fills up automatically. A little water will leak from the frothing jet. SYSTEM FILLING HEATING UP PRESS RINSE Place a cup under the height-adjustable coffee spout (18). Press Rinse MACHINE RINSING Now the water lines are flushed with fresh water. -
Page 9: Using A Claris Plus Filter Cartridge
Now turn the Rotary Switch (4) until the following message is displayed: EXIT Now press the Rotary Switch (4) to leave the programming mode. SELECT PRODUCT 5. Using a CLARIS plus filter cartridge When using the CLARIS plus filter cartridge correctly, de- calcifying your IMPRESSA will no longer be necessary. -
Page 10: Rinsing The Machine
FILTER RINSING Filter rinsing stops automatically. SELECT PRODUCT You can also trigger a change of filter manually from the Maintenance menu at any point in time (only if the filter has been activated) - see Chapter 13.3. 6. Rinsing the machine If the coffee machine is switched off and has cooled down, you will be prompted to start a rinsing cycle when switching the machine back on. -
Page 11: Making Coffee À La Carte
To stop the brewing process prematurely, press any of the product keys. We recommend always using powder from fresh coffee beans or pre-ground, vacuum-packed coffee. Never fill in more than 2 scoops of powder. The filler funnel is no storage tank. -
Page 12: Drawing Off Steam
The amounts given in ML are approximate values and may vary from the effective quantity. 10. Drawing off steam To ensure perfect operation, clean the 2-stage frothing jet (24) regularly. Screw the jet off as described. Hold the jet at the top and at the bottom end and screw it apart (Fig. -
Page 13: Making Cappuccino And Hot Milk With The Professional-Cappuccino Frother
Frother under running water. Re-assemble the Professional-Cappuccino Frother and attach it to your IMPRESSA. 12. Switching the IMPRESSA S9/S7 avantgarde off Switching the IMPRESSA off causes the coffee spout to be rinsed first. Therefore, please make sure to place a suitable receptacle un- der the coffee spout (18). -
Page 14: Programming The Filter
Temperature Water portion Steam portion Economy mode Time Automatic switch-on time Automatic switch-off time Language Display Information (to be viewed only) 13.1 Programming the filter Please refer to Chapter 5 “Using the CLARIS plus filter cartridge”. 13.2 Programming your machine to the correct water hardness (only with FILTER NO) Please refer to Chapter 4 “Adjusting your machine to the water hardness”. -
Page 15: Setting The Amount Of Water For Coffee
NORMAL (example) – _ _ _ + Now turn the Rotary Switch (4) until the required amount of powder is set. STRONG (example) – _ _ + Confirm the selected setting by pressing the Rotary Switch (4). POWDER QUANTITY Now turn the Rotary Switch (4) until the following message is displayed: EXIT Now press the Rotary Switch (4) to leave the programming... -
Page 16: Programming The Water Portion
TEMPERATURE NORMAL (example) Now turn the Rotary Switch (4) until the required temperature is set. TEMPERATURE HIGH (example) Confirm the selected setting by pressing the Rotary Switch (4). TEMPERATURE Now turn the Rotary Switch (4) until the following message is displayed: EXIT Now press the Rotary Switch (4) to leave the programming... -
Page 17: Economy Mode
Press the Rotary Switch (4) to leave the programming mode. SELECT PRODUCT 13.9 Economy mode You can set your machine to various power saving modes. SELECT PRODUCT Open the programming door (3). Press the Rotary Switch (4) until you hear an acoustic signal. FILTER NO or YES Turn the Rotary Switch (4) until the following message is dis-... -
Page 18: Programming The Automatic Switch-On Time
SELECT PRODUCT Open the programming door (3). Press the Rotary Switch (4) until you hear an acoustic signal. FILTER NO or YES Turn the Rotary Switch (4) until the following message is dis- played: TIME —:— Now press the Rotary Switch (4) to start programming. TIME —:—... -
Page 19: Programming The Automatic Switch-Off Time
Now press the Rotary Switch (4) to leave the programming mode. SELECT PRODUCT If the IMPRESSA is switched off with the power switch (27), you will need to set the time again next time you switch the machine on. The machine will prompt you to do so. 13.12 Programming the automatic switch-off time SELECT PRODUCT Open the programming door (3). -
Page 20: Information
Open the programming door (3). Press the Rotary Switch (4) until you hear an acoustic signal. FILTER NO or YES Turn the Rotary Switch (4) until the following message is dis- played: DISPLAY 24HRS / ML Now press the Rotary Switch (4) to start programming. DISPLAY 24HRS / ML Turn the Rotary Switch (4) to change the time format. -
Page 21: Maintenance
14. Maintenance 14.1 Filling the water tank FILL WATER TANK If this information is displayed, the machine will no longer make coffee. Refill water as described in Chapter 2.3. SELECT PRODUCT The water tank should be rinsed out and filled with fresh water daily. -
Page 22: Removing Stones From The Grinding Gear
14.6 Removing stones from the grinding gear Switch the machine off using the ON / OFF key Turn the power switch (27) off. Open the lid of the bean tank (16) and remove the aroma preser- vation cover (15). Remove any beans with a vacuum cleaner. Remove the screw in the bean tank (Fig. -
Page 23: General Cleaning Instructions
When the process has been completed, the IMPRESSA switches itself off. The display will read “FILL SYSTEM / PRESS STEAM” next time you switch the machine on. For more information, please refer to Chapter 3 “First use”. 14.11 General cleaning instructions Never use sharp objects or caustic chemicals for cleaning. -
Page 24: Decalcifying
EMPTY TRAY / EMPTY GROUNDS Empty out the drip tray (1) and integrated coffee grounds bin. TRAY MISSING Place the empty, clean drip tray (1) and integrated coffee grounds bin back into the IMPRESSA. SELECT PRODUCT When the cleaning program has finished, take out the removable coffee powder tank and briefly rinse it under running water. -
Page 25: Disposal
Turn the Hot Water key (22) to the symbol. MACHINE DE-SCALING You will hear an acoustic signal. CLOSE TAP Turn the Hot Water key (22) to the symbol. MACHINE DE-SCALING You will hear an acoustic signal. EMPTY TRAY / EMPTY GROUNDS Empty out the drip tray (1) and integrated coffee grounds bin. -
Page 26: Tips For Perfect Coffee
18. Tips for perfect coffee Height-adjustable coffee spout (18) You can adjust the height of the coffee spout to the size of your cups. Grinding degree Refer to Chapter 2.5 “Adjusting the grinding gear”. Preheating cups The machine features a heatable cup shelf (19). You can, however, additionally preheat the cups with hot water. -
Page 27: Problems
19. Problems Problem Grinding gear makes a very loud noise Too little froth when frothing milk Coffee only drips from the coffee spout Display constantly indicates ‘Tray missing‘ ‘Fill beans’ not displayed despite empty bean tank Cause Foreign body in the grinding gear Professional Cappuccino Frother clogged Grinding degree too fine Pre-ground coffee too fine... -
Page 28: Legal Information
20. Legal information These operating instructions contain all the information required for operating and maintaining the machine properly. Knowledge of and compliance with the specifications contained in these operating instructions is required for using the machine safely as well as for operational safety and safety during mainte- nance.
Need help?
Do you have a question about the IMPRESSA S9/S7 and is the answer not in the manual?
Questions and answers