Table of Contents
Advertisement
Quick Links
Advertisement
Table of Contents

Related Manuals for Compak BOLT


Summary of Contents for Compak BOLT
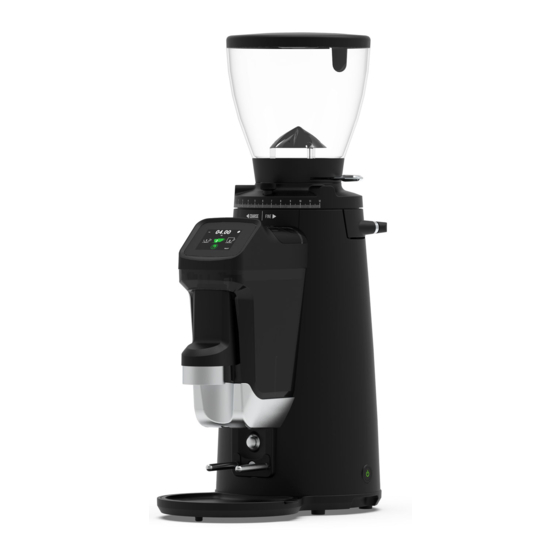
- Page 1 BOLT COFFEE GRINDER USER MANUAL...
- Page 2 K09650H00 | PROC-CAL/002/03 USER MANUAL | V. 06/04/2022...
-
Page 3: Table Of Contents
CONTENTS BOLT COFFEE GRINDER SAFETY DESCRIPTION INSTRUCTIONS IDENTIFICATION TECHNICAL CHARACTERISTICS EXTERNAL COMPONENTS INSTALLATION ADJUSTMENT OPERATION SETTINGS CLEANING MAINTENANCE DECLARATION OF CONFORMITY K09650H00 | PROC-CAL/002/03 USER MANUAL | V. 06/04/2022... -
Page 4: Safety
SAFETY ADDITIONAL SAFETY MEASURES BUILT-IN TO OUR GRINDERS: Special screw to keep the hopper fixed. • Safety current cut-off by microswitch to access • the grinding unit This coffee grinder Children should not should only be used play with the device. for the function for which it was designed: Cleaning and... - Page 5 SAFETY USERS SHOULD PAY SPECIAL ATTENTION TO, AND SCRUPULOUSLY OBEY THE FOLLOWING SAFETY INSTRUCTIONS If it is necessary to access the interior, where the electrical components are located, go to the nearest technical service Any other use will be considered improper In the event of and dangerous.
-
Page 6: Description
Warning For the optimum functionality of the grinder models described in this user manual, the maximum work cycles are as follows: Work cycle Model BOLT 64 30 s BOLT 83 SOUND LEVEL The level of sound emitted is: Sound level... -
Page 7: Identification
Rotational 1500 1290 1310 velocity Ø Production Production Time for one dose Flat Burrs 50 Hz* 60 Hz* (7g) 50Hz BOLT 64 BOLT 83 17.5 38.5 Kg/h lb/h Kg/h lb/h Height Time for one dose Hopper capacity Net weight Width... -
Page 8: External Components
EXTERNAL COMPONENTS Hopper security screw Hopper Coffee bean hopper Hopper shutter Grind regulator Break option stepped grind Lock Position Load indicator System Cleaning TFT screen cover Tamper Exit chute Switch ON-OFF Dose button Portafilter holder Nozzle adjustment wheel Coffee Fork collection tray adjustment screw... -
Page 9: Installation
INSTALLATION 7.3. WHERE TO USE IT 7.1. LEGAL NOTICES The appliance must be installed on a The installer must read this instruction solid and flat surface. manual carefully before installing the machine. The minimum size for the working space, to ensure you installation get the best performance from device must be carried out... -
Page 10: Adjustment
ADJUSTMENT 8.1. GRINDER SET UP Remove the hopper lid ( ), fill the hopper Place the hopper ( ) on the grind regulator with coffee ( ), and replace the lid on the ) and make sure the bean trap ( ) is in hopper ( ) (Fig. - Page 11 ADJUSTMENT 8.2. ADJUSTING THE PORTAFILTER 8.3. GRIND ADJUSTMENT SYSTEM SUPPORT Rotate the grind regulator ( ) until reaching In order to ensure the proper distribution of the grind level desired. ground coffee in the portafilter, it is possible Rotating the grind regulator clockwise will to adjust the height of the lower portafilter result in a courser grind;...
-
Page 12: Operation
) has the following that this operation performed, when changing positions: OFF/ON (Fig. 4) to a finer grinding, with the motor running, to prevent BOLT coffee from building between burrs The equipment’s electronic func- blocking the grinder. tions are activated... - Page 13 OPERATION 9.5. DETECTION MODE On FRESH MODE once the grind cycle is initiated, it can be paused by pressing the lower In this operating mode, the grinder detects activation button ( ). The cycle will pause, and the presence of the portafilter through will complete the timed grind cycle as long as the the movement of a fitted Tag.
-
Page 14: Settings
SETTINGS 10.1. DISPLAY ICON GUIDE DISPLAY PREDOSE MODE DISPLAY FRESH MODE Time of active dose 08.00 Grind Time Grind Time Menu Menu Configuration Configuration Configuration Configuration Dose 2 Dose 1 Dose 1 Dose 3* active Dose 2 active Time from last Active 10:20:59 PUSH... - Page 15 SETTINGS 10.2.3. Inside the dose time configuration 10.3. ACCESS TO THE menu, this can be changed by sliding the CONFIGURATION MENU seconds and tenths of a second up or down 10.3.1. Press until the desired time is obtained and press OK. DOSE 1 GRINDING TIME SECONDS...
- Page 16 SETTINGS 10.4. MODE MENU 10.4.3 Choose between the different working modes: Push, Detection or Touch. 10.4.1. Press in the configuration Menu MENU PREDOSE PUSH MODE DETECTION MODE MODE CLEANING STATISTICS TOUCH MODE 10.5. CLEANING MENU 10.5.1. Press in the configuration menu 10.4.2 There are two different options to to activate the Cleaning Mode.
- Page 17 SETTINGS 10.6.2. The number of independent doses The screen will display the message “Doors open, please clean with brush from the top” for each selection is shown, either absolute and will remain in that state until you press from the date of installation of the grinder, or the OK to go back to working mode.
- Page 18 SETTINGS 10.6.4. To access the Burrs wear graph, press 10.7. RECIPES COFFEE STATISTICS 10.7.1. Press Relatives MENU Absoluts Total: RESET STATISTICS RECIPES SETTINGS 10.6.4. There is a graphical view of the Burrs 10.7.2 There are two options, the first one wear in % as well as the Total ground Kg will access the menu to configure the dose and the Kg configured for the Burrs change...
- Page 19 SETTINGS 10.8. SETTINGS MENU 10.9. PASSWORD 10.9.1. Press 10.8.1. Press in the configuration menu GRINDER SETTINGS GRINDER SETTINGS MENU PASSWORD LANGUAGE DATE/HOUR STATISTICS RECIPES SETTINGS If the Password is active, enter the Default one: 0000 There are 4 Settings options. Use the horizontal scroll to navigate between: Password, PASSWORD Language, Date / Hour, and Sounds.
- Page 20 SETTINGS 10.9.3. Enter a new 4 numbers Password. 10.10.2. Choose between the different Show or hide the numbers by pressing languages available using the vertical scroll. or delete the numbers pressing LANGUAGE NEW PASSWORD 0 1 2 3 4 ENGLISH 7 8 9 DEUTSCH 10.10.
- Page 21 SETTINGS 10.11.2. Edit both the time, the date or the 10.11.4. Edit the date by pressing to access way to show the date between DD/MM/YY the date setting screen. change the days, or MM/DD/YY. months and years by sliding up or down until the desired time is obtained and press the button OK to confirm.
- Page 22 SETTINGS 10.12.2. Activate or deactivate the sound by ALARMS pressing the button SOUNDS BURRS CHANGE ALARM SOUNDS ADJUST WEIGHT DOSE 2 GRS SET UP ALARM RESET ALARM 10.13.3. To adjust the Weight of Dose 2 press 10.13. BURRS CHANGE ALARM 10.13.1.
-
Page 23: Cleaning
SETTINGS CLEANING 11.1. GENERAL CLEANING BURRS CHANGE 11.1.1. To ensure that the grinder functions properly, and produces the highest quality DOSE 2 WEIGHT IN GRS. grind possible, the parts that come into contact with coffee should cleaned periodically. GRAMS General Cleaning guidelines as follows: •... - Page 24 CLEANING 11.3. CLEANING THE COFFEE EXIT CHUTE CLEANING MODE 11.3.1. It is very important to maintain the exit chute clean of coffee in order to ensure the DOORS OPEN, PLEASE consistency of the dosis and the continued CLEAN WITH BRUSH functioning of the grinder.
-
Page 25: Maintenance
CLEANING MAINTENANCE 12.1. GENERAL WARNING The steps to follow are: In order to properly clean the bean hopper ( ), 12.1.1. Before performing any type of first empty out all remaining beans and fragments. maintenance you should: • Close the bean trap on the hopper ( ) and •... - Page 26 MAINTENANCE 12.3. GRINDING GROUP MAINTENANCE From that point, if your grinder have “Lock Load System” skip until the point 12.3.7 if To perform grind chamber maintenance not, keep following the next the steps please observe the following steps: 12.3.3. Loosen the grinding regulator screws 12.3.1.
- Page 27 MAINTENANCE 12.3.5. Loosen the upper burs support Only for grinders with a Lock Load System screws with a Hex Allen screwdriver #3, according to (Fig. 7). Remove the upper 12.3.7. To avoid losing the position of the holder by pulling upwards to access the regulator scale with respect to the current grinding cavity, clean the interior with the grinding point, it is essential to tighten the...
- Page 28 MAINTENANCE 12.3.9. Pull up holding the grind regulator 12.3.11. When the grinding regulator is in ( ), according to access the grinding cavity, place, lock the system by pulling back the clean the interior with the help of a brush levers ( ) (Fig.
- Page 29 MAINTENANCE 12.5. BATTERY REPLACEMENT 12.4. REPLACING THE SILICONE CURTAIN This grinder has a built-in battery back-up for saving operating information when the The silicon curtain ensures regularity in the grinder is shut down. When this battery is dose and reduces static electricity. Located spent, it must be replaced by another of the inside the coffee spout, can be replaced same characteristics: CR2032 (Lithium Cell...
- Page 30 MAINTENANCE Fig. 23 Fig. 24 Remove the top screws with a T10 Torx, and bottom screws with a #4 Allen key that hold the aluminium cover (Fig. 25) and pull to remove it (Fig. 26). Fig. 25 Fig. 26 Remove the battery from its holder inside the control panel and replace it with a new one (Fig.
-
Page 31: Declaration Of Conformity
Molí Barri, Parcela B - Pol. Ind. Can Barri - 08415 Bigues i Riells - Barcelona - Spain Ph. 34 93 703 13 00 - Fax 34 93 703 13 23 - www.compak.es K09650H00 | PROC-CAL/002/03 USER MANUAL | V. 06/04/2022... - Page 32 www.fsc.org...
Need help?
Do you have a question about the BOLT and is the answer not in the manual?
Questions and answers