Table of Contents
Advertisement
Quick Links
ADVANCED MANUAL
VHF/UHF DUAL BAND
TRANSCEIVER
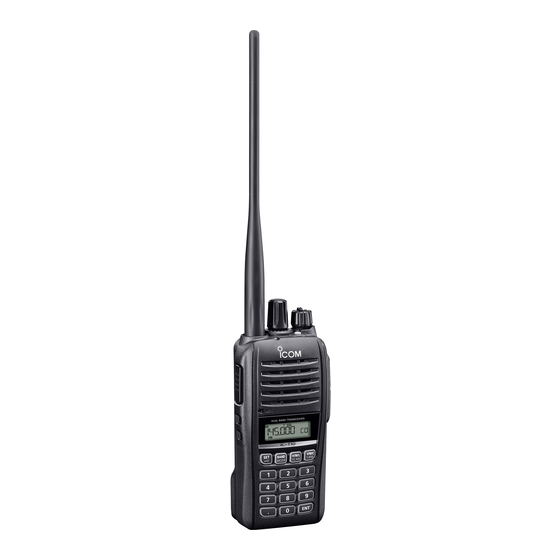
|T10
This manual describes instructions for advanced
features and instructions.
See the BASIC MANUAL that come with the
transceiver for precautions and basic operations.
INTRODUCTION
1 BATTERY CHARGING
2 MEMORY OPERATION
3 SCAN OPERATION
4 REPEATER AND DUPLEX OPERATIONS
5 SET MODE
6 OTHER FUNCTIONS
7 OPTIONS
Advertisement
Chapters
Table of Contents

Subscribe to Our Youtube Channel
Related Manuals for Icom IC-T10


Summary of Contents for Icom IC-T10
- Page 1 ADVANCED MANUAL INTRODUCTION VHF/UHF DUAL BAND TRANSCEIVER 1 BATTERY CHARGING |T10 2 MEMORY OPERATION 3 SCAN OPERATION 4 REPEATER AND DUPLEX OPERATIONS 5 SET MODE 6 OTHER FUNCTIONS 7 OPTIONS This manual describes instructions for advanced features and instructions. See the BASIC MANUAL that come with the transceiver for precautions and basic operations.
- Page 2 INTRODUCTION Thank you for choosing this Icom product. This product is designed and built with Icom’s state of the art technology and craftsmanship. With proper care, this product should provide you with years of trouble-free operation. ABOUT THE CONSTRUCTION OF THE MANUAL You can use the following manuals to understand and operate this transceiver.
- Page 3 INTRODUCTION ® ® ® FUNCTIONS AND FEATURES OF ADOBE ACROBAT READER The following functions and features can be used with Adobe Acrobat Reader. • Keyword search • Find screen Click “Find” (Ctrl+F) or “Advanced Search” (Shift+Ctrl+F) in the Edit menu to open the search screen. This is convenient when searching for a particular word or phrase in this manual.
-
Page 4: Table Of Contents
Section BATTERY CHARGING Battery information .................1-2 D Battery life ..................1-2 D Battery icon ..................1-2 D Attention to the swelled battery pack ..........1-2 Charging the battery pack ..............1-3 D Using the BC-213 rapid charger ..........1-3 External DC power operation ..............1-4 D Using an external power source .............1-4 Specifications for the battery charger and battery packs......1-4 D BC-213 rapid charger ..............1-4 D BP-280 Li-ion battery pack ............1-4... -
Page 5: Section 1 Battery Charging
BATTERY CHARGING Battery information D Battery life D Battery icon The approximate battery life (operating time) as Icon Battery status shown below is calculated under the following The battery has sufficient capacity. assumptions: • Power save setting: Auto The battery is exhausted a little. •... -
Page 6: Charging The Battery Pack
• CAUTION: DO NOT use a battery pack or charger (BP-280) that are not manufactured or approved by Icom. • BE SURE to turn OFF the transceiver. When the transceiver’s power cannot be turned OFF because of the battery exhaustion, detach the battery pack from the transceiver. -
Page 7: External Dc Power Operation
Specifications for the battery charger and battery packs D BC-213 rapid charger • Power source requirement: 12 V ~ 16 V DC or the specified Icom power adapter • Charging temperature range: 10°C ~ 40°C, 50°F ~ 104°F • Weight: Approximately 84 g, 3.7 oz (without power adapter) - Page 8 Section MEMORY OPERATION General description ................2-2 D Memory channel content ..............2-2 Selecting a Memory channel ..............2-2 D Using [DIAL] ..................2-2 D Using the Ten-Keypad..............2-2 Selecting a Call channel .................2-3 Entering Memory channels ..............2-3 Copying Memory content to the VFO .............2-4 Entering a memory name ...............2-5 D Selecting a display mode ..............2-5...
-
Page 9: Section 2 Memory Operation
MEMORY OPERATION General description Selecting a Memory channel In the Memory mode, you can quickly select the saved D Using [DIAL] memory channels. 1. Repeatedly push [V/M/C] to select the Memory Channel No. Usage mode. 0 ~ 199 Normal memory channels. The (M-CH) transceiver has 200 Memory channels. -
Page 10: Selecting A Call Channel
MEMORY OPERATION Selecting a Call channel Entering Memory channels Call channels are used for quick recall of most often Example: Entering 145.800 MHz into Channel 11 used operating frequencies. 1. Repeatedly push [V/M/C] to select the VFO mode. 1. Repeatedly push [V/M/C] to select the Call 2. -
Page 11: Copying Memory Content To The Vfo
MEMORY OPERATION Copying Memory content to the VFO It is convenient to operate on a frequency near a Memory or Call channel in the VFO mode. 1. Repeatedly push [V/M/C] to select the Memory mode or Call Channel mode. 2. Rotate [DIAL] to select a Memory Channel or Call channel to copy. -
Page 12: Entering A Memory Name
MEMORY OPERATION Entering a memory name Each memory channel can be given a name of up to 6 characters. Step 1. Selecting a display mode Step 2. Entering a memory name Select “nAmE” in the Display Mode item in the Initial Set mode, to display the channel name. - Page 13 Section SCAN OPERATION Scan Type ....................3-2 D VFO scan ..................3-2 D Memory scan ..................3-2 About Scans ...................3-3 D [DIAL] operation during a scan ............3-3 D Squelch setting for a scan ..............3-3 D Tuning step for a VFO scan ............3-3 D Scan Skip function ................3-3 D Operating mode during a scan ............3-3 D When a signal is received ...............3-3 VFO Scan ....................3-4...
-
Page 14: Section 3 Scan Operation
SCAN OPERATION Scan Type Scanning is a versatile function that can automatically search for signals. A scan makes it easier to locate stations to contact or listen to, or to skip unwanted channels or frequencies. D VFO scan D Memory scan Scans for signals within the specified frequency range. -
Page 15: About Scans
SCAN OPERATION About Scans D [DIAL] operation during a scan D Operating mode during a scan z Rotate [DIAL] to change the scan direction during a • The VFO scan uses the selected operating mode. scan. • During a Memory mode scan, the operating mode z Rotate [DIAL] to resume the scan when the scan is entered into the channel is used. -
Page 16: Vfo Scan
SCAN OPERATION VFO Scan The VFO scan searches for signals within the D VFO Scan type specified frequency range. There are the following types of VFO scans. ALL: Full scan 1. Repeatedly push [V/M/C] to select the VFO mode. bAnd: Band scan 2. -
Page 17: Memory Scan
SCAN OPERATION Memory Scan Setting/clearing a Skip Channel Enter two or more memory channels to run the The channels set as Skip channels are skipped during Memory Scan (p. 2-3). a scan. 1. Repeatedly push [V/M/C] to select the Memory D Setting/clearing a Skip channel mode. - Page 18 Section REPEATER AND DUPLEX OPERATION Accessing a repeater ................4-2 D Checking the Repeater input signal ..........4-3 D Using the 1750 Hz tone burst ............4-3 Duplex operation ..................4-4 D Setting the frequency offset ............4-4 D Setting the duplex direction ............4-4 D Duplex operation ................4-4 D Using the Duplex Reverse function ..........4-5 D Using the Auto Repeater function ...........4-5 D Off band indication ................4-5...
-
Page 19: Section 4 Repeater And Duplex Operation
REPEATER AND DUPLEX OPERATION Accessing a repeater A Repeater receives signals on one frequency, and Step 2. Transmitting then retransmits them on a different frequency. 1. Hold down [PTT] for 2 seconds. When using a Repeater, the transmit frequency is •... -
Page 20: D Checking The Repeater Input Signal
REPEATER AND DUPLEX OPERATION Accessing a repeater D Checking the Repeater input signal D Using the 1750 Hz tone burst A 1750 Hz tone is required to access many European You can check whether or not another station’s repeaters. transmit signal can be received directly (not through a repeater) by listening to the repeater input frequency. -
Page 21: Duplex Operation
REPEATER AND DUPLEX OPERATION Duplex operation The duplex operation shifts the transmit frequency up or down from the receive frequency by an offset amount. D Setting the frequency offset D Setting the duplex direction 1. Push [SET] to enter the Set mode. 1. -
Page 22: D Using The Duplex Reverse Function
REPEATER AND DUPLEX OPERATION Duplex operation D Using the Duplex Reverse function D Using the Auto Repeater function (For only the USA version) When the Duplex Reverse function is ON, the receive and transmit frequencies are reversed. When the operating frequency falls within the Repeater output frequency range, the Auto Repeater function automatically sets the Repeater settings 1. - Page 23 Section SET MODE Using Set Mode ..................5-2 D Using the Basic Set mode ..............5-2 D Using the Initial Set mode ...............5-2 Set Mode items..................5-3 Initial Set Mode items ................5-7...
- Page 24 SET MODE Using Set Mode You can use the Set mode to set infrequently changed values or function settings. The transceiver has two types of Set modes, as shown below. D Using the Basic Set mode D Using the Initial Set mode Example: Selecting a 20 kHz tuning step Example: Setting the Auto Power OFF Timer to 30 1.
- Page 25 SET MODE Set Mode items Tone/DTCS (Default: OFF) DTCS (Default: 023) Selects a tone type during FM mode operation. Selects a DTCS code to use for the DTCS squelch function. • OFF: Turns OFF the function DTCS codes: • tOnE: Repeater Tone •...
- Page 26 SET MODE Set Mode items Frequency offset (Default: 0.600*) Tone scan (Default: OFF) Sets the difference between the transmit and receive Selects whether or not to enable the Tone Scan frequencies for Repeater operation or Duplex function. operation. • OFF: Turns OFF the function.
- Page 27 SET MODE Set Mode items Backlight (Default: Auto) VOX function (Default: OFF) Selects a backlight option. Selects whether or not to enable the VOX function. • OFF: Turns OFF the Backlight. • OFF: Turns OFF the function. • On: Turns ON the Backlight. •...
- Page 28 SET MODE Set Mode items DTMF transmission (Default: kEy) Pushing a key while holding down [PTT] transmits the DTMF code assigned to the key. • kEy: [0] ~ [9]: Transmits (0) ~ (9). [SET]: Transmits (A). [BAND]: Transmits (B). [H/M/L]: Transmits (C).
- Page 29 SET MODE Initial Set Mode items Beep level (Default: 2) Auto power OFF (Default: OFF) Selects a key-touch beep level. Selects whether or not to automatically turn OFF the The key-touch beep level is linked to the audio output transceiver after inactivity for this set period of time. level.
- Page 30 SET MODE Initial Set Mode items DTMF speed (Default: 100) Power save (Default: Auto) Selects a rate at which DTMF memories send Selects an option for the Power Save function, which individual DTMF characters to accommodate your conserves the battery life. operating needs.
- Page 31 SET MODE Initial Set Mode items Voltage indication (Default: On) Earphone antenna (Default: OFF) Selects whether or not to display the battery voltage Selects whether or not to use the earphone antenna while turning ON the transceiver. for FM radio. •...
- Page 32 Section OTHER FUNCTIONS Using the DTMF memory ...............6-2 D Entering the DTMF code ..............6-2 D Monitoring the entered DTMF code ..........6-2 D Clearing the DTMF memory contents ..........6-2 Transmitting a DTMF code ..............6-3 D Using a DTMF memory channel .............6-3 D Manual DTMF code transmission ...........6-3 D Selecting the DTMF transmit speed ..........6-4 Tone squelch operation ................6-5...
-
Page 33: Section 6 Other Functions
OTHER FUNCTIONS Using the DTMF memory The transceiver can save up to 16 memories of a 24 D Monitoring the entered DTMF code digit DTMF code. You can check and hear the entered DTMF code. D Entering the DTMF code 1. -
Page 34: Transmitting A Dtmf Code
OTHER FUNCTIONS Transmitting a DTMF code The transceiver has two ways of transmitting a DTMF code sequence. D Using a DTMF memory channel D Manual DTMF code transmission Transmit the DTMF memory contents (p. 6-2). Transmit the DTMF code that you manually entered using the Ten-keypad. -
Page 35: D Selecting The Dtmf Transmit Speed
OTHER FUNCTIONS Transmitting a DTMF code D Selecting the DTMF transmit speed You can select the DTMF transmit speed. 1. Rotate [VOL] counter-clockwise to turn OFF the transceiver. 2. While holding down [SET], rotate [VOL] clockwise to turn ON the transceiver. •... -
Page 36: Tone Squelch Operation
OTHER FUNCTIONS Tone squelch operation The tone squelch opens only when you receive a Tone squelch types indication signal that includes a matching subaudible tone in the FM or FM narrow (FM-N) mode. You can silently wait for calls from other stations using the same tone. Also, the reversed tone squelch function mutes the squelch when a signal includes a matching subaudible Repeater tone (Example) -
Page 37: Dtcs Code Squelch Operation
OTHER FUNCTIONS DTCS code squelch operation The tone squelch opens only when you receive a DTCS codes indication signal that includes a matching DTCS code in the FM or FM narrow (FM-N) mode. You can silently wait for calls from others using the same tone. Also, a reversed tone squelch function mutes the squelch when you receive a signal including a matching DTCS DTCS code squelch... -
Page 38: Using The Tone Scan Function
OTHER FUNCTIONS Using the Tone scan function The Tone Scan function detects the subaudible tone frequency and DTCS code in a received signal. By monitoring a signal transmitted on a repeater input frequency, you can determine the tone frequency required to access the repeater. Step.1 Turning ON the Tone scan function 1. -
Page 39: Weather Channel Operation (For Only The Usa Version)
OTHER FUNCTIONS Weather channel operation (For only the USA version) There are ten weather channels for monitoring the National Oceanographic and Atmospheric Administration (NOAA) weather broadcasts. D Selecting a Weather channel D Using the Weather Alert function 1. Repeatedly push [V/M/C] to select the Weather NOAA broadcast stations transmit weather alert tones Channel mode. -
Page 40: Using The Vox Function
OTHER FUNCTIONS Using the VOX function The Voice Operated eXchange (VOX) function toggles Connection (IC-T10) the transceiver between transmit and receive by your voice. This function provides hands-free operation. You can use the VOX function with the optional HS-94LWP or HS-95LWP. -
Page 41: Using The Simple Mic Function
OTHER FUNCTIONS Using the Simple MIC function The Simple MIC function enables controlling the • SImPLE transceiver through your control unit attached to the Selects a Call channel. [SP] jack. Turns the Monitor function ON or OFF. Selects memory channel 0. Remote control unit To the [SP]... -
Page 42: Cloning
OTHER FUNCTIONS Cloning The transceiver has a data copying capability. This function is useful for copying all of the settings and entered contents from one transceiver to another. D Cloning between two transceivers D Cloning using a PC An optional OPC-474 programming cable or 3.5 mm Copy the data using the optional CS-T10 programming software and an OPC-478UC/OPC- (1/8 inch) stereo jack cable (user supplied) is required. -
Page 43: Resetting
2. While holding down [SET], [BAND], and [H/M/L], clockwise to turn ON the transceiver. rotate [VOL] clockwise to turn ON the transceiver. • “Icom” and the voltage are displayed, and then the • “CLEAR,” “Icom,” and the voltage are displayed, and operating frequency is displayed. - Page 44 Section OPTIONS Options ....................7-2 D Microphone ..................7-2 D Battery pack ..................7-2 D Chargers/Adapters/DC cables ............7-2 D Others .....................7-2 D Detaching/Attaching the jack cover ..........7-3 D Using the optional speaker microphone .........7-4 D Panel description ................7-4...
- Page 45 OPTIONS Options D Microphone D Others • MB-130 charger bracket • HM-158LA/HM-159LA/ HM-168LWP/HM-222HLWP speaker microphone Mounts the BC-213 desktop charger on a variety Combination speaker microphone that provides of places in a vehicle. convenient operation while the transceiver is hanging •...
- Page 46 OPTIONS Options D Detaching/Attaching the jack cover The jack cover is attached using the M2 × 6 mm screws. Detaching: Attaching: 1. Remove the screws (1). 1. Attach the jack cover (1). 2. Remove the jack cover (2). 2. Attach the screws (2). CAUTION: •...
- Page 47 OPTIONS Options D Using the optional speaker microphone HM-222HLWP: Use the optional speaker microphone on page 7-2, as shown below. Attaching: Microphone z Attach the microphone�s plug to the [MIC/SP] jack, and then tighten the screws using your finger. Speaker L Turn OFF the transceiver before attaching or [PTT] detaching the microphone.
- Page 48 How the World Communicates A7682-4EX-1 1-1-32 Kamiminami, Hirano-ku, Osaka 547-0003, Japan © 2022 Icom Inc. Jul. 2022...
Need help?
Do you have a question about the IC-T10 and is the answer not in the manual?
Questions and answers