Table of Contents
Advertisement
Quick Links
Advertisement
Table of Contents

Related Manuals for Watchguard AP332CR


Summary of Contents for Watchguard AP332CR
- Page 1 WatchGuard AP332CR Hardware Guide WatchGuard AP332CR Outdoor Access Point...
- Page 2 WatchGuard Technologies, Inc.
- Page 3 Guide revised: 7/11/2022 Copyright, Trademark, and Patent Information Copyright © 1998 – 2022 WatchGuard Technologies, Inc. All rights reserved. All trademarks or trade names mentioned herein, if any, are the property of their respective owners. Complete copyright, trademark, patent, and licensing information can be found in the Copyright and Licensing Guide, available online at https://www.watchguard.com/wgrd-help/documentation/overview.
-
Page 4: Table Of Contents
Contents WatchGuard AP332CR Hardware Guide Access Point Management About Your Hardware Hardware Specifications Environmental Requirements Hardware Description Bottom Panel Top Panel Rear Panel Side Panel Mount and Connect the Access Point Wall Mount Installation Pole Mount Installation Antenna Installation Connect the Ground Wire... - Page 5 CISPR 22 Statement Mexico NOM Japan Statement Japan VCCI Class B Statement Taiwan NCC Statement RoHS Statement WEEE Statement REACH Certificate of Compliance Declaration of Conformity WatchGuard Technologies, Inc.
-
Page 6: Watchguard Ap332Cr Hardware Guide
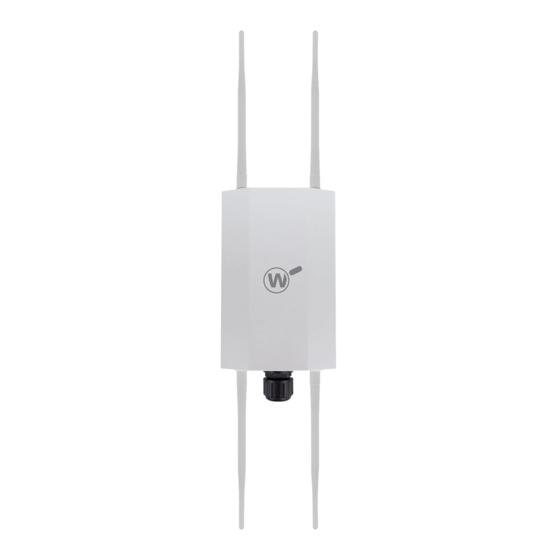
The WatchGuard AP332CR is designed for indoor or rugged outdoor deployment conditions and built with an industrial-rated IP67 enclosure. The AP332CR features 802.11ax 2x2 2.4 GHz and 5 GHz dual concurrent radios that support data rates up to 1148 Mbps on the 2.4 GHz band and 2402 Mbps on the 5 GHz band. -
Page 7: Access Point Management
You can manage the AP332CR with WatchGuard Cloud. WatchGuard Cloud delivers a simplified platform for Wi-Fi management to easily deploy, configure, and monitor your wireless networks. For more information on how to set up your access point with WatchGuard Cloud, see watchguard.com/start. -
Page 8: Environmental Requirements
WatchGuard AP332CR Hardware Guide Environmental Requirements To safely install your WatchGuard access point, we recommend that you: Install the device per local regulations Make sure the device has adequate clearance for air flow and cooling This equipment is not suitable for use in locations where children are likely to be present. -
Page 9: Hardware Description
WatchGuard AP332CR Hardware Guide Hardware Description Bottom Panel 2.4GHz Antenna connector for the 2.4 GHz radio. LAN (PoE) The LAN (PoE) port is a 2.5 GbE port that connects the access point to a wired LAN connection through a switch or hub. This port also provides PoE+ (802.3at) power for the access point. -
Page 10: Rear Panel
WatchGuard Cloud device registration, and the connection to WatchGuard Cloud. The access point briefly passes through each stage until the device is connected to WatchGuard Cloud and shows a solid blue LED indicator. If the access point remains in the same state for a long period of time without a solid blue LED indicator status, there might be a network issue, activation or feature key issue, or a problem with your WatchGuard Cloud account. - Page 11 WatchGuard account. The license key must be for a feature key WatchGuard Standard or USP Wi-Fi license for Wi-Fi in WatchGuard Cloud. Make sure the access point is connected to the network and has received an IP address from DHCP.
- Page 12 Cloud Access Point Firmware 1.1.4-0 and Lower Wi-Fi in WatchGuard Cloud access points that run firmware 1.1.4-0 and lower have basic LED indicators that can show if the device is successfully connected to WatchGuard Cloud. If the access point remains in the same state for a long period of time without a solid blue LED indicator status, there might be a network issue, activation or feature key issue, or a problem with your WatchGuard Cloud account.
- Page 13 WatchGuard In most cases a network issue, blocked port, licensing, or Cloud WatchGuard Cloud account issue will result in the access point not connecting or appearing in your WatchGuard Cloud account. Make sure you have activated your access point with a valid device serial number and license key in your WatchGuard account.
- Page 14 Device did not receive an IP address from DHCP WatchGuard Cloud Device cannot connect to *.watchguard.com or *.watchguard.io because of a network issue or blocked port Use the access point command line interface (CLI) to run network connectivity diagnostic tests. For more information, Access Point Command Line...
-
Page 15: Mount And Connect The Access Point
WatchGuard AP332CR Hardware Guide Mount and Connect the Access Point Your package includes these accessories: The MAC address and serial number of your access point are printed on a label on the back of the device. Make sure you record this information before you mount the device. -
Page 16: Wall Mount Installation
WatchGuard AP332CR Hardware Guide Wall Mount Installation Use the supplied wall-mounting accessories to install the access point on a wall. 1. Mark the location on the wall surface for the four mounting holes of the wall mounting bracket. Use an appropriate drill bit to drill holes that are 8.1mm diameter and 26mm depth in the markings and hammer the bolts into the openings. -
Page 17: Pole Mount Installation
WatchGuard AP332CR Hardware Guide Pole Mount Installation Use the supplied pole mount accessories to install the access point on a pole. 1. Insert the pole mount clamps in the tabs on the mounting bracket and wrap the clamps around the pole. -
Page 18: Antenna Installation
WatchGuard AP332CR Hardware Guide Antenna Installation The access point includes four antennas. The access point requires two antennas for each radio. On the top and bottom of the access point, there are two connectors for the 2.4 and 5 GHz radios Insert the antennas into the connectors for each radio and turn clockwise to tighten. -
Page 19: Connect The Access Point
WatchGuard AP332CR Hardware Guide Connect the Access Point Plug one end of the Ethernet cable from your network into the LAN (PoE) port on the bottom panel of the access point. Make sure the other end of the Ethernet cable is connected to your network through a hub, switch, or injector with PoE+ (802.3at) power enabled. -
Page 20: How To Assemble The Weatherproof Connector
WatchGuard AP332CR Hardware Guide How to Assemble the Weatherproof Connector Use these instructions to connect the Ethernet cable to the access point through the weatherproof connector. WatchGuard Technologies, Inc. -
Page 21: How To Disassemble The Weatherproof Connector
WatchGuard AP332CR Hardware Guide How to Disassemble the Weatherproof Connector Use these instructions to disconnect the Ethernet cable from the weatherproof connector. WatchGuard Technologies, Inc. -
Page 22: Ethernet Power Injector (Optional)
This device complies with IEEE 802.3at/af PoE specifications. Do not use any PoE adapters that are not IEEE 802.3at/af compliant as they may damage your device. To connect an Ethernet Power Injector to the WatchGuard access point: 1. Plug the Ethernet Power Injector into an AC power source. - Page 23 WatchGuard AP332CR Hardware Guide Ethernet Power Injector Specs 30W maximum Output Power Ethernet Interfaces LAN: RJ-45 for 10/100/1000/2500 Mbps data POE: RJ-45 for 10/100/1000/2500 Mbps data and power Voltage: Pin4, 5:54V, Pin7, 8:Return Indicator Power: Green Operating: 0 - 40°C (32 - 104°F) Temperature Storage: -30 - 80°C (-22 - 176°F)
-
Page 24: Notices
WatchGuard AP332CR Hardware Guide Notices All WatchGuard products are designed and tested to meet strict safety requirements. These requirements include product safety approvals and other global compliance standards. Please read these instructions carefully before operating the product, and refer to them as needed to ensure the continued safe operation of your product. -
Page 25: Ce Notice
This equipment should be installed and operated with minimum distance 40cm between the radiator & your body. CE Notice The CE symbol on your WatchGuard Technologies equipment indicates that it is in compliance with the Electromagnetic Compatibility (EMC) directive and the Low Voltage Directive (LVD) of the European Union (EU). - Page 26 WatchGuard AP332CR Hardware Guide Lorsqu’il y a lieu, les types d’antennes (s’il y en a plusieurs), les numéros de modèle de l’antenne et les pires angles d’inclinaison nécessaires pour rester conforme à l’exigence de la p.i.r.e. applicable au masque d’élévation, énoncée à la section 6.2.2.3, doivent être clairement indiqués Radiation Exposure Statement This equipment complies with ISED radiation exposure limits set forth for an uncontrolled environment.
-
Page 27: Eu Declaration Of Conformity
WatchGuard AP332CR Hardware Guide EU Declaration of Conformity This device complies with the essential requirements of the RED Directive 2014/53/EU. The following test methods have been applied in order to prove presumption of conformity with the essential requirements of the RED Directive 2014/53/EU:... - Page 28 WatchGuard AP332CR Hardware Guide EN 300 328 V2.2.2 Electromagnetic compatibility and Radio spectrum Matters (ERM); Wideband transmission systems; Data transmission equipment operating in the 2.4 GHz ISM band and using wide band modulation techniques; Harmonized EN covering the essential requirements of article 3.2 of the RED Directive EN 301 893 V2.1.1...
-
Page 29: Brazil Anatel
WatchGuard AP332CR Hardware Guide Brazil ANATEL Este equipamento não tem direito à proteção contra interferência prejudicial e não pode causar interferência em sistemas devidamente autorizados. CISPR 22 Statement Este produto não é apropriado para uso em ambientes domésticos, pois poderá causar interferências eletromagnéticas que obrigam o usuário a tomar medidas necessárias para minimizar estas... -
Page 30: Rohs Statement
WEEE statutes, and that the recovery of our product per the specific EU country legislative requirements is seamless for our product’s end users. If you have a WatchGuard product that is at its end of life and needs to be disposed of, please contact WatchGuard Customer Care Department at: U.S. - Page 31 WatchGuard do not need to be registered for the following reasons: WatchGuard does not import more than 1 metric ton per year of a substance as defined by REACH. WatchGuard products are non-chemical products that are not designed to release any substance under normal and reasonably predictable application.
-
Page 32: Declaration Of Conformity
WatchGuard AP332CR Hardware Guide Declaration of Conformity WatchGuard Technologies, Inc. - Page 33 WatchGuard Technologies, Inc.
Need help?
Do you have a question about the AP332CR and is the answer not in the manual?
Questions and answers