
Related Manuals for Biobase BK-HS32


Summary of Contents for Biobase BK-HS32
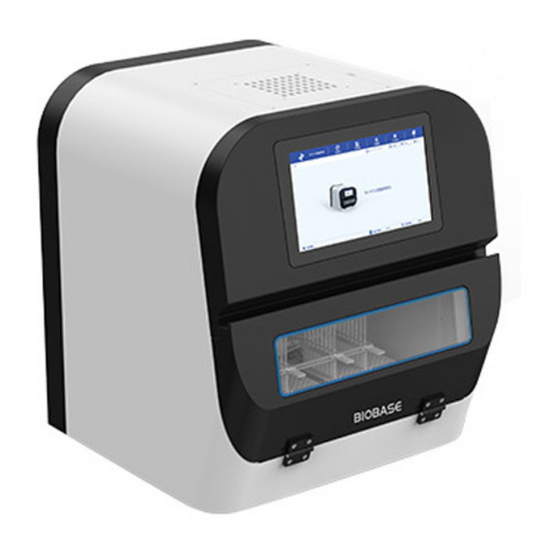
- Page 1 Automatic Nucleic Acid Extraction System BK-HS32 User Manual BIOBASE GROUP Version 2020.09...
-
Page 2: Preface
The intellectual property rights of this operation manual and its corresponding instrument belong to Biobase Biodustry(Shandong) Co., Ltd. Without the written consent of Biobase Biodustry(Shandong) Co., Ltd. no individual or organization may copy, modify or translate any part of this manual. - Page 3 BK-HS32, please see the corresponding chapter for details. Before using this instrument, users should read this manual carefully for better understanding and command of the...
- Page 4 Note: The readers of this Operation Manual are the following professionals: daily operation personnel; Maintenance and troubleshooting personnel; People who learn to operate. The "extractors, instruments, and systems" mentioned in this article all refer to "BK-HS32Automatic Nucleic acid extraction system".
-
Page 5: Table Of Contents
Content Preface..............................1 1.Foreword............................. 6 1.1 Symbols............................. 6 1.2 Security precautions........................7 1.2.1 Work environment requirements..................7 1.2.2 Electricity safety......................8 1.2.3 Electrical danger......................9 1.2.4 Mechanical danger......................9 1.2.5 Electromagnetic interference prevention.................9 1.2.6 Biological risk protection....................10 1.2.7 Other precautions......................10 1.3 Accessories list........................ - Page 6 3.3.2 Edit..........................20 3.3.3 System default program....................21 3.4 Program management......................22 3.4.1 Language settings......................23 3.4.2 Instrument Debug......................23 3.4.3 Import/Export........................ 23 3.4.4 Software upgrade......................23 3.5 UV disinfection........................24 3.6 About............................25 3.7 Exit............................26 4.Maintenance............................27...
-
Page 7: Foreword
1.Foreword 1.1 Symbols You may see these signs, labels and symbols used with text on the BK-HS32 to remind operators of the warnings and potential dangers, please understand the meaning of the symbols before use. Symbols Description Biological risk: This mark appears on the instrument as a warning of the risk of contamination associated with biological or chemical materials. -
Page 8: Security Precautions
Text description in the manual. Text Description Used to illustrate important information in the action steps or other Notice things that need to be brought to the user's attention. Warning Remind the user to follow the instructions, otherwise it may result in personal injury. -
Page 9: Electricity Safety
Do not place objects on the instrument. In the event of a spill, immediately turn off the power and contact Biobase Biodustry(Shandong) Co., Ltd. Customer Service or your local service representative. Do not plug or unplug the power supply with wet hands. -
Page 10: Electrical Danger
of this instrument. If the instrument may be damaged, disconnect it from the power outlet and do not operate it again. 1.2.3 Electrical danger To prevent electrical hazards, please observe the following precautions. Warning: The operator must always observe the electrical safety operation regulations. -
Page 11: Biological Risk Protection
1.2.6 Biological risk protection To prevent biohazard effectively, please observe the following precautions. Biological risk: All liquids and solids in the laboratory are considered to be biological hazards and the user must take general laboratory precautions. All clinical samples are considered to be potentially infectious. Improper use may result in infection. -
Page 12: Module Function Introduction
2. Module function introduction 2.1 Performance parameters function Technical parameters Serum, plasma, lymph, allelic fluid, semen, saliva, Applicable specimen types: sputum, alveolar lavage fluid, oral swab, cell culture supernatant or other liquid samples. extraction method Magnetic Bead Method Sample throughput Processing volume 20-1000ul Processing time... -
Page 13: Module Structure And Function
2.2 Module structure and function 2.2.1 Structure of magnetic rod and rod sleeve Figure 3-1 The magnetic rod module and the rod sleeve module are independent and independently controlled by the dual Z-axis motors. The rod sleeve module can run independently during the shake and lysis process, and the magnetic rod module and the rod sleeve module also can run as a whole during adsorption process. -
Page 14: Function Of Hepa
2.2.4 Function of HEPA This instrument uses the filter without partitions, which is made of fine glass fiber paper and hot melt glue, and is used for air purification under normal temperature, normal pressure and normal humidity. The HEPA filter can filter the aerosol generated when the instrument is heating or shaking and the dust in daily work. -
Page 16: Operation Guidance
3.Operation guidance 3.1 Boot Turn on the power switch of the automatic nucleic acid extractor, turn on the instrument and perform a system reset. After the reset is successful, it will enter the main menu interface. The main interface contains 5 sub-menus such as "Run", "Program Manage", "Instrument Manage", "UV Operator", and "About", as shown in Figure 3-1. -
Page 17: Program Viewing
Figure 3-2 3.2.1 Program viewing Choose a program and click [Select] in the “Run” interface to entering the interface as Figure 3-3, which displays the detailed steps of the program, including the steps name and the time of each step. Figure 3-3 3.2.2 Program running Choose a program and click [Run] in the “Run”... -
Page 18: Alarming
Figure 3-4 After clicking [Start], the program starts to run, [Step Remaining Time] is displayed as the remaining running time of the current step, and [Total Remaining Time] is displayed as the overall remaining running time of the program. After the program starts running, the [Pause] and [Stop] keys will change from gray to clickable. Click [Pause] to pause the program operation, and the [Pause] button to switch to [Continue], click [Stop], the instrument stops the program operation and automatically resets. -
Page 19: Program Management
Figure 3-5 Common types of alarm information are as follows: Reset failure of magnetic rod and magnetic sleeve X! Magnetic sleeve Z reset abnormally! The magnet Z is reset abnormally! Cleavage temperature sensor abnormality! Elution temperature sensor abnormality bit! The cracking position oscillates abnormally! Elution bit abnormal oscillation! Safety door open! Handling method after alarm:... -
Page 20: Add
Figure 3-6 3.3.1 Add Click [Add] to enter the interface as shown in Figure 3-7 to create a new program. Click [Add] after "Program Name" to set the program name, and the [Add] button is replaced with [Cancel]. After entering the program name, the following [Save] button changes from gray to clickable, click [Save] to save the program name settings. -
Page 21: Edit
3.3.2 Edit Select the program you want to modify in the "Program Manage" interface, and then click [Edit] to enter the "Program Edit" interface, as shown in Figure 3-8, where you can see each step of the program. Select a step to edit the parameters of that step. Figure 3-8 ID: The sequence of steps in the program. -
Page 22: System Default Program
Delete: Delete the selected step. Return: Return to the upper interface. 3.3.3 System default program Figure 3-9 For example, select the "DNA/RNA" program, click [Select] to enter the interface as shown in Figure 3-10. Figure 3-10 Step Description Name The operating position is in column 2 of the deep-well plate. There is no waiting time during the operation. -
Page 23: Program Management
no waiting time during the operation. The mixing time is 15 min. The mixing mode is vertical oscillation and the mixing rate is high. There is need to be heated to 90℃ before operation. The number of magnetization is 2 times. This step The processing volume is 800ul. The operating position is in column 3 of the deep-well plate. -
Page 24: Language Settings
3.4.1 Language settings Click [Language Settings] to switch the software between Chinese and English, as shown in Figure 3-12.(Need a password, you can contact the after-sales engineer.) Figure 3-12 3.4.2 Instrument Debug The “Instrument debugging” interface can set the instrument motion parameters and position parameters, which have been set before leaving the factory and usually not need to be modified. -
Page 25: Uv Disinfection
shown in Figure 3-14. Click the circuit board module that needs to be upgraded, then select the .bin file that needs to be upgraded, and then click [Upgrade] to complete the module upgrade. As shown in Figure 3-15. Figure 3-14 Figure 3-15 3.5 UV disinfection Click [UV Operator] to enter the interface shown in Figure 3-16. -
Page 26: About
Figure 3-16 Note: 1) At the end of the disinfection time, the system will automatically turn off the UV lamp, or the operator can turn off the UV lamp according to the actual situation. 2) During the UV disinfection process, no icons except UV disinfection function can be used. Other icons can be used only when the UV lamp is off. -
Page 27: Exit
Figure 3-18 3.7 Exit After clicking the [Exit] button in the upper right corner, a prompt box as shown in Figure 3-19 is displayed. Figure 3-19 Shut down: Turn off the industrial computer. Reboot: Reboot the industrial computer. Exit software: Only exit the software, the interface returns to the main interface of the industrial computer. -
Page 28: Maintenance
4.Maintenance 1) Please read the operating instructions carefully before using the instrument. 2) After the testing, turn off the power supply of the instrument. Please use absorbent cotton dipped in 75% ethanol for wiping the cabin instead of pouring ethanol into the cabin directly. After the ethanol is dried, turn on the UV lamp to disinfecting more than 30 minutes. - Page 29 BIOBASE GROUP 2# building, No.9 Gangxing Road, High-tech Zone, Jinan City, Shandong Province, China Tel: +86-531-81219803/01 Fax: +86-531-81219804 Inquiry: export@biobase.com Complaints: customer_support@biobase.cc After-sales service: service_sd@biobase.cc; service_ivd@biobase.cc Web: www.biobase.cc/www.meihuatrade.com / www.biobase.com...
Need help?
Do you have a question about the BK-HS32 and is the answer not in the manual?
Questions and answers