
Subscribe to Our Youtube Channel
Related Manuals for Biobase BSC-4FA2-GL


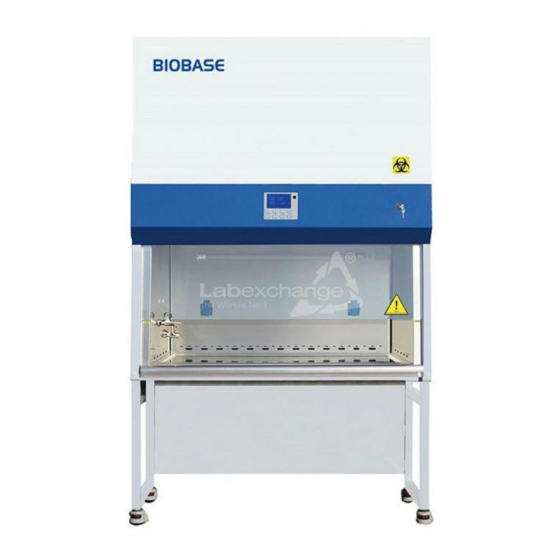
Summary of Contents for Biobase BSC-4FA2-GL
- Page 1 Biosafety Cabinet Class II A2 BSC-4FA2-GL/BSC-6FA2-GL User Manual BIOBASE GROUP Version 2021.06...
-
Page 2: Preface
Preface Thank you very much for purchasing our class II A2 Biosafety Cabinet. Please read the “Operating Instructions” and “Warranty” before operating this unit to assure proper operation. After reading these documents, be sure to store them securely together with the “Warranty” at a hand place for future reference. -
Page 3: Table Of Contents
Content Preface..............................1 Content..............................2 1.Unpacking,Installation,Debugging....................4 1.1 Unpacking..........................4 1.2 Accessories checking....................... 6 1.3 Installation conditions and using environment................ 7 1.4 Installation..........................7 1.5 Checking after installation..................... 11 1.6 On-site debugging........................12 1.7 Test and standard........................12 2. User Instructions..........................14 2.1 Product instruction......................... 14 2.1.1 Product concept......................14 2.1.2 Application Range....................... - Page 4 2.5.3 Clean process....................... 22 2.5.4 Vent tank........................22 2.5.5 Necessary disinfection....................23 2.6 Replacement part list......................23 2.7 Wiring diagram........................25 3.Common faults & solution......................26 3.1 Common faults & solution.....................26 3.1.1 Warning and reminder....................26 3.1.2 Trouble shooting......................26 3.1.3 Simple accessories replacement...................27 3.2 Label Description........................28 4.
-
Page 5: Unpacking,Installation,Debugging
1.Unpacking,Installation,Debugging Please firstly check if packing box is in good condition. If the packing box is damaged, please take photos. 1.1 Unpacking Choose the proper unpacking method according to the actual situation. Method 1 Necessary tools for unpacking: Electric drill with hexagon dead M8 Picture 1 Method 2 Use M8 Wrench to unpack Picture 2... - Page 6 Picture 3 Notes: 1) Check the package after receiving the device. Broken glass or other visible damage must be indicated in the equipment receipt, and immediately notify the shipper. Note: Equipment cannot be returned to the factory, unless receive return authorization! 2) If the device is transported in cold weather, please place it in the area for 24 hours at room temperature before putting it in working place.
-
Page 7: Accessories Checking
Model Position Quantity Main Body Wooden box 1unit Base Stand Placed in two carton box 1set UV Lamp (T6 30W) BSC-4FA2-GL Top or back of main body UV Lamp (T6 40W) BSC-6FA2-GL Protective tube(12.5A) 2pcs Protective tube(6.3A) 3pcs Protective tube(2.5A) -
Page 8: Installation Conditions And Using Environment
1.3 Installation conditions and using environment To avoid disturbances to the safety cabinet and its operator, follow the following guidelines, while determining a suitable location for the cabinet: a. The distance from the plane of the aperture to any circulation space should be at least 1000 mm, so as to preserve a zone undisturbed by anyone other than the operator. - Page 9 components. If necessary, test filter and the fixed bolt on the front panel, these bolts should not be too tight. If you need to check the surface of the air filter, you can loosen bolts fixed well wind network and take it out carefully from the front. 7) Check if the work place stable.
- Page 10 Picture 5 Aligned the mounting holes on the bottom of the cabinet side with the locating bolts, slow down the cabinet on the mounting base. Picture 6...
- Page 11 Take out the M10*20 Hexagon socket head screws, Flat washer 10, Spring washer 10 from the accessory box, and fasten tightly according to Picture 6. c. Installation of Drain valve Picture 7 1. Drain valve connector 2. Shim 3. Safety cabinet bottom installation holes 4.
-
Page 12: Checking After Installation
Picture 9 1. Tighten nut 2.The tap/gas tap Pick up the water tap, gas tap and tightening nut, install as shown in Picture 9. 1.5 Checking after installation Checking Items Normal situation Wind speed display Inflow 0.53m/s, downflow 0.33m/s Pressure display exhaust filter80-120Pa, downflow filter 80-120Pa Fan operation The fan running... -
Page 13: On-Site Debugging
3) Press the LIGHT button on control panel, turn on the lights. If the lamp is not bright, please check lamp-tube or socket, it may course loose between the lamp and lamp holder in the carrying process. 4) Press UV button on the control panel; turn on the UV lamp and to check whether UV light is working properly. - Page 14 entering the opening of the work area has been identified when designs the Biosafety Cabinet. The test should be conformed the rules of the NSF49. The opening air velocity testing data see the APPENDIX 1. To adjust the fan speed adjustment should be according to the data specified in the APPENDIX 1. To set the air velocity of the opening work area correctly.
-
Page 15: User Instructions
2. User Instructions 2.1 Product instruction 2.1.1 Product concept Biosafety Cabinet meet the standards of NSF/ANSI49-2012. However, the A/B3 is the old version. The equipment has the following three functions: Protect the operators against the hazardous particles or hazardous particles in the air. Provide the clean working area, prevent the air pollutants from touching the working bench. -
Page 16: Circuit Of Digital Control
sampling dish. Correct operation can make sure there is no cross infection of the samples in the cabinet. (h) Note: The operator’s arm and hand maybe the pollution source, so the operator must wear sterilized gloves or wash hands using sterilization soap. The used gloves should be gotten off from the sleeve of lab-gown. -
Page 17: Using Of Uv Lamp
Whether the safety cabinet is working, the exhaust hood can always provide continuous stable gas flow exhausting outdoor. The total exhaust air rate of the exhaust hood is no less than 100m3/h of safety cabinet’s gas displacement, gas displacement of safety cabinet BSC-4FA2-GL,BSC-6FA2-GL are separately 590m3/h and 825m3/h. - Page 18 Flow alarm system is an independent software package programmed in advance to monitor the abnormal of air volume. It alarms when the air volume exceed normal value. 2.1.11Technical Parameter Model BSC-4FA2-GL BSC-6FA2- GL Technical parameter Rated voltage AC 220V±10% □...
-
Page 19: Structural Composition
2.2 Structural composition Picture 12 1.Air Outlet safety guard 5.Alarm rest plate 2.Control panel 6.UV lamp 3.LCD display 7. IV bar 4.Fluorescent lamp 8. Base stand 2.3 Control panel Picture 13... - Page 20 1.UV lamp 14.Glass window up status 2.Fluorescent lamp 15. UV status 3.Blower 16.Socket status 4.Socket 17. Fluorescent lamp status 5.Glass window up 18. Blower status 6.Glass window down 19. Exhaust filter differential pressure 7.Mute 20. Inflow velocity 8.Power 21. Supply filter differential pressure 9.Alarm status 22.
-
Page 21: The Usage Of Remote Control
: To control socket power status. : Press MUTE button to stop voice prompt : Press UP button, glass window will raise. Stopping at10inch distance units panel. Continue to press UP button until it reached its lowest point, glass window will stop move when loose the button. : Press Down button, glass window will fall down. - Page 22 Functions of Control panel: 1.Power 2.Sub 3.Install Timer Picture 14 4.Confirm 5.Cancel 6.Turn Up(+) 7.Turn Down(-) 8.Blower status(FAN) 9.UV lamp(UV) 10.Fluorescent lamp (LIGHT) 11.Socket status(SOCKET) 12.Mute status (MUTE) 13.Glass window up status(UP) 14.Glass window up status(DOWN) Remote Control Reservation Time (SUB) a.
-
Page 23: Methods And Procedures For Disinfection
c. After the time is confirmed, the Timer function starts. When the time counts down to zero, all the functions will be off, the cabinet will be in standby mode. Application of Reservation Time Biosafety Cabinet is equipped with special UV lamp. When turning on or turning off the cabinet, sterilization time of UV lamp should be at least 30 minutes. -
Page 24: Necessary Disinfection
-Start an entirely different working program -When the safety office or safety committee requires Note: Only the safety office or safety committee can determine the right disinfection method. 2.6 Replacement part list BSC-4FA2-GL Replacement parts list Designation Specification @aba01 Lamp holder T8... - Page 25 BSC-6FA2-GL Replacement part list Designation Standard @abb01 Lamp holder T8 FL011-W @abb02 UV Lamp T6 40W @abb03 Fluorescent Lamp LED 22W @abb04 UV lamp ballast TBE-232FWc F40/T8 @abb05 Upper filter (Exhaust filter) 1240*470*69 @abb06 Down-flow filter (Supply filter) 1700*470*69 @abb07 Wheel:DD10-7 3/4P Motor:5SDA39RL @abb08...
-
Page 26: Wiring Diagram
2.7 Wiring diagram W H I T E ( 1 4 A W G ) B L A C K ( 1 4 A W G ) Y e l l o w ( 2 0 A W G ) R E D B L A C K Y E L L O W... -
Page 27: 3.Common Faults & Solution
3.Common faults & solution 3.1 Common faults & solution 3.1.1 Warning and reminder Digital display of pressure difference, digital velocity display, audible and visual alarm system. 1) Over safety height alarm for front window. There will be audio and visual alarm when front window is lifting over safety height. Same time LCD display will twinkle exclamation mark. -
Page 28: Simple Accessories Replacement
(a)The speed of the fan is set incorrectly Air speed too (b)Check whether the HEPA filter is blockage, check pressure readings (c)Air flow need balance between input and output. Front window (a)Check whether the circuit board fuse F8 6.3A is burn out doesn’t work (b)Motor damaged, replace the motor (a)Didn’t turn on the socket... -
Page 29: Label Description
Picture 17 2)Replace the UV lamp UV lamp should be replaced regularly according to the frequency of use, when using UV lamps reach to the time of 600 hours, we recommend to replace the lamp. When replacing, first make sure the power is off, Rotary screw off the tubes, take corresponding models of the UV lamp tubes, and then rotary screw the bulb and take it off, then take the correspondence type of lamp, and put it to the lamp holder and and rotary screw in reverse direction.After replacing the UV lamp, it needs to keep... - Page 30 Picture20 3)Glass door super elevation warning label Picture 21 4)MET Picture 22 5)Warning note Picture 23 6)DECONTAMINATE note Picture 24...
-
Page 31: Warranty
4. Warranty We provide warranty for all Biosafety Cabinet that purchase from our company,and will abide by the following terms and conditions: (a) 18 months warranty period is as follows; Warranty is 12 months after delivery,include the machine and parts; The following 6 months only guarantee parts;... -
Page 32: Annex 1
Biosafety Cabinet The setting of the downflow and inflow velocity Measured by Air Flow Anemometer The reading of the Highest Model type Inflow Velocity Downflow Velocity point and lowest point Average BSC-4FA2-GL 0.505-0.555m/s 0.305-0.355m/s ±0.08m/s Average BSC-6FA2-GL 0.505-0.555m/s 0.305-0.355m/s ±0.08m/s... - Page 33 BIOBASE GROUP 2# building, No.9 Gangxing Road, High-tech Zone, Jinan City, Shandong Province, China Tel: +86-531-81219803/01 Fax: +86-531-81219804 Inquiry: export@biobase.com Complaints: customer_support@biobase.cc After-sales service: service_sd@biobase.cc; service_ivd@biobase.cc Web: www.biobase.cc/www.meihuatrade.com / www.biobase.com...
Need help?
Do you have a question about the BSC-4FA2-GL and is the answer not in the manual?
Questions and answers