Table of Contents
Advertisement
Advertisement
Table of Contents

Related Manuals for Biobase BKMZB


Summary of Contents for Biobase BKMZB
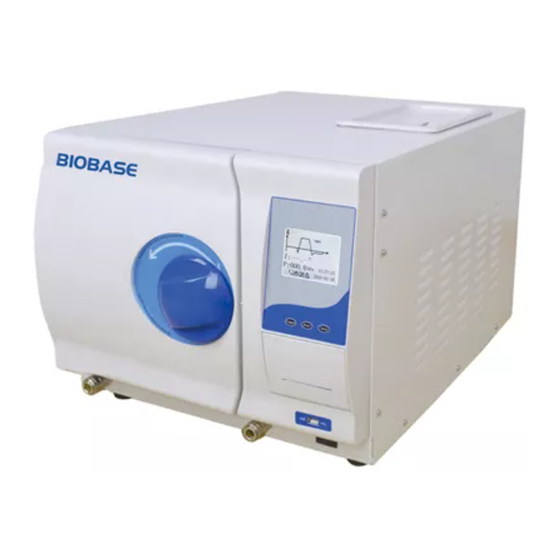
- Page 1 Table-Top Autoclave BKMZB User Manual BIOBASE GROUP Version 2021.02...
- Page 2 Preface Thank you for choosing our autoclave, please read the operation manual carefully before using it. Safety Tips: This sign indicates internal earthing protection of the machine. Scald-proof This sign can be seen after opening the door. Important safety tip This prompts the operator this part is the important safety information.
-
Page 3: Table Of Contents
Content Preface..............................1 Content..............................2 1.Introduction............................1 2.Technical parameters........................... 2 3.Package..............................3 4.Installation............................4 5.Operation............................. 5 5.1 Preparation............................5 5.1.1 Open the door..........................5 5.1.2 Connect the power ........................5 5.1.3 Turn on the power........................5 5.1.4 Adding distilled water....................... 6 5.2 Preparation of the equipment......................6 5.3 Sterilization procedure choice...................... - Page 4 6.3 S2 State............................12 6.4 S3 state............................13 6.5 S4 State............................13 6.6 Printer(Optional)........................13 6.7 USB Port............................15 7.Maintenance............................16 7.1 Cleaning the distilled water reservoir...................16 7.2 Cleaning inner chamber........................16 7.3 Changing air filter........................16 7.4 Cleaning door gasket and the mating surface................17 7.5 Changing door gasket........................17 7.6 Replacing Fuse..........................
-
Page 5: Preface
By running pattern: continuous operation Application range It is mainly used in medical institution where users need to sterilize various surgical instruments, dressings, glassware, and injection equipment. Note: make sure the sterilizer is well grounded when using Model BKMZB Capacity(L)... -
Page 6: Content
2.Technical parameters (1) Chamber Size: Φ247mm×470mm (2) Power: AC220V±10% 50/60Hz (3) Consumption: 1950VA (4) Sterilization Temp: 121℃/134℃ (5) Power Fuse: F10A/250V (6) Water Consumption: 0.16L~0.18L in one cycle (7) Ambient Temp.: 5~40℃ (8) External Size (W*H*D): 700x495x410mm (9) Net Weight: 53Kg (10) Noise: <60dB Use Environment (11) Relative Humidity: Max 80%, no condensation... -
Page 7: Package
3.Package Number Name Quantity BKMZB Autoclave Instrument tray Instrument rack Instrument tray disk folder Drain(Each 60cm) User manual Fuse(F10A/AC250V) Solenoid Fuse(F3A/AC250V) Board Fuse(F1A/AC250V) Door seals... -
Page 8: Installation
4.Installation * The autoclave must be placed in a horizontal work surface * Leave at least 10cm around the autoclave, at the top of at least 30cm, around maintain good ventilation * Don’t cover the sterilizer doors or vents, don’t place near the source of radiation * Don’t put in the liquid splashing place * Don’t be near any heat source... -
Page 9: Operation
5.Operation 5.1 Preparation 5.1.1 Open the door When the first time use, remove the instrument tray,instrument rack and other accessories from the chamber, then remove the packaging. 5.1.2 Connect the power Insert one end of the wire in the power socket and connect the other end to the socket on the back of the autoclave Note:The power supply outlet must be reliably grounded,connecting wires must be reliable and secure. -
Page 10: Adding Distilled Water
Flashing indicates water tank lack water Flashing indicates water tank exceeds the max level Flashing indicates condensate water tank exceeds the max level Twinkling shows door unlocked, constant lighting shows door locked Constant lighting indicates the output function of USB is working Constant lighting indicates the print function is working 5.1.4 Adding distilled water Removing the water storage cover of autoclave from its top as shown, you can directly pour water... -
Page 11: Temp Button
5.3.2 TEMP Button Choose the temperature of sterilization 5.3.3 PROGRAM Button Choose the program of sterilization 5.3.4 START/STOP Button Using this button to start sterilization procedure, if push this button in 3second, you can terminate the program. Pushing this button in 10 seconds after trouble solved can delete the display of wrong equipment information. -
Page 12: Sterilization Finished
Hereby display total Time for sterilization, When entering the sterilization holding time or the drying process, display countdown Attention: when the door is not closed to its right position, will twinkle, at this time, the starting program won’t work although starting button is pushed. 5.4.3 Sterilization finished At the end of a sterilization, program will display END. -
Page 13: Drain Valve
5.5.4 Drain Valve Waste Water Tank joints Water Tank joints 2、After the drain plug is inserted, turn the 1 、 Insert the drain plug drain connector counterclockwise and the into the drain connector water is automatically discharged. 3 、 After the drainage, turn the drain joint clockwise to seal the drain. - Page 14 5.5.2 Choose HELIX test program 5.5.2.1 put HELIX test paper into HELIX test tube。 5.5.2.2 Put HELIX test tube into the chamber of autoclave,and press START to start program. 5.5.2.3 After sterilization is complete, check the test paper to see whether it reach requirements 5.5.3 choose VACUUM test program 5.5.3.1 close the door,start program。...
-
Page 15: Advanced Settings
Note:Vacuum test program must be run when the sterilization chamber is in cold state . Otherwise there will be running more than 3 degrees temperature fluctuations Situation. 6. Advanced Settings 6.1 Enter setup interface 6.1.1 Press on START,open the main power. After the buzzer sounds, Enter the setting interface. -
Page 16: S2 State
6.3 S2 State 6.3.1 In this state, you can view Sterilization count and equipment number, but you can't change it 6.3.2 Set the highland set If you use at high altitudes, you need to set the following highland setting parameters: 1.0>h>0.5km, 0.5;1.5>h<1.0km,1.0 2.0>h>1.5km,1.5;2.5>h>2.0km,2.0 3.0>h>2.5km,2.5;3.5>h>3.0km,3.0... -
Page 17: S3 State
6.4 S3 state 6.4.1 This state is to adjust the sterilization time and drying time Press PROGRAM to choose program. Press TEMP to choose sterilization temperature. Press START again to adjust the sterilization time and drying time 6.4.2 Press TEMP to change value Press PROGRAM to choose the value need to change. - Page 18 Sample of the printed sterilization data Program:WRAPPED Program:Vacuum test Temperature:134 Tp: 1 °C Pressure:210.0kpa P1:-70kpa Vacuum Num:3 P2:-69.0kpa Dry Time:10Min rate of pressure rise:0.1kpa Ster Time:4.0Min Start Time:08:22 Start Time:05:38:12/88.1°C End Time:09:01 T1:05:40:03/84.7°C/-70.0kpa Date:2011-06-30 T2:05:42:23/101.8°C、52.0kpa Test Value :Success T3:05:44:15、79.4 °C/-70.0kpa S/N: BK000010 T4:05:46:21/108.5°C/50.3kpa Operator...
-
Page 19: Usb Port
Operator 6.7 USB Port 6.7.1 Plug the USB disk to the port on the front of the autoclave 6.7.2 Data transfer is completed when the screen indicates “END”. Note: The disk must adopt FAT32. Hard disks are not accepted. -
Page 20: Maintenance
7.Maintenance Maintenance Required Operation Daily Cleaning the door gasket and the mating surface Cleaning the outside of the door Weekly Cleaning the water reservoir Cleaning the inner chamber Every 3 to 6 months Changing the air filter (Every 200 operations) Yearly Changing the door gasket 7.1 Cleaning the distilled water reservoir... -
Page 21: Cleaning Door Gasket And The Mating Surface
7.4 Cleaning door gasket and the mating surface Clean up the door gasket and the mating surface using no-shedding cloth dipped with distilled water. 7.5 Changing door gasket 7.5.1 Open the door of the autoclave. 7.5.2 Remove the gasket 7.5.3 Clean up the mating surface 7.5.4 Wet the new gasket 7.5.5 Install the new one by following steps 1. -
Page 22: Replacing Fuse
3. Embed the other parts by diagonal way. 4. Press the gasket equably by hand. Notice:Before changing the gasket, ensure that the sterilizer is cool, in order to avoid scald. 7.6 Replacing Fuse 1. Turn off the main power supply 2. -
Page 23: Transportation And Storage
8.Transportation and Storage 8.1 Shut off the power switch, unplug the cord, and make the sterilizer been cooled down completely. 8.2 Drain water from reservoir and the condensate collector completely 8.3 Conditions For Transportation And Storage: Temperature:-20℃~+55℃ Humidity:<85% Atmospheric pressure:50kpa-106kpa... -
Page 24: Alarm
9. Alarm CODE CODE DESCRIDTIONS DISPOSE Steam generator is overheating Check steam generator whether disconnected Inner temperature overheating Check the internal temperature sensor whether disconnected Outer wall temperature overheating Check the outer wall of the sensor whether disconnected Heating failure Check whether the leak Stress release failure Check the exhaust valve whether blocked... -
Page 25: Safety Device
10.Safety Device 1.Fuse Protect the entire device to prevent overload Action:Cut off current 2. Thermal Fuse Prevent short circuit and transformer overheating Action: Cut off current of the transformer. 3.Safety Valve Prevent over pressure Action: Release pressure, when there is over pressure 4. - Page 26 Appendix I Adding water suggestions Item Water supply Condensation residue Evaporated residue ≤10mg/L ≤1.0mg/kg Silica ≤1mg/L ≤0.1mg/kg Iron ≤0.2mg/L ≤0.1mg/kg Cadmium ≤0.005mg/L ≤0.005mg/kg Lead ≤0.05mg/L ≤0.05mg/kg Other heavy metals ≤0.1mg/L ≤0.1mg/kg Chloride ≤2mg/L ≤0.1mg/kg Phosphate ≤0.5mg/L ≤0.1mg/kg Electric conductivity ≤15μS/cm ≤3μS/cm PH value 5-7.5...
- Page 27 Appendix II Sterilization Procedure Temperature Pressure maintain time Total time Max capacity of Max capacity Procedure Instrument type (℃) (kpa) (minute) (min) each tray(kg) (Kg) 15~20 Solid Encapsulate solid load without package instrument 30~45 30~45 Hollow equipment without package Packaging instrument 35~50 Single package solid instrument...
- Page 28 HELIX test 22~35 — — Vacuum test — — — 15~20 — — The highest temperature of 134℃ sterilization procedure is 137℃. The highest temperature of 121℃ sterilization procedure is 124℃.
- Page 33 Appendix III Main board diagram TP1: Steam Generator Temperature Sensor V2: Inlet Valve TP2: Inner Chamber Sensor V3: Water Pump Valve TP3: External Wall Temperature Sensor V4: Drain Valve V1: Exhaust Valve V5: Vacuum Pump Valve...
- Page 34 Appendix IV Piping Diagram V1: Drain Valve V2: Intake Valve V3: Water Pump Valve V4: Drain Valve V5: Vacuum Pump Valve...
- Page 35 Appendix V Packing List for Sterilizer Sequence Name Quantity Comment Number Equipment(Sterilizer BKMZA/B) Instrument Tray Instrument Rack Instrument Clamp Drain Pipe(60cm) Specification Fuse(10*38-25A) Door Seal Optional accessories Sequence Name Quantity Comment Number Consumables are 57mm receipt printing Printer paper Filter Consumable...
- Page 36 Appendix VI Printer operating instructions Name Diagram instruction Open Printer Shield:”Push and push” switches Inward push the upper middle position of printer shield switch printer Close Printer shield.When you open the printer shield, Shield you can see the printer control panel. Printer Control State Indicating Light:Light on,printer is Panel...
- Page 37 Fourth Step: Put the paper roll in the paper Feed Port axis, pinch both sides of the paper shaft, put the paper roll into the paper warehouse, loosen the paper shaft and then tighten it. Paper Warehouse Scroll Reel Note: Please pay special attention to the direction of the paper roll and must follow the diagram.
- Page 38 Open the lid from here First Step: Inward push the center area of Ribbon Change ribbon the printer control panel,and the inner shell Tightness Operating of the printer pops up automatically. Adjusting Sequence Rotary Knob Second Step: Open the lid, and then change the ribbon.When finished, fasten the lid and push into the rear.
- Page 39 BIOBASE GROUP 2# building, No.9 Gangxing Road, High-tech Zone, Jinan City, Shandong Province, China Tel: +86-531-81219803/01 Fax: +86-531-81219804 Inquiry: export@biobase.com Complaints: customer_support@biobase.cc After-sales service: service_sd@biobase.cc; service_ivd@biobase.cc Web: www.biobase.cc/www.meihuatrade.com / www.biobase.com...
Need help?
Do you have a question about the BKMZB and is the answer not in the manual?
Questions and answers