NetApp StorageGRID SG5700 Series Hardware Installation And Maintenance Manual
Hide thumbs
Also See for StorageGRID SG5700 Series:
- Hardware installation and maintenance manual (80 pages) ,
- Install (15 pages) ,
- Manual (362 pages)

Related Manuals for NetApp StorageGRID SG5700 Series


Summary of Contents for NetApp StorageGRID SG5700 Series
- Page 1 StorageGRID 11.4 ® Hardware Installation and Maintenance Guide For StorageGRID SG5700 Series Appliances July 2020 | 215-14699_2020-07_en-us doccomments@netapp.com...
-
Page 2: Table Of Contents
Hardware Installation and Maintenance Guide for SG5700 Appliances Contents Contents StorageGRID appliance overview.................. 4 Controllers in the StorageGRID appliance........................6 Installation and deployment overview................8 Preparing for installation....................10 Preparing the site................................10 Unpacking the boxes..............................10 Obtaining additional equipment and tools........................11 Web browser requirements............................ - Page 3 Hardware Installation and Maintenance Guide for SG5700 Appliances Contents HE error: Error synchronizing with SANtricity OS Software................59 Troubleshooting connection issues..........................59 Unable to connect to the appliance ........................59 Rebooting the controller while the StorageGRID Appliance Installer is running............60 Maintaining the SG5700 appliance................61 Upgrading SANtricity OS on the storage controller.....................61 Upgrading SANtricity OS Software on the storage controllers using the Grid Manager........
-
Page 4: Storagegrid Appliance Overview
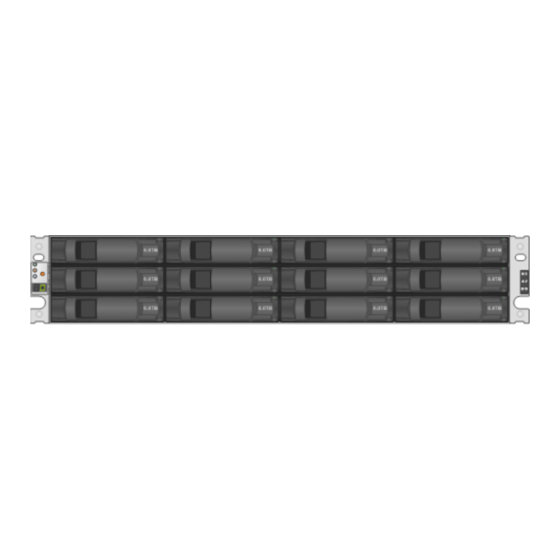
Hardware Installation and Maintenance Guide for SG5700 Appliances StorageGRID appliance overview StorageGRID appliance overview The SG5700 StorageGRID appliance is an integrated storage and computing platform that operates as a Storage Node in a StorageGRID grid. The appliance can be used in a hybrid grid environment that combines appliance Storage Nodes and virtual (software-based) Storage Nodes. - Page 5 Hardware Installation and Maintenance Guide for SG5700 Appliances StorageGRID appliance overview E2800 controller (storage controller) E5700SG controller (compute controller) Power-fan canisters Model SG5760 This figure shows the front and back of the SG5760 model, a 4U enclosure that holds 60 drives in 5 drive drawers.
-
Page 6: Controllers In The Storagegrid Appliance
Fan canister (1 of 2) Power canister (1 of 2) Related information NetApp E-Series Systems Documentation Center Controllers in the StorageGRID appliance Both the SG5712 and SG5760 models of the StorageGRID appliance include an E5700SG controller and an E2800 controller. You should review the diagrams to learn the differences between the controllers. - Page 7 Hardware Installation and Maintenance Guide for SG5700 Appliances StorageGRID appliance overview Port Type Management port 2 1-Gb (RJ-45) Ethernet Options: • Bond with management port 1 for a redundant connection to the Admin Network for StorageGRID. • Leave unwired and available for temporary local access (IP 169.254.0.1).
-
Page 8: Installation And Deployment Overview
Hardware Installation and Maintenance Guide for SG5700 Appliances Installation and deployment overview Installation and deployment overview You can install one or more StorageGRID appliances when you first deploy StorageGRID, or you can add appliance Storage Nodes later as part of an expansion. You might also need to install an appliance Storage Node as part of a recovery operation. - Page 9 Hardware Installation and Maintenance Guide for SG5700 Appliances Installation and deployment overview Red Hat Enterprise Linux or CentOS installation Ubuntu or Debian installation SG1000 appliance installation and maintenance Expanding a StorageGRID system Recovery and maintenance...
-
Page 10: Preparing For Installation
Steps 1. Confirm that the site meets the requirements for temperature, humidity, altitude range, airflow, heat dissipation, wiring, power, and grounding. See the NetApp Hardware Universe for more information. 2. If you are installing the SG5760 model, confirm that your location provides 240-volt AC power. -
Page 11: Obtaining Additional Equipment And Tools
Hardware Installation and Maintenance Guide for SG5700 Appliances Preparing for installation Rail kit with instructions Front bezel for the appliance SG5760: Handles SG5760: Sixty drives SG5760: Back brackets and cage nuts for square-hole rack installation Cables and connectors The shipment for the StorageGRID appliance includes the following cables and connectors: Two power cords for your country. -
Page 12: Web Browser Requirements
Hardware Installation and Maintenance Guide for SG5700 Appliances Preparing for installation Phillips No. 2 screwdriver Medium flat-blade screwdriver ESD wrist strap Ethernet cables Optical cables for the 10/25-GbE ports you plan to use Optional: SFP28 transceivers if you want to use 25-GbE link speed Service laptop Optional tools... -
Page 13: Reviewing Appliance Network Connections
Hardware Installation and Maintenance Guide for SG5700 Appliances Preparing for installation Reviewing appliance network connections Before installing the StorageGRID appliance, you should understand which networks can be connected to the appliance and how the ports on each controller are used. StorageGRID appliance networks When you deploy a StorageGRID appliance as a Storage Node in a StorageGRID grid, you can connect it to the following networks:... - Page 14 Hardware Installation and Maintenance Guide for SG5700 Appliances Preparing for installation Port Type of port Function Management port 1 on the 1-GbE (RJ-45) Connects to the network where you access E2800 controller SANtricity System Manager. You can use the Admin Network for StorageGRID or an independent management network.
-
Page 15: Port Bond Modes For E5700Sg Controller Ports
Hardware Installation and Maintenance Guide for SG5700 Appliances Preparing for installation Port bond modes for E5700SG controller ports When configuring network links for the E5700SG controller ports, you can use port bonding for the 10/25-GbE ports that connect to the Grid Network and optional Client Network, and the 1-GbE management ports that connect to the optional Admin Network. -
Page 16: Gathering Installation Information
Hardware Installation and Maintenance Guide for SG5700 Appliances Preparing for installation Callout Which ports are bonded All connected ports are grouped in a single LACP bond, allowing all ports to be used for Grid Network and Client Network traffic. If you plan to use Aggregate port bond mode: •... - Page 17 Hardware Installation and Maintenance Guide for SG5700 Appliances Preparing for installation Table 1: Information needed to connect to SANtricity System Manager on the E2800 controller You must connect the E2800 controller to the management network you will use for SANtricity System Manager. Information needed Your value Ethernet switch port you will connect to management...
- Page 18 Hardware Installation and Maintenance Guide for SG5700 Appliances Preparing for installation Information needed Your value Switch port for port 1 Switch port for port 2 (Active-Backup network bond mode only) DHCP-assigned IP address for management port 1, if • IPv4 address (CIDR): available after power on •...
- Page 19 Hardware Installation and Maintenance Guide for SG5700 Appliances Preparing for installation Note: See "10/25-GbE port connections for the E5700SG controller" for more information about the options for these ports. Information needed Your value Network bond mode Choose one: • Active-Backup (default) •...
- Page 20 Hardware Installation and Maintenance Guide for SG5700 Appliances Preparing for installation Information needed Your value VLAN tagging enabled Choose one: • No (default) • VLAN tag Enter a value between 0 and 4095: (if VLAN tagging is enabled) DHCP-assigned IP address for the Client Network, if •...
-
Page 21: Installing The Hardware
Sign in with your username and password. b. Select Products > My Products. c. Confirm that the new serial number is listed. d. If it is not, follow the instructions for new NetApp customers. New NetApp customer a. Click Register Now, and create an account. - Page 22 Hardware Installation and Maintenance Guide for SG5700 Appliances Installing the hardware CAUTION: Install hardware from the bottom of the rack or cabinet or rack up to prevent the equipment from tipping over. CAUTION: The SG5712 weighs approximately 64 lb (29 kg) when fully loaded with drives. Two people or a mechanized lift are required to safely move the SG5712.
-
Page 23: Cabling The Appliance
Hardware Installation and Maintenance Guide for SG5700 Appliances Installing the hardware f. Repeat these steps for the other four drawers. 6. Attach the front bezel. Cabling the appliance You must connect the two controllers to each other, connect the management ports on each controller, and connect the 10/25-GbE ports on the E5700SG controller to the Grid Network and optional Client Network for StorageGRID. - Page 24 Hardware Installation and Maintenance Guide for SG5700 Appliances Installing the hardware Port Type of port Function Management port 1 on the 1-GbE (RJ-45) Connects to the network where you access E2800 controller SANtricity System Manager. You can use the Admin Network for StorageGRID or an independent management network.
-
Page 25: Connecting Power Cords And Applying Power
Hardware Installation and Maintenance Guide for SG5700 Appliances Installing the hardware 4. Connect the 10/25-GbE ports on the E5700SG controller to the appropriate network switches, using optical cables and SFP+ or SFP28 transceivers. Note: All ports must use the same link speed. Install SFP+ transceivers if you plan to use 10-GbE link speeds. -
Page 26: Viewing Boot-Up Status Codes
Hardware Installation and Maintenance Guide for SG5700 Appliances Installing the hardware Viewing boot-up status codes The seven-segment displays on each controller show status and error codes as the appliance powers up. About this task The E2800 controller and the E5700SG controller display different statuses and error codes. To understand what these codes mean, see the following resources: Controller Reference... -
Page 27: Status Indicators On The E5700Sg Controller
Hardware Installation and Maintenance Guide for SG5700 Appliances Installing the hardware Controller Seven-segment display E5700SG controller Shows HO, followed by a repeating sequence of two numbers. HO -- IP address for Admin Network -- IP address for Grid Network HO In the sequence, the first set of numbers is the DHCP-assigned IP address for the controller's management port 1. - Page 28 Hardware Installation and Maintenance Guide for SG5700 Appliances Installing the hardware Display State Description Expansion Port Amber These LEDs are always amber (no link established) Attention LEDs because the appliance does not use the expansion ports. Host Port Link Green The link is up.
- Page 29 Installation or communication with the E2800 controller has failed. Related reference Troubleshooting the hardware installation on page 58 If you encounter issues during the installation, you might find it helpful to review troubleshooting information related to hardware setup and connectivity issues. Related information NetApp Support...
-
Page 30: Configuring The Hardware
Hardware Installation and Maintenance Guide for SG5700 Appliances Configuring the hardware Configuring the hardware After applying power to the appliance, you must configure SANtricity System Manager, which is the software you will use to monitor the hardware. You must also configure the network connections that will be used by StorageGRID. - Page 31 Hardware Installation and Maintenance Guide for SG5700 Appliances Configuring the hardware In the sequence: ◦ The first set of numbers is the DHCP address for the appliance Storage Node on the Admin Network, if it is connected. This IP address is assigned to management port 1 on the E5700SG controller.
- Page 32 Hardware Installation and Maintenance Guide for SG5700 Appliances Configuring the hardware 3. If the E5700SG controller could not acquire an IP address using DHCP: a. Connect the service laptop to management port 2 on the E5700SG controller, using an Ethernet cable. b.
-
Page 33: Configuring Network Links
Hardware Installation and Maintenance Guide for SG5700 Appliances Configuring the hardware Note: If you cannot access the Home page over a link-local connection, configure the service laptop IP address as , and try again. 169.254.0.2 4. Review any messages displayed on the Home page and configure the link configuration and the IP configuration, as required. - Page 34 Hardware Installation and Maintenance Guide for SG5700 Appliances Configuring the hardware Callout Which ports are bonded All four ports are grouped in a single LACP bond, allowing all ports to be used for Grid Network and Client Network traffic. The table summarizes the options for configuring the four 10/25-GbE ports. The default settings are shown in bold.
- Page 35 Hardware Installation and Maintenance Guide for SG5700 Appliances Configuring the hardware Steps 1. From the menu bar of the StorageGRID Appliance Installer, click Configure Networking > Link Configuration. The Network Link Configuration page displays a diagram of your appliance with the network and management ports numbered.
- Page 36 Hardware Installation and Maintenance Guide for SG5700 Appliances Configuring the hardware 2. If you plan to use the 25-GbE link speed for the 10/25 GbE ports, select 25GbE from the Link speed drop-down list. The network switches you are using for the Grid Network and the Client Network must also support and be configured for this speed.
- Page 37 Hardware Installation and Maintenance Guide for SG5700 Appliances Configuring the hardware The Client Network settings for the 10/25-GbE ports are now shown. 4. Refer to the table, and configure the port bond mode and the network bond mode. The example shows: •...
-
Page 38: Setting The Ip Configuration
Hardware Installation and Maintenance Guide for SG5700 Appliances Configuring the hardware https://E5700SG_Controller_IP:8443 Related concepts Port bond modes for E5700SG controller ports on page 15 When configuring network links for the E5700SG controller ports, you can use port bonding for the 10/25-GbE ports that connect to the Grid Network and optional Client Network, and the 1-GbE management ports that connect to the optional Admin Network. - Page 39 Hardware Installation and Maintenance Guide for SG5700 Appliances Configuring the hardware If you selected Static, follow these steps to configure the Grid Network: a. Enter the static IPv4 address, using CIDR notation. b. Enter the gateway. If your network does not have a gateway, re-enter the same static IPv4 address. c.
- Page 40 Hardware Installation and Maintenance Guide for SG5700 Appliances Configuring the hardware individual nodes. The MTU values do not have to be the same for all network types. d. Click Save. When you change the IP address, the gateway and list of subnets might also change. If you lose your connection to the StorageGRID Appliance Installer, re-enter the URL using the new static IP address you just assigned.
- Page 41 Hardware Installation and Maintenance Guide for SG5700 Appliances Configuring the hardware individual nodes. The MTU values do not have to be the same for all network types. d. Click Save. To configure the Admin Network, select either Static or DHCP in the Admin Network section of the page.
- Page 42 Hardware Installation and Maintenance Guide for SG5700 Appliances Configuring the hardware e. Confirm that the list of Admin Network subnets is correct. You must verify that all subnets can be reached using the gateway you provided. Note: The default route cannot be made to use the Admin Network gateway. •...
- Page 43 Hardware Installation and Maintenance Guide for SG5700 Appliances Configuring the hardware If you selected Static, follow these steps to configure the Client Network: a. Enter the static IPv4 address, using CIDR notation. b. Click Save. c. Confirm that the IP address for the Client Network gateway is correct. Note: If the Client Network is enabled, the default route is displayed.
-
Page 44: Verifying Network Connections
Hardware Installation and Maintenance Guide for SG5700 Appliances Configuring the hardware Attention: The MTU value of the network must match the value configured on the switch port the node is connected to. Otherwise, network performance issues or packet loss might occur. Related tasks Changing the link configuration of the E5700SG controller on page 80... -
Page 45: Verifying Port-Level Network Connections
Hardware Installation and Maintenance Guide for SG5700 Appliances Configuring the hardware Verifying port-level network connections To ensure that access between the StorageGRID Appliance Installer and other nodes is not obstructed by firewalls, confirm that the StorageGRID Appliance Installer can connect to a specific TCP port or set of ports at the specified IP address or range of addresses. - Page 46 Hardware Installation and Maintenance Guide for SG5700 Appliances Configuring the hardware 5. Click Test Connectivity. • If the selected port-level network connections are valid, the "Port connectivity test passed" message appears in a green banner. The nmap command output is listed below the banner. •...
-
Page 47: Accessing And Configuring Santricity System Manager
Hardware Installation and Maintenance Guide for SG5700 Appliances Configuring the hardware • If a port-level network connection cannot be made for one or more selected ports, the "Port connectivity test failed" message appears in a red banner. The nmap command output is listed below the banner. -
Page 48: Setting The Ip Address For The E2800 Management Port
Hardware Installation and Maintenance Guide for SG5700 Appliances Configuring the hardware Setting the IP address for the E2800 management port Management port 1 on the E2800 controller connects the appliance to the management network for SANtricity System Manager. You must set a static IP address for the E2800 controller to ensure that you do not lose your management connection to the hardware and the controller firmware in the StorageGRID appliance. -
Page 49: Accessing Santricity System Manager
Hardware Installation and Maintenance Guide for SG5700 Appliances Configuring the hardware When you connect to SANtricity System Manager, you will use the new static IP address as the URL: https://E2800_Controller_IP Accessing SANtricity System Manager You can monitor and manage the appliance hardware by browsing to SANtricity System Manager, which is included on the E2800 controller (the storage controller in the appliance). -
Page 50: Setting Up Santricity System Manager
Hardware Installation and Maintenance Guide for SG5700 Appliances Configuring the hardware Related tasks Setting the IP address for the E2800 management port on page 48 Management port 1 on the E2800 controller connects the appliance to the management network for SANtricity System Manager. You must set a static IP address for the E2800 controller to ensure that you do not lose your management connection to the hardware and the controller firmware in the StorageGRID appliance. -
Page 51: Reviewing The Hardware Status In Santricity System Manager
Hardware Installation and Maintenance Guide for SG5700 Appliances Configuring the hardware https://E2800_Controller_IP The log in page for SANtricity System Manager appears. 2. Enter the administrator password. 3. Click Cancel to close the Set Up wizard and to display the SANtricity System Manager home page. - Page 52 Hardware Installation and Maintenance Guide for SG5700 Appliances Configuring the hardware 4. Review the information displayed for appliance hardware and confirm that all hardware components have a status of Optimal. a. Click the Hardware tab. b. Click Show back of shelf. From the back of the shelf, you can view the E2800 controller, the power and fan canisters in the appliance, the battery in the E2800 controller, and component temperatures.
-
Page 53: Optional: Changing The Raid Mode (Sg5760 Only)
Hardware Installation and Maintenance Guide for SG5700 Appliances Configuring the hardware c. To see the settings for the E2800 controller, select Controller A and select View settings from the context menu. d. To see the setting for other components in the back of the shelf, select the component you want to view. -
Page 54: Optional: Remapping Network Ports For The Appliance
Hardware Installation and Maintenance Guide for SG5700 Appliances Configuring the hardware Related information NetApp E-Series Systems Documentation Center Optional: Remapping network ports for the appliance You might need to remap the internal ports on the appliance Storage Node to different external ports. -
Page 55: Deploying An Appliance Storage Node
Hardware Installation and Maintenance Guide for SG5700 Appliances Deploying an appliance Storage Node Deploying an appliance Storage Node After installing and configuring the storage appliance, you can deploy it as a Storage Node in a StorageGRID system. When you deploy an appliance as a Storage Node, you use the StorageGRID Appliance Installer included on the appliance. - Page 56 Hardware Installation and Maintenance Guide for SG5700 Appliances Deploying an appliance Storage Node 2. In the Primary Admin Node connection section, determine whether you need to specify the IP address for the primary Admin Node. If you have previously installed other nodes in this data center, the StorageGRID Appliance Installer can discover this IP address automatically, assuming the primary Admin Node, or at least one other grid node with ADMIN_IP configured, is present on the same subnet.
- Page 57 Hardware Installation and Maintenance Guide for SG5700 Appliances Deploying an appliance Storage Node 4. In the Node name field, enter the name you want to use for this appliance node, and click Save. The node name is assigned to this appliance node in the StorageGRID system. It is shown on the Nodes page (Overview tab) in the Grid Manager.
-
Page 58: Troubleshooting The Hardware Installation
Hardware Installation and Maintenance Guide for SG5700 Appliances Troubleshooting the hardware installation Troubleshooting the hardware installation If you encounter issues during the installation, you might find it helpful to review troubleshooting information related to hardware setup and connectivity issues. Related tasks Hardware setup appears to hang on page 58 The StorageGRID Appliance Installer might not be available if hardware faults or cabling errors... -
Page 59: He Error: Error Synchronizing With Santricity Os Software
You can use these displays to determine status and troubleshoot errors. Related information NetApp E-Series Systems Documentation Center HE error: Error synchronizing with SANtricity OS Software The seven-segment display on the compute controller shows an HE error code if the StorageGRID Appliance Installer cannot synchronize with SANtricity OS Software. -
Page 60: Rebooting The Controller While The Storagegrid Appliance Installer Is Running
Hardware Installation and Maintenance Guide for SG5700 Appliances Troubleshooting the hardware installation If that does not resolve the issue, contact technical support. d. If the ping was successful, open a web browser. e. Enter the URL for the StorageGRID Appliance Installer: https://E5700SG_Controller_IP:8443 The Home page appears. -
Page 61: Maintaining The Sg5700 Appliance
SANtricity OS are compatible with your appliance. • You have contacted NetApp technical support to confirm you need to update the SANtricity OS, and you know which version you need. • You must have the Maintenance permission. - Page 62 SANtricity OS upgrade. Steps From a service laptop or management client, download the new SANtricity OS Software file from the NetApp support site. Be sure to choose the SANtricity OS version for the E2800 storage controllers. NetApp Downloads: SANtricity OS Sign in to the Grid Manager using a supported browser.
- Page 63 Hardware Installation and Maintenance Guide for SG5700 Appliances Maintaining the SG5700 appliance Select the SANtricity OS upgrade file you downloaded from the NetApp support site. a. Click Browse. b. Locate and select the file. c. Click Open. The file is uploaded and validated. When the validation process is done, the file name is shown in the Details field.
- Page 64 Hardware Installation and Maintenance Guide for SG5700 Appliances Maintaining the SG5700 appliance The Start button is enabled. Click Start. A warning box appears stating that your browser's connection might be lost temporarily as services on nodes that are upgraded are restarted. Click OK to stage the SANtricity OS upgrade file to the primary Admin Node.
- Page 65 Hardware Installation and Maintenance Guide for SG5700 Appliances Maintaining the SG5700 appliance Optionally, sort the list of nodes in ascending or descending order by Site, Name, Progress, Stage, or Details. Or, enter a term in the Search box to search for specific nodes. You can scroll through the list of nodes by using the left and right arrows at the bottom right corner of the section.
- Page 66 Hardware Installation and Maintenance Guide for SG5700 Appliances Maintaining the SG5700 appliance • SANtricity OS upgrade is not applicable to this node. • SANtricity OS file is not compatible with this node. The message "SANtricity OS upgrade is not applicable to this node" indicates that the node does not have a storage controller that can be managed by the StorageGRID system.
-
Page 67: Upgrading Santricity Os Software On The E2800 Controller Using Maintenance Mode
SANtricity are compatible with your appliance. • You have contacted NetApp technical support to confirm you need to update the SANtricity OS, and you know which version you need. • You must have the Maintenance permission. - Page 68 Hardware Installation and Maintenance Guide for SG5700 Appliances Maintaining the SG5700 appliance Steps 1. If the StorageGRID appliance is running in a StorageGRID system, place the E5700SG controller into maintenance mode. a. From the Grid Manager, select Nodes. b. From the tree view of the Nodes page, select the appliance Storage Node. c.
- Page 69 Hardware Installation and Maintenance Guide for SG5700 Appliances Maintaining the SG5700 appliance When the appliance is in maintenance mode, a confirmation message lists the URLs you can use to access the StorageGRID Appliance Installer. f. Browse to any of the URLs displayed. Note: If possible, use the URL containing the IP address of the appliance's Admin Network port.
-
Page 70: Replacing The E2800 Controller
Hardware Installation and Maintenance Guide for SG5700 Appliances Maintaining the SG5700 appliance b. Click Reboot Controller. During the reboot, the following screen appears: The appliance reboots and rejoins the grid. This process can take up to 20 minutes. c. On the Nodes page, verify that the appliance node returns to the expected status by viewing the icon to the left of the node name. - Page 71 If all drives are secured, you have reviewed the steps in the simplex E2800 controller replacement procedure, which include downloading and installing E-Series SANtricity Storage Manager from the NetApp Support Site and then using the Enterprise Management Window (EMW) to unlock the secured drives after you have replaced the controller.
- Page 72 Hardware Installation and Maintenance Guide for SG5700 Appliances Maintaining the SG5700 appliance Note: Collecting support data before and after replacing a component ensures you can send a full set of logs to technical support in case the replacement does not resolve the problem.
- Page 73 Hardware Installation and Maintenance Guide for SG5700 Appliances Maintaining the SG5700 appliance When the appliance is in maintenance mode, a confirmation message lists the URLs you can use to access the StorageGRID Appliance Installer. f. Browse to any of the URLs displayed. Note: If possible, use the URL containing the IP address of the appliance's Admin Network port.
- Page 74 Hardware Installation and Maintenance Guide for SG5700 Appliances Maintaining the SG5700 appliance 4. Remove the controller from the appliance: a. Put on an ESD wristband or take other antistatic precautions. b. Label the cables and then disconnect the cables and SFPs. Attention: To prevent degraded performance, do not twist, fold, pinch, or step on the cables.
- Page 75 Hardware Installation and Maintenance Guide for SG5700 Appliances Maintaining the SG5700 appliance Item Description Battery release latch Battery d. Lift up on the battery, and slide it out of the controller. e. Remove the cover from the replacement controller. f. Orient the replacement controller so that the slot for the battery faces toward you. g.
- Page 76 Hardware Installation and Maintenance Guide for SG5700 Appliances Maintaining the SG5700 appliance • Incorrect – The battery's metal flange is not inserted into the slot on the controller: j. Replace the controller cover. 6. Install the replacement controller into the appliance. a.
- Page 77 When the reboot is complete, the Tasks tab looks like the following screenshot: 9. From SANtricity System Manager, confirm that the new controller is Optimal, and collect support data. Related information NetApp E-Series Systems Documentation Center...
-
Page 78: Replacing The E5700Sg Controller
Hardware Installation and Maintenance Guide for SG5700 Appliances Maintaining the SG5700 appliance Replacing the E5700SG controller You might need to replace the E5700SG controller if it is not functioning optimally or if it has failed. Before you begin • You have a replacement controller with the same part number as the controller you are replacing. - Page 79 After the controllers have successfully booted up, the seven-segment displays should show the following: • E2800 controller: The final state is • E5700SG controller: The final state is 7. Confirm that the appliance Storage Node appears in the Grid Manager and that no alarms appear. Related information NetApp E-Series Systems Documentation Center...
-
Page 80: Replacing Other Hardware Components
You might need to replace the E2800 controller if it is not functioning optimally or if it has failed. Related information NetApp E-Series Systems Documentation Center Changing the link configuration of the E5700SG controller You can change the Ethernet link configuration of the E5700SG controller. You can change the port bond mode, the network bond mode, and the link speed. - Page 81 Hardware Installation and Maintenance Guide for SG5700 Appliances Maintaining the SG5700 appliance Steps 1. Follow these steps to place the E5700SG controller into maintenance mode. a. From the Grid Manager, select Nodes. b. From the tree view of the Nodes page, select the appliance Storage Node. c.
- Page 82 Hardware Installation and Maintenance Guide for SG5700 Appliances Maintaining the SG5700 appliance When the appliance is in maintenance mode, a confirmation message lists the URLs you can use to access the StorageGRID Appliance Installer. f. Browse to any of the URLs displayed. Note: If possible, use the URL containing the IP address of the appliance's Admin Network port.
- Page 83 Hardware Installation and Maintenance Guide for SG5700 Appliances Maintaining the SG5700 appliance StorageGRID Appliance Installer using one of the other IP addresses assigned to the appliance: https://E5700SG_Controller_IP:8443 If you made changes to the VLAN settings, the subnet for the appliance might have changed. If you need to change the IP addresses for the appliance, follow the instructions for configuring IP addresses.
-
Page 84: Changing The Mtu Setting
Hardware Installation and Maintenance Guide for SG5700 Appliances Maintaining the SG5700 appliance Related tasks Configuring network links on page 33 You can configure network links for the ports used to connect the appliance to the Grid Network, the Client Network, and the Admin Network. You can set the link speed as well as the port and network bond modes. - Page 85 Hardware Installation and Maintenance Guide for SG5700 Appliances Maintaining the SG5700 appliance e. Enter the provisioning passphrase, and click OK. A progress bar and a series of messages, including "Request Sent," Stopping StorageGRID, and "Rebooting" indicate that the appliance is completing the steps for entering maintenance mode.
- Page 86 Hardware Installation and Maintenance Guide for SG5700 Appliances Maintaining the SG5700 appliance f. Browse to any of the URLs displayed. Note: If possible, use the URL containing the IP address of the appliance's Admin Network port. Note: Accessing requires a direct connection to the https://169.254.0.1:8443 local management port.
- Page 87 Hardware Installation and Maintenance Guide for SG5700 Appliances Maintaining the SG5700 appliance Attention: The MTU value of the network must match the value configured on the switch port the node is connected to. Otherwise, network performance issues or packet loss might occur. Attention: For the best network performance, all nodes should be configured with similar MTU values on their Grid Network interfaces.
- Page 88 Hardware Installation and Maintenance Guide for SG5700 Appliances Maintaining the SG5700 appliance b. Click Reboot Controller. During the reboot, the following screen appears: The appliance reboots and rejoins the grid. This process can take up to 20 minutes. c. On the Nodes page, verify that the appliance node returns to the expected status by viewing the icon to the left of the node name.
-
Page 89: Copyright And Trademark
NetApp assumes no responsibility or liability arising from the use of products described herein, except as expressly agreed to in writing by NetApp. The use or purchase of this product does not convey a license under any patent rights, trademark rights, or any other intellectual property rights of NetApp.
Need help?
Do you have a question about the StorageGRID SG5700 Series and is the answer not in the manual?
Questions and answers