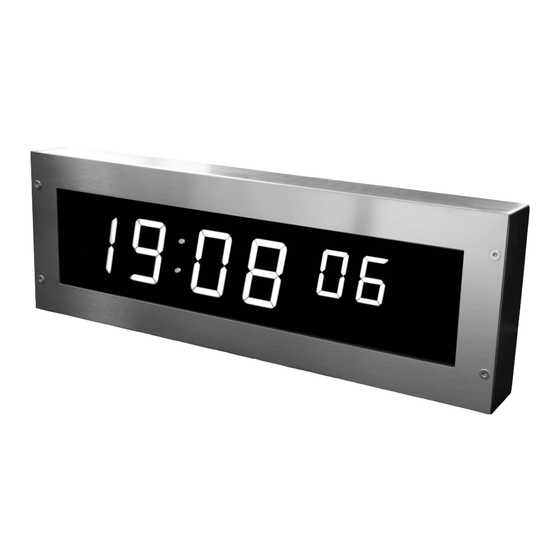
Summary of Contents for Mobatime SLH-DC Series
- Page 1 INSTRUCTION MANUAL State-of-the-art technology digital clock SLH-DC series addition to the standard DC series instruction manual (for SLH-DC only) © MOBATIME BE-800945.06...
- Page 2 It is prohibited to reproduce, to store in a computer system or to transfer this publication in a way or another, even part of it. The copyright remains with all the rights with BÜRK MOBATIME GmbH, D-78026 VS-Schwenningen and MOSER-BAER AG – CH 3454 Sumiswald / SWITZERLAND.
-
Page 3: Table Of Contents
20 GUARANTEE AND MAINTENANCE ......................15 NOTE: Chapters 2.7 - 15 are the same as in the DC Instruction manual. Use the DC user manual to control and set parameters for the SLH-DC clock. © MOBATIME 3 / 16 800945.06... -
Page 4: Description
• manual or automatic adjustment of the luminosity of LED displays • excellent visibility, even from extremely sharp angles • alternating time, date and temperature display, duration of the display can be customized © MOBATIME 4 / 16 800945.06... -
Page 5: Housing
• remote IR controller for clock set up and stopwatch control On request • internal relay – relay can switch for specified duration, when the stopwatch in the countdown mode reach the zero. © MOBATIME 5 / 16 800945.06... -
Page 6: Assembly
PCB. Reconnect the earth wire to connect the clock body to the front panel. • Put the front panel into the clock body. Check the cables to prevent them from being pinched between the back of the front panel and the clock body. © MOBATIME 6 / 16 800945.06... -
Page 7: Ceiling And Side Mounting Double-Sided Stainless-Steel Clock
Ethernet cable or the RS 232 and RS 485 interface connectors, if these are used. • Push the temperature sensor connector, the keyboard connector, Ethernet connector or the RS 232 and RS 485 jacks into the corresponding terminals on the © MOBATIME 7 / 16 800945.06... -
Page 8: Ceiling And Side Mounting Single-Sided Stainless-Steel Clock
Fix the connection by tightening the screw using an allen key. • On mains powered clock loosen the screw on the underside of the 230 VAC terminal cover and remove the cover. Unscrew the cable clamp. © MOBATIME 8 / 16 800945.06... -
Page 9: Flush Mounting Single-Sided Stainless-Steel Clock
Both parts of the clock are held together by neodymium magnets. • Remove the front panel from the clock body. The panel is held by magnets, you need to use a relatively high force to remove it. © MOBATIME 9 / 16 800945.06... - Page 10 PCB. Reconnect the earth wire to connect the clock body to the front panel. • Put the front panel into the clock body. Check the cables to prevent them from being pinched between the back of the front panel and the clock body. SLH-DC..N.F clamps mounting © MOBATIME 10 / 16 800945.06...
-
Page 11: Connecting Terminal Block
SLH-DC..N.F wall niche mounting Connecting terminal block ¨ terminal block for NTP and WiFI version terminal block for remaining version (except PoE) © MOBATIME 11 / 16 800945.06... -
Page 12: Engineering Data
N.F single sided N.N single sided N.S double sided D.S Dimensions [mm] (W x H x D) flush mounting N.F flush mounting back cover 430,5 430,5 dimension W1 x H1 dial diameter © MOBATIME 12 / 16 800945.06... -
Page 13: Voltage Range And Electric Current Consumption Of The Lines
+- 12 – 30 V 3 – 7 mA MIN, CODE +- 30 – 60 V 3 – 7 mA MIN, CODE (on request) 20 mVpp – 2 Vpp 20 uA – 2 mA IRIG B © MOBATIME 13 / 16 800945.06... -
Page 14: Accessories
Unusable batteries can be returned free of charge at appropriate collection points of your waste disposal company or at shops that sell batteries. By doing so, you fulfil your legal responsibilities and help protect the environment. © MOBATIME 14 / 16 800945.06... -
Page 15: Guarantee And Maintenance
The following circumstances are excluded from the guarantee: inappropriate handling or interventions chemical influences mechanical defects external environmental influences (natural catastrophes) • Repairs during and after the guarantee period are assured by the manufacturer. © MOBATIME 15 / 16 800945.06... - Page 16 19 ch. du Champ-des-Filles, CH-1228 Plan-les-Ouates Tel. +41 34 432 46 46 / Fax +41 34 432 46 99 Tel. +41 22 884 96 11 / Fax + 41 22 884 96 90 moserbaer@mobatime.com / www.mobatime.com export@mobatime.com / www.mobatime.com SALES SWITZERLAND...


Need help?
Do you have a question about the SLH-DC Series and is the answer not in the manual?
Questions and answers