
Related Manuals for Moxa Technologies DA-710 Series. DA-710-XPE


Summary of Contents for Moxa Technologies DA-710 Series. DA-710-XPE
- Page 1 DA-710 Series WinXP Embedded User’s Manual First Edition, December 2009 www.moxa.com/product © 2009 Moxa Inc. All rights reserved. Reproduction without permission is prohibited.
- Page 2 DA-710 Series WinXP Embedded User’s Manual The Moxa software described in this manual is furnished under a license agreement and may be used only in accordance with the terms of that agreement. Copyright Notice Copyright © 2009 Moxa Inc. All rights reserved. Reproduction without permission is prohibited.
-
Page 3: Table Of Contents
Table of Contents Chapter 1 Introduction ....................1-1 Overview..........................1-2 Software Specifications ......................1-2 Application Development Environment ............... 1-2 Networking and Communication Capabilities.............. 1-4 Supporting Services and Daemons ................1-5 How to Determine Firmware Build Versions................1-5 Inserting a USB Mass Storage Device into the Computer ............1-6 Insert a Compact Flash Card Storage into a DA-710 Computer .......... -
Page 4: Chapter 1 Introduction
Introduction Chapter 1 Thank you for purchasing the Moxa’s DA-710 series of x86 ready-to-run embedded computers. This manual introduces the software configuration and management of DA-710 computers running the Windows Embedded Standard 2009 operating system. For hardware installation, connector interfaces, setup procedures, and upgrading the BIOS, please refer to the DA-710 Series Hardware User’s Manual. -
Page 5: Overview
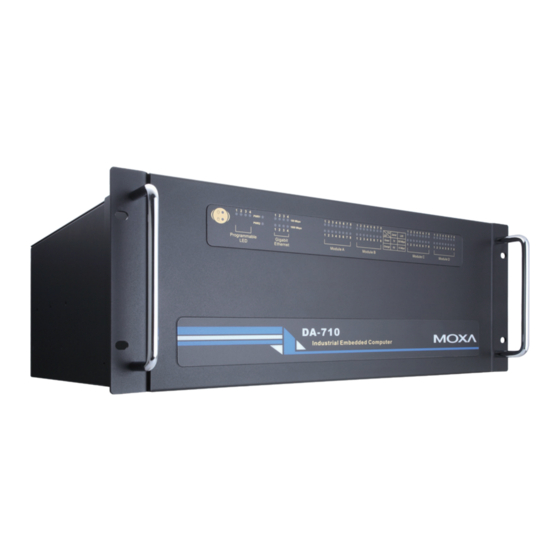
DA-710 XPE User’s Manual Introduction Overview Moxa’s DA-710 x86-based rackmount embedded computers are designed for industrial data acquisition applications. The state-of-the-art four expansion module design gives users a versatile combination of up to 32 RS-232/422/485 serial ports, or up to an additional 16 Ethernet ports. This friendly design gives users the advantage of being able to swap out modules quickly and easily. - Page 6 DA-710 XPE User’s Manual Introduction DirectShow—Base filter graph and device enumeration support for all DirectShow applications. This component also provides most DirectShow filters. Distributed Transaction Coordinator (MSDTC) —A distributed transaction facility for Microsoft Windows systems, which uses transaction-processing technology. MSDTC exploits loosely coupled systems to provide scalable performance.
-
Page 7: Networking And Communication Capabilities
DA-710 XPE User’s Manual Introduction Networking and Communication Capabilities The DA-710-XPE embedded computers provide powerful hardware communication interfaces for network-centric embedded applications, including Ethernet and serial ports, and also support the networking and communications capabilities that are built into Windows Embedded Standard 2009 with SP3 OS. -
Page 8: Supporting Services And Daemons
DA-710 XPE User’s Manual Introduction Supporting Services and Daemons In addition to development and communication capability, the DA-710-XPE embeds the services and daemons shown below. These common and easy-to-use application servers help users migrate industrial communication applications to the DA-710-XPE embedded computer very easily and conveniently. -
Page 9: Inserting A Usb Mass Storage Device Into The Computer
DA-710 XPE User’s Manual Introduction Inserting a USB Mass Storage Device into the Computer Inserting a USB mass storage device will generate a new drive on the DA-710-XPE. The new drive should be visible in the File Explorer. -
Page 10: Insert A Compact Flash Card Storage Into A Da-710 Computer
DA-710 XPE User’s Manual Introduction Insert a Compact Flash Card Storage into a DA-710 Computer There is a Compact Flash slot in the side of DA-710 computer. The Compact Flash slot is designed for storage expansion. Please note that it does not support “Plug and Play” and “Hot swap”. If you plug a CF card into the slot when entering the operating system, it may cause system damage. -
Page 11: Inserting A Sata Hard Disk Into A Da-710 Computer
DA-710 XPE User’s Manual Introduction Inserting a SATA Hard Disk into a DA-710 Computer Inserting a SATA hard disk device will generate a new disk that should appear in the File Explorer. NOTE: The DA-710 computer supports only 5 VDC power for a 2.5-inch SATA hard disk. If you would like to use a 3.5-inch hard disk, you will need to use external power supply for your SATA hard disk. -
Page 12: Chapter 2 Software Configuration
Software Configuration Chapter 2 In this chapter, we explain how to operate a DA-710-XPE computer directly or from a PC. Instructions are given on how to adjust the system time, troubleshoot network connectivity, and manage other functions. Some of these operations can be done with system commands after gaining access to the computer, and others can be done from the “Control Panel,”... -
Page 13: Starting Your Da-710-Xpe Computer
DA-710 XPE User’s Manual Software Configuration Starting Your DA-710-XPE Computer Connect the CRT monitor or LCD monitor to the target computer, and then power it up by connecting it to the power adaptor. It takes about 30 to 40 seconds for the system to boot up. Once the system is ready, the Desktop will appear on your monitor. -
Page 14: Changing The Network Settings
DA-710 XPE User’s Manual Software Configuration Changing the Network Settings The DA-710-XPE computer comes with four network interfaces. All of the default IP addresses are DHCP. Choose Start Network Connections, and then right-click the network interface icon, select Properties, and then click Internet Protocol (TCP/IP) and select Properties to enter the network settings page. -
Page 15: Operating Your Da-710-Xpe Computer With A Telnet Client
DA-710 XPE User’s Manual Software Configuration Operating Your DA-710-XPE Computer with a Telnet Client Use a crossover Ethernet cable to connect your development workstation directly to the target computer, or use a straight-through Ethernet cable to connect the computer to a LAN hub or switch. Next, use a telnet client on your development workstation to connect to the Telnet console utility of the target computer. - Page 16 DA-710 XPE User’s Manual Software Configuration 2. Click the Exceptions tab.
- Page 17 DA-710 XPE User’s Manual Software Configuration 3. Click Add Port.
- Page 18 DA-710 XPE User’s Manual Software Configuration 4. Enter the name, for example, TCP, and Port number 23. Click OK to continue.
- Page 19 DA-710 XPE User’s Manual Software Configuration 5. When finished, check if TCP is in the Programs and Services list. 6. Now you can run Telnet to connect to the DA-710-XPE.
-
Page 20: Adjusting The System Time
DA-710 XPE User’s Manual Software Configuration Adjusting the System Time Setting the System Time Manually: Use the date/time command line utility to query the current system date/time or set a new system date/time. Date/Time Control panel: Go to the Control Panel and double click the Date and Time icon. -
Page 21: Starting And Stopping Services
DA-710 XPE User’s Manual Software Configuration SNTP: In the Date and Time Properties window, you can see the NTP server setting. Starting and Stopping Services Select Start Control Panel Administrative Tools and double click Services. Select and right-click on the service name, and then choose to stop or start. 2-10... -
Page 22: Simple Network Management Protocol (Snmp)
DA-710 XPE User’s Manual Software Configuration Simple Network Management Protocol (SNMP) To check SNMP agent capabilities on a target DA-710-XPE (e.g., suppose the network IP is 192.168.3.127) computer, log on to the workstation computer on which the SNMP manager resides and then type: \>... - Page 23 DA-710 XPE User’s Manual Software Configuration Make sure that the Allow users to connect remotely to this computer checkbox is selected. Next, click Select Remote Users, and add the users allowed to connect to your desktop. When finished, click OK. 2-12...
-
Page 24: Configuring Serial Ports
DA-710 XPE User’s Manual Software Configuration Configuring Serial Ports The DA-710-XPE has 2 RS-232 serial ports with DB9 connectors. The ports are located on the rear panel of the computer. To configure the 2 RS-232 serial ports, first right-click the My Computer icon on the desktop and then select Properties. - Page 25 DA-710 XPE User’s Manual Software Configuration Right-click the COM port you wish to configure, and then select Properties. You can configure the parameters of these serial ports. Note that they support the bit rates up to 115,200 bps. Click OK to finish. 2-14...
- Page 26 DA-710 XPE User’s Manual Software Configuration The DA-710-XPE also has 4 expansion slots that can be used with Moxa’s DA Series Expansion Modules, such as a serial port module, LAN module, switch module, or a PCI development kit. If you have inserted a serial port module, such as the DA-SP08-DB, DA-SP08-I-DB, DA-SP08-I-TB, or DA-SP38-I-TB, you may use the following steps to configure these serial ports.
- Page 27 DA-710 XPE User’s Manual Software Configuration Right-click the MOXA MU860 UART CHIP (PCI Bus) and select Properties to re-assign the port number for each COM port. 2-16...
- Page 28 DA-710 XPE User’s Manual Software Configuration Click the Port Configuration tab and select the COM port you would like to configure, and then click Port Setting. Uncheck Auto Enumerating COM Number if you would like to select the COM number yourself.
- Page 29 DA-710 XPE User’s Manual Software Configuration From the Port Number drop-down list, select the port number for a specific COM port. Click OK to finish. You may also configure Rx FIFO Level and Tx FIFO Level from the drop-down lists on the same screen, and then click OK.
- Page 30 DA-710 XPE User’s Manual Software Configuration You may now check the configuration. In this case, we have re-assigned the port numbers from 17 to 24. Click OK to complete. 2-19...
- Page 31 DA-710 XPE User’s Manual Software Configuration Return to Device Manager to view the COM ports have been re-named. 2-20...
- Page 32 DA-710 XPE User’s Manual Software Configuration To configure these COM ports, right-click the COM port, and then select Properties. 2-21...
- Page 33 DA-710 XPE User’s Manual Software Configuration You can configure this COM port from the drop-down lists, and then click OK to finish. You can also use program code to set the operation mode. The example “UartMode” is under \examples\C++\ of Software DVD. The code snippet is as follows: port[n]: 3 ;...
- Page 34 DA-710 XPE User’s Manual Software Configuration #include "stdafx.h" #include <windows.h> #include "..\release\devices.h" char mode_array[][20]={"RS232", "RS485-2W", "RS422","RS485-4W"}; int _tmain(int argc, _TCHAR* argv[]) int port=0,mode=0; int n=0; WCHAR sin; WCHAR wcs_port[3],wcs_mode[3]; printf("UART Mode Test Program\n"); printf("\t (0) Exit Program\n"); printf("\t (1) Display UART Mode\n"); printf("\t (2) Set UART Mode\n");...
- Page 35 DA-710 XPE User’s Manual Software Configuration //Get Port Number printf("Input the Port Number (3,4...) = \n"); wscanf(L"%s",wcs_port); port=_wtoi(wcs_port); //Get Mode Value printf("Input the Mode value (0 ~ 3) = "); wscanf(L"%s",wcs_mode); mode=_wtoi(wcs_mode); //Set UART Mode if(uart_setmode(port,mode)==-1) printf("Set UART Mode Fail!!\n"); else printf("COM%d=%s\n",port,mode_array[mode]);...
-
Page 36: Enhanced Write Filter
DA-710 XPE User’s Manual Software Configuration Enhanced Write Filter The “Enhanced Write Filter” protects the contents of a volume on the target media volume by redirecting all writes to another storage location called on overlay. Use the following steps to enable the Enhanced Write Filter. -
Page 37: File Based Write Filter
DA-710 XPE User’s Manual Software Configuration File Based Write Filter File-Based Write Filter (FBWF) allows Windows Embedded Standard 2009 to maintain the appearance of read and write access to write sensitive or read only storage. FBWF makes read and write access transparent to applications. Writing to storage media may be undesirable or impossible in embedded devices. - Page 38 DA-710 XPE User’s Manual Software Configuration 3. When the system has rebooted, type fbwfmgr /displayconfig in the command prompt again to confirm thatthe status has been changed to enabled. The default folder for FBWF will be \temp. Type fbwfmgr /help for more detailed information. C:\>...
- Page 39 DA-710 XPE User’s Manual Software Configuration 4. You may copy a file (in this example, we will use TestFile.txt) to C:\temp and to C:\, and then reboot the system. 5. After rebooting the system, you should see that the file in C:\ has disappeared and that the file in C:\temp remains.
-
Page 40: Chapter 3 Management Tools
Management Tools Chapter 3 The DA-710-XPE ready-to-run embedded computers are shipped with the Windows Embedded Standard 2009 operating system already installed. This network-centric platform is designed to serve as a front-end for data acquisition and industrial control applications. A set of Windows XP management tools are installed on the DA-710-XPE computer to resolve management issues. -
Page 41: Computer Management
DA-710 XPE User’s Manual Management Tools Computer Management [Control Panel] [Administrative Tools] Computer Management. You can use the tools for a variety of tasks, such as disk partition, disk mount/dismount, and create/remove users. You can also check services in the Computer Management window. -
Page 42: Component Services
DA-710 XPE User’s Manual Management Tools Component Services [Control Panel] [Administrative Tools] Component Services. You can install/view/remove COM components with this tool. -
Page 43: Event Viewer
DA-710 XPE User’s Manual Management Tools Event Viewer [Control Panel] [Administrative Tools] Event Viewer. Every DA-710-XPE event, including system, applications, and security events are logged in this event database. -
Page 44: Internet Information Services (Web/Ftp)
DA-710 XPE User’s Manual Management Tools Internet Information Services (Web/FTP) [Control Panel] [Administrative Tools] Internet Information Services. If you need to set up Web or FTP, you must use this tool for configuration purposes, and you can also start/stop HTTP/FTP services. - Page 45 DA-710 XPE User’s Manual Management Tools A default web page is located in the directory c:\Inetpub. Use this default page to test your web server. Follow the steps shown below to create the virtual directory. 1. Create a virtual directory by selecting Default Web Site Virtual Directory.
- Page 46 DA-710 XPE User’s Manual Management Tools 2. Follow the virtual directory creation wizard and complete the steps to create the virtual directory c:\Inetpub. Type the alias, for example web, into the text box. Click Next to continue.
- Page 47 DA-710 XPE User’s Manual Management Tools...
- Page 48 DA-710 XPE User’s Manual Management Tools...
- Page 49 DA-710 XPE User’s Manual Management Tools 3. When you complete the steps, the virtual directory WEB will appear under Default WEB Site. 4. On your desktop, type [IP Address]/WEB/Default.htm (e.g., 192.168.1.127/WEB/Default.htm). The following message will appear. The steps are indicated in the following sequence of diagrams. 3-10...
- Page 50 DA-710 XPE User’s Manual Management Tools If you need to use the FTP server, you must create the default password for your account and turn on the write permission on your home directory located in c:\intepub\ftproot. Select FTP Sites Default FTP Site Properties Home Directory, and checkmark the Write checkbox.
- Page 51 DA-710 XPE User’s Manual Management Tools 3-12...
-
Page 52: Odbc Data Source Administrator
DA-710 XPE User’s Manual Management Tools ODBC Data Source Administrator [Control Panel] [Administrative Tools] Data Sources (ODBC) This database source configuration tool is for users to add, delete, or set up the data source, and then display information about the installed ODBC drivers. You can create a new data source or trace the calls to ODBC functions. - Page 53 DA-710 XPE User’s Manual Management Tools 2. Select the driver to set up a data source (in this case, we select Driver do Microsoft Access (*.mdb) ). 3. Select the database and then click OK. 3-14...
- Page 54 DA-710 XPE User’s Manual Management Tools 4. Type Data Source Name and Description and then click OK. 5. A user data source has been successfully established. Click OK to finish. 3-15...
-
Page 55: Performance Monitor
DA-710 XPE User’s Manual Management Tools Performance Monitor [Control Panel] [Administrative Tools] Performance. You can use this tool to monitor system and network resources. 3-16... -
Page 56: Services
DA-710 XPE User’s Manual Management Tools Services [Control Panel] [Administrative Tools] Services You can use this utility to start/stop/restart services. (e.g. If you do not need telnet service you can stop it and set the “startup option” to “manual”.) 3-17... -
Page 57: Chapter 4 System Recovery
System Recovery Chapter 4 The DA-710-XPE ready-to-run embedded computers are a Windows Embedded Standard 2009 platform. This chapter describes the recovery process in the event of system instability. The following topics are covered in this chapter: Recovery Environment Recovery Procedure Uninstalling Recovery Utility... -
Page 58: Recovery Environment
DA-710 XPE User’s Manual System Recovery Recovery Environment The environment includes a DA-710-XPE embedded computer and a bootable USB disk with the recovery programs and system image file. Hardware The hardware used includes a PC, a DA-710-XPE computer and a USB disk with the recovery programs. - Page 59 DA-710 XPE User’s Manual System Recovery Click Browse and select the folder you wish to install to and then click Next.
- Page 60 DA-710 XPE User’s Manual System Recovery Click Next to start the installation.
- Page 61 DA-710 XPE User’s Manual System Recovery Click Close to finish.
- Page 62 DA-710 XPE User’s Manual System Recovery Step 2: Extract Recovery Image from PC to USB disk After the installation is complete, you will see the XPeRecovery shortcut on your desktop. You can start the USB disk recovery utility by opening this shortcut. Double-click the shortcut then click OPEN to select the image file.
- Page 63 DA-710 XPE User’s Manual System Recovery Click the drop-down list and select your USB disk drive letter (in this example, it is the E drive), and check Format USB Disk. Click Apply to start the process; the utility will display the progress and time remaining This message will appear when the process is complete.
- Page 64 DA-710 XPE User’s Manual System Recovery Step 3: Change the BIOS Settings NOTE: If you have already installed a CompactFlash card in the DA-710-XPE, remove this CompactFlash card before starting recovery. Insert the USB disk on any USB port of the DA-710-XPE, and then you need to change the BIOS settings to boot from USB disk.
- Page 65 DA-710 XPE User’s Manual System Recovery Step 4: Reboot the Computer and Start Recovery The system will boot from the USB disk and then enter Windows Pre-installation Environment. The recovery utility window will appear as below. Click Recover to start system recovery.
- Page 66 DA-710 XPE User’s Manual System Recovery Click OK when the recovery process is complete and system will reboot. Step 5: Change the BIOS Setting to Boot from Original Disk. Now, you need to change the boot priority so that it can boot from the original disk. As the system reboots, press DEL to enter BIOS setup menu.
- Page 67 DA-710 XPE User’s Manual System Recovery Step 6: Reboot the Computer. Remove the USB disk from the USB port before restarting and rebooting the DA-710-XPE. You need to wait for about ten to fifteen minutes while the system recovers. DO NOT power off or shut down the computer during this time.
-
Page 68: Uninstalling Recovery Utility
DA-710 XPE User’s Manual System Recovery Uninstalling Recovery Utility To uninstall the recovery utility, double-click Add or Remove Programs from Start Control Panel. 4-12... - Page 69 DA-710 XPE User’s Manual System Recovery Click XPeRecovery from program list, and then click Remove to continue. Click Yes to uninstall. Once complete, the recovery utility will be removed from the system. 4-13...
Need help?
Do you have a question about the DA-710 Series. DA-710-XPE and is the answer not in the manual?
Questions and answers