Moxa Technologies DA-681 Series Manual
Hide thumbs
Also See for DA-681 Series:
- User manual (52 pages) ,
- Quick installation manual (2 pages) ,
- User manual (52 pages)

Related Manuals for Moxa Technologies DA-681 Series


Summary of Contents for Moxa Technologies DA-681 Series
- Page 1 DA-681 Series Linux Manual Fourth Edition, August 2012 www.moxa.com/product © 2012 Moxa Inc. All rights reserved.
- Page 2 DA-681 Series Linux Manual The software described in this manual is furnished under a license agreement and may be used only in accordance with the terms of that agreement. Copyright Notice © 2012 Moxa Inc. All rights reserved. Trademarks The MOXA logo is a registered trademark of Moxa Inc.
-
Page 3: Table Of Contents
Table of Contents Introduction ............................1-1 Overview ............................1-2 Product Features ..........................1-2 Software Specifications........................1-2 Read-only Root File System ......................... 1-3 Software Components ......................... 1-3 Software Configuration ........................2-1 Starting from a VGA Console ........................ 2-2 Connecting from a Telnet Console ......................2-2 Connecting from an SSH Console ...................... -
Page 4: Introduction
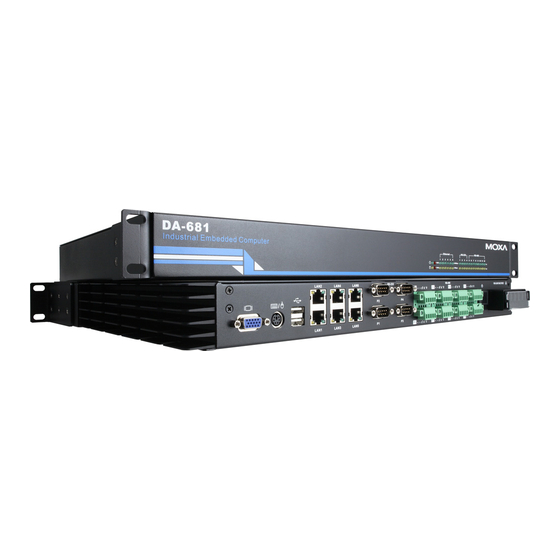
Introduction Thank you for purchasing the Moxa DA-681 Series of x86 ready-to-run embedded computers. This manual introduces the software configuration and management of the DA-681-LX, which runs the Linux operating system. For hardware installation, connector interfaces, setup, and upgrading the BIOS, please refer to the “DA-681 Series Hardware User’s Manual.”... -
Page 5: Overview
Moreover, the DPP-T models are in full compliance with IEC 61850-3 standards to meet the demands of power substation automation. Product Features The DA-681 Series Basic System has the following features: • IEC 61850-3 certified for power substation automation systems (DPP-T models only) •... -
Page 6: Read-Only Root File System
DA-681 Linux Introduction User Applications Daemon (Apache, Telnet, FTPD) Application Interface (POSIX, Socket, Secure Socket) Protocol Stack TCP, IP, UDP, CMP, ARP, HTTP, SNMP, SMTP File System Linux Device Driver PCMCIA, CF, WLAN, USB, UART, RTC, VGA Kernel Micro Kernel Memory Control, Schedule, Process Hardware RS-232/422/485, Ethernet, PCMCIA, CompactFlash, SATA, USB... - Page 7 DA-681 Linux Introduction Component Version Description bsdmainutils 6.1.6 Collection of more utilities from FreeBSD bsdutils 2.12r-19etch1 Basic utilities from 4.4BSD-Lite busybox 1.1.3-4 Tiny utilities for small and embedded system console-common 0.7.69 Basic infrastructure for text console configuration console-data 1.01-7 Keymaps, fonts, charset maps, fallback table for console-tools console-tools 0.2.3dbs-65...
- Page 8 DA-681 Linux Introduction Component Version Description klibc-utils 1.4.34-2 Small statically-linked utilities built with klibc klogd 1.4.1-18 Kernel Logging Daemon libacl1 2.2.41-1 Access control list shared library libattr1 2.4.32-1 Extended attribute shared library libbind9-0 9.3.4-2etch1 BIND9 Shared Library used by BIND libblkid1 1.39+1.40-WIP-2006 11.14+dfsg-2etch1 block device id library...
- Page 9 DA-681 Linux Introduction Component Version Description libnet-telnet-perl 3.03-1 Script telnetable connections libnewt0.52 0.52.2-10 Not Erik’s Windowing Toolkit - text mode windowing with slang libnfsidmap2 0.18-0 An nfs idmapping library libopencdk8 0.5.9-2 Open Crypto Development Kit (OpenCDK) (runtime) libpam-modules 0.79-5 Pluggable Authentication Modules for PAM libpam-runtime 0.79-5 Runtime support for the PAM library...
- Page 10 DA-681 Linux Introduction Component Version Description linux-kernel-headers 2.6.18-7 Linux Kernel Headers for development locales 2.3.6.ds1-13etch5 GNU C Library: National Language (locale) data [support] lockfile-progs 0.1.10 Programs for locking and unlocking files and mailboxes login 4.0.18.1-7 System login tools logrotate 3.7.1-3 Log rotation utility lsb-base 3.1-23.2etch1...
- Page 11 DA-681 Linux Introduction Component Version Description tcpd 7.6.dbs-13 Wietse Venema's TCP wrapper utilities tcpdump 3.9.5-2etch1 A powerful tool for network monitoring and data acquisition telnet 0.17-34 The telnet client telnetd 0.17-34 The telnet server tftpd 0.17-15 Trivial file transfer protocol server time 1.7-21 The GNU time program for measuring cpu resource usage...
-
Page 12: Software Configuration
Software Configuration In this chapter, we explain how to operate a DA-681-LX computer directly or from a PC near you. There are three ways to connect to the DA-681-LX computer: through VGA monitor, by using Telnet over the network, or by using an SSH console from a Windows or Linux machine. -
Page 13: Starting From A Vga Console
DA-681 Linux Software Configuration Starting from a VGA Console Connect the display monitor to the DA-681-LX VGA connector, and then power it up by connecting it to the power adaptor. It takes about 30 to 60 seconds for the system to boot up. Once the system is ready, a login screen will appear on your monitor. -
Page 14: Connecting From An Ssh Console
DA-681 Linux Software Configuration Use a cross-over Ethernet cable to connect your development workstation directly to the target computer, or use a straight-through Ethernet cable to connect the computer to a LAN hub or switch. Next, use a Telnet client on your development workstation to connect to the target computer. -
Page 15: Windows Users
DA-681 Linux Software Configuration Windows Users Click on the link http://www.chiark.greenend.org.uk/~sgtatham/putty/download.html to download PuTTY (free software) to set up an SSH console for the DA-681-LX in a Windows environment. The following screen shows an example of the configuration that is required. Linux Users From a Linux machine, use the ssh command to access the DA-681-I-LX’s console utility via SSH. -
Page 16: Ntp Client
DA-681 Linux Software Configuration # date MMDDhhmmYYYY Month Date hhmm: Hour and Minute YYYY: Year Use the following command to write the current system time to the RTC. # hwclock –w Moxa:~# date Fri Jun 23 23:30:31 CST 2000 Moxa:~# hwclock Fri Jun 23 23:30:35 2000 -0.557748 seconds Moxa:~# date 120910002004 Thu Dec 9 10:00:00 CST 2004... -
Page 17: Updating The Time Automatically
DA-681 Linux Software Configuration Updating the Time Automatically This section describes how to use a shell script to update the time automatically. Example shell script for updating the system time periodically #!/bin/sh ntpdate time.nist.gov # You can use the time server’s ip address or domain # name directly. -
Page 18: Enabling And Disabling Daemons
DA-681 Linux Software Configuration Enabling and Disabling Daemons The following daemons are enabled when the DA-681-LX boots up for the first time. • snmpd SNMP Agent Daemon • telnetd Telnet Server/Client Daemon inetd • Internet Daemons • ftpd FTP Server/Client Daemon sshd •... -
Page 19: Setting The Run-Level
DA-681 Linux Software Configuration # !/bin/sh # Add the daemonyou want to run daemon /root/tcps2-release & 5. After you finish writing or modifying the code, remember to execute “umount /” to change the root directory back to Read-only mode. Moxa:~# umount / 6. -
Page 20: Cron-Daemon For Executing Scheduled Commands
DA-681 Linux Software Configuration MOXA:~# cd /etc/rc2.d MOXA:/etc/rc2.d# MOXA:/etc/rc2.d# ls S19nfs-common S25nfs-user-server S99showreadyled S20snmpd S55ssh S24pcmcia S99rmnologin MOXA:/etc/rc2.d# MOXA:/etc/rc2.d# ln –s /root/tcps2-release S60tcps2 MOXA:/etc/rc2.d# ls S19nfs-common S25nfs-user-server S99rmnologin S20snmpd S55ssh S99showreadyled S24pcmcia S60tcps2 MOXA:/etc/rc2.d# The command SxxRUNFILE has the following meaning: Start the run file while Linux boots up. -
Page 21: Inserting A Sata Hard Drive Into The Computer
DA-681 Linux Software Configuration 1. Write a shell script named fixtime.sh and save it to /home/. #!/bin/sh ntpdate time.nist.gov hwclock –w exit 0 2. Change mode of fixtime.sh # chmod 755 fixtime.sh 3. Modify /etc/crontab file to run fixtime.sh at 8:00 every day. Add the following line to the end of crontab: * 8 * * * root /home/fixtime.sh... -
Page 22: Inserting A Usb Storage Device Into The Computer
DA-681 Linux Software Configuration title Debian GNU/Linux, kernel 2.6.18-5-686 (single-user mode) root (hd0,0) kernel /boot/vmlinuz-2.6.18-5-686 root*/dev/sdb1 ro single initrd /boot/initrd.img-2.6.18-5-686 savedefault 3. Edit the /etc/fstab file and change the selected hard disk for system bootup. # /etc/fstab: static file system information. # <file system>... -
Page 23: Inserting A Compactflash Card Into The Computer
ATTENTION The DA-681 Series Embedded Computer does not support the CompactFlash hot swap function. You must remove the power source first before inserting or removing the CompactFlash card. If you do not shut down the power source, you could damage your CompactFlash card. -
Page 24: Apt-Installing And Removing Packages
DA-681 Linux Software Configuration APT—Installing and Removing Packages APT is the Debian tool used to install and remove packages. Before installing a package, you need to configure the apt source file, /etc/apt/sources.list, which is located in the read-only partition. 1. Mount the root file system with write permission. MOXA:~# mount -o remount,rw /dev/hda1 / 2. -
Page 25: Wdt (Watchdog Timer)
DA-681 Linux Software Configuration MOXA:~# df -h Filesystem Size Used Avail Use% Mounted on rootfs 790M 219M 531M 30% / udev 1% /dev /dev/hdb1 790M 219M 531M 30% / /dev/hdb1 790M 219M 531M 30% /dev/.static/dev tmpfs 248M 0 248M 0% /dev/shm none 248M 13M 236M... - Page 26 DA-681 Linux Software Configuration ioctl(swtd_fd, IOCTL_SWATCHDOG_ACK, NULL); … close(swtd_fd); For convenient programming, we re-package these IO control commands in a convenient API in libswtd.c like this. int swtd_open(void) Description Open the file handle to control the sWatchDog. If you want to do something you must first to this. And keep the file handle to do other.
- Page 27 DA-681 Linux Software Configuration unsigned long *time – the function will return the current time period. Output: OK will be zero. The other has some error, to get error code from errno(). int swtd_ack(int fd) Description: Acknowledge sWatchDog. When the user application enable sWatchDog. It need to call this function periodically with user predefined time in the application program.
- Page 28 DA-681 Linux Software Configuration exit(0); * The convenient watchdog API --- libswtd.c #include <stdio.h> #include <stdlib.h> #include <fcntl.h> // following for sWatchDog implement #define IOCTL_SWATCHDOG_ENABLE #define IOCTL_SWATCHDOG_DISABLE #define IOCTL_SWATCHDOG_GET #define IOCTL_SWATCHDOG_ACK swtd_open(void) return open("/dev/swtd", O_RDWR); swtd_enable(int fd, unsigned long time) return ioctl(fd, IOCTL_SWATCHDOG_ENABLE, &time);...
- Page 29 DA-681 Linux Software Configuration struct timeval time; time.tv_sec = msec / 1000; time.tv_usec = (msec % 1000) * 1000; select(1, NULL, NULL, NULL, &time); static int swtdfd; static int stopflag=0; static void stop_swatchdog() stopflag = 1; static void do_swatchdog(void) swtd_enable(swtdfd, 500); while ( stopflag == 0 ) { mydelay(250);...
- Page 30 DA-681 Linux Software Configuration return ioctl(fd, IOCTL_SWATCHDOG_DISABLE, NULL); swtd_get(int fd, int *mode, unsigned long *time) struct { mode; unsigned long time; } nowset; ret; ret = ioctl(fd, IOCTL_SWATCHDOG_GET, &nowset); *mode = nowset.mode; *time = nowset.time; return ret; swtd_ack(int fd) return ioctl(fd, IOCTL_SWATCHDOG_ACK, NULL); swtd_close(int fd) return close(fd);...
-
Page 31: Managing Communications
Managing Communications The DA-681-LX ready-to-run embedded computer is a network-centric platform designed to serve as a front-end for data acquisition and industrial control applications. This chapter describes how to configure the various communication functions supported by the Linux operating system. The following topics are covered in this chapter: ... -
Page 32: Changing The Network Settings
DA-681 Linux Managing Communications Changing the Network Settings The DA-681-LX computer has6 Ethernet ports named LAN1 to LAN6. The LAN Port Expansion Module supports an additional four 10/100 Mbps Ethernet ports named LAN5 to LAN8. The default IP addresses and netmasks of the network interfaces are as follows: Default IP Address Netmask... -
Page 33: Adjusting Ip Addresses With "Ifconfig
DA-681 Linux Managing Communications Dynamic IP Address using DHCP To configure one or both LAN ports to request an IP address dynamically, replace static with dhcp and then delete the rest of the lines. # The primary network interface allow-hotplug eth0 iface eth0 inet dhcp After modifying the boot settings of the LAN interface, issue the following command to activate the LAN settings immediately. -
Page 34: Disabling The Telnet Server
DA-681 Linux Managing Communications Disabling the Telnet Server Disable the daemon by typing “#” in front of the first character of the row to comment out the line. For example, to disable the Telnet server, use the following commands: discard dgram udp wait root /bin/discard discard stream tcp nowait root /bin/discard telnet stream tcp nowait root /bin/telnetd After you finish writing or modifying the code, remember to execute “umount /”... -
Page 35: Etc/Hostname
DA-681 Linux Managing Communications /etc/hostname 1. Mount the root file system with write permission. MOXA:~# mount -o remount,rw /dev/hda1 / Edit /etc/hostname MOXA:~# vi /etc/hostname MOXA 3. After you finish writing or modifying the code, remember to execute “umount /” to change the root directory back to Read-only mode. -
Page 36: Apache Web Server
DA-681 Linux Managing Communications # `info libc "Name Service Switch"' for information about this file. passwd: compat group: compat shadow: compat hosts: files dns networks: files protocols: db files services: db files ethers: db files rpc: db files netgroup: Apache Web Server Default Homepage The Apache web server’s main configuration file is /etc/apache2/sites-available/default, with the default homepage located at /var/www/apache2-default/index.html. -
Page 37: Saving Web Pages To A Usb Storage Device
DA-681 Linux Managing Communications echo REMOTE_ADDR = $REMOTE_ADDR echo REMOTE_USER = $REMOTE_USER echo AUTH_TYPE = $AUTH_TYPE echo CONTENT_TYPE = $CONTENT_TYPE echo CONTENT_LENGTH = $CONTENT_LENGTH Before you modify the homepage, use a browser (such as Microsoft Internet Explore or Mozilla Firefox) from your PC to test if the Apache web server is working. -
Page 38: Iptables
DA-681 Linux Managing Communications Allow from all </Directory> </VirtualHost> <VirtualHost *:443> DocumentRoot /media/usb0/www <Directory /> Options FollowSymLinks AllowOverride None </Directory> ScriptAlias /cgi-bin/ /media/usb0/www/cgi-bin/ <Directory "/media/usb0/wwwz/cgi-bin/"> AllowOverride None Options ExecCGI -MultiViews +SymLinksIfOwnerMatch Order allow,deny Allow from all </Directory> </VirtualHost> 6. Use the following commands to restart the Apache web server: #cd /etc/init.d #./apache2 restart 7. - Page 39 DA-681 Linux Managing Communications The DA-681-LX supports three types of IPTABLES: Filter tables, NAT tables, and Mangle tables. Filter Table—includes three chains: INPUT chain OUTPUT chain FORWARD chain NAT Table—includes three chains: PREROUTING chain—transfers the destination IP address (DNAT). POSTROUTING chain—works after the routing process and before the Ethernet device process to transfer the source IP address (SNAT).
-
Page 40: Iptables Hierarchy
DA-681 Linux Managing Communications IPTABLES Hierarchy The following figure shows the IPTABLES hierarchy. Incoming Packets Mangle Table PREROUTING Chain NAT Table PREROUTING Chain Local Host Other Host Packets Packets Mangle Table Mangle Table INPUT Chain FORWARD Chain Filter Table Filter Table INPUT Chain FORWARD Chain Local... -
Page 41: Iptables Modules
DA-681 Linux Managing Communications IPTABLES Modules The DA-681-LX supports the following sub-modules. Be sure to use the module that matches your application. arptable_filter.ko arp_tables.ko arpt_mangle.ko ip_conntrack_amanda. ip_conntrack_ftp.ko ip_conntrack_h323.ko ip_conntrack_irc.ko ip_conntrack.ko ip_conntrack_netbios_ns. ip_conntrack_netlink.ko ip_conntrack_pptp.ko ip_conntrack_proto_sctp. ip_conntrack_sip.ko ip_conntrack_tftp.ko ip_nat_amanda.ko ip_nat_ftp.ko ip_nat_h323.ko ip_nat_irc.ko ip_nat.ko ip_nat_pptp.ko ip_nat_sip.ko... -
Page 42: Define Policy For Chain Rules
DA-681 Linux Managing Communications -F: Flush the selected chain (all the chains in the table if none is listed). -X: Delete the specified user-defined chain. -Z: Set the packet and byte counters in all chains to zero. Examples: # iptables -L -n In this example, since we do not use the -t parameter, the system uses the default “filter”... -
Page 43: Nat (Network Address Translation)
DA-681 Linux Managing Communications --sport: Source port number. -d: Destination address. --dport: Destination port number. -j: Jump target. Specifies the target of the rules; i.e., how to handle matched packets. For example, ACCEPT the packet, DROP the packet, or LOG the packet. Examples: Example 1: Accept all packets from the lo interface. -
Page 44: Nat Example
DA-681 Linux Managing Communications NAT Example The IP address of all packets leaving LAN1 are changed to 192.168.3.127 (you will need to load the module ipt_MASQUERADE): #ehco 1 > /proc/sys/net/ipv4/ip_forward #modprobe ipt_MASQUERADE #iptables –t nat –A POSTROUTING –o eth0 –j MASQUERADE Enabling NAT at Bootup In most real world situations, you will want to use a simple shell script to enable NAT when the DA-681-LX boots up. -
Page 45: Ppp (Point To Point Protocol)
DA-681 Linux Managing Communications /sbin/iptables -F /sbin/iptables -X /sbin/iptables -Z /sbin/iptables -F -t nat /sbin/iptables -X -t nat /sbin/iptables -Z -t nat /sbin/iptables -P INPUT ACCEPT /sbin/iptables -P OUTPUT ACCEPT /sbin/iptables -P FORWARD ACCEPT /sbin/iptables -t nat -P PREROUTING ACCEPT /sbin/iptables -t nat -P POSTROUTING ACCEPT /sbin/iptables -t nat -P OUTPUT ACCEPT # Step 3. -
Page 46: Connecting To A Ppp Server Over A Hard-Wired Link
DA-681 Linux Managing Communications “ “ Send a return (null text followed by the usual return) ogin: username word: password Log in with username and password. Refer to the chat man page, chat.8, for more information about the chat utility. /dev/ Specify the callout serial port. -
Page 47: Setting Up A Machine For Incoming Ppp Connections
DA-681 Linux Managing Communications MOXA:~# ping 129.67.1.165 PING 129.67.1.165 (129.67.1.165): 56 data bytes 64 bytes from 129.67.1.165: icmp_seq=0 ttl=225 time=268 ms 64 bytes from 129.67.1.165: icmp_seq=1 ttl=225 time=247 ms 64 bytes from 129.67.1.165: icmp_seq=2 ttl=225 time=266 ms --- 129.67.1.165 ping statistics --- 3 packets transmitted, 3 packets received, 0% packet loss round-trip min/avg/max = 247/260/268 ms MOXA:~#... -
Page 48: Pppoe
DA-681 Linux Managing Communications init "/usr/sbin/chat -v -f /etc/ppp/ppp-ttyM0.chat" # Set up routing to go through this PPP link defaultroute # Default modem (you better replace this with /dev/ttySx!) /dev/ttyM0 # Speed 115200 # Keep modem up even if connection fails persist crtscts modem... - Page 49 DA-681 Linux Managing Communications 4. Edit the file /etc/ppp/pap-secrets and add the following: “username@hinet.net” “password” # ATTENTION: The definitions here can allow users to login without a # password if you don't use the login option of pppd! The mgetty Debian # package already provides this option;...
-
Page 50: Nfs (Network File System) Client
DA-681 Linux Managing Communications name username@hinet.net mtu 1492 mru 1492 defaultroute noipdefault "/etc/ppp/options.eth0" 5 lines, 67 characters Type your username (the one you set in the /etc/ppp/pap-secrets and /etc/ppp/chap-secrets files) after the name option. You may add other options as desired. 7. -
Page 51: Snmp (Simple Network Management Protocol)
DA-681 Linux Managing Communications for the DA-681-LX without worrying about the amount of disk space that will be available. The DA-681-LX supports only NFS client protocol. ATTENTION Click on the following links for more information about NFS. • http://www.tldp.org/HOWTO/NFS-HOWTO/index.html • http://nfs.sourceforge.net/nfs-howto/client.html The following procedures illustrate how to mount a remote NFS Server. -
Page 52: Openvpn
DA-681 Linux Managing Communications SNMPv2-MIB::snmpOutGetRequests.0 = Counter32: 0 SNMPv2-MIB::snmpOutGetNexts.0 = Counter32: 0 SNMPv2-MIB::snmpOutSetRequests.0 = Counter32: 0 SNMPv2-MIB::snmpOutGetResponses.0 = Counter32: 540 SNMPv2-MIB::snmpOutTraps.0 = Counter32: 0 SNMPv2-MIB::snmpEnableAuthenTraps.0 = INTEGER: disabled(2) SNMPv2-MIB::snmpSilentDrops.0 = Counter32: 0 SNMPv2-MIB::snmpProxyDrops.0 = Counter32: 0 [root@jaredRH90 root]# ***** SNMP QUERY FINISHED ***** ATTENTION Click on the following links for more information about RFC1317 RS-232 like group and RFC 1213 MIB-II. - Page 53 DA-681 Linux Managing Communications 2. Generate a preset shared key by typing the command: # openvpn --genkey --secret secrouter.key 3. Copy the file that is generated to the OpenVPN machine: # scp /etc/openvpn/secrouter.key 192.168.8.174:/etc/openvpn ATTENTION A preshared key is located at /etc/openvpn/secrouter.key. You can use it for testing purposes. We suggest creating a new key for non-testing purpose.
- Page 54 DA-681 Linux Managing Communications 6. On machine OpenVPN B, modify the remote address in configuration file /etc/openvpn/tap0-br.conf. # point to the peer remote 192.168.8.173 dev tap0 secret /etc/openvpn/secrouter.key cipher DES-EDE3-CBC auth MD5 tun-mtu 1500 tun-mtu-extra 64 ping 40 up /etc/openvpn/tap0-br.sh #comp-lzo 7.
- Page 55 DA-681 Linux Managing Communications ATTENTION You can create link symbols to start the OpenVPN service at boot time: # ln -sf /etc/init.d/openvpn /etc/rc2.d/S16openvpn To stop the service, you should create these links: # ln -sf /etc/init.d/openvpn /etc/rc0.d/K80openvpn # ln -sf /etc/init.d/openvpn /etc/rc6.d/K80openvpn 9.
-
Page 56: Ethernet Bridging For Private Networks On The Same Subnet
DA-681 Linux Managing Communications Ethernet Bridging for Private Networks on the Same Subnet 1. Set up four machines, as shown in the following diagram. 2. The configuration procedure is almost the same as for the previous example. The only difference is that you will need to comment out the parameter up in /etc/openvpn/tap0-br.conf of OpenVPN A and /etc/openvpn/tap0-br.conf of OpenVPN B. - Page 57 DA-681 Linux Managing Communications 2. On machine OpenVPN A, modify the remote address in configuration file /etc/openvpn/tun.conf. # point to the peer remote 192.168.8.174 dev tun secret /etc/openvpn/secrouter.key cipher DES-EDE3-CBC auth MD5 tun-mtu 1500 tun-mtu-extra 64 ping 40 ifconfig 192.168.2.173 192.168.4.174 up /etc/openvpn/tun.sh #----------------------------end----------------------------- 3.
- Page 58 DA-681 Linux Managing Communications The first argument of parameter ifconfig is the local internal interface and the second argument is the internal interface at the remote peer. $5 is the argument that the OpenVPN program passes to the script file. Its value is the second argument of ifconfig in the configuration file.
-
Page 59: System Recovery
System Recovery The DA-681-LX is installed with the Embedded Linux operating system, which is located in the Flash DOM (CompactFlash card) shipped with the DA-681-LX computer. Although it happens rarely, you may find on occasion that operating system files and/or the disk file system are damaged. This chapter describes how to recover the Linux operating system. -
Page 60: Recovery Environment
DA-681 Linux System Recovery Recovery Environment The recovery environment includes the DA-681-LX embedded computer and a bootable USB disk with the recovery programs and system image file. DA-681-LX Bootable USB DISK USB Port (recovery Recovery Procedure 1. Format an Empty USB Disk. a. - Page 61 DA-681 Linux System Recovery b. Power on and press DEL to enter the bios setup menu. c. Select Advanced Hard Disk Boot Priority and then press Enter. d. From the setup menu, use “↑” or “↓” to select the USB device e.
- Page 62 DA-681 Linux System Recovery 4. Recover the Linux system from a USB Disk. a. If the BIOS setup is correct, it will boot from the USB disk. Follow the steps below to set up recovery parameters. Welcome to PING (Partition Image Is Not Ghost)! This tool can be used to both backup a Ghost-like image of your hard disk and to restore your hard disk from such an image.
- Page 63 DA-681 Linux System Recovery d. Choose restore image from Local disk partition. PING (Partition Image Is Not Ghost)! Where do you want to save/restore your image to/from? Network share Local disk partition <OK> <Cancel> e. Choose ### Choose THIS if you want a restoration ### Choose the partition to backup Note that you cannot restore a partition to itself.
- Page 64 DA-681 Linux System Recovery g. Enter “\” to choose the root directory of the restoration image. Enter root directory containing your data (eg. \mydir\PartImage) <OK> <Cancel> h. Choose DA680_V1.0_Build_08031316 for the restoration image. Action and Available images for restoration … Choose Create_New_Image if you want a ghost-like images of your partitions.
- Page 65 DA-681 Linux System Recovery 5. Set up the BIOS back to boot from DOM or CompactFlash Disk. a. Power on and press DEL to enter the bios setup menu. b. Select Advanced Hard Disk Boot Priority and then press Enter. c.
Need help?
Do you have a question about the DA-681 Series and is the answer not in the manual?
Questions and answers