
Subscribe to Our Youtube Channel
Related Manuals for Wacker Neuson RD24


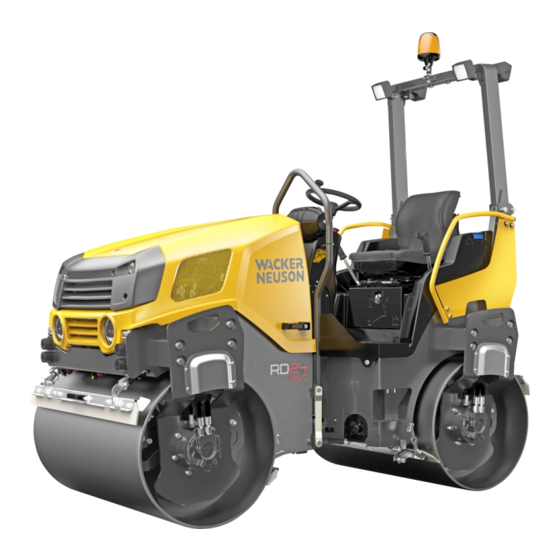
Summary of Contents for Wacker Neuson RD24
- Page 1 Instruction manual Tandem roller / Combination roller RD24 / RD27 Vehicle type RD24 / RD27 Issue Document order number 5100010696 Language From serial number WNCR0601JHAA00160...
- Page 2 Manufacturer: HAMM AG Hammstraße 1 D-95643 Tirschenreuth, Germany Manufactured for: Wacker Neuson Produktion GmbH & Co. KG Wackerstraße 6 D-85084 Reichertshofen, Germany www.wackerneuson.com Tel: +49 (0) 8453 340 32 00 E-mail: service-LE@wackerneuson.com Original instruction manual Created on: 01.02.2015 Changed on: 15.10.2019...
- Page 3 This instruction manual is valid for the following roller types: TANDEM ROLLER RD24-100 RD24-100o RD27-120 RD27-120o COMBINATION ROLLER RD24-100c RD27-100c BA RD24_RD27 en 04...
-
Page 4: Table Of Contents
Table of Contents TABLE OF CONTENTS Preface..........................12 1.00 Preface............................. 13 1.00.01 Preface to the instruction manual..................13 1.00.02 Product information......................13 1.00.03 Guarantee..........................13 1.00.04 Modifications/reservations....................14 1.00.05 Packaging and storage..................... 14 1.00.06 Signs and symbols......................14 1.00.07 Explanation of abbreviations.....................15 1.00.08 Warning notes........................16 1.01 Documentation........................17 1.02... - Page 5 Table of Contents 2.01 General view of machine.......................37 2.01.01 Chassis/safety devices......................37 2.01.02 Stickers on the machine....................38 2.01.03 ROPS..........................42 2.01.04 Consumable fill holes......................43 2.02 Control stand.......................... 44 2.02.01 Seat console........................44 2.02.02 Operating station controls....................45 2.02.03 Steering column........................ 45 2.02.04 Control panel........................
- Page 6 Table of Contents 3.14 Starting the machine......................82 3.15 Driving............................. 84 3.15.01 Seat contact switch......................84 3.15.02 Adjusting the engine speed....................85 3.15.03 Driving in normal operation....................86 3.16 Stopping the machine in normal operation................ 88 3.17 Stopping the machine in an emergency – EMERGENCY STOP........89 3.18 Stopping the machine because of a fault................
- Page 7 Table of Contents Maintenance........................123 4.00 General maintenance instructions..................123 4.00.01 Important information about maintenance works............123 4.00.02 Running-in instructions....................126 4.00.03 Maintenance overview....................127 4.00.04 Welding work on the machine..................129 4.01 Chassis/safety devices......................130 4.01.01 Basic maintenance work....................130 4.01.02 Checking and replacing steps/slip-resistant surface............130 4.01.03 Testing the EMERGENCY STOP function..............131...
- Page 8 5.00.04 Hydraulic oil (mineral oil)....................170 5.00.05 Biodegradable hydraulic oil.....................172 5.00.06 Overview of lubricant details...................173 5.00.07 Starting torques....................... 174 5.01 Technical data........................175 5.01.01 RD24-100........................175 5.01.02 RD24-100o........................177 5.01.03 RD24-100C........................179 5.01.04 RD27-120........................181 5.01.05 RD27-120o........................183 5.01.06 RD27-120c........................185 BA RD24_RD27 en 04...
- Page 9 Table of Contents 5.02 Dimension sheet........................187 5.02.01 RD24-100, RD24-100o....................187 5.02.02 RD24-100c........................187 5.02.03 RD27-120, RD27-120o....................188 5.02.04 RD27-120c........................188 5.03 Fuses............................. 189 5.03.01 Engine compartment....................... 189 5.03.02 Steering column......................190 5.03.03 Dashboard/control panel....................190 5.04 Diagnostic Code........................191 5.04.01 Standard design......................
- Page 10 Table of Contents 6.07 Anti-freeze filling system for water sprinkling..............221 6.07.01 Overview..........................221 6.07.02 Description........................221 6.07.03 Operation......................... 221 6.08 HAMM Temperature Meter....................223 6.08.01 Overview..........................223 6.08.02 Description........................223 6.08.03 Operation......................... 224 6.09 Bypass filter for hydraulic oil..................... 225 6.09.01 Overview..........................225 6.09.02 Maintenance........................225 BA RD24_RD27 en 04...
- Page 11 EC Declaration of Conformity EC DECLARATION OF CONFORMITY BA RD24_RD27 en 04...
-
Page 12: Preface
This instruction manual is not a manual for extensive maintenance and repair work. Such work should be carried out by Wacker Neuson Service or authorised specialists. The safety of the operator was one of the most important aspects taken into consideration when this machine was designed. -
Page 13: Preface
Preface Preface 1.00 Preface 1.00.01 Preface to the instruction manual This chapter contains important instructions for the operating personnel on how to operate the machine and to use this instruction manual. Read the instruction manual carefully and get to know the machine. Following the instruction manual: Helps to avoid risks. -
Page 14: Modifications/Reservations
Preface Preface if you install the accessory equipment that the manufacturer has approved. if you maintain the machine as prescribed. if you use the machine how described in the instruction manual. In all other cases, the warranty is excluded. 1.00.04 Modifications/reservations The instruction manual describes the current version of the machine. -
Page 15: Explanation Of Abbreviations
Preface Preface Positioning in illustrations Figures are labelled with numbers. Item lines connect the correct items in the figure with the numbers. The numbers only annotate the items for the text section to which the figure belongs. The numbering starts anew for each figure. In descriptive text, these numbers are in square brackets. -
Page 16: Warning Notes
Preface Preface Abbreviation Meaning Selective Catalytic Reduction Exhaust gas after-treatment system 1.00.08 Warning notes Warning notices inform about sources of danger, and state risks and how to avoid them. Always follow the instructions to avoid risks! Warning notices always apply to the complete section of the instruction manual that they precede. -
Page 17: Documentation
Preface Documentation 1.01 Documentation This instruction manual is intended to make the operating personnel familiar with the basic work and activities on and with the machine. The entire instruction manual consists of: Safety manual Instruction manual of the machine Instruction manual of the diesel engine If necessary, additional information (e. -
Page 18: Use
Preface 1.02 1.02.01 Intended use The machine represents state-of-the-art technology and complies with all valid safety regulations concerning its intended use at the time the machine was launched on the market. When designing the machine it was not possible to avoid all possible foreseeable misuse or residual risks without restricting the machine's intended functionality. -
Page 19: Residual Risks
Preface In the case the spare parts used are no original spare parts. Omission of maintenance and repair work. Improper maintenance and repair work. Unauthorized modifications of the machine. 1.02.03 Residual risks Residual risks have been analysed and evaluated prior to starting the construction and planning the machine. - Page 20 Preface Operation outside this temperature range requires the express authorization of the manufacturer. Use under extreme climatic conditions places special demands on equipment and fuel. WARNING Explosion! Severe injury and death due to burns and moving parts. Do not use aerosol start-up aid (e.g. ether). Do not use any liquids as start-up aid (e.g.
-
Page 21: Environmental Protection
Preface Environmental protection 1.03 Environmental protection Send packaging, cleaning materials and used or residual operating materials for recycling. Observe the environmental protection regulations applicable at the place of use. When operating the machine, observe the notes in this instruction manual in order to avoid unnecessary impact on the environment. -
Page 22: Disposal
Preface Disposal 1.04 Disposal Conservation of nature is one of our major tasks. Properly disposed devices avoid negative impacts on human beings and the environment and allows re-using our precious resources. Operating supply items Please dispose all operating supply items according to relevant specifications and local regulations of the relevant country. -
Page 23: Type Plate
Preface Type plate 1.05 Type plate The type plate as a whole has an official value and must not be altered or effaced. The pictogram represents the machine's conformity. If the machine type plate does not bear a CE pictograph, the machine does not correspond to the applicable EU Directives. - Page 24 Preface Type plate Machine type plate The type plate is attached to the machine frame ("Chassis/safety devices", page 37). 17236 Homologation (for example the Designation registration number for driving on public roads) Type Year of manufacture Vehicle identification number Engine power/nominal speed (VIN/PIN) Unladen weight Operating weight...
- Page 25 Preface Type plate BA RD24_RD27 en 04...
- Page 26 Preface Type plate ROPS/FOPS type plate The ROPS (cab, roll-over bar) and/or FOPS (falling-object protective structure) approved for this machine by the manufacturer are/is identified by a type plate that is attached to the cab/roll-over bar ("Control stand", page 44). 17237 Series/type (part of the VIN/ Cab/ROPS identification...
- Page 27 Preface Type plate Engine type plate The engine approved by the manufacturer for this machine is also indicated by a specially produced type plate. It is located on the side of the machine type plate (in the engine compartment). 17390 Engine manufacturer Type Engine identification number...
-
Page 28: Noise And Vibration Requirements
Preface Noise and vibration requirements 1.06 Noise and vibration requirements The sound emission of the machine was measured according to the CE Sound Emission Directive in the version 2000/14/EC. The sound and vibration indications on the driver's seat correspond to the requirements of the CE Machinery Directive in the version 2006/42/EC. -
Page 29: Personnel
Preface Personnel 1.07 Personnel 1.07.01 Qualification and duties Operating personnel All activities at the machine must be carried out by authorised operating personnel only. For the purpose of this instruction manual, operating personnel shall be deemed to include every authorized person entrusted with operating, maintaining, installing, setting, cleaning or transporting the machine. - Page 30 Preface Personnel Please adhere to the following instructions: Please make yourself familiar with the machine's and the loading vehicle's dimensions. Wear reflective clothing. For instructing please use voice radio (e.g when loading with a crane) or via hand signals (e.g. when reversing the machine). BA RD24_RD27 en 04...
-
Page 31: General Safety Instructions
Preface General safety instructions 1.08 General safety instructions Safety manual The safety manual is part of the instruction manual. Please make yourself familiar with these safety instructions prior to working with the machine. Warning notes Observe and follow the warning notes in this instruction manual and on the machine (warning signs) without fail. -
Page 32: Driving On Public Roads
Preface Driving on public roads 1.09 Driving on public roads The following is applicable in Germany (StVZO – German Road Traffic Type Approval Law) The government of Upper Palatinate grants an exception permit (see the details indicated on the original) for this machine pursuant to section 70, subsections 1 and 2 of the German Road Traffic Type Approval Law (StVZO). -
Page 33: Danger Zone
Preface Danger zone 1.10 Danger zone The machine's danger zone is divided into two sub-zones: "inactive" and "moving". There are other danger zones when the machine is loaded by crane and transported. Also observe the operating manuals and instructions for the loading and transporting machines. "Inactive"... -
Page 34: Description
Description Information on the machine DESCRIPTION 2.00 Information on the machine When working at the machine please always adhere to the instructions given in your Safety instructions! 2.00.01 Technical characteristics Drive unit Hydrostatic all-wheel drive infinitely variable Single lever operation Dynamic compaction system Direct hydrostatic drive Steering... -
Page 35: List Of Auxiliary Equipment
Description Information on the machine 2.00.02 List of auxiliary equipment The following list shows possible (optional) special attachments. This operating manual also describes special attachments that may not be present on your machine. Please contact your customer service if you have any questions about availability. -
Page 36: Control Panel Versions
Description Information on the machine 2.00.03 Control panel versions The original operator control panel of the series has been adapted and enlarged in part in order to improve operator control and functional checks for different pieces of add-on equipment, In some cases, this may lead to changes in operator control sequences and procedures. -
Page 37: General View Of Machine
Description General view of machine 2.01 General view of machine 2.01.01 Chassis/safety devices Stickers indicating dangers Lifting lug for crane loading Bonnet Lashing point Chassis Safety strut Steps [10] Machine type plate Position for fire extinguisher (optional) [11] [12] Lifting lug (optional) Trailer hitch (optional) [13] Seat belt... -
Page 38: Stickers On The Machine
Description General view of machine 2.01.02 Stickers on the machine Below please find a list of warning signs and information signs affixed to the machine. The images and values may vary according to the type of machine. For the detailed arrangement of warning and information signs, please refer to the spare parts catalogue. - Page 39 Description General view of machine Water tank outlet Additive sprinkling system Water tank inlet for additive sprinkling Water tank outlet for additive sprinkling Water pump Hydraulic oil fill level Hydraulic oil reservoir inlet Hydraulic oil reservoir outlet BA RD24_RD27 en 04...
- Page 40 Description General view of machine 12 V socket Engine oil outlet Fuel filter water sump outlet Coolant fill level Coolant inlet Tyre pressure Guaranteed sound power level First aid BA RD24_RD27 en 04...
- Page 41 Description General view of machine Expert inspection test badge Maintenance overview 10 hrs; daily maintenance The activities that are shown on the sign must be carried out on a daily basis before starting up the machine – at least every 10 hours. The check and maintenance work that is to be carried out may deviate from what is shown, depending on the model and equipment of the machine.
-
Page 42: Rops
Description General view of machine Check: Hydraulic oil fill level (top up if required) Coolant fill level (top up if required) Engine oil fill level (top up if required) Dust valve at the air filter (clean if required) Tyre pressure (correct if required) Clean: Filter for the water-sprinkling system Sprinkler nozzles... -
Page 43: Consumable Fill Holes
Description General view of machine Version with folding ROPS roll-over bar Handrails Storage compartment for instruction manual/first aid kit Steering column Driver's seat console Roll-over bar ROPS roll-over bar type plate Locking pin 2.01.04 Consumable fill holes Fuel Water sprinkling system Additive sprinkling system BA RD24_RD27 en 04... -
Page 44: Control Stand
Description Control stand 2.02 Control stand 2.02.01 Seat console Driver's seat, model A Seat adjustment weight Seat adjustment forward/backward Seat adjustment backrest Seat adjustment left/right Safety belt Driver's seat, model B Seat adjustment weight Seat adjustment forward/backward Seat adjustment backrest Seat adjustment left/right Safety belt Seat heating (option) -
Page 45: Operating Station Controls
Description Control stand 2.02.02 Operating station controls Steering column Driving lever Switch for all-wheel lock Switch for water sprinkling system Switch for additive sprinkling system 2.02.03 Steering column Steering wheel Control panel EMERGENCY STOP Preselection engine speed Electrical system/engine start switch Switch seat heating (option) KAG sprinkler switch (option) BA RD24_RD27 en 04... -
Page 46: Control Panel
Description Control stand 2.02.04 Control panel Standard version Warning and pilot lights Driving light, turn signals, signal horn Work light Rotating beacon Parking brake Hazard warning light Dynamic compaction system Water sprinkling system control Tank content fill level [10] Info display for system info/diagnostic codes BA RD24_RD27 en 04... -
Page 47: Drive Lever
Description Control stand Version with auxiliary equipment Warning and pilot lights Driving light, turn signals, signal horn Work light Rotating beacon Parking brake Hazard warning light Dynamic compaction system Water sprinkling system control Tank content fill level [10] Info display for system info/diagnostic codes [11] Compaction display [12]... -
Page 48: Drive Unit/Diesel Engine
Description Drive unit/diesel engine 2.03 Drive unit/diesel engine Fuel system Oil dipstick Oil inlet Diesel engine with drive units Air filter Coolant inlet Coolant level indicator Air filter Dust discharge valve Cooling system Diesel engine oil outlet Exhaust system V-belt protection BA RD24_RD27 en 04... - Page 49 Description Drive unit/diesel engine Diesel engine type plate BA RD24_RD27 en 04...
-
Page 50: Hydraulic Oil Supply
Description Hydraulic oil supply 2.04 Hydraulic oil supply Oil inlet Fill level indicator Hydraulic oil reservoir Oil outlet Hydraulic oil filter BA RD24_RD27 en 04... -
Page 51: Electrical System
Description Electrical system 2.05 Electrical system Engine compartment Battery Battery isolating switch Main fuse Control stand Fuses Machine diagnostic interface - for version with add-on equipment Socket 12 V BA RD24_RD27 en 04... -
Page 52: Transmission
Description Transmission 2.06 Transmission Tandem roller Wheel hub motor Top drum scraper Bottom drum scraper Combination roller Wheel hub motor Top drum scraper Bottom drum scraper Scrapper tyres BA RD24_RD27 en 04... -
Page 53: Steering System
Description Steering system 2.07 Steering system Steering cylinder Articulated pendulum joint BA RD24_RD27 en 04... -
Page 54: Water System
Description Water system 2.08 Water system 2.08.01 Water sprinkling system 4, 5 Water sprinkler nozzles Water tank inlet Water tank Water outlet Water filter 2.08.02 Additive sprinkling Additive sprinkler nozzles Additive tank Additive sprinkling water pump Additive tank outlet Additive tank inlet BA RD24_RD27 en 04... -
Page 55: Dynamic Compaction System
Description Dynamic compaction system 2.09 Dynamic compaction system Drum with vibrator/oscillator Vibration drive motor BA RD24_RD27 en 04... -
Page 56: Operation
Operation Important information about operating the machine OPERATION 3.00 Important information about operating the machine Operating the machine requires specialist knowledge about driving construction machines. Only authorized operating personnel may operate the machine. The following safety instructions apply to all operating activities machine. DA NG ER Operating errors! Danger to life and limb and risk of injuries and material damage... - Page 57 Operation Important information about operating the machine WARNING Unintended engine start! Severe injury and death caused in case of an unintended engine start during testing and adjusting work. Do not carry out any testing and adjusting work unless the engine has been stopped and the ignition has been switched off.
-
Page 58: Safety Strut
Operation Safety strut 3.01 Safety strut WARNING Unintentional movement of the machine! Severe injury or death due to unexpected machine movement during setting work. Do not connect or disconnect the safety strut unless the engine is stopped and the ignition is set to off. Park the machine on safe ground, i.e., flat and horizontal ground with sufficient bearing capacity. - Page 59 Operation Safety strut Releasing safety strut Pull the spring cotter pin [1] out of the bolt [2]. Pull out the bolt [2]. Swing the coupling bar [3] upwards and press it down. Use the bolt [2] to lock the coupling bar [3] in place. Slide the spring cotter pin [1] into the bolt [2].
-
Page 60: Loading And Transporting
Operation Loading and transporting 3.02 Loading and transporting Observe all regulations when loading and transporting the machine to and from its place of use! Regulations and Provisions When loading rollers onto trucks, trailers or semitrailers, it is essential to secure the machine properly on the carrying vehicle. The duty for tie-down on street vehicles arises from StVO §... - Page 61 Operation Loading and transporting Drive the roller slowly and carefully from the loading area. For crane loading, always attach appropriate sling equipment at the lifting lugs provided for them. The crane vehicle must be positioned on flat ground providing the bearing capacity required while observing all relevant safety regulations.
- Page 62 Operation Loading and transporting Load securing Special notes Variant and variant may be combined. The lashing devices must not necessarily be arranged crosswise. Do not use any lashing device unless it is of sufficient dimension, bears the corresponding marking, and has been subjected to a valid inspection.
- Page 63 Operation Loading and transporting Maximum permissible ramp slope: See loading charts Ramp length [mm] Difference in height [mm] Ramp slope [%] H x 100 Always use the correct load distribution plan. ] Centre of gravity BA RD24_RD27 en 04...
- Page 64 Operation Loading and transporting Crane loading Special instructions Park the crane vehicle on flat ground that provides the necessary load-bearing capacity. Comply with all applicable safety regulations when doing so. The crane's load table must correspond to the weight and to the centre of gravity of the machine to be lifted.
- Page 65 Operation Loading and transporting Loading chart Diagram of the transport position Diagram of the centre of gravity specifications Lashing variant 1 Weight class [t] Lashing capacity LC (μ=0.6) [daN] max. 5.7 2000 Lashing variant 2 Weight class [t] Lashing capacity LC (μ=0.6) [daN] max.
- Page 66 Operation Loading and transporting Machine parameters Weight of machine [t] 1,5 t < m < 5,7 t Area of centre of gravity [mm] = 778–1048 = 428–753 = 650–1030 Identification reference point: Centre drum, front left Interface parameters: Type of contact: Anti-slip Material Frictional force [μ]:...
-
Page 67: Function Tests Before Starting Work
Operation Function tests before starting work 3.03 Function tests before starting work Check the following to ensure safe operation of the machine: Test Refer to Can the machine be accessed safely? see page 68 Has the driver's seat been adjusted? see page 69 Has the seat belt been tested? see page 72... -
Page 68: Access To The Machine
Operation Access to the machine 3.04 Access to the machine WARNING Danger of slipping when climbing up and down! Risk of injury caused by slipping when climbing onto and off the machine. Use only the ladders, climbing handholds and steps provided. Only climb up and down on machines that are stationary and secured. -
Page 69: Adjust The Operator's Seat
Operation Adjust the operator's seat 3.05 Adjust the operator's seat WARNING Uncontrolled motion! Injuries due to uncontrolled movements when changing the driver's seat position when driving. Only drive with latched operator’s seat. Do not adjust the driver's seat during travel. Free access to bodywork and engine parts. - Page 70 Operation Adjust the operator's seat Seat adjustment left/right Lift the lever [4]. Slide the seat pedestal to the desired position to the left or right. Release the lever [4] and let the seat pedestal snap in place. Driver's seat, model B Set driver's weight There is damping built into the driver's seat that compensates for shock- like machine movements.
- Page 71 Operation Adjust the operator's seat Seat heating (option) To allow heating the seat, the driver's seat for version B is equipped with an optional seat heater. The switch is located on the right-hand side of the steering column. Press switch [5]. The seat heater is on.
-
Page 72: Using Safety Belt
Operation Using safety belt 3.06 Using safety belt WARNING Driving without safety belt! Serious injuries or death can occur if the machine brakes suddenly or tips over and the seat belt is damaged or not worn correctly. Only drive the machine when wearing the seat belt. Put on the seat belt correctly and do not twist it. - Page 73 Operation Using safety belt When the safety belt is not fastened, a warning lamp lights up on the operator control panel (see "Operator control panel - Warning and pilot lights") and an audible signal is heard. BA RD24_RD27 en 04...
-
Page 74: Set Operation And Rear Mirror
Operation Set operation and rear mirror 3.07 Set operation and rear mirror The operation and rear-view mirrors are an option. They can be installed either on one side or on both sides. Adjust the mirrors so that you can watch the traffic in the rear of the machine. -
Page 75: Opening And Closing The Bonnet
Operation Opening and closing the bonnet 3.08 Opening and closing the bonnet Opening the engine hood Use the ignition key in the lock on the handle [2] to unlock the engine hood [1]. Press the push-button on the handle [2]. Raise the engine hood [1]. -
Page 76: On-Board Electrical System/Battery Isolation Switch
Operation On-board electrical system/battery isolation switch 3.09 On-board electrical system/battery isolation switch NO T IC E Voltage spikes! Damage or destruction of electrical components. Only interrupt the electrical circuit at the battery main switch when the engine is at a standstill and the electrical system is switched off. -
Page 77: Switching The Electrical System On/Off
Operation Switching the electrical system on/off 3.10 Switching the electrical system on/off Ignition key The electrical system is switched on and off and the diesel engine started and stopped with the ignition key. Switching on electrical system Turn ignition key [1] to position I. The electrical system is switched on. -
Page 78: Switching The Parking Light, Driving Light And Work Light On/Off
Operation Switching the parking light, driving light and work light on/off 3.11 Switching the parking light, driving light and work light on/ To control parking light and driving light, use the operator control panel. The parking light can still be switched on when the electrical system is switched off. - Page 79 Operation Switching the parking light, driving light and work light on/off Switch [1] unlit: Driving light off. When it is set to on, the parking light will automatically change to driving light as soon as the electrical system is set to on. When it is set to on, the driving light will automatically change to parking light as soon as the electrical system is switched off.
-
Page 80: Switching The Turn Signals/Hazard Warning Lights On And Off
Operation Switching the turn signals/hazard warning lights on and off 3.12 Switching the turn signals/hazard warning lights on and off To control the indicator lights and warning flashers, use the operator control panel. The warning flashers can also be switched on when the electrical system is off. -
Page 81: Switching The Rotating Beacon And Signal Horn On And Off
Operation Switching the rotating beacon and signal horn on and off 3.13 Switching the rotating beacon and signal horn on and off The rotating beacon and signal horn are operated from the control panel. Switching rotating light on/off Requirement: Electrical system is ON. Press switch [1]. -
Page 82: Starting The Machine
Operation Starting the machine 3.14 Starting the machine Requirement: Fill levels for the operating materials, for example fuel, water etc., are adequate. Before starting the machine, check all functions and settings (see "Function tests before starting work"). The electrical system is switched on and off and the diesel engine started and stopped with the ignition key. - Page 83 Operation Starting the machine When the starting temperature is reached, the indicator light switches off. Do not start the diesel engine before this. Preheating is time controlled only. When the temperature is low, preheat twice if necessary. Starting the diesel engine NO TI CE Damage of the starter! Damage or destruction of the starter as a result of an excessively long...
-
Page 84: Driving
Operation Driving 3.15 Driving WARNING Braking delay! Severe injury or death due to a longer braking distance at a low operating temperature and especially when freezing. After starting the diesel engine, wait for a few minutes before driving off until the machine reaches the operating temperature. Drive the machine at moderate speed until the yellow hydraulic oil temperature warning light goes out. -
Page 85: Adjusting The Engine Speed
Operation Driving If the driver fails to react, the machine will be braked until it stops after a total of 3 seconds, and the working functions will be set to off. The diesel engine continues running. Braking is not initiated if the driver returns to his seat within 2 seconds of leaving it. -
Page 86: Driving In Normal Operation
Operation Driving 3.15.03 Driving in normal operation Make ready to drive/release parking brake Requirement: Diesel engine is running, drive lever in 0 position Press the parking brake [1] switsch. Parking brake indicator light [2] is out. For versions with add-on equipment: Parking brake switch [1] unlit. Machine is ready to start. - Page 87 Operation Driving All-wheel lock (optional) The machine is equipped with a hydraulic four-wheel drive, which is driven by a variable displacement pump. The blower output is fed to both hub motors in the drum. The driving power of the machine is used for the locomotion according to the surface conditions and the corresponding drift.
-
Page 88: Stopping The Machine In Normal Operation
Operation Stopping the machine in normal operation 3.16 Stopping the machine in normal operation Quietly and steadily move the drive lever to position 0 and stop it/let it click into place there. Set the motor speed to idle (MIN). The hydrostatic transmission brakes the machine to a standstill. The parking brake has not been activated. -
Page 89: Stopping The Machine In An Emergency - Emergency Stop
Operation Stopping the machine in an emergency – EMERGENCY STOP 3.17 Stopping the machine in an emergency – EMERGENCY STOP WARNING Full braking! Stopping the machine suddenly can lead to serious injuries or death. Only use the EMERGENCY STOP in the event of danger. Do not use the EMERGENCY STOP as the service brake. - Page 90 Operation Stopping the machine in an emergency – EMERGENCY STOP To release the EMERGENCY STOP button [1]: Turn the button clockwise until the lock is released. Switch on the electrical system using the ignition key. The diesel engine can be started. BA RD24_RD27 en 04...
-
Page 91: Stopping The Machine Because Of A Fault
Operation Stopping the machine because of a fault 3.18 Stopping the machine because of a fault NO TI CE Severe malfunctions! Damage or destruction of machine components caused by continuing operation despite serious faults. When a serious fault is indicated, immediately stop the machine at a safe position outside the danger zone. - Page 92 Operation Stopping the machine because of a fault A serious fault is indicated in the following events: Hydraulic oil temperature is too high Engine temperature is too high Water in diesel (water sump fuel prefilter) Missing charge current when the diesel engine is running. Fault indication (For versions with add-on equipment) In case of deviation from the normal operating condition:...
-
Page 93: Driving With Dynamic Compaction System
Operation Driving with dynamic compaction system 3.19 Driving with dynamic compaction system WARNING Reduced road adhesion! Serious injuries or death through the machine tipping over because of reduced ground adhesion. Never switch on the dynamic compaction system when traveling across a slope or on hard ground. WARNING Explosion! Severe injury or death by gas explosion. -
Page 94: Switching The Compaction System On And Off
Operation Driving with dynamic compaction system 3.19.01 Switching the compaction system on and off The dynamic compaction system is deactivated every time the engine is started. Standard version [II] Version with auxiliary equipment Switch/symbol Meaning Operating mode switch Manual Automatic Preselect the drum Indicator LED for the preselected drum Activate the drum... -
Page 95: Jump Operation (Rmv)
Operation Driving with dynamic compaction system switched off when at low or high speed. Always preset manual mode when restarting the machine. Preselect the roller drum The dynamic compression of the roller drums can be performed both in combination and single for every roller drum. Press switch [2]. -
Page 96: Compaction (Hmv)
Operation Driving with dynamic compaction system 3.19.03 Compaction (HMV) Display on the version with auxiliary equipment The HMV value indicates the currently achieved compaction. The driver can see whether the subgrade needs further compaction or where there is a weak point. If the machine is not equipped with a computer unit for HMV, nothing will be displayed. -
Page 97: Driving With Water Sprinkling System
Operation Driving with water sprinkling system 3.20 Driving with water sprinkling system After each engine start water sprinkling system is deactivated. The water sprinkling system wets the drums/tyres and the edge pressure and cutting device with water. The wetting prevents that bitumen sticks on roller drums/tyres when laying blacktops. - Page 98 Operation Driving with water sprinkling system Luminous spots [3] are off. Pilot LED [2] is permanently off while driving. Ensure that the drums/tyres are wetted evenly. Selecting sprinkling stage When the water sprinkling system is avtivated, the water consumption can be regulated areas using spinkling stages. Requirement: Water sprinkling system is activated.
-
Page 99: Driving With Additive Sprinkling System
Operation Driving with additive sprinkling system 3.21 Driving with additive sprinkling system The additive sprinkling moistens the tyres with a separating compound. The wetting prevents that bitumen sticks on tyres when laying blacktops. This is the way to make a neat and even covering. The frequency of sprinkling depends on the temperature of the tyres. -
Page 100: Track Offset
Operation Track offset 3.22 Track offset Compacting work along kerbs or similar borders cannot be carried out, or only in a limited way, without track movement of the drums. A track adjustment especially developed for this problem enables the machine to drive very precisely along such problem areas. Adjust track movement WARNING Unintentional movement of the machine! - Page 101 Operation Track offset Loosen the 6x hexagon nuts [1] at the console of the articulated pendulum joint by a maximum of two turns. Apply a piece of squared timber to the side of the console [2]. Readjust the track offset to the right or left by giving hammer blows. Tighten the 6x hexagon nuts [1].
-
Page 102: Adjusting Scrapers
Operation Adjusting scrapers 3.23 Adjusting scrapers The scrapers remove dirt adhering to the surfaces of the drums/tyres. For transport driving, move the scrapers away from the drums/tyres. This prevents premature wear. Rinse out dirt embedded between drums/tyres and scrapers with a water jet. Remove any extremely stubborn dirt with a spatula or similar tool. -
Page 103: Lower Folding Roller Drum Scraper
Operation Adjusting scrapers Attach scraper Switch off diesel engine and remove ignition key. Turn stop lever [1] to I position. The scraper folds down to the roller drum/tyre. Moving the scraper away Switch off diesel engine and remove ignition key. Turn stop lever [1] to 0 position. - Page 104 Operation Adjusting scrapers Attach scraper Switch off diesel engine and remove ignition key. Turn stop lever [1] to I position. The scraper folds down to the roller drum/tyre. Moving the scraper away Switch off diesel engine and remove ignition key. Turn stop lever [1] to 0 position.
-
Page 105: Operation Monitoring
Operation Operation monitoring 3.24 Operation monitoring 3.24.01 Control panel – Warning and pilot lights Standard version Symbol Warning and pi- Status Meaning/action lot light Charge current flashing red No charge current: Check the electrical sys- (battery) tem. Request assistance from customer service. Air filter flashing red The air filter cartridge is contaminated. - Page 106 Operation Operation monitoring Symbol Warning and pi- Status Meaning/action lot light [10] Driving light lit yellow Lights up when the parking light or driving light is switched on. [11] Work lighting lit yellow Lights up when the work light and/or drum light are/is switched on.
- Page 107 Operation Operation monitoring Version with auxiliary equipment 10 13 12 13 Symbol Warning and pi- Status Meaning/action lot light Charge current flashing red No charge current: Check the electrical sys- (battery) tem. Request assistance from customer service. Air filter flashing red The air filter cartridge is contaminated.
- Page 108 Operation Operation monitoring Symbol Warning and pi- Status Meaning/action lot light [11] All-wheel lock lit yellow Lights up when the all-wheel lock is switched [12] Seat belt monitor- lit yellow Lights up when the seat belt is not being used. ing device (option- Put on the seat belt.
-
Page 109: Control Panel - Fill Level Control Indicator
Operation Operation monitoring 3.24.02 Control panel – Fill level control indicator The filling levels in the service fluid tanks are indicated by luminous spots. One or more luminous spots light up according to the filling level. Standard version No. Symbol Indicator Status Meaning/action... -
Page 110: Control Panel - Info Display/System Info
Operation Operation monitoring 3.24.03 Control panel – Info display/system info Standard version Operating hour meter After the electrical system is switched on, the operating hours of the machine are shown in the display field. Maintenance work has to be carried out according to the accumulated operating hours. -
Page 111: Switching Diesel Engine Off
Operation Switching diesel engine off 3.25 Switching diesel engine off Requirement: Diesel engine is running. Latch driving lever in position 0. Fully lower attached accessory equipment. Switch off accessory equipment. Apply parking brake. Parking brake is applied. Diesel engine is running in idle speed. Allow the diesel engine to continue to idle for 1 to 2 minutes. -
Page 112: Automatic Engine Stop
Operation Automatic engine stop 3.26 Automatic engine stop The automatic engine stop automatically sets the diesel engine to off during a longer halt. This is done after a preset period of inactivity when the following conditions are met: Diesel engine is running. Working functions set to off. -
Page 113: Shutting Down And Leaving The Machine Safely
Operation Shutting down and leaving the machine safely 3.27 Shutting down and leaving the machine safely WARNING Unintended machine movement! Severe injury or death due to unexpected machine movements. The driver may only leave the machine when it has been properly and safely shut down. -
Page 114: Towing The Machine
Operation Towing the machine 3.28 Towing the machine An inoperable machine can be towed by another vehicle for short distances. For distances longer than 500 m, the machine must be loaded for further transport. WARNING Spring-operated brake out of function! Severe injury or death due to machine rolling away. -
Page 115: Depressurize The Hydraulic System
Operation Towing the machine Move the drive lever into the position. Press the parking brake switsch. The drive lever is blocked. Parking brake is active. The transmission is not active. Shut down the diesel engine, if still functional. Use parking chocks to secure machine against rolling away. Replace damaged pipes and hoses from which oil leaks before towing (environment protection). -
Page 116: Releasing Spring-Operated Brake
Operation Towing the machine 3.28.03 Releasing spring-operated brake The spring-operated brake may only be disabled when: The engine is defective, or The hydraulic system is defective Putting spring-powered brake out of operation Loosen the screw [1] at the parking brake valve block and unscrew it until you feel resistance (approx. - Page 117 Operation Towing the machine After the repair: The machine must not be brought back into use until a complete function test has been made. BA RD24_RD27 en 04...
-
Page 118: Start With Jump Leads
Operation Start with jump leads 3.29 Start with jump leads Preparation for start assistance Observe precaution measures for handling batteries (see Safety instructions). A discharged battery can freeze already at 0 °C (32 °F). Thaw a frozen battery in a warm room. Remove the plug. Do not disconnect the battery from the vehicle's internal power supply. - Page 119 Operation Start with jump leads Remove the terminal caps from the poles of the batteries. Connect the pole terminal [1] of the first lead to the positive pole of the charged battery. Connect the other terminal clamp [2] of the first lead to the positive terminal of the discharged battery.
-
Page 120: Shutting Down
Operation Shutting down 3.30 Shutting down 3.30.01 Temporarily shutting down the machine and starting it up again WARNING Dangerous operating materials! Risk to health and the environment caused by operating materials that have not been disposed of properly. Dispose of operating materials in accordance with the applicable safety and environmental regulations. -
Page 121: Permanently Shutting Down And Disposing Of The Machine
Operation Shutting down Drain and preserve the fuel system. Fill the AdBlue®/DEF reservoir to 25%. Check the coolant level and, if required, top it up. Drain the engine oil and preserve the engine using running-in preserving oil. Check the gear oil level and, if required, top it up. Drain the liquids from the tanks for water sprinkling, additive sprinkling and the windscreen washer system. - Page 122 Operation Shutting down Disposing of operating materials Catch all liquids in suitable containers and dispose of them properly in accordance with the relevant specifications and national regulations. Wear personal protective equipment: Protective work wear Safety goggles Protective gloves Safety shoes. Remove the batteries and dispose of them in accordance with the statutory provisions.
-
Page 123: Maintenance
Maintenance MAINTENANCE When working at the machine please always adhere to the instructions given in your Safety instructions! Also pay attention to chapter 6, which contains a description of the auxiliary equipment and explains how to operate and service it. 4.00 General maintenance instructions This section describes the work on the machine required for its care and... - Page 124 Maintenance General maintenance instructions WARNING Unintended engine start! Severe injury and death caused in case of an unintended engine start during maintenance work. Do not carry out any maintenance work unless the engine has been stopped and the ignition has been switched off. Before starting maintenance work, set the battery isolating switch to off in order to de-energize the electrical system.
- Page 125 Maintenance General maintenance instructions WARNING Work above floor level! Injury caused by falling. Do not perform any maintenance or repair work above ground level unless using a stable ladder or a maintenance scaffold. To reach the maintenance points on the machine, use the steps indicated.
-
Page 126: Running-In Instructions
Maintenance General maintenance instructions Note on the environment: Catch and properly dispose of any liquid escaping or drained during any maintenance work. 4.00.02 Running-in instructions For engine maintenance, see the instruction manual for the diesel engine. After 50 operating hours Diesel engine maintenance Change the engine oil (see page... -
Page 127: Maintenance Overview
Maintenance General maintenance instructions 4.00.03 Maintenance overview For engine maintenance, see instruction manual for diesel engine. Every 10 operating hours 10 h Check that the parking brake is see page 132 working properly Checking that the seat contact see page 132 switch is working properly Test the EMERGENCY STOP func- see page 131... - Page 128 Maintenance General maintenance instructions Replace the filter cartridge in the fuel see page 136 filter Replace the preliminary fuel filter see page 137 Replace the air filter cartridge see page 140 Check that the driving lever is work- see page 134 ing properly Check the starter battery see page 149...
-
Page 129: Welding Work On The Machine
Maintenance General maintenance instructions 4.00.04 Welding work on the machine Welding work on the machine may only be performed by specifically trained and authorized personnel. Welding work on the machine may change the characteristics of the machine, and are only permissible with the agreement of the manufacturer. -
Page 130: Chassis/Safety Devices
Maintenance Chassis/safety devices 4.01 Chassis/safety devices WARNING Uncontrolled driving behaviour! Severe injury or death due to separate machine movements. Ensure that there are no persons or objects in the danger zone of the machine (moved). Do not check functioning of safety devices in case there is not enough space. -
Page 131: Testing The Emergency Stop Function
Maintenance Chassis/safety devices 4.01.03 Testing the EMERGENCY STOP function Checking function with machine at standstill (daily) Engage drive lever [2] in the 0-position. Start the diesel engine. Press the parking brake [3] switch. Press EMERGENCY STOP [1] when engine at standstill. The machine: switches off the working functions. -
Page 132: Checking That The Parking Brake Is Working Properly
Maintenance Chassis/safety devices 4.01.04 Checking that the parking brake is working properly Checking the parking brake when the machine is stationary Requirement: The driving lever is locked in the 0 position. Start the diesel engine [1]. To apply the parking brake: Press the parking brake switch [2]. Briefly push the driving lever [3] forwards. - Page 133 Maintenance Chassis/safety devices Checking the seat contact switch when the machine is stationary Start the diesel engine [1]. Stand up from the driver's seat (looking forwards). Be sure of your footing and hold on tight. To release the parking brake: Press the parking brake switch [2]. Briefly push the driving lever [3] forwards.
-
Page 134: Control Stand
Maintenance Control stand 4.02 Control stand 4.02.01 Checking that the driving lever is working properly Before making the functional check, set the controls to their home positions: Engage drive lever [1] in the 0-position. Set the motor speed [2] to MIN. Unlock the emergency stop [3]. -
Page 135: Drive Unit/Diesel Engine
Maintenance Drive unit/diesel engine 4.03 Drive unit/diesel engine WARNING Inflammable fuel! Severe injury and death due to fire, explosion and moving parts. Do not smoke. No open fire! Do not inhale fuel fumes. Catch spilling fuel or water sump, do not allow to seep away into the ground! WARNING Fuel is under very high pressure! -
Page 136: Lubricating Oil Change Intervals
Maintenance Drive unit/diesel engine NO T IC E Contaminated inlet air When it is defective, clogged, or contaminated, the air filter can damage the engine. Inspect all lines, flexible tubes and the casing of the air filter for tightness and integrity on a regular basis (at least once per year). Immediately replace any damaged part. -
Page 137: Fuel Prefilter
Maintenance Drive unit/diesel engine Oil dipstick Oil filler Oil drain screw 4.03.03 Fuel prefilter Changing filter cartridge for the fuel pre-filter Switch off diesel engine and remove ignition key. Allow machine to cool down under a temperature of 30 °C (86 °F). Open the drain valve [1] (screw conical nipple into housing). - Page 138 Maintenance Drive unit/diesel engine Switch on the electrical system until fuel runs out of the vent hole [5] of the fuel filter cartridge. Screw in and tighten the vent screw [5]. Check for tightness after assembly. Air in the fuel system is fully vented when starting the diesel engine.
-
Page 139: Check And Clean The Dust Discharge Valve At The Air Filter
Maintenance Drive unit/diesel engine 4.03.04 Check and clean the dust discharge valve at the air filter Before starting work, check the proper passage through the dust discharge valve: Switch off diesel engine and remove ignition key. Squeeze the dust discharge valve [1] and clean the discharge slot. 4.03.05 Check the air filter NO TI CE... -
Page 140: Replacing Air Filter Cartridge
Maintenance Drive unit/diesel engine filter cartridge [1] and the safety cartridge [2] are ready for operation. Air filter pilot light flashing on the information display: Replace the air filter cartridge [1] and/or the safety cartridge [2]. 4.03.06 Replacing air filter cartridge Switch off diesel engine and remove ignition key. -
Page 141: Checking/Cleaning The Radiator
Maintenance Drive unit/diesel engine Changing safety cartridge Switch off diesel engine and remove ignition key. Allow machine to cool down less than 30 °C (86 °F). Fold up the clips [1]. Remove dust container [2]. Clean the inside of the dust container. Pull the air filter cartridge [3] out of the air filter. -
Page 142: Checking Coolant Level
Maintenance Drive unit/diesel engine Check the radiator Check the cooling fins of the radiator for fouling. Cooling fins not soiled: The machine is ready for operation. Cooling fins contaminated: Clean the cooling fins thoroughly and without delay. Cleaning the radiator Switch off the diesel engine and remove the ignition key. -
Page 143: Changing Coolant
Maintenance Drive unit/diesel engine Switch off diesel engine and remove ignition key. Only check the coolant level when the diesel engine is cold. Correct coolant level: Centre of inspection glass [2] on compensator tank. Do not exceed this level! In case of a lack of coolant, only fill up coolant in the specified concentration through filling opening [1] at the compensator tank. - Page 144 Maintenance Drive unit/diesel engine Check coolant level when the diesel motor is cold, fill up as necessary. Correct coolant level: Centre of inspection glass [2] on compensator tank. BA RD24_RD27 en 04...
-
Page 145: Hydraulic Oil Supply
Maintenance Hydraulic oil supply 4.04 Hydraulic oil supply WARNING Leaks in hydraulic hoses! Injuries or fire as a result of oil squirting out of a leaking hydraulic system. All lines, hoses and screwed connections of the hydraulic system must be checked for leaks and visible damage (at least once per year). -
Page 146: Changing Hydraulic Oil And Ventilation Filter
Maintenance Hydraulic oil supply 4.04.02 Changing hydraulic oil and ventilation filter $ Lubricant only admissible if containing this marking ("Technical data", page 165 sqq.). Variant 1 Standard design Variant 2 Vandalism proof version Switch off diesel engine and remove ignition key. Allow machine to cool down less than 30 °C (86 °F). -
Page 147: Replacing The Filter Insert In The Pressure Filter For The Hydraulic System
Maintenance Hydraulic oil supply Also actuate the steering. The pipes and hose lines will be filled with oil and vented. Check oil level with the diesel engine at a standstill. Top up oil if necessary. Check hydraulic system for leaks. 4.04.03 Replacing the filter insert in the pressure filter for the hydraulic system $ Only lubricant with this marking is permitted... -
Page 148: Electrical System
Maintenance Electrical system 4.05 Electrical system 4.05.01 Starter battery WARNING Explosion! Serious injuries or burns caused by exploding gases. Naked flames and smoking are prohibited when handling any battery. Be sure to avoid any sparking. Do not store or charge the battery unless in a well ventilated room. Do not store or charge the battery unless at a temperature of between –15 °C and 45 °C (5 °F and 113 °F). - Page 149 Maintenance Electrical system Battery case Battery terminals and terminal clamps Battery mounting and fastening Maintenance These intervals depend on: Storage and ambient temperatures Acid level and acid concentration Service conditions Do not open batteries without plugs, or VRLA batteries! The battery must be replaced if the electrolyte level or the acid concentration falls below the minimum.
- Page 150 Maintenance Electrical system Check the battery open-circuit voltage (must be at least 11.9 V) with suitable means, and recharge if necessary. Full starter power. External charging Deeply discharged batteries must be removed from the machine for recharging. Observe the manufacturer's specifications for charger and battery during every charging work step.
-
Page 151: Transmission
Maintenance Transmission 4.06 Transmission 4.06.01 Checking roller drum/tyre scraper Only scrapers in correct condition ensure a clean roller drum/type surface. Check scraper for cleanliness. Clean soiled scrapers. Check the condition of the scrapers. Replace worn scrapers in good time. Check setting of the scrapers. Adjust preset scrapers. 4.06.02 Cleaning roller drum/tyre scraper Rinse out dirt embedded between scrapers and roller drums/tyres... -
Page 152: Replacing/Adjusting Type Scrapers
Maintenance Transmission Folding scraper Exchanging the scraper Switch off diesel engine and remove ignition key. Turn stop lever [3] to 0 position. Move the scraper [1] away. Loosen clamp connection [2]. Replace scraper [1] by a new one. Tighten clamp connection [2]. 4.06.04 Replacing/adjusting type scrapers If they are worn-out to such an extent that sticking dirt is not... -
Page 153: Lubricate The Scraper Stop Lever
Maintenance Transmission Loosen clamp connection [2] (2 ×). Replace the scraper [1] by a new one if necessary. Push scraper [1] to the tyres. Establish a clearance of 10 mm between the tyres and the scrapers. Tighten clamp connection [2]. 4.06.05 Lubricate the scraper stop lever Switch off diesel engine and remove ignition key. -
Page 154: Checking Air Pressure In The Tyres
Maintenance Transmission 4.06.07 Checking air pressure in the tyres WARNING Explosion! Severe injury and death due to explosion and moving parts. Change damaged tyres. When filling, do not exceed the values of the specified air pressure. Use only suitable filling devices with a pressure indicator. When filling the tyres, be always next to the tyre, not in front of it. - Page 155 Maintenance Transmission NO TI CE Increased material wear! Material damage through increased wear on tyres, running gear and drive parts as a result of a combination of different tyres on each axle. On one axle, only mount and use tyres that are the same type and have the same design, profile and diameter.
- Page 156 Maintenance Transmission Disassembly Press the valve extension hose [1] out of the fixing device. Loosen and unscrew the wheel nuts [2]. Remove the circlips [3]. Remove the wheels [4, 5] from the wheel hub. Remove the centring rings [6] from the tyre bolt [7]. Assembly Clean/derust the contact surfaces between the wheel and hub.
-
Page 157: Steering System
Maintenance Steering system 4.07 Steering system WARNING Uncontrolled movements! Serious injuries or death caused by unexpected steering movements. Perform work on the steering system with the engine at rest and the electrical system switched off. On machines with safety strut, apply the safety strut before maintenance work. - Page 158 Maintenance Steering system Switch off diesel engine and remove ignition key. Apply the articulated frame steering blocking. Grease lubricating nipple [1]. BA RD24_RD27 en 04...
-
Page 159: Water Sprinkling
Maintenance Water sprinkling 4.08 Water sprinkling NO TI CE Corrosion and frost! Material damage to sprinkler installations due to corrosion and frost. While the machine is going to be parked for an extended period of time and/or in case of danger of freezing: Empty and clean the water sprinkling unit/additive sprinkling system. -
Page 160: Cleaning Sprinkler Nozzles
Maintenance Water sprinkling Sprinkler nozzle check for additive sprinkling Press and hold the switch [3] or foot switch [4]. The additive sprinkler will be active as long as one of the switches is pressed and held. Release switch [3] or [4]. Additive sprinkling turned off. -
Page 161: Emptying And Cleaning The Water Sprinkling System
Maintenance Water sprinkling Switch off diesel engine and remove ignition key. Unscrew the filter head [1] from the water tank and remove it together with the pressure spring [2] (be careful with the sealing rings [3] on the filter head). Pull the filter insert [4] from the water tank. -
Page 162: Emptying And Cleaning The Additive Sprinkling System
Maintenance Water sprinkling Unscrew the filter head [3] from the water tank and remove it together with the pressure spring (be careful with the sealing rings on the filter head). Pull the filter insert from the water tank. Empty the water tank when the filter has been removed. Before cleaning the water tank, remove the filter screen from the fill hole. - Page 163 Maintenance Water sprinkling Observe the disposal regulations as specified by the additive manufacturer. After completing tank drainage, operate the additive sprinkling system until no more separating compound comes out of the sprinkler nozzles. Thoroughly clean the additive tank with a jet of water. Flush the sprinkler nozzle housings and the hoses.
-
Page 164: Dynamic Compaction System
Maintenance Dynamic compaction system 4.09 Dynamic compaction system Prior to maintenance works clean roller drums thoroughly. 4.09.01 Checking the damping elements Switch off diesel engine and remove ignition key. Check the damping elements [1] of the roller drum suspension for cracks. -
Page 165: Tables
Tables Technical data TABLES When working at the machine please always adhere to the instructions given in your Safety instructions! 5.00 Technical data 5.00.01 Engine oil NO TI CE Wrong engine oil! Using the wrong engine oil damages the engine, increases wear, lowers operational reliability and shortens the service life of the engine. - Page 166 Tables Technical data BA RD24_RD27 en 04...
-
Page 167: Fuel
Tables Technical data 5.00.02 Fuel Use only the diesel fuel commercially available which contains a sulphur content below 0.5 %. The engine oil replacement intervals specified here apply only for diesel fuel. Approved diesel fuel specifications are: DIN EN 590 ASTM D 975 Grade-No. -
Page 168: Cooling Liquid (Coolant)
Tables Technical data Exterior temperature Admixture fraction engine petroleum Summer diesel fuel Winter diesel fuel With lower ambient temperatures paraffin precipitations may result in congestions of the fuel system and, thus, in malfunctions. Below an ambient temperature of 0 °C (32 °F) it is necessary to use winter diesel fuel (up down –20 °C (–4 °F)) (gas stations provide them early enough prior to winter time). - Page 169 50 % –40 °C (–40 °F) 52 Vol.% 48 % Wacker Neuson uses and recommends products that are free of nitrites, amines, silicates and phosphates. These are listed in the "Overview of service fluid specifications" section (see page 173). Wacker Neuson supplies all the machines filled with a coolant mixture of 50 parts cooling system protective agent and 50 parts water.
-
Page 170: Hydraulic Oil (Mineral Oil)
Tables Technical data 5.00.04 Hydraulic oil (mineral oil) NO T IC E Wrong hydraulic oils! Using the wrong hydraulic oils can damage or impair the function of the hydraulic system. Only use hydraulic oils recommended by manufacturer. Use only hydraulic oil with a viscosity appropriate for the working temperature. - Page 171 Tables Technical data Excessive amounts of heat (for example from combustion en- gines) Pressure fluid temperature range Optimal operating viscosity range [1000 =] Maximum permissible (short-term) viscosity [II =] 100 mm /s (t = +90 °C) ... 1000 mm /s (t = –25 °C) BA RD24_RD27 en 04...
-
Page 172: Biodegradable Hydraulic Oil
Tables Technical data 5.00.05 Biodegradable hydraulic oil NO T IC E Wrong hydraulic oils! Using the wrong hydraulic oils can damage or impair the function of the hydraulic system. Only use hydraulic oils recommended by manufacturer. Use only hydraulic oil with a viscosity appropriate for the working temperature. -
Page 173: Overview Of Lubricant Details
ISO VG 68 tropical HEES Synthetic saturated ester ISO VG 100 extreme heat (ISO-VG: Viscosity grade). Special oil Use only Wacker Neuson special oil. Special oil Use only Wacker Neuson special oil. Transmission oil with limited slip addi- tives. API GL-5... -
Page 174: Starting Torques
Tables Technical data 5.00.07 Starting torques The starting torques indicated within the tables apply to nuts and screws with headrest according to ISO 4014, 4032, 4762... (frictional coefficient μ =0.095) total unless otherwise specified. Check the tightening torques of nuts and bolts at regular intervals. Tighten if necessary. Starting torques for regular type screw threads Starting torques MA (Nm) Threads... -
Page 175: Technical Data
The version valid at the time the technical data was prepared for this version of the manual was used (see impressum: change date). Other values may apply if modifications are made to the machine in the course of its further development. 5.01.01 RD24-100 Designation Value Unit Dimensions and weights... - Page 176 Tables Technical data Designation Value Unit Water sprinkling system 180.00 l Sound power level Sound power level L , guaranteed 106 dB(A) Sound power level L , representative measurement 104 dB(A) Emissions sound pressure level at the driver's seat Sound pressure level L , measured with cab, max.
-
Page 177: Rd24-100
Tables Technical data 5.01.02 RD24-100o Designation Value Unit Dimensions and weights Unladen weight without ROPS roll-over bar 2284 kg Operating weight with ROPS roll-over bar 2525 kg Front/rear axle load 1205/1320 kg Working width/max. working width 1000/1050 mm Inside/outside turning radius... - Page 178 Tables Technical data Designation Value Unit Water sprinkling system 180.00 l Sound power level Sound power level L , guaranteed 106 dB(A) Sound power level L , representative measurement 104 dB(A) Emissions sound pressure level at the driver's seat Sound pressure level L , measured with cab, max.
-
Page 179: Rd24-100C
Tables Technical data 5.01.03 RD24-100C Designation Value Unit Dimensions and weights Unladen weight without ROPS roll-over bar 2134 kg Operating weight with ROPS roll-over bar 2385 kg Front/rear axle load 1210/1175 kg Axle load per tyre 293.75 kg Working width/max. working width... - Page 180 Tables Technical data Designation Value Unit Diesel engine coolant 8.00 l Hydraulic oil 26.00 l Water sprinkling system 180.00 l Additive sprinkling system 18.00 l Sound power level Sound power level L , guaranteed 106 dB(A) Sound power level L , representative measurement 104 dB(A) Emissions sound pressure level at the driver's seat...
- Page 181 Tables Technical data 5.01.04 RD27-120 Designation Value Unit Dimensions and weights Unladen weight without ROPS roll-over bar 2454 kg Operating weight with ROPS roll-over bar 2695 kg Front/rear axle load 1335/1360 kg Working width/max. working width 1200/1250 mm Inside/outside turning radius 2370/3570 mm Diesel engine Manufacturer...
- Page 182 Tables Technical data Designation Value Unit Sound pressure level L , measured with cab, max. Not available Sound pressure level L , measured with ROPS, max. 90 dB(A) Electrical system Operating voltage 12 V BA RD24_RD27 en 04...
-
Page 183: Rd27-120
Tables Technical data 5.01.05 RD27-120o Designation Value Unit Dimensions and weights Unladen weight without ROPS roll-over bar 2514 kg Operating weight with ROPS roll-over bar 2755 kg Front/rear axle load 1335/1420 kg Working width/max. working width 1200/1250 mm Inside/outside turning radius 2370/3570 mm Diesel engine Manufacturer... - Page 184 Tables Technical data Designation Value Unit Water sprinkling system 180.00 l Sound power level Sound power level L , guaranteed 106 dB(A) Sound power level L , representative measurement 104 dB(A) Emissions sound pressure level at the driver's seat Sound pressure level L , measured with cab, max.
-
Page 185: Rd27-120C
Tables Technical data 5.01.06 RD27-120c Designation Value Unit Dimensions and weights Unladen weight without ROPS roll-over bar 2344 kg Operating weight with ROPS roll-over bar 2595 kg Front/rear axle load 1340/1255 kg Axle load per tyre 313.75 kg Working width/max. working width 1200/1220 mm Inside/outside turning radius 2370/3570 mm... - Page 186 Tables Technical data Designation Value Unit Diesel engine coolant 8.00 l Hydraulic oil 26.00 l Water sprinkling system 180.00 l Additive sprinkling system 18.00 l Sound power level Sound power level L , guaranteed 106 dB(A) Sound power level L , representative measurement 104 dB(A) Emissions sound pressure level at the driver's seat...
-
Page 187: Dimension Sheet
Tables Dimension sheet 5.02 Dimension sheet 5.02.01 RD24-100, RD24-100o (34.1") 1000 1700 1000 (2.2") (2.2") (39.4") (66.9") (39.4") 1100 2530 (43.3") (99.6") 2738 (107.8") 5.02.02 RD24-100c (34.1") 1000 1700 1000 (2.2") (39.4") (2.2") (66.9") (39.4") 2530 1100 (43.3") (99.6") 2738 (107.8") -
Page 188: Rd27-120, Rd27-120O
Tables Dimension sheet 5.02.03 RD27-120, RD27-120o (34.1") 1200 1700 1200 (2.2") (47.2") (2.2") (66.9") (47.2") 1310 2530 (51.6") (99.6") 2738 (107.8") 5.02.04 RD27-120c (34.1") 1140 1700 1200 (1.2") (44.9") (1.2") (66.9") (47.2") 1310 2530 (51.6") (99.6") (2.2") (2.2") 2738 (107.8") BA RD24_RD27 en 04... -
Page 189: Fuses
Tables Fuses 5.03 Fuses WARNING Fire in the machine electrical system! Serious injuries or death or material damage as a result of fire caused by using fuses not meeting specifications. Only use fuses specified by the manufacturer (not fuses with a higher amperage). Do not bridge fuses. -
Page 190: Steering Column
Tables Fuses 5.03.02 Steering column [3] Central electrical system Position Fuse assignment Fuse All-wheel lock Time relay cold start assistance Drum edge lighting 15 A Driving light, left 10 A Driving light, right 10 A Reversing lights 15 A Working spotlight 15 A Pilot light cold start assistance Edge pressing and cutting assembly (KAG), switching between... -
Page 191: Diagnostic Code
Tables Diagnostic Code 5.04 Diagnostic Code The original operator control panel of the series has been adapted and enlarged in part in order to improve operator control and functional checks for different pieces of add-on equipment, In some cases, this may lead to changes in operator control sequences and procedures. They are described in the instructions. -
Page 192: Version With Add-On Equipment
Tables Diagnostic Code Code No Component Possible cause Generator exciter circuit Short-circuit, line break Parking light Defective Engine direction of travel monitoring Diesel engine running/run in reverse 5.04.02 Version with add-on equipment Code No Component Possible cause Driving light Open lines, short-circuit Rotary beacon Open lines, short-circuit Additive sprinkling pump... -
Page 193: Auxiliary Equipment
Auxiliary equipment AUXILIARY EQUIPMENT The section describes the mounting and dismounting, operation and maintenance of special attachments. Please consider the parts included in the scope of supply. They may be different from the parts list content indicated here due to further developments in the product. Safety Instructions The "Special attachments"... -
Page 194: Roll-Over Protection Structure (Rops)
Auxiliary equipment Roll-over protection structure (ROPS) 6.00 Roll-over protection structure (ROPS) The ROPS safety device (cab/roll-over bar) is a rollover protection structure in the case the machine tilts or rolls over. It avoids that the driver is crushed to death based on the high self-weight of the machine. If the ROPS safety equipment is dismounted from the machine for transport or repair, it must be remounted according to specifications before the machine is used again. - Page 195 Auxiliary equipment Roll-over protection structure (ROPS) Observe the service manual for mounting the ROPS safety equipment. Use appropriate lifting devices and hoisting equipment. Observe weight (see type plate of ROPS safety device). Lift ROPS safety device onto platform and align with fixing holes. Screw ROPS safety device with operator platform.
-
Page 196: Falling-Object Protective Structure (Fops)
Auxiliary equipment Falling-object protective structure (FOPS) 6.01 Falling-object protective structure (FOPS) The FOPS safety equipment is a design that prevents the driver from being injured by falling objects. If available, the FOPS safety equipment is integrated into the cabin roof, sunroof or weather-protection roof, depending on the machine's equipment. -
Page 197: Rotating Beacon
Auxiliary equipment Rotating beacon 6.02 Rotating beacon 6.02.01 Overview Rotating light mounted Contact tube Clamping screw Plug contact 6.02.02 Description The rotating beacon is an orange warning light that radiates light over a 360° area. A switched on rotating beacon visual identifies, marks and safeguards danger areas. - Page 198 Auxiliary equipment Rotating beacon Mounting rotating beacon Swivel the protective cap [2] to the side. Put the locating hole [3] of the rotating beacon on the contact tube [1] and slide it up to the stop. The electrical connection has been made. Tighten clamping screw [4].
-
Page 199: Operation
Auxiliary equipment Rotating beacon Rotating beacon, foldable The rotating beacon can be turned through 90 degrees to reduce the height of the machine for transport on a low loader or truck. Move the rotating beacon to lock-in position 0 for transport. Move the rotating beacon to lock-in position I for work. -
Page 200: Maintenance
Auxiliary equipment Rotating beacon 6.02.05 Maintenance WARNING Work above floor level! Injury caused by falling. Do not perform any maintenance or repair work above ground level unless using a stable ladder or a maintenance scaffold. To reach the maintenance points on the machine, use the steps indicated. -
Page 201: Towing Coupling
Auxiliary equipment Towing coupling 6.03 Towing coupling Only use the trailer hitch [1] to tow trailers. Permitted total weight of the trailer load G (Trailer with load) and max. permitted support load S must not be exceeded. max. Do not use the trailer hitch for other purposes or with other loads. For a folding ROPS, a bump stop [2] is installed to avoid damage to the ROPS and trailer hitch. -
Page 202: Seven-Pole Electrical Outlet For Trailers
Auxiliary equipment Seven-pole electrical outlet for trailers 6.04 Seven-pole electrical outlet for trailers 6.04.01 Overview When driving on public roads, the trailer must also be equipped with functional lighting. A socket is provided for the electrical connection between machine and trailer. Socket 7 pole Towing coupling 6.04.02... - Page 203 Auxiliary equipment Seven-pole electrical outlet for trailers Main fuses in the engine compartment Position Fuse assignment Fuse On-board electrical system (terminal 30) 80 A Left lighting 30 A Right lighting 30 A Control stand fuses F131 F133 F130 F132 Position Fuse assignment Fuse F130...
-
Page 204: Edge Pressing And Cutting Device (Kag)
Auxiliary equipment Edge pressing and cutting device (KAG) 6.05 Edge pressing and cutting device (KAG) 6.05.01 Overview Tool carrier Lever Hydraulic cylinder Water spray nozzle Cutting wheel Pressure roller 6.05.02 Description The edge pressure and cutting device (KAG) cuts or forms the longitudinal edges of hot asphalt. -
Page 205: Mounting/Dismounting Tools
Auxiliary equipment Edge pressing and cutting device (KAG) Pressure roller Conical pressing rolls chamfer the edges of asphalt surfaces. The pressing rolls can be changed to match different layer thicknesses and produce different chamferings. Track indicator (option) With the aid of the track indicator, the driver can align the tire track with a previously marked working line. -
Page 206: Operation
Auxiliary equipment Edge pressing and cutting device (KAG) Dismounting/Mounting Mounting tool Remove the tool [1] from the flange [3] at the holder. Loosen 8 screws and washers [4]. Put the tool [1] on the flange [2] at the KAG lever arm. Fasten the tool [1] to the flange [2] using 8 screws and washers [4] (observe the tightening torque). - Page 207 Auxiliary equipment Edge pressing and cutting device (KAG) Overview of controls KAG switch Switch for water sprinkling system Foot-operated switch for water KAG sprinkler stop cock sprinkling system The switch [1] on the driving lever controls lifting and lowering of the KAG.
-
Page 208: Maintenance
Auxiliary equipment Edge pressing and cutting device (KAG) Press and hold the switch [2] or foot switch [3] for water sprinkling. Roller drum and KAG sprinkling will be performed as long as the switches are being pressed. Close the stop cock [4]. The KAG sprinkler is disconnected from the water sprinkler of the roller drums. - Page 209 Auxiliary equipment Edge pressing and cutting device (KAG) Cleaning sprinkler nozzles Switch off diesel engine and remove ignition key. Loosen the cap nut [4] and remove it together with spray nozzle [3] and filter [2] of casing [1]. Loosen the cap nut [4] and remove it together with spray nozzle [3] and filter [2] of casing [1].
- Page 210 Auxiliary equipment Edge pressing and cutting device (KAG) Switch off diesel engine and remove ignition key. Lubricate lubrication nipple [1] (2 nipples). BA RD24_RD27 en 04...
-
Page 211: Hamm Line Spreader
Auxiliary equipment HAMM line spreader 6.06 HAMM line spreader During all activities, also comply with the manufacturer's instruction manual for the chip spreader. With the chip spreader as an additional device a regulated output of grit and simultaneous rolling in into the road surface is possible. An optimal output of the grit depends on an exact setting of the grit components. - Page 212 Auxiliary equipment HAMM line spreader Spreader floor Fixing screw Operating levers and adjustment handles Speed of spreader shaft Vibration selection/chip spreader BA RD24_RD27 en 04...
-
Page 213: Mounting/Dismounting
Auxiliary equipment HAMM line spreader Instruments and controls Operating mode switch Drum preselection switch Dynamic compaction system Compaction system/chip switch spreader switch 6.06.02 Mounting/Dismounting WARNING High own weight of the chip spreader! Serious injuries or death caused by crushing or getting caught during assembly. -
Page 214: Operation
Auxiliary equipment HAMM line spreader Mounting chip spreader Lift the chip spreader on to the suspension eyelets [1] Put the grit spreader on the holder at the machine frame and align it. Connect 2 x lower links [2] with socket pins and secure them with split pins. - Page 215 Auxiliary equipment HAMM line spreader NO TI CE Sticking gritting material! Blocked spreader shaft, material damage or destruction of the driving elements. Completely open the spreader apertures before switching on the spreader rotor. With the machine is at a standstill, only allow the spreader rotor to start with a low speed, and increase to working speed after a short time.
- Page 216 Auxiliary equipment HAMM line spreader Adjusting the spreader shaft speed The spreader rotor [1] ensures that the chips are distributed equally to the spreader apertures. According on the speed setting, more or less chips are conveyed to the spreader apertures. According on the speed setting, more or less chips are conveyed to the spreader apertures.
- Page 217 Auxiliary equipment HAMM line spreader Selecting the operating mode Prerequisite: Electrical system is ON. Press the switch [1]. Manual indicator LED lights up. The chip spreader can only be switched on and off on the drive lever. Press the switch [1]. Automatic indicator LED lights up.
-
Page 218: Maintenance
Auxiliary equipment HAMM line spreader At the end of the spreading work, with the machine at a standstill, empty most of the remaining chips out of the storage container. Switch off diesel engine and remove ignition key. Loosen the fixing screws [1] (from the outside to the inside), and swing down. -
Page 219: Technical Data
Auxiliary equipment HAMM line spreader Maintenance overview Every 250 operating hours 250 h Grease bearings Grease bearings " Lubricant only admissible if containing this marking ("Technical data", page 165 sqq.). Switch off diesel engine and remove ignition key. Grease lubricating nipple [1]. 6.06.05 Technical Data Description... - Page 220 Auxiliary equipment HAMM line spreader Dimension sheet 1000 1700 (39.4") (66.9") (31.5") 2530 (99.6") 2675 (105.3") 3214 (126.5") BA RD24_RD27 en 04...
-
Page 221: Anti-Freeze Filling System For Water Sprinkling
Auxiliary equipment Anti-freeze filling system for water sprinkling 6.07 Anti-freeze filling system for water sprinkling 6.07.01 Overview Hose Change-over valve Vessel for antifreeze solution 6.07.02 Description The anti-freeze filling system fills the pipes of the water sprinkling unit with antifreeze. This helps to prevent the sprinkler system from freezing and thus the sprinkler nozzles from being destroyed when there is any risk of frost. - Page 222 Auxiliary equipment Anti-freeze filling system for water sprinkling Fill the piping system Switch off the diesel engine. Water sprinkling system functional test: Switch the water sprinkling system on when the machine is at a standstill (see page 97). Take the hose [1] out of its holder. Clean the end of the hose if it is dirty.
-
Page 223: Hamm Temperature Meter
Auxiliary equipment HAMM Temperature Meter 6.08 HAMM Temperature Meter Only if equipped with such a thermometer are data about asphalt temperatures displayed on the indicators. 6.08.01 Overview Temperature sensor Temperature sensor Instruments and controls System info display System info switch 6.08.02 Description Asphalt compaction can only be done in a special temperature range. -
Page 224: Operation
Auxiliary equipment HAMM Temperature Meter The asphalt temperature measuring system (HAMM Temperature Meter) informs the driver of the surface temperature of the asphalt beneath the roller. This enables the driver to avoid the above-mentioned damage and achieve optimal compaction. 6.08.03 Operation Repeatedly press the switch [2] to set the display [3] to asphalt temperature. -
Page 225: Bypass Filter For Hydraulic Oil
Auxiliary equipment Bypass filter for hydraulic oil 6.09 Bypass filter for hydraulic oil 6.09.01 Overview Clean hydraulic oil is the most important prerequisite for trouble- free working of the hydraulic system. Additional fine filtering of the hydraulic oil retards the ageing process of the oil, and filters most of the contamination, such as particles and water, out of the oil. - Page 226 Auxiliary equipment Bypass filter for hydraulic oil Switch off diesel engine and remove ignition key. Allow machine to cool down to a temperature under 30 °C (86 °F). Unscrew and remove the filter casing [1] together with the seal ring [3].
- Page 228 Wacker Neuson Produktion GmbH & Co. KG Wackerstraße 6 85084 Reichertshofen, Germany www.wackerneuson.com Tel.: +49 (0) 8453 340 32 00 Order no. 5100010696 Language en...
Need help?
Do you have a question about the RD24 and is the answer not in the manual?
Questions and answers