
Related Manuals for Wacker Neuson RD18


Summary of Contents for Wacker Neuson RD18
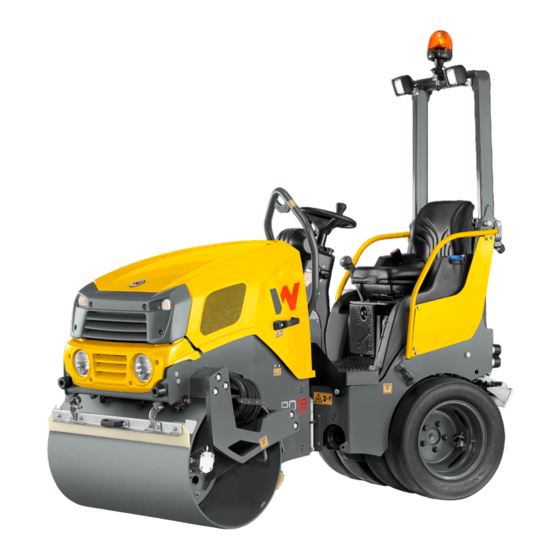
- Page 1 Instruction manual Tandem roller / Combination roller RD18 Vehicle type RD18 Issue Document order number 5100055889 Language From serial number WNCR0510JHAA00160...
- Page 2 Manufacturer: HAMM AG Hammstraße 1 D-95643 Tirschenreuth, Germany Manufactured for: Wacker Neuson Produktion GmbH & Co. KG Wackerstraße 6 D-85084 Reichertshofen, Germany www.wackerneuson.com Tel: +49 (0) 8453 340 32 00 E-mail: service-LE@wackerneuson.com Original instruction manual Created on: 21.04.2020 Changed on: 14.09.2020...
- Page 3 This operating manual is valid for the following roller types: TANDEM ROLLER RD18-80 RD18-100 COMBINATION ROLLER RD18-100c BA RD18 en 01...
-
Page 4: Table Of Contents
Description........................33 2.00 Information on the machine....................33 2.00.01 Technical characteristics....................33 2.00.02 List of auxiliary equipment....................35 2.01 General view of machine.......................36 2.01.01 Chassis/safety devices......................36 2.01.02 ROPS..........................36 2.01.03 Stickers on the machine....................37 2.01.04 Consumable fill holes......................42 BA RD18 en 01... - Page 5 Switching the signal horn and lighting on and off.............77 3.12 Starting the machine......................79 3.13 Driving............................. 81 3.13.01 Seat contact switch......................82 3.13.02 Adjusting the engine speed....................83 3.13.03 Driving in normal operation....................83 3.14 Stopping the machine in normal operation................ 85 BA RD18 en 01...
- Page 6 Permanently shutting down and disposing of the machine..........114 Maintenance........................116 4.00 General maintenance instructions..................116 4.00.01 Important information about maintenance works............116 4.00.02 Running-in instructions....................119 4.00.03 Maintenance overview....................120 4.00.04 Welding work on the machine..................122 BA RD18 en 01...
- Page 7 Check that wheel nuts/wheel bolt connections are tight..........148 4.06.07 Checking air pressure in the tyres..................148 4.06.08 Changing the tyres......................149 4.07 Steering system........................152 4.07.01 Lubricating the articulated joint bearings................ 152 4.07.02 Lubricating the steering cylinder pins................152 BA RD18 en 01...
- Page 8 RD18-80.......................... 175 5.02.02 RD18-100........................175 5.02.03 RD18-100c........................176 5.03 Fuses............................. 177 5.03.01 Engine compartment....................... 177 5.03.02 Steering column......................177 5.04 Diagnostic code........................179 Auxiliary equipment..................... 180 6.00 Roll-over protection structure (ROPS)................181 6.01 Falling-object protective structure (FOPS)................ 183 BA RD18 en 01...
- Page 9 Description........................184 6.02.03 Fitting/removing....................... 184 6.02.04 Operation......................... 186 6.02.05 Maintenance........................187 6.03 Anti-freeze filling system for water sprinkling..............188 6.03.01 Overview..........................188 6.03.02 Description........................188 6.03.03 Operation......................... 188 6.04 Bypass filter for hydraulic oil..................... 190 6.04.01 Overview..........................190 6.04.02 Maintenance........................190 BA RD18 en 01...
- Page 10 EC Declaration of Conformity EC DECLARATION OF CONFORMITY BA RD18 en 01...
-
Page 11: Preface
This instruction manual is not a manual for extensive maintenance and repair work. Such work should be carried out by Wacker Neuson Service or authorised specialists. The safety of the operator was one of the most important aspects taken into consideration when this machine was designed. -
Page 12: Preface
They are intended to be used by the operating personnel. Thus, keep the instruction manual always at hand! 1.00.03 Guarantee Warranty claims can only be accepted: if you operate the machine correctly. if you use original spare parts. if you use the specified operating supply items. BA RD18 en 01... -
Page 13: Modifications/Reservations
Cross-references help you to find quickly sections in this instruction manual which supply you with additional important information. The cross-reference shows you the page of the relevant section. The abbreviation sqq. means "and the following pages". Example: (see "Hydraulic oil supply", page 176) BA RD18 en 01... -
Page 14: Explanation Of Abbreviations
Edge pressing and cutting device Edge forming device Resonance Measurement Value Measured value for the resonance behaviour of the compaction system ROPS Roll Over Protective Structure Structure for the driver's cab and driver's platform to protect against rolling over BA RD18 en 01... -
Page 15: Warning Notes
Indicates a possible danger to persons. If this situation is not avoided, minor or light injuries may be caused. NO TI CE Indicates a danger to machines, objects or the environment. If it is not averted, material damage will ensue. BA RD18 en 01... -
Page 16: Documentation
This instruction manual must be kept on the machine at all times. Read this instruction manual carefully. Let someone explain to you the things that you do not understand. Until this has been done, do not carry out any work with or on the machine. BA RD18 en 01... -
Page 17: Use
Using the machine with the protective equipment removed. Spraying with high-pressure cleaners or fire extinguishing equipment. Towing trailing loads. Non-compliance with maintenance intervals. Omission of measurements and tests to detect damages early. Omission of replacing wear parts. BA RD18 en 01... -
Page 18: Residual Risks
Improper operation. Improper maintenance and/or repair work. Improper operating supply items. 1.02.04 Climatic conditions The permissible ambient temperature range for using the machine is –20 °C (–4 °F) up to 55 °C (130 °F). BA RD18 en 01... - Page 19 At high ambient temperature and/or use of the machine at high altitudes: Do not completely fill the fuel and operating liquid tanks/reservoirs. Adjust the control system to reduce the amount of fuel injected quality fuel engine. Observe the instruction manual for the diesel engine. BA RD18 en 01...
-
Page 20: Environmental Protection
Send packaging, cleaning materials and used or residual operating materials for recycling. Observe the environmental protection regulations applicable at the place of use. When operating the machine, observe the notes in this instruction manual in order to avoid unnecessary impact on the environment. BA RD18 en 01... -
Page 21: Disposal
Please dispose all materials as demanded by local provisions of the relevant country. Electrical/electronic system/battery Electrical/electronical components are not subject to Directive 2012/19/EC and relevant national regulations (in Germany e.g. ElektroG). Dispose electrical/electronic components directly at a specialised recycling company. BA RD18 en 01... -
Page 22: Type Plate
The EAC (Eurasian Conformity) pictogram confirms the conformity of the machine with the requirements of the Eurasian Customs Union Please state the vehicle identification number (VIN) and the type of your machine when ordering spare parts. BA RD18 en 01... - Page 23 100 % water & additive tank contents 75 kg for the driver the static weight of all options or attachments manufacturer the same time and approved by manufacturer (e.g., chip spreader). No additional ballasting is allowed. BA RD18 en 01...
- Page 24 Preface Type plate BA RD18 en 01...
- Page 25 Cab/ROPS identification PIN) number 1 Cab/ROPS identification Cab/ROPS serial number (if number 2 available) 1 Cab/ROPS serial number (if FOPS identification number (if available) 2 installed) Year of manufacture Tested up to the maximum operating weight BA RD18 en 01...
- Page 26 It is located on the side of the machine type plate (in the engine compartment). 17390 Engine manufacturer Type Engine identification number Number of the type approval Exhaust emissions category Exhaust gas after-treatment EU/USA VIN/PIN BA RD18 en 01...
-
Page 27: Noise And Vibration Requirements
= 0.5 m/s² are not exceeded. Hand arm vibrations The weighted rms values of the acceleration with hand arm vibrations have been accessed in accordance with DIN EN 1032 and do not exceed = 2.5 m/s². BA RD18 en 01... -
Page 28: Personnel
The meaning of signals must be unambiguous between driver and banksman/spotter. To avoid ambiguities, clarify hand signal, such as specified by the German BG Directive "Safety and Health Protection Signals at Work", must be used. BA RD18 en 01... - Page 29 Please make yourself familiar with the machine's and the loading vehicle's dimensions. Wear reflective clothing. For instructing please use voice radio (e.g when loading with a crane) or via hand signals (e.g. when reversing the machine). BA RD18 en 01...
-
Page 30: General Safety Instructions
It is absolutely necessary to use a safety belt in proper working condition. It is absolutely necessary to use a safety belt in proper working condition. BA RD18 en 01... -
Page 31: Driving On Public Roads
The following is applicable outside The laws, regulations, guidelines and standards applicable at the place of use must be observed (for example those concerning the lighting and warning systems). BA RD18 en 01... -
Page 32: Danger Zone
For a moving machine, the danger zone is defined as follows: 13 metres In front of and behind the machine 3 metres To the left and right of the machine Make sure there is nobody in the danger zone during compacting work and transport operations. BA RD18 en 01... -
Page 33: Description
EMERGENCY STOP Machine is braked with spring-operated brakes and hydrostatic travel drive. Water sprinkling Pressure sprinkling Manual actuation Automatic interval system Additive sprinkling Pressure sprinkling Manual actuation Electrical system Operating voltage 12 V Drive system Diesel engine BA RD18 en 01... - Page 34 Description Information on the machine Exhaust gas after-treatment None BA RD18 en 01...
-
Page 35: List Of Auxiliary Equipment
Battery isolation switch with mechanical remote control Version with German approval for road use (TÜV) Lockable tank cover Bypass filter system Lockable dashboard cover Seat belt buckle monitoring device Smooth drum scraper Metal protective roof Rear-view mirror BA RD18 en 01... -
Page 36: General View Of Machine
Steering block Steps Seat belt [10] Suspension eyelet 2.01.02 ROPS Version with rigid ROPS roll-over bar Handrails Storage compartment for operating manual/first aid kit Steering column Driver's seat console Roll-over bar ROPS roll-over bar type plate BA RD18 en 01... -
Page 37: Stickers On The Machine
Be sure to observe the warning signs and information signs affixed to the machine and strictly follow their instructions. Information signs Below is a list of examples of the information signs. The images and values may vary according to the machine type. Drive lever function BA RD18 en 01... - Page 38 General view of machine All-wheel lock Engine speed Water-sprinkling system Water tank filling inlet Drain outlet for water tank Additive-sprinkling system Filling inlet for water tank for additive sprinkling Drain outlet for water tank for additive sprinkling BA RD18 en 01...
- Page 39 Water pump Hydraulic oil fill level Filling inlet for hydraulic oil tank Drain outlet for hydraulic oil tank 12 V socket Drain outlet for engine oil Drain outlet for fuel filter water sump Coolant fill level BA RD18 en 01...
- Page 40 Description General view of machine Coolant filling inlet Tyre pressure Guaranteed sound power level First aid Expert inspection test badge Maintenance overview BA RD18 en 01...
- Page 41 Filter for the water-sprinkling system Sprinkler nozzles Drain the water sump on the water separator Functional check in the case of an existing ma- chine: Seat contact switch EMERGENCY STOP Safety switch for multifunction armrest Parking brake BA RD18 en 01...
-
Page 42: Consumable Fill Holes
Description General view of machine 2.01.04 Consumable fill holes Fuel Water-sprinkling system Additive-sprinkling system BA RD18 en 01... -
Page 43: Control Stand
The version of the driver's seat may vary depending on the configuration of the machine. The scope of the adjustment options is identical for all versions. 2.02.02 Operating station controls Steering column Switch for water-sprinkling system Drive lever Switch for additive-sprinkling system BA RD18 en 01... -
Page 44: Steering Column
Driving light, turn signals, signal horn Work light Rotating beacon Parking brake Hazard warning light Dynamic compaction system Water sprinkling system control Tank content fill level [10] Info display for system info/diagnostic codes [11] [12] Compaction display without function BA RD18 en 01... -
Page 45: Drive Lever
Description Control stand 2.02.05 Drive lever Drive lever Dynamic compaction system ON/OFF switch BA RD18 en 01... -
Page 46: Drive Unit/Diesel Engine
Diesel engine with drive units Lubricating oil filter Fuel filter Fuel prefilter Fuel pump Cooling system Filling opening for engine oil Engine oil dipstick Engine type plate Air filter Drain outlet for engine oil Dust valve Exhaust system BA RD18 en 01... -
Page 47: Hydraulic Oil Supply
Description Hydraulic oil supply 2.04 Hydraulic oil supply Hydraulic oil tank Hydraulic oil filling opening Hydraulic oil fill level indicator Hydraulic oil drain outlet Hydraulic oil filter BA RD18 en 01... -
Page 48: Electrical System
Description Electrical system 2.05 Electrical system Engine compartment Battery Main fuse Battery isolation switch Battery isolation switch with mechanical remote control (optional) Control stand 1, 2 Fuses Machine diagnostic interface 12 V socket BA RD18 en 01... -
Page 49: Transmission
Description Transmission 2.06 Transmission Tandem roller Wheel hub motor Top drum scraper Bottom drum scraper Combination roller Wheel hub motor Top drum scraper Bottom drum scraper Tyre scraper BA RD18 en 01... -
Page 50: Steering System
Description Steering system 2.07 Steering system Steering cylinder Three-point articulation BA RD18 en 01... -
Page 51: Water System
Water tank filling opening Water tank Water tank drain outlet Water filter Water pump Water-sprinkling system fill level indicator 2.08.02 Additive sprinkling Additive sprinkling nozzles Additive tank filling opening Additive tank Additive tank drain outlet Additive tank water pump BA RD18 en 01... -
Page 52: Dynamic Compaction System
Description Dynamic compaction system 2.09 Dynamic compaction system Drum with vibrator Vibration drive motor BA RD18 en 01... -
Page 53: Operation
Do not carry out any testing and adjusting work unless the engine has been stopped and the ignition has been switched off. Park the machine on safe ground, i.e., flat and horizontal ground with sufficient bearing capacity. Secure machine against rolling away. BA RD18 en 01... - Page 54 NO T IC E Uncontrolled movements! Damage to machine or environment by uncontrolled steering system movements and by consequent front or rear end swings. Applying safety strut before: crane loading the machine. transporting the machine. maintenance and repair work. BA RD18 en 01...
-
Page 55: Safety Strut
Move the coupling bar [4] from the upper mounting [3] to the lower mounting [5]. Use the bolt [2] to lock the coupling bar [4] in the lower mounting [5]. Slide the retaining bracket [1] onto the coupling bar [4]. Steering block is applied. BA RD18 en 01... - Page 56 Move the coupling bar [4] from the lower mounting [5] to the upper mounting [3]. Use the bolt [2] to lock the coupling bar [4] in the upper mounting [3]. Slide the retaining bracket [1] onto the coupling bar [4]. The steering block is now released. BA RD18 en 01...
-
Page 57: Loading And Transporting
Lower attachments. In case of rollers with articulated steering, the safety strut must always be activated for transport. Remove wedges and lashing devices completely before unloading. Unblock steering system by unblocking the safety strut. BA RD18 en 01... - Page 58 The crane's load table must correspond to the machine to be lifted. No crane loading must be performed unless all these items have been complied with. BA RD18 en 01...
- Page 59 Store the machine on the load platform, placing two continuous and clean strips of anti-slide mats (grammage approx. 10 kg/m², loadable up to 630 t/m², 10 mm thick, friction factor µ ≥ 0.6) under every roller drum/tyre. BA RD18 en 01...
- Page 60 Operation Loading and transporting Maximum permissible ramp slope: See loading charts Ramp length [mm] Difference in height [mm] Ramp slope [%] H x 100 Always use the correct load distribution plan! Centre of gravity BA RD18 en 01...
- Page 61 Attach lifting tackle to the suspension eyelets provided. Note the load-bearing capacity of the lifting tackle! Use lifting frames or spreader beams if necessary! Apply the steering block to the machine before crane loading! BA RD18 en 01...
- Page 62 Diagram of the transport position Diagram of the centre of gravity specifications Lashing variant 1 Weight class [t] Lashing capacity LC (μ=0.6) [daN] to 5.7 2000 Lashing variant 2 Weight class [t] Lashing capacity LC (μ=0.6) [daN] to 5.7 2000 BA RD18 en 01...
- Page 63 Positive blocking longitudinally/transversely to the direction of travel Lashing equipment capacity [daN]: 10000 Quantity: 4 Miscellaneous: Recommended type of lashing equip- Chain (6/8 2200 daN), ment: Belt (2000 daN) as an alternative Connecting pieces to the lashing point: Hook with safety latch BA RD18 en 01...
- Page 64 0.6 MPa (6 bar, 87 psi). Check the inflation pressure at least every 24 hours and, if refill the air, if necessary (see Technical data). Miscellaneous Lock the seat console in position Put down the add-on equipment BA RD18 en 01...
-
Page 65: Functional Tests Before Starting Work
Has the additive tank fill level been checked? page 158 Has the air pressure in the tyres been checked? page 148 Have the scrapers been checked? page 145 Has the engine hood been closed and locked? page 74 BA RD18 en 01... -
Page 66: Access To The Machine
Emergency exit The access to the driver’s platform on the left side in the direction of travel serves as an emergency exit. Use the emergency exit only in emergency cases. BA RD18 en 01... - Page 67 Pull the step [1] out of the bracket [2]. Fold down the step [1] as far as it will go. Folding in the step Fold up the step [1] as far as it will go. Push the step [1] into the bracket [2]. BA RD18 en 01...
-
Page 68: Adjusting The Driver's Seat
Push the handle [1] downwards and set the driver's weight. Setting the slope of the backrest Lift the lever [2]. Move the seat face forwards. The seat back is inclining backwards. Move the seat face backwards. The seat back is inclining forward. Release lever [2]. BA RD18 en 01... - Page 69 Setting the slope of the backrest Turn the hand wheel [2] in + (plus) direction. The seat back is inclining backwards. Turn the hand wheel [2] in – (minus) direction. The seat back is inclining forward. BA RD18 en 01...
- Page 70 Operation Adjusting the driver's seat Seat adjustment forward/backward Lift the lever [3]. Slide the seat forward or backward to reach the desired position. Release the lever [3] and let the seat pedestal snap in place. BA RD18 en 01...
-
Page 71: Using The Seat Belt
Insert the locking plate [1] into the belt lock [2]. Seat belt is applied and locked. Loosing belt Press knob at the buckle [2]. Seat belt is released. Place the seat belt on the driver's seat or allow it to roll into the belt retainer. BA RD18 en 01... - Page 72 Seat belt buckle monitoring device (optional) When the safety belt is not fastened, a warning lamp lights up on the operator control panel (see "Operator control panel - Warning and pilot lights") and an audible signal is heard. BA RD18 en 01...
-
Page 73: Adjusting The Working Mirror And Rear-View Mirror
This is the only way of avoiding a blind spot. Folding in the working mirror and rear-view mirror Turn the mirror mount [2] forwards. Fold in and lock the operation mirror before transporting the machine on a lorry. BA RD18 en 01... -
Page 74: Opening And Closing The Engine Hood
Lower the engine hood [1] and push it into the lock. Use the ignition key in the lock on the handle [2] to lock the engine hood [1]. The engine hood is closed. The engine hood must be locked while the machine is operating. BA RD18 en 01... -
Page 75: On-Board Power Supply/Battery Isolation Switch
To actuate the switch, the engine hood must be opened. As an option, the battery isolating switch can be operated via a Bowden wire at the machine side. The on-board electrical system can then be switched off without opening the engine hood. BA RD18 en 01... -
Page 76: Switching The Electrical System On And Off
Functional control of warning and pilot lights Diesel engine remains switched off. Switching off the electrical system Turn the ignition key [1] to position 0. The diesel engine is stopped. The electrical system is switched off. BA RD18 en 01... -
Page 77: Switching The Signal Horn And Lighting On And Off
To guarantee road safety, the defective light bulb must be replaced. Switching the parking light on and off Prerequisite: The electrical system is OFF. Press switch [7]. Switch [7] lights up: The parking light is switched on. BA RD18 en 01... - Page 78 Prerequisite: The electrical system is ON. Press switch [6]. Switch [6] lights up: The rotating beacon is switched on. Press the switch [6] again. Switch [6] is not lit up: The rotating beacon is switched off. BA RD18 en 01...
-
Page 79: Starting The Machine
The cold start assistance [2] pilot lamp is lit. The cold start assistance [2] pilot lamp goes out after a few seconds. Ignition key turns back to position I after releasing. The engine is ready to start. BA RD18 en 01... - Page 80 Set the motor speed [4] to MIN. Turn the ignition key [3] to position III and hold it there until the diesel engine starts. Diesel engine starts. Ignition key turns back to position I after releasing. BA RD18 en 01...
-
Page 81: Driving
Do not drive laterally over roadway edges, kerbs, gutters or similar obstacles. Drive around dents or bumps, e.g. potholes or manhole covers. On embankments or when driving fast around corners, observe the dynamic driving behaviour of the machine. Adjust the speed and actuation angle accordingly. BA RD18 en 01... -
Page 82: Seat Contact Switch
Bring the machine into the home position – drive on after the delayed braking Prerequisites: The machine is at a standstill, after delayed braking. Driver sitting on the seat again. Diesel engine is running. Move the drive lever to position 0. The operating functions are active again. BA RD18 en 01... -
Page 83: Adjusting The Engine Speed
Driving in normal operation Make ready to drive/release parking brake Requirement: Diesel engine running, drive lever in position 0 Press the parking brake switch [1]. The parking brake switch [1] is not illuminated. Machine is ready to start. BA RD18 en 01... - Page 84 While driving, slowly move the drive lever via the 0 position in the opposite direction. The machine brakes to a halt and accelerates in the opposite direction, depending on the deflection of the drive lever and on the motor speed selected. BA RD18 en 01...
-
Page 85: Stopping The Machine In Normal Operation
Activating the parking brake Press the parking brake switch [1]. The parking brake is activated. The parking brake switch [1] lights up. The parking brake can only be released if the drive lever is engaged in position 0. BA RD18 en 01... -
Page 86: Stopping The Machine In An Emergency - Emergency Stop
Restarting the machine after an EMERGENCY STOP Switch off the electrical system using the ignition key. Engage the drive lever in position 0. BA RD18 en 01... - Page 87 Stopping the machine in an emergency – EMERGENCY STOP To release the EMERGENCY STOP [1]: Turn the button clockwise until the lock is released. Switch on the electrical system using the ignition key. The diesel engine can be started. BA RD18 en 01...
-
Page 88: Stopping The Machine Because Of A Fault
Water in diesel (water sump fuel prefilter) Diesel particle filter (DPF) is too heavily loaded No charge current with diesel engine running. Note on a fault If there is a deviation from the normal operating status: BA RD18 en 01... - Page 89 Rectify the cause of the fault without delay, no later than at the end of the work shift. No further operation of the machine is admissible unless the error messages indicated do not cause any immediate risk to the safety of people, machinery or environment. BA RD18 en 01...
-
Page 90: Driving With The Dynamic Compaction System
This may cause a damage to buildings or pipe systems under the machine. Amplitudes/frequency: The vibration system uses an amplitude. The frequency depends on the preselected motor speed. BA RD18 en 01... -
Page 91: Switching The Compaction System On And Off
The dynamic compaction system is deactivated every time the engine is started. Switch/symbol Meaning Operating mode switch Manual Automatic Preselect the drum Indicator LED for the preselected drum Activate the drum Activated vibration symbols Dynamic compaction system ON/OFF switch BA RD18 en 01... - Page 92 Requirement: Diesel engine is running. Press switch at drive lever [6]. In accordance with the settings, the compaction system works immediately (manual) or when driving starts (automatic). Switch off vibrations Press the switch on the drive lever [6] again. BA RD18 en 01...
-
Page 93: Driving With Water Sprinkling System
The illuminated dots [3] show the current sprinkling stage. The indicator LED [2] is on when the sprinkling system is switched on via the automatic interval system. Deactivating water sprinkling system Press the switch [1] again. Water sprinkling system is deactivated. BA RD18 en 01... - Page 94 Switching continuous water sprinkling on and off Press and hold the foot pedal [6]. Water sprinkling takes place for as long as the foot pedal is held down. Sprinkling also is possible when the machine is stationary. BA RD18 en 01...
-
Page 95: Driving With Additive Sprinkling System
Additive sprinkling takes place for as long as one of the switches is held down. When the switch is pressed [1]: Indicator LED [3] on. Release the switch [1] or foot pedal [2]. Additive sprinkling stops. The indicator LED [3] is off. BA RD18 en 01... -
Page 96: Track Offset
Due to the track offset, the machine always remains manoeuvrable since a steering lock is also always possible on the lateral limiting systems. With the "inline" version of the machine (no track offset), it is not possible to compact right to the edge. BA RD18 en 01... -
Page 97: Adjusting Scrapers
3.21.01 Rigid drum scraper The scrapers are constantly rubbing against the roller drums. They are pressed against the roller drums with spring force and cannot be lifted up. 3.21.02 Top drum scraper BA RD18 en 01... -
Page 98: Bottom Drum Scraper
The scraper folds up to the roller drum. Moving the scraper away Switch off diesel engine and remove ignition key. Turn stop lever [1] to 0 position. Press the pedal [2] until the catch latches in. 3.21.04 Tyre scraper BA RD18 en 01... - Page 99 The scraper folds down to the roller drum/tyre. Moving the scraper away Switch off diesel engine and remove ignition key. Turn stop lever [1] to 0 position. Lift the scraper bracket [2] until the catch latches in. BA RD18 en 01...
-
Page 100: Operation Monitoring
Stop using the machine! Warning, notifica- Lights up yellow Deviation from the normal operating status. At tion, fault least one warning light is flashing and an error code is displayed. BA RD18 en 01... - Page 101 Lights up when the seat belt is not being used. ing device (option- Put on the seat belt! [13] Water sprinkling Lights up yellow Lights up when the water-sprinkling system or additive-sprinkling system is switched on. [14] No function BA RD18 en 01...
-
Page 102: Control Panel - Fill Level Control Indicator
No. Symbol Indicator Status Meaning/measure Fuel fill level lights up Fuel available green flashes green Fuel fill level between 2/3 and 1/3: Top up the fuel. flashes yellow Fuel fill level below 1/10: Top up the fuel. BA RD18 en 01... -
Page 103: Control Panel - Info Display/System Info
→ Press and hold the switch to change to level 2. Level 2 Roller type e.g. RD18-100 Dashboard software version Compaction computer software version BA RD18 en 01... -
Page 104: Switching Diesel Engine Off
Diesel engine is running in idle speed. Allow the diesel engine to continue to idle for 1 to 2 minutes. Turn ignition key to position 0. Diesel engine is switched off. Electrical system is switched off. BA RD18 en 01... -
Page 105: Automatic Engine Stop
Bringing the machine back into operation After activation of the engine stop automatic, the machine has to be restarted in order to resume operation. Turn ignition key to position 0. Machine is switched off and can be restarted (see "Starting machine"). BA RD18 en 01... -
Page 106: Shutting Down And Leaving The Machine Safely
Switch off the machine, using the main battery switch. Lock the instrument panel covering, as well as all cladding covers. Use suitable precautions (e.g., parking chock) to secure the machine against rolling away in addition when parking on an uphill or downhill gradient. BA RD18 en 01... -
Page 107: Towing The Machine
(see Loading and transporting). Alternatively, the machine can be pulled out of hazardous situations using towing ropes or towing chains (pulling power at least double the machine's operating weight). 3.26.01 Preparing the machine for towing BA RD18 en 01... -
Page 108: Depressurising The Hydraulic System
Do not unscrew the screw from the housing by more than three rotations. Otherwise, hydraulic oil may escape between the screw and the housing and air may enter the system. Restoring the traction for the hydraulic travel drive On both high-pressure valves: BA RD18 en 01... -
Page 109: Releasing The Spring-Operated Brake
Parking machine safely at the location to which it has been towed Prevent the machine from rolling away with suitable protective measures (e.g. chocks). Enable the parking brake again (see "Release spring-operated brake"). Reconnect the hydrostatic transmission (see "Depressurize the hydraulic system"). Remove towing tool. BA RD18 en 01... - Page 110 Operation Towing the machine Machine safely shut down. The prerequisites for repair are fulfilled. After the repair: The machine must not be brought back into use until a complete function test has been made. BA RD18 en 01...
-
Page 111: Start With Jump Leads
The positive pole of a battery is marked by a Plus (+) sign. The negative pole of a battery is marked by a Minus (–) sign. The vehicle ground is, for example, the engine block or the fastening screw of the engine mounting. BA RD18 en 01... - Page 112 Remove the jump leads in reverse order: Disconnect pole terminal [4], then [3], then [2], then [1]. Put the terminal caps on the poles of the batteries. BA RD18 en 01...
-
Page 113: Shutting Down
Check the drive unit, auxiliary units, hoses, hose connections and flange-mountings for leaks and/or escaping operating and auxiliary materials. If there are any anomalies, repair any affected components. Remove the batteries and store them in a frost-free environment. Follow the battery manufacturer's instruction manual. BA RD18 en 01... -
Page 114: Permanently Shutting Down And Disposing Of The Machine
The work steps listed below are NOT INSTRUCTIONS. They are a non-exhaustive list of examples of work that must be carried out in order to permanently decommission the machine. For precise information or for carrying out the decommissioning, contact customer service. BA RD18 en 01... - Page 115 Hand over any electrical/electronic components to a specialised recycling company. Hand over the machine to an approved recycling company so that it can be destroyed and disposed of. Observe any national and, if required, regional disposal regulations. BA RD18 en 01...
-
Page 116: Maintenance
Secure machine against rolling away. Do not carry out any maintenance work unless the engine has been stopped and the ignition has been switched off. On machines with safety strut, apply the safety strut before maintenance work. BA RD18 en 01... - Page 117 Lower raised devices to the ground. After switching off the diesel engine, wait at least 1 minute until the pressure has been reduced. Wear personal protective equipment. BA RD18 en 01...
- Page 118 Do not lay any tool or machine element on the battery. NO T IC E Engine hood swinging range! Material damage when opening the engine hood. Keep a sufficient distance to other objects located either above or at the rear. BA RD18 en 01...
-
Page 119: Running-In Instructions
Replace the fuel prefilter's filter cartridge (see page 132). Hydraulic system maintenance Replace the filter insert of the pressure filter for the hydraulic system (see page 141). Axle maintenance Checking that wheel nuts/wheel bolt connections are tight (see page 148). BA RD18 en 01... -
Page 120: Maintenance Overview
141 sure filter for the hydraulic system Checking the damping elements see page 160 Checking the wheel nuts/wheel bolts see page 148 for tightness Changing the engine oil see the operating manual for the diesel engine BA RD18 en 01... - Page 121 140 Replacing the V-belt see the operating manual for the diesel engine Changing the coolant see page 137 Replacing the safety cartridge see page 134 Replacing the hydraulic oil tank's see page 140 ventilation filter BA RD18 en 01...
-
Page 122: Welding Work On The Machine
– Allow the fumes from solvents or paint strippers to evaporate for at least 15 minutes. – Remove any containers for solvents and paint strippers (or any other flammable liquids) from the operating area. BA RD18 en 01... - Page 123 Remove plug of the control devices of the machine. Connect negative terminal of the welding appliance in the vicinity of the weld. Do not get too close to other components when welding. Reconnect all connection plugs after welding. Attach battery. BA RD18 en 01...
-
Page 124: Chassis/Safety Devices
Regularly check the non-slip property of the surfaces of the steps and in the driver's cab (e.g. sand-coated foil). For steps: Replace or regrind non-slip profiles with a minimum height of 1 mm. For sand-coated foils: Replace ineffective or worn foils. BA RD18 en 01... -
Page 125: Checking The Emergency Stop Function
If the machine reacts other than as described above or if the EMERGENCY STOP does not work, it must be tested and repaired without delay. The machine must not be used until this has been done. Request assistance from customer services! BA RD18 en 01... -
Page 126: Checking That The Parking Brake Is Working Properly
[2] is pressed, the parking brake must be inspected or replaced. The machine must not be operated until this work has been carried out. Request assistance from customer service! 4.01.05 Checking that the seat contact switch is working properly BA RD18 en 01... - Page 127 After the check: Return the driving lever [3] to the 0 position and apply the parking brake [2]. If the seat contact switch does not work, it must be tested and repaired without delay. The machine must not be operated until this has been completed. Contact customer service! BA RD18 en 01...
-
Page 128: Control Stand
The drive lever must allow even movement in both directions without using excessive force. Lock the drive lever [1] in its 0 position after the functional check. No machine operation is permitted if the drive lever binds or is sluggish. Request assistance from customer services! BA RD18 en 01... -
Page 129: Drive Unit/Diesel Engine
Material damage to the diesel engine as a result of contamination in the fuel system. Ensure that no dirt or dust can get into the fuel system (cover dirty areas with foil). Thoroughly clean and dry components and the surrounding areas (e.g. with a high-pressure cleaner). BA RD18 en 01... -
Page 130: Lubricating Oil Change Intervals
4.03.02 Maintenance points on the diesel engine when changing oil For engine maintenance see instruction manual for diesel engine! # Only lubricants with this symbol are permitted ("Technical data", page 161 et seq.). BA RD18 en 01... -
Page 131: Replacing The Filter Cartridge On The Fuel Filter
Switch on the electrical system until fuel runs out of the bleed bore [2]. Screw in and tighten the bleed screw [2]. Check for leaks after assembly. The fuel filter has to be periodically drained at the drain valve [3] depending on the water content in the fuel. BA RD18 en 01... -
Page 132: Replacing The Filter Cartridge For The Fuel Prefilter
20 seconds at a time; otherwise, the starter winding will overheat and be destroyed. There must be pauses of at least 1 minute between the individual starting processes in order to allow the starter to cool down. BA RD18 en 01... -
Page 133: Check And Clean The Dust Discharge Valve At The Air Filter
Check the operating readiness of the air filter while the diesel engine is running: Start diesel engine and shortly rev up to maximum speed. The air filter pilot light is not flashing on the information display: Air BA RD18 en 01... -
Page 134: Replacing Air Filter Cartridge
After 2000 operating hours at the latest. If the air filter pilot light is flashing on the information display after having replaced the air filter cartridge. If the air filter cartridge is defective. BA RD18 en 01... -
Page 135: Checking/Cleaning The Radiator
Damage of radiator when cleaning with high-pressure cleaner. Maintain a safe distance between the lance of the high-pressure cleaner and the radiator. Use a directed spray. Guide the directed spray parallel (not at an angle) to the cooling fins of the radiator. BA RD18 en 01... -
Page 136: Checking The Coolant Fill Level
Checking the coolant fill level & Only lubricants with this symbol are permitted ("Technical data", page 161 onwards). Switch off the diesel engine and remove the ignition key. Only check the coolant level when the diesel engine is cold. BA RD18 en 01... -
Page 137: Changing The Coolant
[2]. Close the filling opening with the sealing cap [1]. Start the diesel engine and bring it to operating temperature (thermostat opens). Switch off the diesel engine and remove the ignition key. BA RD18 en 01... - Page 138 Maintenance Drive unit/diesel engine Check the coolant level when the diesel engine is cold, fill up as necessary. Correct coolant level: Centre of fill level indicator [2] on the compensation tank. BA RD18 en 01...
-
Page 139: Hydraulic Oil Supply
Correct oil level: centre of sight glass [2]. If the oil level is too low, fill with appropriate oil through the fill opening [1]. In case of bigger oil losses, find out and eliminate the cause. BA RD18 en 01... -
Page 140: Changing The Hydraulic Oil And Ventilation Filter
Add the specified oil through the filling opening [2]. Correct oil level: Centre of sight glass [1]. Tighten ventilation filter [2]. Start the diesel engine. Actuate drive lever with low engine speed until the transmission activates. BA RD18 en 01... -
Page 141: Replacing The Filter Insert In The Pressure Filter For The Hydraulic System
Unscrew the filter insert [2] from the filter head and replace with a new one. Clean the inside the barrel casing [1]. Screw in and tighten the barrel casing [1] in the filter head again. Check hydraulic system for leaks. BA RD18 en 01... -
Page 142: Electrical System
The electrical power supply is ensured by a generator and by a starter battery. All cabels, fastenings and screwed connections must be checked for visible damage (at least once per year). Damaged parts must be replaced immediately. Damaged cables may cause injuries and fire. BA RD18 en 01... - Page 143 Top up distilled water or replace the battery as necessary. If possible, check the acid concentration. (1.28 kg/l ±0.1). Clean the battery casing [1] with a damp or antistatic cloth. Correct acid concentration. Correct electrolyte level. BA RD18 en 01...
- Page 144 Always watch the charging process and stop charging when the acid temperature exceeds 55 °C or in case of acid spill. Battery charged. Switch off and disconnect the charger from the battery. If necessary, remount the battery. Battery is ready for use. BA RD18 en 01...
-
Page 145: Transmission
Switch off the diesel engine and remove the ignition key. Readjusting/replacing scrapers Loosen the clamp connection [2]. Replace the scraper [1] by a new one if necessary. Push scraper [1] to the roller drum. Tighten clamp connection [2]. BA RD18 en 01... -
Page 146: Adjusting/Replacing The Tyre Scraper
Fit the new scrapers such that the screws in the clamp connection are located in the lowermost position of the elongated holes. BA RD18 en 01... -
Page 147: Lubricate The Scraper Stop Lever
Turn stop lever [1] to I position. Lubricate the guide bolt of the locking lever with oil at positions [2]. Move the locking lever to and fro several times between positions 0 and I to distribute the lubricant in the guide. BA RD18 en 01... -
Page 148: Check That Wheel Nuts/Wheel Bolt Connections Are Tight
When filling the tyres, be always next to the tyre, not in front of it. Use a tyre cage. Visually inspect the tyre pressure daily. There is no visible air shortage: The machine is ready for operation. Visible air shortage: Obtain the specified air pressure with appropriate filling devices. BA RD18 en 01... -
Page 149: Changing The Tyres
Switch off diesel engine and remove ignition key. Have hoisting gear ready that is appropriate for the weight of the machine and wheels. Lift the machine until the wheels leave the ground: BA RD18 en 01... - Page 150 Guide the valve extension hose [1] to the outside via the opening on the wheel rims. Place the retaining rings [3] onto the wheel studs [7]. Screw the wheel nuts [2] onto the wheel studs [7] and tighten them to the specified tightening torque. BA RD18 en 01...
- Page 151 Maintenance Transmission Push the valve extension hose [1] into the bracket. Lift the machine and remove the supports. Set the machine down so that the wheels are in contact with the ground. BA RD18 en 01...
-
Page 152: Steering System
Switch off diesel engine and remove ignition key. Apply the articulated frame steering blocking. Grease lubricating nipple [1]. 4.07.02 Lubricating the steering cylinder pins " Only lubricants with this symbol are permitted ("Technical data", page 161 onwards). BA RD18 en 01... - Page 153 Maintenance Steering system Switch off diesel engine and remove ignition key. Apply the articulated frame steering blocking. Grease lubricating nipple [1]. BA RD18 en 01...
-
Page 154: Water Sprinkling
If it needs to be topped up, open the tank cover [2] and fill the water tank with water. Lock the tank cover [2] again. 4.08.02 Checking the spray nozzles Check that an even sprinkling pattern is obtained on the roller drums/tyres. BA RD18 en 01... - Page 155 Additive sprinkling turned off. Latch driving lever in position 0. Switch off the electrical system. If the sprinkler does not work or does not produce the desired sprinkling pattern, the sprinkler nozzles need to be cleaned. BA RD18 en 01...
-
Page 156: Cleaning Sprinkler Nozzles
A large, corrosion-free water filter is arranged upstream of the water pump. It prevents premature contamination of pump, lines and spraying nozzles, thus ensuring trouble-free operation. The maintenance of the water filter depends on the purity of the water used. Only use clean water! BA RD18 en 01... -
Page 157: Emptying And Cleaning The Water-Sprinkling System
[6] is included in the on-board tool as an option. The filter insert must be replaced by a new one when it is defective, worn out or cannot be cleaned. For ordering, please contact the customer service. 4.08.05 Emptying and cleaning the water-sprinkling system BA RD18 en 01... -
Page 158: Emptying And Cleaning The Additive-Sprinkling System
Catch and dispose of any release agent emulsion that flows out. Lift the additive tank [4] from the cladding [7] and drain it. After the tank has been drained, actuate the additive-sprinkling system until release agent emulsion no longer escapes from the sprinkler nozzles. BA RD18 en 01... - Page 159 Place the additive tank [4] into the cladding [7]. Secure the additive tank [4] using the bracket [2]: Two screws, nuts and washers [3]. Secure the hose [8] to the connection [5] using the union nut [6]. Close the additive tank cover [1]. BA RD18 en 01...
-
Page 160: Dynamic Compaction System
Checking the damping elements Switch off diesel engine and remove ignition key. Check the damping elements [1] of the roller drum suspension for cracks. Let replace damaged damping elements by new ones. Contact the customer service. BA RD18 en 01... -
Page 161: Tables
Select the engine oil suitable for your operating temperature. Take account of the SAE viscosity grades. Use multigrade oils for work in widely ranging temperatures. The cold starting ability of the engine can suffer if the temperature falls below the limit for a short period. BA RD18 en 01... - Page 162 Tables Technical data BA RD18 en 01...
-
Page 163: Fuel
Use winter diesel fuel for working at temperatures between 0 °C (32 °F) and –20 °C (–4 °F) Use special diesel fuels for working in arctic climatic zones with temperature down to –44 °C (–47 °F). BA RD18 en 01... -
Page 164: Cooling Liquid (Coolant)
50 % –40 °C (–40 °F) 52 Vol.% 48 % Wacker Neuson uses and recommends products that are free of nitrites, amines, silicates and phosphates. These are listed in the "Overview of service fluid specifications" section (see page 167). Wacker Neuson supplies all the machines filled with a coolant mixture of 50 parts cooling system protective agent and 50 parts water. -
Page 165: Hydraulic Oil (Mineral Oil)
Select the hydraulic oil suitable for your ambient temperature. Take account of the viscosity grades. Winter conditions in Central Europe Summer conditions in Central Europe or in enclosed premises Tropical conditions or in premises subject to high amounts of heat BA RD18 en 01... -
Page 166: Biodegradable Hydraulic Oil
50 operating hours. Then comply with the filter change intervals stated in this manual. Take old bio-oil and mineral oil to a reliable disposal centre. Bio-hydraulic fluid is easily biodegradable. BA RD18 en 01... -
Page 167: Overview Of Lubricant Details
HEES Synthetic saturated ester ISO VG 100 extreme heat (ISO-VG: Viscosity grade). Special oil Use only Wacker Neuson special oil. Special oil Use only Wacker Neuson special oil. Gear oil with limited slip additives. The oil quality must meet the... -
Page 168: Starting Torques
Starting torques MA (Nm) Threads (wrench size) 10.9 12.9 M8x1 (SW13) M10x1.25 (SW16) M12x1.25 (SW18) M12x1.5 (SW18) M14x1.5 (SW21) M16x1.5 (SW24) M18x1.5 (SW27) M20x1.5 (SW30) M22x1.5 (SW34) M24x2 (SW36) 1070 M27x2 (SW41) 1330 1550 M30x2 (SW46) 1300 1840 2150 BA RD18 en 01... -
Page 169: Technical Data
33 ° Pendulum compensation upwards and downwards 8 ° Filling capacities Fuel 33.00 l Engine oil (for oil change) 5.10 l Diesel engine coolant 6.10 l Hydraulic oil 26.00 l Water sprinkling 70.00 l Sound power level BA RD18 en 01... - Page 170 105 dB(A) Sound power level L , representative measurement 101 dB(A) Emissions sound pressure level at the driver's seat Sound pressure level L , measured with ROPS, max. 88 dB(A) Electrical system Operating voltage 12 V BA RD18 en 01...
- Page 171 Sound power level L , guaranteed 105 dB(A) Sound power level L , representative measurement 101 dB(A) Emissions sound pressure level at the driver's seat Sound pressure level L , measured with ROPS, max. 88 dB(A) Electrical system BA RD18 en 01...
- Page 172 Tables Technical data Designation Value Unit Operating voltage 12 V BA RD18 en 01...
-
Page 173: Rd18-100
Steering Steering lock to both sides 32 ° Pendulum compensation upwards and downwards 8 ° Filling capacities Fuel 33.00 l Engine oil (for oil change) 5.10 l Diesel engine coolant 6.10 l Hydraulic oil 26.00 l BA RD18 en 01... - Page 174 (parent) engine that is representative of the engine type or the engine family in a fixed test cycle under laboratory conditions, and it does not represent an explicit or implicit guarantee for the performance of a specific engine. BA RD18 en 01...
-
Page 175: Dimension Sheet
RD18-80 (26.8") 8° 8° (31.5") (2.4") (2.1") (31.5") (2.2") 1560 (33.7") (14.6") (61.4") 2295 (90.4") 2483 (97.8") 5.02.02 RD18-100 (26.8") 1000 1000 (39.4") (2.4") (2.1") (39.4") (2.2") 1560 1056 (41.6") (14.6") (61.4") 2295 (90.4") 2483 (97.8") BA RD18 en 01... -
Page 176: Rd18-100
Tables Dimension sheet 5.02.03 RD18-100c (26.8") 1000 1000 (39.4") (2.4") (39.4") 1040 1560 (40.9") (14.6") (61.4") 2309 (90.9") 2501 (98.5") BA RD18 en 01... -
Page 177: Fuses
[3] Central electrical system/option 1 Component Fuse assignment Fuse All-wheel lock Cold start assistance central relay Drum edge lighting 15 A Left driving light 10 A Right driving light 10 A Reversing lights 15 A Working spotlight 15 A BA RD18 en 01... - Page 178 25 A Seat belt buckle monitoring device 7.5 A Plug-in socket for fuse test You can use the fusible test receptacle to check a fuse. The green light-emitted diode (LED) lights up when the fuse is functional. BA RD18 en 01...
-
Page 179: Diagnostic Code
Right turn signal Open line, short-circuit Water sprinkling Internal plausibility error Solenoid valve vibration front or rear Internal plausibility error Hydraulic oil pressure or temperature sensor Short-circuit, mechanical defect Drive lever Implausible signal Starting conditions Implausible signal Fault BA RD18 en 01... -
Page 180: Auxiliary Equipment
For the special attachments, observe ALL the general warning and safety notices listed in the Operation and Maintenance chapter. "Important information about operating the machine" "Important information about maintenance works" When working at the machine please always adhere to the instructions given in your Safety instructions! BA RD18 en 01... -
Page 181: Roll-Over Protection Structure (Rops)
Perform installation work on firm ground (flat, stable, horizontal). Carry out fitting work only when the engine is stopped. Use suitable load suspension and hitching gear with an adequate loading capacity. Do not step underneath suspended loads. BA RD18 en 01... - Page 182 (observe starting torque values). Bolts and nuts must not be damaged, bent or deformed. It is absolutely forbidden to modify or repair/level the reinforcement elements in any way. BA RD18 en 01...
-
Page 183: Falling-Object Protective Structure (Fops)
Installation A damaged FOPS component must only be installed or replaced by specialist personnel who are trained to do so. Inform customer service. BA RD18 en 01... -
Page 184: Rotating Beacon
All work above floor level must only be carried out using a stable ladder or on maintenance scaffolding. To reach the maintenance points on the machine, use the designated steps and treads. Do not step on any other machine element or add-on part. BA RD18 en 01... - Page 185 Unscrew the clamping screw [4] and slide the rotating beacon [3] off the contact tube [2]. Close the contact tube [2] with the protective cap [1]. Stow the rotating beacon [3] on the holder [5] inside the cab. BA RD18 en 01...
-
Page 186: Operation
Press the rotating beacon switch [1] on the control panel. LED on: Rotating beacon [2] lights. Switching off rotating beacon Press the rotating beacon [1] switch on the control panel again. LED off: Rotating beacon [2] off. BA RD18 en 01... -
Page 187: Maintenance
Dust or sand can impair the function of the rotating beacon. Cleaning Use a sponge and soap water to clean the rotating beacon. Do not clean the rotating beacon with a water jet or high-pressure cleaner. Maintenance Spray electrical contacts using a contact spray. BA RD18 en 01... -
Page 188: Anti-Freeze Filling System For Water Sprinkling
6.03.03 Operation Use a commercially available antifreeze solution for windscreen washing systems when filling the piping system. Match the mixing ratio with water to the expected temperatures. BA RD18 en 01... - Page 189 Fill the piping system until the antifreeze solution exudes out of all the spray nozzles. Switch off the sprinkler. Switch off the electrical system, and remove the ignition key. Put the hose [1] back in its holder. Set the switchover valve [2] to sprinkle. BA RD18 en 01...
-
Page 190: Bypass Filter For Hydraulic Oil
Maintenance overview Every 500 operating hours 500 h Replacing the filter cartridge in the bypass filter Exchange the bypass filter for the hydraulic system $ Lubricant only admissible if containing this marking ("Technical data", page 161 sqq.). BA RD18 en 01... - Page 191 Screw on and tighten the filter casing [1]. Start the diesel engine; Check the filter for leaks. Check oil level of the hydraulic system with the diesel engine at a standstill. Top up the stipulated hydraulic oil if necessary. BA RD18 en 01...
- Page 194 Wacker Neuson Produktion GmbH & Co. KG Wackerstraße 6 85084 Reichertshofen, Germany www.wackerneuson.com Tel.: +49 (0) 8453 340 32 00 Order no. 5100055889 Language en...
Need help?
Do you have a question about the RD18 and is the answer not in the manual?
Questions and answers