
Related Manuals for KANSAI SPECIAL LX-SP Series


Summary of Contents for KANSAI SPECIAL LX-SP Series
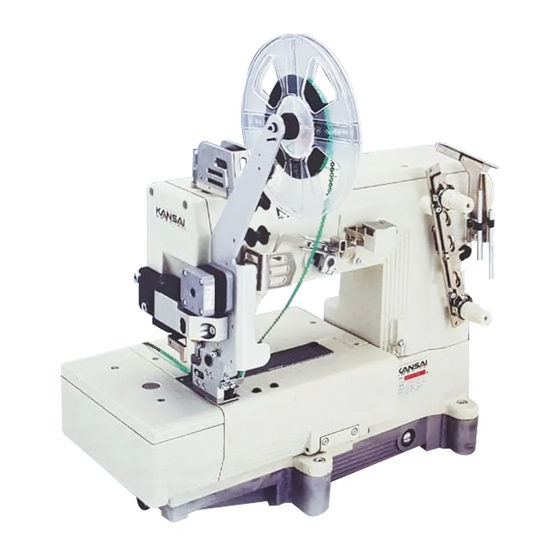
- Page 1 INSTRUCTION Industrial Sewing Machines LX5801SP First published : April 2006 No. 060035...
- Page 2 INTRODUCTION Thank you for your purchasing Kansai Special’s LX-SP Series. Read and study this instruction manual carefully before beginning any procedures and save it for later use. This instruction manual describes setting-up and adjustment procedures for this machine. Before operating the machine, make sure the pulley cover, safety cover, etc. are secured.
-
Page 3: Table Of Contents
CONTENTS 1. SPECIFICATION ·························································· 1 2. SETTING UP THE MOTOR 2-1 Installing the synchronizer ·········································· 1 2-2 Adjusting the needle stop position ································ 1 2-3 Max. machine speed ··················································· 1 3. SETTING UP THE SEQUIN DEVICE 3-1 Installing the sequin device ········································· 2 3-2 Installing the sequin reel ············································... -
Page 4: Specification
【1】SPECIFICATION LX5801(1 needle, double chain stitch) Machine model Machine motor Servo Motor Max. machine speed 600rpm Standard needle type UY128GAS #14 5mm(Factory Setting) 3mm(Including optional presser foot & guide) Sequin size 7mm(Including optional presser foot & guide) 1 sequin on every stitches Sewing pattern 1 sequin on 2 stitches 〜... -
Page 5: Setting Up The Sequin Device
【3】SETTING UP THE SEQUIN DEVICE (Fig.3) 3-1 Installing the sequin device ■ I nstall the sequin device to the head cover with screws A. (Fig.3) ■ T ighten the screws A after checking the followings. The needle drops into the center of sequin hole. (Fig.4) The clearance range between the bottom surface of sequin device and the top surface of the... -
Page 6: Inserting The Sequin Tape
3-3 Inserting the sequin tape ■ I nsert the sequin tape to the sequin guide. Refer to the following figure. (Fig.9) ■ I n case of the reverse rolled reel, threading way is different. Refer to the following figure. (Fig.8) (Fig.8) (Fig.9) (Fig.10) -
Page 7: Connecting The Electric Cord
3-4 Connecting the electric cord ■ C onnect the electric cord as the following figure. (Fig.12) (Fig.12) (Fig.13) 3-5 Checking the sequin feed timing ■ P roper timing is the moment which a sequin starts to be fed, when the point of needle reaches 0.5~1.0mm above from the sequin surface on its upstroke. -
Page 8: Adjusting The Sequin Device
【4】ADJUSTING THE SEQUIN DEVICE (Fig.14) 4-1 Adjusting the sequin cutting position ■ F eed a sequin by pushing the feeding bar. A reference figure is on the page. 6. (Fig.16) ■ C ut a sequin by pushing down the movable knife as the figure on the right. - Page 9 ■ I n case of wrong cutting position, adjust it with the following procedures. (Fig.15) Loosen the screw X on the sequin pressure foot bracket. Refer to the right figure. (Fig.15) Loosen the screw Z on the feeding bar to release itself freely from the shaft.
-
Page 10: Adjusting The Sequin Hole Position Against The Needle
4-2 Adjusting the sequin hole position against the needle Note: This adjustment is necessary only for: If the needle drop position is incorrect into the sequin hole, after followed “4-1 Adjusting the sequin cutting position.” (Fig.19) ■ A djusting the front-back position Loosen the screw A and B. -
Page 11: Adjusting The Height Of Sequin Device
4-3 Adjusting the height of sequin device ※Height will be changed depending on the fabric weight. Loosen screw E on the figure. (Fig.21) Move the sequin device up or down. Clearance range between the bottom surface of sequin device and the top surface of the needle plate should be 1.5~2.0mm. -
Page 12: Setting Up & Operating The Control Box
【5】SETTING UP & OPERATING THE CONTROL BOX 5-1 Description ■ T he sequin pitch (feeding amount) and skip pattern (sequin interval) are both changeable by operation panel setting and machine adjustment. ■ M ax. speed 600 rpm is available, and insures stable operation for the sequin feed. 5-2 Connecting the power wire ■ ... -
Page 13: Functions Of The Control Box
5-3 Functions of the control box (Fig.28) Size Setting Rotary switch (Left) Sequin size can be determined by this switch, and then feeding amount is also changed. 3mm, 5mm, and 7mm, sequin size, are available. Switch assignment is the following; No Data No Data No Data... - Page 14 Pattern Setting Rotary switch (Right) Switch assignment is the following; Pattern Switch No. Skip pattern Continuous sequins 1 0 1 sequin on every 2 stitches 2 1 1 sequin on every 3 stitches 3 2 1 sequin on every 4 stitches 4...
- Page 15 Set switch Yellow push button. To apply the new settings, press “Set” after change the sequin size or pattern. Caution A “Set” switch does not function while an operation. To change the sequin size or pattern, press “Set” switch while a machine has stopped.
-
Page 16: Applying The New Settings
5-4 Applying the new settings ■ A pplying the rotary switch (Fig.30) Press the sequin size and pattern switch after making a push-tab switch stand as the following figures. To avoid touching the switch accidentally, please face down the push-tab switch after changing the settings (Fig.30) ※The upper push-tab switch: +1 with each pressing. - Page 17 ■ P attern setting (Fig.32) While the operation stops, press “Set” to apply the changing after changing the sequin size. The new setting is completely set right after pressing “Set.” (Fig.32) ※A “Set” bottom can be used to change both changing: size and pattern at the same time. ■ ...
Need help?
Do you have a question about the LX-SP Series and is the answer not in the manual?
Questions and answers