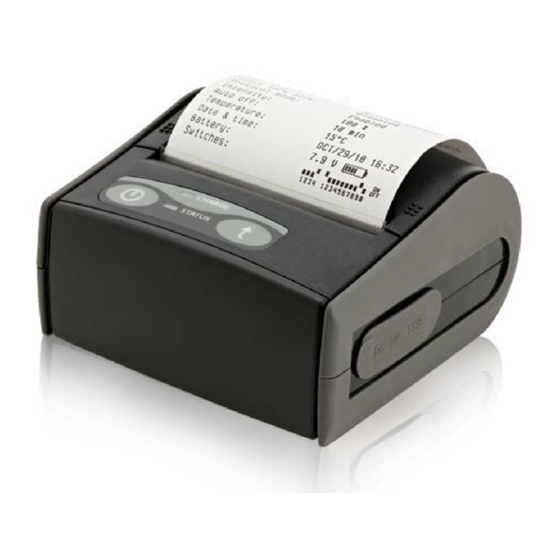
Infinite Peripherals DPP-350 Work Instructions
Infinite peripherals dpp-350: supplementary guide
Hide thumbs
Also See for DPP-350:
- User manual (31 pages) ,
- User manual (31 pages) ,
- User manual (21 pages)
Table of Contents
Advertisement
Quick Links
Download this manual
See also:
User Manual
Advertisement
Table of Contents

Related Manuals for Infinite Peripherals DPP-350


Summary of Contents for Infinite Peripherals DPP-350
- Page 1 1 DATECS ESC/POS printer DPP-350 Made by: Svetlomira Jeliazkova Checked by: Antonio Kandov Approved by: Hristina Yordanova EN ISO 9001:2000 WORK INSTRUCTIONS model: DPP-350 edition: 02 Signature: Date: 09.2007 09.2007 09.2007 identif.No: WI 07.01.52 Version: 2 Page. 1 from 30...
-
Page 2: Table Of Contents
Scheme of card reader module ... 5 Scheme of MiFare reader module ... 6 Main PCB scheme ... 7 Modules for assembling of DPP-350 ... 8 Assembling DPP-350 ... 13 Preparation of bottom cover ... 13 Preparation of top cover ... 21 Closing of printer DPP-350 ... -
Page 3: Esc/Pos Printer Dpp-350
1 DATECS 1. ESC/POS PRINTER DPP-350 Position Number Name Documentation DPP350 000.000 Assembly scheme ASSEMBLED UNITS Buzzer Bluetooth PCB Connectors PCB Main PCB SD WiFi PCB DPP350 100.000 Card reader module DPP350 200.000 MiFARE reader module PARTS Battery DPP350 000.001 Right Button DPP350 000.002... -
Page 4: Assembly Scheme
1 DATECS identif.No: WI 07.01.52 EN ISO 9001:2000 WORK INSTRUCTIONS Version: 2 model: DPP-350 edition: 02 Page. 4 from . 30 2. ASSEMBLY SCHEME... -
Page 5: Scheme Of Card Reader Module
Lightguide of card reader DPP350 100.003 Spring STANDARD PARTS Screw 2.4 x 4 Screw 2 x 3 Screw 2 x 6 EN ISO 9001:2000 WORK INSTRUCTIONS model: DPP-350 Qty. identif.No: WI 07.01.52 Version: 2 edition: 02 Page. 5 from . 30... -
Page 6: Assembly Scheme
Number Name DOCUMENTATION DPP350 200.000 Assembly scheme ASSEMBLED UNITS MIiFare PCB PARTS DPP350 200.001 Front cover of MiFare reader module EN ISO 9001:2000 WORK INSTRUCTIONS model: DPP-350 Qty. identif.No: WI 07.01.52 Version: 2 edition: 02 Page. 6 from . 30... -
Page 7: Main Pcb Scheme
5. MAIN PCB SCHEME Position Number Name DOCUMENTATION DPP350 300.000 Assembly scheme ASSEMBLED UNITS FTP 638ÑÂ103 PARTS DPP350 300.001 Printer attachment EN ISO 9001:2000 WORK INSTRUCTIONS model: DPP-350 Qty. identif.No: WI 07.01.52 Version: 2 edition: 02 Page. 7 from . 30... -
Page 8: Modules For Assembling Of Dpp-350
1 DATECS model: DPP-350 6. Modules for assembling of DPP-350 • • • • • Main PCB (fig. 1) • • • • • Card Reader PCB (fig. 2) • • • • • Bluetooth PCB (fig.3) • • • • •... - Page 9 1 DATECS model: DPP-350 • • • • • MCR cable (fig. 6) • • • • • MCR head (fig. 7) • • • • • Bottom cover (fig. 8) • • • • • Top cover (fig. 9) •...
- Page 10 1 DATECS model: DPP-350 • • • • • Front cover for Card Reader Module (Fig. 11) • • • • • Front cover when there is no Card Reader module (fig. 12) • • • • • Attachment for printer mechanism (fig. 13) •...
- Page 11 1 DATECS model: DPP-350 • • • • • Keyboard (fig. 20) • • • • • Silicone plate (fig. 21) • • • • • Paper cutter (fig. 22) • • • • • Buzzer prepared for production (fig. 23) •...
- Page 12 1 DATECS model: DPP-350 • • • • • Lightguide for Card Reader (fig. 30) • • • • • Cable for connection of main PCB and Card Reader PCB - 4 pins, 9 cm (ig. • • • • •...
-
Page 13: Assembling Dpp-350
Optron (pos.ÎÏ1) is placed on inner side of printer mechanism’s attachment (pos.3) in a socket (pos.Ã1) and is glued with two drops of hot silicone (fig. 35) EN ISO 9001:2000... - Page 14 Flat cable of printer mechanism is connected to Main PCB in connector CN3 (fig. 37). Fig.36 Fig.37 Main PCB (pos.4) is fixed with 2 screws 2 õ 6mm (pos.30), and printer mechanism – with 2 screws 2 õ 8 mm (pos.31) to bottom cover (fig. 38) Fig.38...
-
Page 15: Battery Cover Opener
2 PCB’s - Main and USB (pos ÊÏ1.) (fig. 39) REMARK: Cog (pos.ÁÇ1) of bottom cover must enter in hole (pos.ÎÒ1) on printer mechanism (fig. 40). 2 pcs. battery cover opener (pos.25) are put in the holes (pos.Î1) on battery cover (pos.16), a clic should be heard and cogs should... -
Page 16: Label
1 DATECS model: DPP-350 Battery cover is placed as shown on (fig. 43). Battery cover opener (pos..25) is turned in direction shown with arrow (À1) for closing of battery cover,for opening - in the direction shown with arrow (À2). Option: Belt hook (pos.18) is fixed with a screw 2.9 õ... - Page 17 1 DATECS identif.No: WI 07.01.52 EN ISO 9001:2000 WORK INSTRUCTIONS Version: 2 model: DPP-350 edition: 02 Page. 17 from . 30 Option (placing Card Reader PCB) Solder MCR cable (fig.6) to MCR head (fig.7) in the direction and way shown in fig.46 , pass through Card Reader PCB (fig.47)and solder PCB (fig.48).
- Page 18 WI 07.01.52 EN ISO 9001:2000 WORK INSTRUCTIONS Version: 2 model: DPP-350 edition: 02 Page. 18 from . 30 Fix carefully lightguide for Card Reader Module (fig.30) with one drop of hot silicone or strong fix glue to front cover (fig.52).
- Page 19 WI 07.01.52 EN ISO 9001:2000 WORK INSTRUCTIONS Version: 2 model: DPP-350 edition: 02 Page. 19 from . 30 Mount the prepared Card Reader PCB (fig.55a) and fix with the help of 4 screws 2 õ 6 mm to Front Cover (fig.55b).
- Page 20 1 DATECS model: DPP-350 Option (mounting of Bluetooth PCB) REMARK: Bluetooth PCB is mounted before the fixture of Main PCB and USB PCB! First connect the cable between Bluetooth PCB and Main PCB (fig.32) respectively in CN7 of Main PCB (fig.58a) and connector CN2 on Bluetooth PCB (fig.58b).
-
Page 21: Preparation Of Top Cover
1 DATECS model: DPP-350 7.2 Preparation of top cover Rubber cover for SD card (pos.12) is placed in the guides (pos.Â1) on top cover (fig.60). Righjt button (pos.9) and left button (pos.10) are placed in the respective nests on top cover (pos.14),after that the keyboard is adhered (pos.17) (fig.61). - Page 22 1 DATECS model: DPP-350 Opening lever (pos.19) is placed in the respective place (pos.Ó1) on paper cover (pos.15), so that a click is heard making the movements in the directions shown (1&2) (fig.64) The so prepared paper cover is attached to top cover - the shafts pos.ÂÎ1 are placed in holes pos.ÂÎ2 (fig.65).
-
Page 23: Closing Of Printer Dpp-350
(Ó2) on paper cover so that a click is heard (fig.69). Place the paper cover in the plae for it and close paper cover. After this step thermal printer DPP-350 is fully assembled! (fig.70). EN ISO 9001:2000 WORK INSTRUCTIONS edition: 02 Fig.66... -
Page 24: Testing Printer Dpp-350
1 DATECS model: DPP-350 8. Testing Printer DPP-350 8.1 testing of charging of LiIon battery (7.4V/2000mAh) Before the device assembly is tested the charging of LiIon battery. For this connect • • • • • battery to connector CN4 • • • • •... -
Page 25: Testing Of Buttons, Buzzer And Printer Mechanism
(LF) button. The printer makes a noise and the ERROR LED lights in red (fig.76). After that diagnostic data is being printed (short self test) (fig.77). This is the end of test for buttons, buzzer and printer mechanism REMARK: Long self test is printed when the button (LF) ) is pressed and held for 2 seconds! (fig.78) -
Page 26: Testing Of Rs232 Communication
If the printer’s firmware is downloaded successfully thenthe RS232 communication works OK. 8.4 Testing USB communication Test is made with a Blackberry PDA, it is connected to printer DPP-350 with mini USB cable (ô fig. 80) connected to mini USB port of printer. − − − − −... -
Page 27: Testing Of Bluetooth Communication
If this is done this means that the Bluetooth communication of printer works OK. 8.6 testing of mag-stripe reader module Test is done with a Blackberry PDA device, which is connected to a switched on printer DPP-350 via mini USB USB cable (fig.80) connected to the mini USB port of printer . -
Page 28: Testing Of Smart Card Reader Module
8.7 Testing of smart card reader module Test is done with a Blackberry PDA device, which is connected to a switched on printer DPP-350, via mini USB cable connected to the mini USB port of printer. − − − − −... -
Page 29: Packing Of Dpp-350
WORK INSTRUCTIONS Version: 2 model: DPP-350 edition: 02 Page. 29 from . 30 9. Packing of DPP-350 PrinterDPP-350 is packed in a nylon bag. Carton box includes also: - Adapter 9V/1A - Connection cable for connection with PC - Users manual... -
Page 30: History Of Document Changes
1 DATECS identif.No: WI 07.01.52 EN ISO 9001:2000 WORK INSTRUCTIONS Version: 2 model: DPP-350 edition: 02 Page. 30 from . 30 History of document changes Version 2 (14.09.2007): Changes: - VERSIONS OF MAIN PCB, CARD READER PCB AND SD CARD PCB ARE UPDATED.
Need help?
Do you have a question about the DPP-350 and is the answer not in the manual?
Questions and answers