Table of Contents
Advertisement
Quick Links
Advertisement
Table of Contents

Related Manuals for Fisher & Paykel WASHSMART WA1068G


Summary of Contents for Fisher & Paykel WASHSMART WA1068G
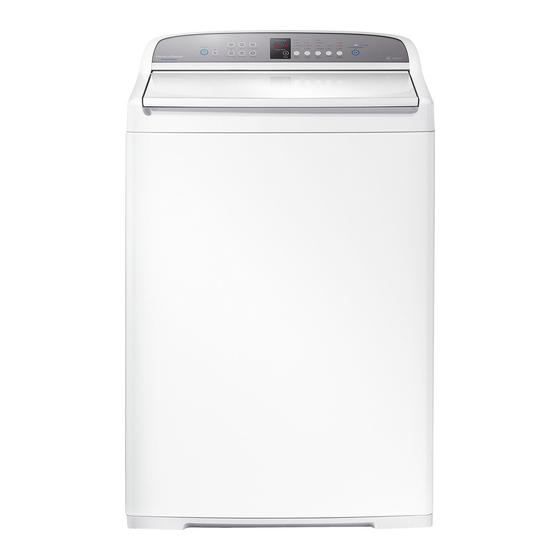
- Page 1 WASHSMART™ CLOTHES WASHER WA1068G model INSTALLATION GUIDE / USER GUIDE NZ AU...
-
Page 3: Table Of Contents
CONTENTS Safety and warnings Installation instructions Before your first wash Safety features Control panel Wash cycles Eco Active™ wash Wash preparation Getting started quickly Wash options Customising a wash cycle Changing pre-set options Caring for your washer Before you call for service Fault codes Troubleshooting Manufacturer’s warranty... -
Page 4: Safety And Warnings
SAFETY AND WARNINGS WARNING! Electrical Shock Hazard Failure to follow this advice may result in electrical shock or death. • If you are using an extension cord or a portable electrical outlet device (eg multi-socket outlet box), ensure that it is positioned so that it does not come into contact with water or moisture. - Page 5 SAFETY AND WARNINGS MODEL CODE MAX CAPACITY* (KG) WA1068G *Capacity refers to the maximum dry weight of items the washer can wash at any one time. Do not overload your washing machine beyond its rated capacity. Do not wash an electric blanket in your washer unless the care label specifically states it is safe to do so.
-
Page 6: Installation Instructions
INSTALLATION INSTRUCTIONS Accessories Check if you received the following accessories with your Fisher & Paykel washer. You will find them inside the drum or attached to the packaging. 1 hose guide 2 inlet hoses Unpacking To ensure the best performance from your new washer please follow the instructions below. Removing the packaging 1 Remove the outer packaging. - Page 7 INSTALLATION INSTRUCTIONS Product dimensions FRONT VIEW PROFILE VIEW PRODUCT DIMENSIONS A Overall height (to highest point on the console) 1060-1090 B Overall width of product C Overall depth of product D Height of product to top of lid closed (measured at 950-980 front of product)* E Height of product to top of lid* open...
- Page 8 INSTALLATION INSTRUCTIONS Levelling instructions It is IMPORTANT to level the washer to ensure good spin performance. A level is provided with your washer. The washer is level when the bubble sits in the centre, within the two lines. Your washer is equipped with self-locking feet at the front to ensure they do not move once you have levelled your washer.
- Page 9 INSTALLATION INSTRUCTIONS Water supply Inlet hoses Failure to adhere to the following instructions may result in a flood and damage to property: 1 Connect the straight ends of the inlet hoses to the taps (there are washers fitted in both ends). Connect the red connector hose to Hot, and the white connector hose to Cold.
- Page 10 INSTALLATION INSTRUCTIONS Draining Placing the drain hose in a standpipe or tub: 1 Carefully pull the drain hose out from the back of the washer by pulling the exposed Pull hose part of the hose downward and outward. through (20 mm) 2 To guide the drain hose over the tub or guide maximum...
- Page 11 INSTALLATION INSTRUCTIONS Completing your installation Turn on the water and check all hose connections for leaks. Make sure there are no kinks in the hoses. Check the hose connections for leaks again after 24 hours. Uncoil power cord, remove and discard the plastic pin cover, and plug into wall socket. Connect the appliance to an earthed outlet protected by a fuse of suitable capacity.
-
Page 12: Before Your First Wash
BEFORE YOUR FIRST WASH Before you start, mark ( ) accordingly if you have gone through the checklist below: 1 Has the base space packer been removed? 2 Is the drain hose threaded through the hose guide ‘U bend’ (with no more than 20mm extended) and hooked into your standpipe or tub, or attached to a spigot? 3 Is the hot hose connected to the Hot valve marked ‘H’? -
Page 13: Safety Features
SAFETY FEATURES Lid lock The lid of your WashSmart™ washer is locked for some parts of the wash cycle, ensuring safety for you and your family while it is operating. light (above the button) is illuminated when the lid lock is activated, LID LOCKED letting you know at a glance if you can open the lid or not. -
Page 14: Control Panel
CONTROL PANEL 7 8 9 1 POWER Touch to turn the washer ON/OFF. 2 Keylock Touch and hold to disable all buttons on the display panel, except button. This prevents accidental button presses. POWER 3 Wash cycles Touch to select the desired cycle for your load. 4 Digital display Shows the following: screen... - Page 15 CONTROL PANEL Time to go Your WashSmart™ washer displays approximately how many minutes the cycle has remaining, so that you can tell at a glance when your washing will be finished. Once you have selected your wash cycle and options, the time the cycle will take to complete will be displayed.
-
Page 16: Wash Cycles
WASH CYCLES Wash cycle guide Your washer has a number of wash cycles to suit your laundering needs. Selecting the most appropriate cycle for each particular wash load will help ensure you get the best wash result. WASH WASH WASH SPIN CYCLE DESIGNED FOR... -
Page 17: Eco Active™ Wash
ECO ACTIVE™ WASH Your WashSmart™ uses a dual-action wash to give excellent wash performance while taking great care of your clothes. We call this the Eco Active™ wash. The two parts to the Eco Active™ wash are explained below: Detergent activating wash (front-loader type wash) Your WashSmart™... -
Page 18: Wash Preparation
WASH PREPARATION Sorting Sort items according to colour, fabric type and soil type. Wash fine, delicate fabrics separately from thick, heavy fabrics. Always separate coloured items from whites, especially when they are new. Colour run could be an issue if you wash items at higher temperatures. Some soils, like mud and blood are best washed in cold water. - Page 19 WASH PREPARATION Selecting the right detergent We recommend using domestic laundry detergent. Use powder or liquid detergent for Top Loader machines. When washing wool items, remember to use a detergent specifically recommended for woollens. Soap flakes or granulated soap powders should not be used in your washer. How much detergent Follow the instructions on the detergent packet as a guide to the correct amount of detergent to use.
- Page 20 WASH PREPARATION How the fabric softener is dispensed The fabric softener goes into the dispenser cup on the top of the agitator. During the rinse the machine spins to release the fabric softener, delivering it down the agitator stem as the machine fills for the final deep rinse.
-
Page 21: Getting Started Quickly
GETTING STARTED QUICKLY The buttons require only a gentle touch to activate. Touch to activate your WashSmart™ washer. Select your desired wash cycle by touching the corresponding button. Choose your wash options, eg you may want wash temperature and a spin WARM SLOW... - Page 22 GETTING STARTED QUICKLY to lock the buttons on the display, which prevents them from being activated accidently. allows you to delay the start of DELAY START your wash by 5 mins up to 18 hours (refer to the ‘Wash options’ section). If you wish to stop your FabricSmart™ washer touch During a spray rinse or spin, there will be a slight delay while the bowl slows to a stop and the lid is unlocked.
-
Page 23: Wash Options
WASH OPTIONS Water Level Auto water level Your washer has the ability to automatically select the most efficient water level for the load. Place your clothes in the machine and select the wash cycle. Press water level if not AUTO automatically selected. - Page 24 WASH OPTIONS Wash temp WashSmart™ offers 5 wash temperatures, and an additional setting, CONTROLLED COLD CONTROLLED WARM/ WARM/ COLD WARM COLD COLD Incoming Incoming 20°C 35°C 40°C 50°C from tap from tap Note: These temperatures are approximate. Touch the button to increase or decrease the wash temperature selected. The WASH TEMP wash temperature selected is used in the Eco Active™...
- Page 25 WASH OPTIONS DO NOT use your washer to soak items in bleach or sanitiser, and if you’ve soaked items in a bucket, do not tip the contents of the bucket into your machine. The chemicals in these products are very corrosive to metal surfaces and can damage your washer. Rinse and wring items out thoroughly before placing them in your machine.
- Page 26 WASH OPTIONS Delay Start option can delay the start of the wash cycle between 5 minutes up to DELAY START 18 hours. This can be useful to time your washing to finish when you arrive home from work, or to start once you have finished in the shower. Touch the button to increase MORE...
- Page 27 WASH OPTIONS Washing bulky items Forcing large items into the machine may result in them being damaged during washing. Make sure there is enough room in the machine for items to move when being washed. Some items float up during the wash (eg duvets / doonas, water-proof and water- resistant items and pillows).
-
Page 28: Customising A Wash Cycle
CUSTOMISING A WASH CYCLE To customise a cycle You can program your WashSmart™ washer to remember the wash options you prefer for each wash cycle. For instance, you may want to set the cycle to default to a REGULAR WARM wash or set cycle to include a HEAVY... -
Page 29: Changing Pre-Set Options
CHANGING PRE-SET OPTIONS Option Adjustment mode CUSTOMISED ICON DEFAULT FUNCTION After using your washer a number of times you may want to fine tune some of the options to suit your wash needs. Regular Wash Temp Wash Temp Recovery There are a number of pre-set options, which can be changed: Heavy Recovery... - Page 30 CHANGING PRE-SET OPTIONS Adjusting your options Enter the Option Adjustment mode, refer to the ‘Option Adjustment mode’ for instructions. The display with change when you enter Wash Temp Recovery Option Adjustment Mode. Options you can change are accessible using the REGULAR cycle.
- Page 31 CHANGING PRE-SET OPTIONS Select the wash temperature you want to adjust, e.g. , by touching the WARM Wash Temp button. The digital display screen WASH TEMP Recovery displays the current setting. EOC Beeps Factory Reset Touch to increase or MORE LESS decrease to the desired temperature.
- Page 32 CHANGING PRE-SET OPTIONS Select wash temperature by touching COLD button (if not already WASH TEMP Wash Temp Recovery selected). EOC Beeps Factory Reset The digital display shows the temperature adjustment possible. The default setting is , which is the same temperature as the incoming water from the cylinder for cold water.
- Page 33 CHANGING PRE-SET OPTIONS Automatic recovery Your washer will try to automatically correct the out of balance load. It will fill with water and agitate to redistribute the load before trying to spin up again. To change the out of balance (OOB) recovery option: Enter Option Adjustment mode, refer to the ‘Option Adjustment mode’...
- Page 34 CHANGING PRE-SET OPTIONS Touch the button to increase or MORE decrease the number of beeps, or for no beeps to sound at the end of the cycle. Factory reset You can reset your washer to the settings it left the factory with: Enter Option Adjustment mode, refer to the ‘Option Adjustment mode’...
-
Page 35: Caring For Your Washer
CARING FOR YOUR WASHER When you have finished using your washer Turn off the taps to prevent the chance of flooding should a hose burst. Turn off the power at the wall. Cold water washing If you always wash with cold water, we recommend that a wash be used at WARM regular intervals, eg every 5th wash should be at least a warm one. - Page 36 CARING FOR YOUR WASHER Select water level, spin and the HIGH MEDIUM option. SOAK Press We do not recommend that you wash clothes during this procedure. Products that might damage your washer Concentrated bleaches, laundry pre-soakers/sanitisers, stain removers and hydrocarbon solvents (eg petrol and paint thinners) can cause damage to the surfaces eg control panel, and components of your washer.
- Page 37 CARING FOR YOUR WASHER Saving water, energy and the environment Water efficient washing machines will save you money, but it is also worth thinking about energy use, recycling water and the environment. Turn the washer off at the wall when not in use. Use Eco option (where available).
-
Page 38: Before You Call For Service
BEFORE YOU CALL FOR SERVICE User warnings Please read the following pages before you call for service. Your washer is capable of diagnosing its own problems. If your washer gives a musical series of beeps every 5 seconds it is telling you that it has a problem which you can solve using the checklist below. - Page 39 BEFORE YOU CALL FOR SERVICE PROBLEM DISPLAYED AS WHAT TO DO The washer is Wash load is out of balance. Ensure the washer is stationary. out of balance. Manually redistribute the load. Check the washer is level, refer to ‘Levelling instructions’. The washer has The washer has a suds build-up (too much detergent may have too many suds.
-
Page 40: Fault Codes
FAULT CODES If a continuous series of beeps sounds, all the lights turn off on the control panel and a number appears on the display, a fault has occurred. The washer automatically enters this mode when there is a fault. The word ‘Fault’ will be shown in the control panel display followed by a number (refer to example shown here). -
Page 41: Troubleshooting
TROUBLESHOOTING The following is a list of problems you may encounter when using this appliance and some suggestions that may help to correct the problem. If you still have problems, please contact your Fisher & Paykel trained and supported service technician. Solving operating problems PROBLEM POSSIBLE CAUSES WHAT TO DO... - Page 42 TROUBLESHOOTING PROBLEM POSSIBLE CAUSES WHAT TO DO Tangling Washing with too much Under-loading can cause the clothes to tangle around water. one another. Increase the size of the load. Incorrect loading Do not load the washer by wrapping items around the agitator, eg place items, especially sheets, in the bowl as loose parcels.
- Page 43 TROUBLESHOOTING PROBLEM POSSIBLE CAUSES WHAT TO DO Creasing Washer overloaded. Do not overload washer. Incorrect cycle for Use the cycle for creasable items. EASY IRON load type. Spin speed too fast. Select a slower spin speed. Wet clothes left in washer Laundry left sitting wet is more likely to crease.
- Page 44 TROUBLESHOOTING PROBLEM POSSIBLE CAUSES WHAT TO DO Poor soil removal Incorrect wash cycle Select a wash cycle with options selected. appropriate to the load, refer to ‘Wash cycles’. Insufficient detergent. Not enough detergent for load size or amount of soil. Washer overloaded.
-
Page 45: Manufacturer's Warranty
MANUFACTURER’S WARRANTY You automatically receive a 2 year Manufacturer’s Warranty with the purchase of this Product covering parts and labour for servicing within the country of purchase. Fisher & Paykel undertakes to: Repair or, at its option, replace without cost to the owner either for material or labour any part of the product, the serial number of which appears on the product, which is found to be defective within TWO YEARS of the date of purchase. - Page 46 MANUFACTURER’S WARRANTY E Normal recommended maintenance as set out in the product’s user guide. F Repairs when the appliance has been dismantled, repaired or serviced by other than a Fisher & Paykel trained and supported service technician or the selling dealer. G Pick-up and delivery. H Transportation or travelling costs involved in the repair when the product is installed outside the Fisher & Paykel trained and supported service technician’s normal service area.
-
Page 47: Customer Care
CUSTOMER CARE Before you call for service or assistance: Check our website, fisherpaykel.com, for ‘Product Help’ to see the latest updates, hints and tips, and information about your product. We recommend that you also refer to your user guide to ensure: 1 Your product is correctly installed. - Page 48 CUSTOMER CARE Registration Register your product with us so we can provide you with the best service possible. To register your product visit our website: fisherpaykel.com Complete and keep for safe reference: Model Serial No. Purchase Date Purchaser Dealer Suburb Town Country...
- Page 52 FISHERPAYKEL.COM © Fisher & Paykel Appliances 2021. All rights reserved. The models shown in this guide may not be available in all markets and are subject to change at any time. The product specifications in this guide apply to the specific products and models described at the date of issue.
Need help?
Do you have a question about the WASHSMART WA1068G and is the answer not in the manual?
Questions and answers