Table of Contents
Advertisement
Advertisement
Table of Contents

Related Manuals for DentalEZ RAMVAC AERAS 3


Summary of Contents for DentalEZ RAMVAC AERAS 3
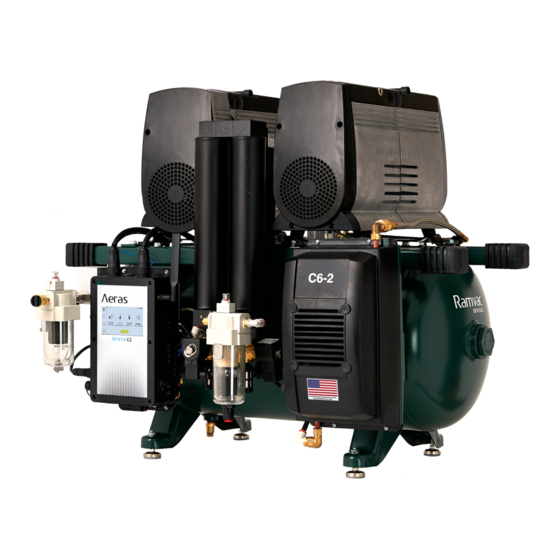
- Page 1 COMPRE SS OR USER MANUAL MODELS: C3-2, C4-1, C4-2, C6-2, C7-2 & C11-2...
-
Page 2: Table Of Contents
Settings Screen ..........................44 SECTION V - CARE Maintenance ............................. 51 SECTION VI - USER SERVICE INFO Service Instruction ..........................67 Disposal of Equipment ........................67 SECTION VII - PARTS DENTALEZ Parts Online ........................68 EMC INFORMATION ........................... 69 LIMITED WARRANTY .......................... 73... - Page 3 COMPRESSOR USER MANUAL NOTES: 866-DTE-INFO dentalez.com PN: 7717-004A...
-
Page 4: Section I - Introduction
This manual contains installation, operation, care and user service information for the Ramvac Aeras dental compressor. To view the latest manual, go to dentalez.com to download a digital (PDF) copy. The Aeras compressors are designed to provide trouble-free service when installed, operated and cared for according to the procedures set forth in this manual. -
Page 5: Product Features
Optional fresh air intake kit is used when room temperatures are beyond operating temperature range and/or when air has contaminants. Optional sound cover lowers decibel ratings by 6 to 8 decibels. It is available for all Aeras models and is simple to install. COMPRESSOR 866-DTE-INFO dentalez.com PN: 7717-004A... -
Page 6: Specifications
SECTION I - INTRODUCTION SPECIFICATIONS AERAS 3 AERAS 4 AERAS 4 AERAS 6 AERAS 7 AERAS 11 (C3-2) (C4-1) (C4-2) (C6-2) (C7-2) (C11-2) Max Users Voltage (AC) (208 - 253) (103 - 126) (208 - 253) (208 - 253) (208 - 253) (208 - 253) Power Consumption 10.5... -
Page 7: Classifications
= Manufacture Date = Manufacturer = Electromagnetic Radiation = Box Must Remain Upright = Do Not Place Box on Unlevel Surface = Do Not Stack Box = Box Contents Safe Temperature Range = Box Contents Safe Humidity Range 866-DTE-INFO dentalez.com PN: 7717-004A... -
Page 8: Safety Precautions
SECTION I - INTRODUCTION SAFETY PRECAUTIONS To ensure that the safety potential of this equipment is achieved, make sure equipment is installed according to written instructions and that the provided INSTALLATION CHECKLIST is completed. If compressor was purchased from an authorized dealer, the dealer is responsible for providing the completed checklist. - Page 9 An air leakage test should be conducted on the facility air system to ensure no air leaks are present. Excessive SECTION V - CARE > air leakage will impact the performance and life expectancy of your compressor. See MAINTENANCE > TEST FOR AIR LEAKS instructions provided in this manual. 866-DTE-INFO dentalez.com PN: 7717-004A...
-
Page 10: Section Ii - Preinstallation
SECTION II - PREINSTALLATION PACKAGING WARNING To prevent tipping during transport, securely fasten unit to shipping pallet until final destination has been reached. TOOLS REQUIRED 7/16" Wrench UNPACKING COMPRESSOR CARTON Carefully remove the shipping carton from the pallet containing the compressor. 2. -
Page 11: Placement
Do not locate this device or it’s air intake opening in an area that is prone to flooding or has previously flooded. Water can damage components, reduce life expectancy of the compressor or cause serious personal injury. 866-DTE-INFO dentalez.com PN: 7717-004A... -
Page 12: Site Requirements
SECTION II - PREINSTALLATION SITE REQUIREMENTS Before the compressor can be properly installed, the following utilities must be supplied. This device requires proper electrical grounding for safe operation. A licensed electrician should always complete the electrical portion of the installation process. WARNING To avoid risk of electric shock, this equipment must only be connected to a supply mains with protective earth. -
Page 13: Section Iii - Installation Feet Kit
Be careful not to damage the drain valve under the center of the tank. Never work under a compressor that is not supported with adequate blocking (FIGURE (Continued on the next page.) FIGURE 3. BLOCK THE COMPRESSOR TANK TO INSTALL FEET 866-DTE-INFO dentalez.com PN: 7717-004A... -
Page 14: Filter Drain Kit
SECTION III - INSTALLATION FEET KIT (CONTINUED) (Continued from the previous page.) 3. Thread feet into the two elevated legs from the bottom side of the leg. 4. Adjust each foot to approximately the same height, then thread a flanged nut (flange side toward the leg) onto each foot (FIGURE NOTE: It is not necessary to tighten the flanged nuts at... - Page 15 NOTE: If drain plumbing is not accessible, the supplied purge bowl can be used instead to catch disposal water. The water should be manually emptied daily. COLORED RING: PUSH IN TO RELEASE ELBOW FROM DRAIN FITTING ELBOW FITTING FIGURE 5. ELBOW FITTING INSTALLED IN COALESCING FILTER DRAIN 866-DTE-INFO dentalez.com PN: 7717-004A...
-
Page 16: Low-Voltage Wiring Connections
SECTION III - INSTALLATION LOW-VOLTAGE WIRING CONNECTIONS WARNING Prior to starting this assembly, read, understand and follow the safety information and the assembly instructions in this user manual. Always disconnect the compressor from the electrical power source prior to conducting any electrical service of the equipment. - Page 17 Illuminated 24V DC Switch Alternative Switching REMOTE SWITCH CONNECTOR Toggle Switch or Other Non- Aeras Illuminated Control Terminals Switch (Option) +24V DC Air Switch +24V DC Air Light DC Common (Continued on the next page.) Common 866-DTE-INFO dentalez.com PN: 7717-004A...
- Page 18 SECTION III - INSTALLATION LOW-VOLTAGE WIRING CONNECTIONS (CONTINUED) (Continued from the previous page.) Alternative Switching OWL Hub Aeras Control Panel OWL Touch OWL Interface LOW-VOLTAGE AUXILIARY CONNECTION NOTICE Maximum wire length for 18-gauge wire is 500 feet. Low-voltage auxiliary connection is used to connect a non-Aeras vacuum, master water control valve, or another non-Aeras compressor to this Aeras compressor.
-
Page 19: Outlet Plumbing Kit
If a conflict does exist, follow the requirements set forth by the other organizations. PARTS INCLUDED FACILITY Final Filter (Particulate) SUPPLY HOSE FITTINGS Facility Supply Hose Fittings Thread Sealer THREAD SEALER FINAL FILTER (PARTICULATE) 866-DTE-INFO dentalez.com PN: 7717-004A... - Page 20 SECTION III - INSTALLATION OUTLET PLUMBING KIT (CONTINUED) ASSEMBLY Determine the best routing for the facility supply hose and the filter assembly. The filter can be mounted in two different directions, depending on the safest and easiest route for the hose (FIGURE Always use the hose assembly provided to connect the compressor to the facility airlines.
-
Page 21: Section Iv - Operation
This minor interruption causes no harm to the dryer or air system. The dryer shuttle valve will relocate itself to the correct position after 35 seconds, and after which the dryer will cycle normally. 866-DTE-INFO dentalez.com PN: 7717-004A... -
Page 22: Aeras Control Panel
By selecting “Accept”, you consent and agree to our Privacy Policy available at Equipment Runtime Info Info https://www.dentalez.com/privacy-policy and our System Switch (ON/STANDBY) Terms of Use available at www.dentalez.com/terms. 85 PSI 85 PSI -40.0 F -40.0 F 3 hrs 3 hrs 70.3 F... -
Page 23: Home Screen
70.3 F 20 hrs TECHNICAL LINK Technical Tank Pressure Equipment Runtime Pressure Dew Point Ambient Temp SETTINGS LINK Standby Settings EQUIPMENT TANK RUNTIME PRESSURE AMBIENT PRESSURE TEMPERATURE DEW POINT SYSTEM SWITCH (STANDBY) FIGURE 9. HOME SCREEN 866-DTE-INFO dentalez.com PN: 7717-004A... - Page 24 SECTION IV - OPERATION HOME SCREEN (CONTINUED) SYSTEM SWITCH (ON/STANDBY) While performing maintenance operations on the compressor, the system should be in STANDBY mode. Motor heads of the compressor will not run while in this mode. The compressor may also be in kept in STANDBY mode during extended periods of non-use in order to conserve energy.
-
Page 25: Information Screen
Model of compressor (C3-2, C4-1, C11-2, etc.) Serial Number of the compressor (set at factory) DentalEZ Support contact phone number (set at factory) Service Provider Contact phone number (set manually by user) SERVICE PROVIDER CONTACT... - Page 26 07:33:14 PM Home Firmware Hardware Brand Aeras Info Model C4-1 ACR0000000 Serial Number Technical DentalEZ Support Contact (866) 383-4636 SERVICE PROVIDER Service Provider Contact (000) 000-0000 CONTACT SCREEN LINK Settings SERVICE PROVIDER CONTACT PHONE NUMBER FIGURE 12. ON THE INFO SCREEN, PRESS SERVICE PROVIDER CONTACT >...
-
Page 27: Technical Screen
High Pressure Mode Maintenance Mode MAINTENANCE MODE SWITCH (OFF) INFO LINK Info RUNTIMES Alerts Runtimes SCREEN TECHNICAL LINK LINK (ACTIVE) Technical Motors Sensors SETTINGS LINK Settings ALERTS, MOTORS & SENSORS SCREEN LINKS FIGURE 14. TECHNICAL SCREEN 866-DTE-INFO dentalez.com PN: 7717-004A... - Page 28 SECTION IV - OPERATION TECHNICAL SCREEN (CONTINUED) HIGH-PRESSURE MODE CAUTION High-pressure mode should only be activated when supplying air to a dedicated milling machine that requires higher pressure. To enable high-pressure mode, on the Technical screen, press the gray HIGH-PRESSURE MODE switch.
- Page 29 Maintenance Mode Info Alerts Runtimes Technical Motors Sensors Settings ALERTS SCREEN LINK Technical Alerts PRESS ALERT MESSAGE Minor low threshold for Ambient Temp surpassed PRESS < TECHNICAL DISMISS RETURN TO PREVIOUS SCREEN FIGURE 16. ALERTS SCREEN 866-DTE-INFO dentalez.com PN: 7717-004A...
- Page 30 SECTION IV - OPERATION TECHNICAL SCREEN (CONTINUED) MOTORS MOTORS > To view the Motors screen, on the Technical screen, press . This will open a new screen for viewing the status of each motor (FIGURE 17). < TECHNICAL Press to return to the previous screen. 07:33:14 PM Home High Pressure Mode...
- Page 31 Motor 1 Motor 2 MOTOR - OFF - - ON - STATUS (OFF OR ON) MOTOR DISABLED MOTOR ENABLED (GRAY) (GREEN) SYSTEM SWITCH (ON) (MOTORS MAY BE RUNNING OR OFF) FIGURE 18. MOTORS SCREEN (STANDBY AND ON) 866-DTE-INFO dentalez.com PN: 7717-004A...
- Page 32 SECTION IV - OPERATION TECHNICAL SCREEN (CONTINUED) SENSORS To view the Sensors screen, on the Technical screen, press SENSORS >. This will open a new screen for viewing the sensors readings. Press the scroll bar located on the right to move the screen up and down (FIGURE 19).
- Page 33 20 hrs Particulate Filter 20 hrs Enabled Runtime 30 hrs Technical Total In Use 15 hrs Equipment Runtime 20 hrs Pressure Sensor 20 hrs Ambient Sensor 20 hrs Dew Point Sensor 20 hrs FIGURE 20. RUNTIMES SCREEN 866-DTE-INFO dentalez.com PN: 7717-004A...
- Page 34 SECTION IV - OPERATION TECHNICAL SCREEN (CONTINUED) MAINTENANCE MODE (ENABLE) This will disable In order to perform maintenance tasks on the compressor, maintenance mode must be enabled. remote switching and put the system in STANDBY mode. To enable maintenance mode, on the Technical screen, press the gray MAINTENANCE MODE switch.
- Page 35 Home High Pressure Mode Maintenance Mode Filter Desiccant Motor 1 Motor 2 Pack Tower Info Alerts Runtimes Desiccant Pressure Ambient Dew Point Cartridge Sensor Sensor Sensor Technical Motors Sensors Settings FIGURE 22. MAINTENANCE MODE DISABLE SCREENS 866-DTE-INFO dentalez.com PN: 7717-004A...
- Page 36 SECTION IV - OPERATION TECHNICAL SCREEN (CONTINUED) MAINTENANCE MODE > SERVICE SERVICE > To view the Service screen, on the Technical screen, press . This will open a new screen showing the service options that are available (FIGURE 23). < TECHNICAL Press to return to the previous screen.
- Page 37 Replace Motor 1 Please enter serial number EXAMPLE PRESS REPLACEMENT < MOTOR 1 1234567890 MOTOR SERIAL RETURN TO NUMBER PREVIOUS SCREEN NUMERIC KEY PAD DELETE FIGURE 24. MOTOR 1 REPLACEMENT SCREENS (Continued on the next page.) 866-DTE-INFO dentalez.com PN: 7717-004A...
- Page 38 SECTION IV - OPERATION TECHNICAL SCREEN (CONTINUED) MAINTENANCE MODE > SERVICE > MOTORS (Continued from the previous page.) Confirm the item name (Motor 1), the replacement serial number (1234567890) and press REPLACE. Press to replace Motor 1 and return to the Service screen, or press CANCEL to cancel the serial number replacement/runtime reset and return to the Motor 1 screen...
- Page 39 Replacing filters will reset Current Runtime to 0. This action CANNOT BE REVERSED. Please confirm and replace ALL filters before BE REVERSED. Please confirm and replace ALL filters before CANCEL ACCEPT Cancel continuing. continuing. UPDATES UPDATES Replace Replace FIGURE 26. FILTER PACK REPLACEMENT SCREENS 866-DTE-INFO dentalez.com PN: 7717-004A...
- Page 40 SECTION IV - OPERATION TECHNICAL SCREEN (CONTINUED) MAINTENANCE MODE > SERVICE > DESICCANT TOWER When replacing a desiccant tower on the compressor, a replacement serial number will need to be manually entered, which will reset current and remaining runtimes. On the Service screen, press DESICCANT TOWER.
- Page 41 (if applicable). This action CANNOT BE REVERSED. Please confirm item name and serial number above before continuing. Please confirm item name and serial number above before continuing. Replace Replace FIGURE 28. DESICCANT TOWER REPLACEMENT SCREENS 866-DTE-INFO dentalez.com PN: 7717-004A...
- Page 42 SECTION IV - OPERATION TECHNICAL SCREEN (CONTINUED) MAINTENANCE MODE > SERVICE > DESICCANT CARTRIDGE After replacing the desiccant cartridge, the current and remaining runtimes will need to be reset. On the Service screen, press DESICCANT CARTRIDGE. This will open the Desiccant Cartridge screen showing current, max and remaining runtimes.
- Page 43 (if applicable). This action CANNOT BE REVERSED. CANCEL ACCEPT Cancel Please confirm item name and serial number above before continuing. Please confirm item name and serial number above before continuing. UPDATES UPDATES Replace Replace FIGURE 30. PRESSURE SENSOR REPLACEMENT SCREENS 866-DTE-INFO dentalez.com PN: 7717-004A...
- Page 44 SECTION IV - OPERATION TECHNICAL SCREEN (CONTINUED) MAINTENANCE MODE > SERVICE > AMBIENT SENSOR After replacing ambient sensor, the current runtime will need to be reset. On the Service screen, press AMBIENT SENSOR. This will open the Ambient Sensor screen showing current runtime. Press REPLACE. Press to replace ambient sensor and return to Service screen, or press CANCEL...
- Page 45 (if applicable). This action CANNOT BE REVERSED. CANCEL ACCEPT Cancel Please confirm item name and serial number above before continuing. Please confirm item name and serial number above before continuing. UPDATES UPDATES Replace Replace FIGURE 32. DEW POINT SENSOR REPLACEMENT SCREENS 866-DTE-INFO dentalez.com PN: 7717-004A...
- Page 46 SECTION IV - OPERATION TECHNICAL SCREEN (CONTINUED) MAINTENANCE MODE > NETWORK NETWORK > To view network status information, on the Technical screen, press . This will open the Network Information screen (FIGURE 33). The Network Information screen of the control panel displays the following information: ...
-
Page 47: Settings Screen
Not Set SCREEN LINK TECHNICAL LINK Technical DATE & TIME Date & Time February 03, 2020 at 05:31:12 PM SCREEN LINK SETTINGS LINK (ACTIVE) Restore System Defaults Reset Settings RESTORE SYSTEM DEFAULTS LINK FIGURE 34. SETTINGS SCREEN 866-DTE-INFO dentalez.com PN: 7717-004A... - Page 48 (FIGURE 35). NOTE: Setting the compressor schedule must be done via the Aeras DentalEZ Smart Utility website located at aeras.dentalez.com. The Smart Schedule detects usage and will keep the system running beyond the scheduled standby time, for up to one hour.
- Page 49 09:00 AM - 12:00 PM; 01:15 PM - 06:15 PM Not Set 09:00 AM - 12:00 PM; 01:15 PM - 06:15 PM Not Set Not Set Not Set Not Set FIGURE 36. SCHEDULE SCREENS WITH NO SCHEDULE SET (LEFT) AND SCHEDULE SET (RIGHT) 866-DTE-INFO dentalez.com PN: 7717-004A...
- Page 50 SECTION IV - OPERATION SETTINGS SCREEN (CONTINUED) DATE & TIME (AUTO SET) When the Aeras control is connected to a network (noted by wireless signal strength indicator bars), the date and time are automatically set in the system. The only adjustable options available on the date and time screen, while TZ + 0:30 connected to a network, are ZONE, AUTOMATIC...
- Page 51 Day Month Year Hour Min. Sec. Zone OPTIONS RIGHT ARROW AM - 06:00 2020 BUTTON LEFT ARROW BUTTON Automatic DST TZ+0:30 (US/Canada only) FIGURE 40. DATE & TIME MENU OPTIONS SCREEN (Continued on the next page.) 866-DTE-INFO dentalez.com PN: 7717-004A...
- Page 52 SECTION IV - OPERATION SETTINGS SCREEN (CONTINUED) DATE & TIME (MANUALLY SET) (Continued from the previous page.) After reaching the desired menu option, use the menu option arrows () to make changes. ZONE ZONE To adjust the time zone, press to move the time zone backward.
- Page 53 586 kPa -40.0 C 9 mins 21.3 C Technical Tank Pressure Equipment Runtime Pressure Dew Point Ambient Temp TEMPERATURES PRESSURE DISPLAYED DISPLAYED IN METRIC UNITS IN METRIC UNITS (CELCIUS) (kPa) Standby Settings FIGURE 43. METRIC MODE ENABLED 866-DTE-INFO dentalez.com PN: 7717-004A...
-
Page 54: Section V - Care
SECTION V - CARE MAINTENANCE OVERVIEW Aeras compressor preventive maintenance is simple, clean and inexpensive. It can help ensure your system provides years of predictable performance. While most maintenance tasks can be performed by the user, Ramvac recommends having all service and maintenance conducted by a dealer service technician. This compressor system, when correctly specified for a dental office, should accumulate around 700 hours per year, or run at approximately a 50% duty cycle (3 minutes on, 3 minutes off). - Page 55 NOTE: Replace element annually, even if the red indicator does not reach the top. DIFFERENTIAL PRESSURE: DIFFERENTIAL PRESSURE: 7 .25 PSI (0.05 MPA) OR LESS 14.25 PSI (0.1 MPA) OR MORE (THE INDICATOR TIP IS VISIBLE) (THE INDICATOR REACHES THE TOP) FIGURE 44. FILTER WITH ELEMENT SERVICE INDICATOR 866-DTE-INFO dentalez.com PN: 7717-004A...
- Page 56 SECTION V - CARE MAINTENANCE (CONTINUED) TEST FOR AIR LEAKS Close shut-off valve (FIGURE 45). 2. Run compressor until it shuts off with a tank pressure of 115 PSI/793 kPa showing on the Home screen of the control panel LDC display (FIGURE 46).
- Page 57 Motors Service Service FIGURE 48. DISABLE MAINTENANCE MODE 07:33:14 PM Home Info 85 PSI -40.0 F 20 hrs 70.3 F Technical Tank Pressure Equipment Runtime Pressure Dew Point Ambient Temp Standby Settings FIGURE 49. PRESS STANDBY 866-DTE-INFO dentalez.com PN: 7717-004A...
- Page 58 SECTION V - CARE MAINTENANCE (CONTINUED) DEPRESSURIZE AIR SYSTEM Push the Aeras control panel power switch to the OFF position (FIGURE 50). 2. Close the shut-off valve (FIGURE 51). 3. Open the petcock to drain any air in the tank (FIGURE 52).
- Page 59 Network Sensors Settings FIGURE 55. PRESS SERVICE > Technical Service Select item for service Filter Desiccant Motor 1 Motor 2 Pack Tower Desiccant Pressure Ambient Dew Point Cartridge Sensor Sensor Sensor FIGURE 56. PRESS FILTER PACK 866-DTE-INFO dentalez.com PN: 7717-004A...
- Page 60 SECTION V - CARE MAINTENANCE (CONTINUED) (Continued from the previous page.) Service Filter Pack Current Runtime 20 hrs On the Filter Pack screen, press REPLACE. Press Max Runtime 2000 hrs on the pop-up dialogue box (FIGURE 57). Remaining Runtime 1980 hrs Replacing filters will reset Current Runtime to 0.
- Page 61 Sensors Network Settings FIGURE 62. PRESS SERVICE > Technical Service Select item for service Filter Desiccant Motor 1 Motor 2 Pack Tower Desiccant Pressure Ambient Dew Point Cartridge Sensor Sensor Sensor FIGURE 63. PRESS FILTER PACK 866-DTE-INFO dentalez.com PN: 7717-004A...
- Page 62 SECTION V - CARE MAINTENANCE (CONTINUED) (Continued from the previous page.) Service Filter Pack Current Runtime 20 hrs 8. On the Filter Pack screen, press REPLACE. Press Max Runtime 2000 hrs on the pop-up dialogue box (FIGURE 64). Remaining Runtime 1980 hrs 9.
- Page 63 Sensors Network Settings FIGURE 69. PRESS SERVICE > Technical Service Select item for service Filter Desiccant Motor 1 Motor 2 Pack Tower Desiccant Pressure Ambient Dew Point Cartridge Sensor Sensor Sensor FIGURE 70. PRESS FILTER PACK 866-DTE-INFO dentalez.com PN: 7717-004A...
- Page 64 SECTION V - CARE MAINTENANCE (CONTINUED) (Continued from the previous page.) Service Filter Pack 9. On the Filter Pack screen, press REPLACE. Press Current Runtime 20 hrs on the pop-up dialogue box (FIGURE 71). Max Runtime 2000 hrs Remaining Runtime 1980 hrs 10.
- Page 65 Ramvac at 866-DTE- INFO. Info Alerts Runtimes (Continued on the next page.) Technical Motors Service Network Sensors Settings FIGURE 75. ENABLE MAINTENANCE MODE TANK PETCOCK FIGURE 76. OPEN TANK PETCOCK 866-DTE-INFO dentalez.com PN: 7717-004A...
- Page 66 SECTION V - CARE MAINTENANCE (CONTINUED) (Continued from the previous page.) 07:33:14 PM 6. On the Technical screen, press and disable Home High Pressure Mode Maintenance Mode MAINTENANCE MODE. Press on the pop-up dialogue box (FIGURE 77). Info NOTE: Turning OFF maintenance mode enables remote switching, but does not return the system to ON Alerts Runtimes...
- Page 67 5. If air comes out of safety valve, the valve is working properly. If valve is working properly, return compressor to service. SAFETY (Continued on the next page.) VALVE SHUT-OFF SAFETY VALVE VALVE RING FIGURE 81. PULL RING ON SAFETY VALVE 866-DTE-INFO dentalez.com PN: 7717-004A...
- Page 68 SECTION V - CARE MAINTENANCE (CONTINUED) (Continued from the previous page.) 07:33:14 PM Home High Pressure Mode Maintenance Mode 6. On the Technical screen, press and disable MAINTENANCE MODE. Press NO on pop-up dialogue (FIGURE 82). Info NOTE: Turning OFF maintenance mode enables Alerts Runtimes remote switching, but does not return the system to ON...
- Page 69 Tank Temp 72.8 F Technical Tank Humidity 0.9% Pressure Dew Point -40.0 F Ambient Temp 71.9 F Ambient Humidity 46.6% Line Voltage 243.1 V Regen Time 45 sec Head Duty Cycle 40.0% FIGURE 85. VIEW TANK HUMIDITY 866-DTE-INFO dentalez.com PN: 7717-004A...
-
Page 70: Section Vi - User Service Info
SECTION VI - USER SERVICE INFO SERVICE INSTRUCTION If the area of concern is not addressed in this manual, contact DENTALEZ customer service at 866-DTE-INFO. (See LIMITED WARRANTY.) Please have the following product information available. Information may be found on the product model/serial number... -
Page 71: Section Vii - Parts
SECTION VII - PARTS COMPRESSOR USER MANUAL DENTALEZ PARTS ONLINE To view parts online, visit dentalezparts.com or scan QR code with a smart phone. 866-DTE-INFO dentalez.com PN: 7717-004A... -
Page 72: Emc Information
EMC INFORMATION GUIDANCE AND MANUFACTURER’S DECLARATION – ELECTROMAGNETIC EMISSIONS The compressor is intended for use in the electromagnetic environment specified below. The customer or the user of the compressor should assure that it is used in such an environment. Emissions Test Compliance Electromagnetic Environment Guidance The compressor uses RF energy only for its internal function;... - Page 73 LTE Band 1, 3, 4, 25, UMTS Blue-tooth, WLAN, Pulse 2,450 2,400 - 2,570 802.11 b/g/n, Modulation RFID 2,450 217 Hz LTE Band 7 5,240 Pulse WLAN 802.11 5,500 5,100 - 5,800 Modulation 217 Hz 5,785 866-DTE-INFO dentalez.com PN: 7717-004A...
- Page 74 EMC INFORMATION RECOMMENDED SEPARATION DISTANCE BETWEEN PORTABLE AND MOBILE RF COMMUNICATIONS EQUIPMENT AND THE MODEL @ 3VRMS The compressor is intended for use in an electromagnetic environment in which radiated RF disturbances are controlled. The customer or the user of the compressor can help prevent electromagnetic interference by maintaining a minimum distance between portable and mobile RF communications equipment (transmitters) and the compressor as recommended below, according to the maximum output power of the communications equipment.
- Page 75 COMPRESSOR USER MANUAL NOTES: 866-DTE-INFO dentalez.com PN: 7717-004A...
-
Page 76: Limited Warranty
AERAS COMPRESSOR FROM RAMVAC DENTALEZ and its employees are proud of the products we provide to the dental community. We stand behind these products with a warranty against defects in material and workmanship as provided below and have our own in-house repair facility to service our products. - Page 77 2500 Highway 31 South Bay Minette, Alabama 36507 866-DTE-INFO dentalez.com © DentalEZ Alabama, Inc. ® Printed in USA PN: 7717-004A March, 2020...
Need help?
Do you have a question about the RAMVAC AERAS 3 and is the answer not in the manual?
Questions and answers