Dorner 2200 Series Installation, Maintenance & Parts Manual
Hide thumbs
Also See for 2200 Series:
- Installation & maintenance (78 pages) ,
- Installation, maintenance & parts manual (66 pages) ,
- Installation & parts manual (50 pages)

Subscribe to Our Youtube Channel
Related Manuals for Dorner 2200 Series


Summary of Contents for Dorner 2200 Series
- Page 1 2200 Series Version 2 Conveyors Installation, Maintenance & Parts Manual For other service manuals visit our website at: www.dornerconveyors.com/manuals-literature Record Conveyor Serial Number Here 851-816 Rev. E...
-
Page 2: Table Of Contents
Lubrication ..............29 Cleated Belt 2200 Series iDrive Conveyor ....7 Maintaining Conveyor Belt ..........29 Flat Belt 2200 Series Mid / Center Drive Conveyor ..7 Troubleshooting ............29 Flat Belt 2200 Series LPZ End Drive Conveyor..7 Cleaning ..............29 Cleated Belt 2200 Series LPZ End Drive Conveyor.. - Page 3 8" (203 mm) to 24" (610 mm) Flat Belt Return Roller .. 97 Cleated Belt Return Roller ..........98 Photo Eye................ 98 Conveyor Belt Part Number Configuration....99 Return Policy..............100 2200 Series Version 2 Conveyors 851-816 Rev. E Dorner Mfg. Corp.
-
Page 4: Introduction
• Inspect packages for shipping damage. Contact carrier countries. regarding damage. Dorner reserves the right to make changes at any time • Accessories may be shipped loose. See accessory instruc- without notice or obligation. tions for installation. -
Page 5: Warnings − General Safety
SEVERE HAZARD! injury. • Dorner cannot control the physical installation and application of conveyors. Taking protective measures is the responsibility of the user. • When conveyors are used in conjunction with other equipment or as part of a multiple conveyor... -
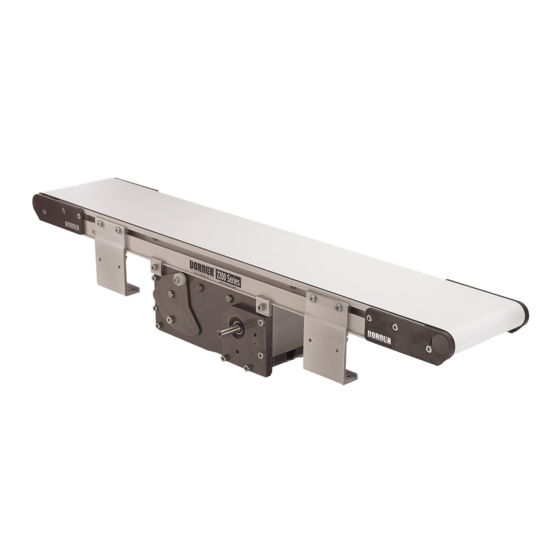
Page 6: Product Description
Idler/Tension End Figure 1 Figure 2 Figure 1 Specifications Models: Flat Belt 2200 Series End Drive Conveyor Cleated Belt 2200 Series End Drive Conveyor 22ED M WW LLLL V X 1 2 3 4 Tail 4 Auxiliary 22CT M WW LLLL V... -
Page 7: Flat Belt 2200 Series Idrive Conveyor
Shaft Option Conveyor Width Tail 2 Document Language Auxiliary Shaft Option Tail 1 Auxiliary Flat Belt 2200 Series Mid / Center Drive Shaft Option Auxiliary Shaft Exists Conveyor Cleat Spacing Profile Cleat Type 22 CD M WW LLLL V X 1 2 3 4... -
Page 8: Conveyor Supports
** For conveyors longer than 13 ft (3962 mm), install 3 = 24" (610 mm) (Idler End) support at joint. Maximum Angle: Figure 4 4 = 30 to 60 degrees Figure 6 Figure 4 Figure 6 2200 Series Version 2 Conveyors Dorner Mfg. Corp. 851-816 Rev. E... -
Page 9: End/Mid Drive Conveyor Specifications
0.38" (10 mm) of stroke = 0.75" (19 mm) of belt take-up * See Ordering and Specifications Catalog for details. ** Conveyor Startup Torque dependent on belt type and conveyor length. 2200 Series Version 2 Conveyors 851-816 Rev. E Dorner Mfg. Corp. -
Page 10: Center Drive Conveyor Specifications
1" (25 mm) of stroke = 2" (51 mm) of belt take-up (Center Drive Conveyors Only) * See Ordering and Specifications Catalog for details. ** Conveyor Startup Torque dependent on belt type and conveyor length. 2200 Series Version 2 Conveyors Dorner Mfg. Corp. 851-816 Rev. E... -
Page 11: Flat Belt Lpz Conveyor Specifications
0.38" (10 mm) of stroke = 0.75" (19 mm) of belt take-up * See Ordering and Specifications Catalog for details. ** Conveyor Startup Torque dependent on belt type and conveyor length. 2200 Series Version 2 Conveyors 851-816 Rev. E Dorner Mfg. Corp. -
Page 12: Cleated Belt Lpz Conveyor Specifications
0.38" (10 mm) of stroke = 0.75" (19 mm) of belt take-up * See Ordering and Specifications Catalog for details. ** Conveyor Startup Torque dependent on belt type and conveyor length. 2200 Series Version 2 Conveyors Dorner Mfg. Corp. 851-816 Rev. E... -
Page 13: Idrive Conveyor Specifications
Brushless DC Belt Speeds 7-70 Ft./Min., 5-50 Ft./Min. 2.4-24 Ft./Min., 1.7-17 Ft./Min Duty Cycle Non-Continuous Duty Non-Continuous Duty Index Capacity Up to 30 per Minute Up to 30 per Minute 2200 Series Version 2 Conveyors 851-816 Rev. E Dorner Mfg. Corp. -
Page 14: Idrive Load Capacity (Lbs)
10-18 5 - 50 Ft./Min. FOR BELT TYPE 09 LENGTH 14-18 2.4 - 24 Ft./Min. FOR BELT TYPE 09 LENGTH 1.7 - 17 Ft./Min. FOR BELT TYPE 09 LENGTH 2200 Series Version 2 Conveyors Dorner Mfg. Corp. 851-816 Rev. E... -
Page 15: Idrive Load Capacity (Lbs) (Continued)
5 - 50 Ft./Min. FOR DOUBLE CARCASS BELT TYPE 05 LENGTH 14-18 2.4 - 24 Ft./Min. FOR DOUBLE CARCASS BELT TYPE 05 LENGTH 14-18 1.7 - 17 Ft./Min. FOR DOUBLE CARCASS BELT TYPE 05 LENGTH 14-18 2200 Series Version 2 Conveyors 851-816 Rev. E Dorner Mfg. Corp. -
Page 16: Idrive Load Capacity (Lbs) (Continued)
2.4 - 24 Ft./Min. FOR SINGLE PLY BELT TYPES 19, 53, 72, 73 AND 76 LENGTH 14-18 1.7 - 17 Ft./Min. FOR SINGLE PLY BELT TYPES 19, 53, 72, 73 AND 76 LENGTH 14-18 2200 Series Version 2 Conveyors Dorner Mfg. Corp. 851-816 Rev. E... -
Page 17: Idrive Load Capacity (Lbs) (Continued)
5 - 50 Ft./Min. FOR ALL OTHER BELT TYPES LENGTH 12-18 2.4 - 24 Ft./Min. FOR ALL OTHER BELT TYPES LENGTH 14-18 1.7 - 17 Ft./Min. FOR ALL OTHER BELT TYPES LENGTH 14-18 2200 Series Version 2 Conveyors 851-816 Rev. E Dorner Mfg. Corp. -
Page 18: Idrive Load Capacity (Lbs) (Continued)
1.7 - 17 Ft./Min. FOR NOSE BAR BELTS LENGTH 14-18 NOTE Maximum conveyor loads based on: • Non-accumulating product • Product moving towards gearmotor • Conveyor being mounted horizontal 2200 Series Version 2 Conveyors Dorner Mfg. Corp. 851-816 Rev. E... -
Page 19: Installation
• Install return rollers on conveyor (optional) Figure 9 • Mount gearmotor mounting package (See accessory instructions) • Attach guides/accessories. (See “Service Parts” section beginning on page 60 for details.) 2200 Series Version 2 Conveyors 851-816 Rev. E Dorner Mfg. Corp. -
Page 20: Knuckles
If equipped with cam tracking assemblies, reposition and adjust belt tracking. Refer to “Conveyor Belt Tracking” on page Figure 13 NOTE Upper knuckle must be assembled to conveyor with belt flow in direction of arrow. 2200 Series Version 2 Conveyors Dorner Mfg. Corp. 851-816 Rev. E... -
Page 21: Mounting Brackets
15, item 1 & 2), washers (Figure 14, item 3) & (Figure 15, item 3), nuts (Figure 14, item 4) & (Figure 15, item 4), and T-bars (Figure 14, item 5) & (Figure 15, item 5) from brackets. 2200 Series Version 2 Conveyors 851-816 Rev. E Dorner Mfg. Corp. -
Page 22: Return Rollers
18, item 2) from roller assembly. Install roller assemblies (Figure 19, item 1) as shown. Tighten screws (Figure 19, item 2) to 60 in-lb (7 Nm). Figure 21 Figure 19 Figure 19 2200 Series Version 2 Conveyors Dorner Mfg. Corp. 851-816 Rev. E... -
Page 23: Idrive Wiring
Exposed moving parts can cause severe injury. LOCK OUT POWER before wiring to avoid accidental startup. The 2200 series iDrive is available in 2 models: A. Cover Mounted Controls B. Cover Mounted Controls with Remote Start/Stop Cable Cover Mounted Controls with 115 volt... -
Page 24: Cover Mounted Controls With Customer Provided Power Supply
DC power plug. Wire +VDC to the short lug (Figure 25, item 1) and -VDC to the long lug (Figure 25, item 2). Figure 25 Figure 25 Required power is 24VDC, 2 amps minimum. 2200 Series Version 2 Conveyors Dorner Mfg. Corp. 851-816 Rev. E... -
Page 25: Cover Mounted Controls With Photo Eye Option
A CAUTION Adjustment pots are 3/4 turn devices. Any resistance encountered while adjusting these pots indicates you have reached the adjustment limit stop. Turning past stop will damage the sensor. 2200 Series Version 2 Conveyors 851-816 Rev. E Dorner Mfg. Corp. -
Page 26: Guide Clips
Figure 28 Adjustable Guides Figure 31 Install guide bracket assembly (Figure 29, item 1) into Figure 32 the conveyor t-slot (Figure 29, item 2). Figure 29 Figure 32 Figure 29 2200 Series Version 2 Conveyors Dorner Mfg. Corp. 851-816 Rev. E... - Page 27 (Figure 34, item 2). Tighten screw (Figure 31, item 1) on end of shaft. Figure 34 Figure 34 Adjust rail width with top screw (Figure 35, item 1). Figure 35 Figure 35 2200 Series Version 2 Conveyors 851-816 Rev. E Dorner Mfg. Corp.
-
Page 28: Notes
Notes 2200 Series Version 2 Conveyors Dorner Mfg. Corp. 851-816 Rev. E... -
Page 29: Preventive Maintenance And Adjustment
Preventive Maintenance and Adjustment Required Tools Cleaning Use Dorner Belt Cleaner. Mild soap and water may also be Standard Tools used. Do not soak the belt. For /05 woven polyester and /06 black anti-static belts, use a • Hex-key wrenches: bristled brush to improve cleaning. -
Page 30: Belt Removal For End Drive And Idrive Conveyors
(Figure 39, item 2): Remove PROVIDE SUPPORT UNDERNEATH THE bracket screws (Figure 39, item 3) then remove bracket GEARMOTOR WHEN CHANGING THE BELT (Figure 39, item 2). 2200 Series Version 2 Conveyors Dorner Mfg. Corp. 851-816 Rev. E... -
Page 31: Belt Removal For Center Drive Conveyors
(Figure 43, item 3) (if equipped) away from head plates. Loosen fastening screws (Figure 43, item 4) and push head plate assembly inward. Figure 43 Figure 43 2200 Series Version 2 Conveyors 851-816 Rev. E Dorner Mfg. Corp. -
Page 32: Gearmotor Mounting Package Removal
Removal” on page timing belt (Figure 46, item 2). 10. Proceed to “Drive Module Removal” on page 33 and Figure 46 “Belt Removal from Drive Module” on page Figure 46 2200 Series Version 2 Conveyors Dorner Mfg. Corp. 851-816 Rev. E... -
Page 33: Drive Module Removal
Remove four mounting screws (Figure 48, item 1) and remove gearmotor. Figure 48 Figure 49 Loosen clamp screws (Figure 49, item 2) on each corner of the module. Remove the module. Figure 48 2200 Series Version 2 Conveyors 851-816 Rev. E Dorner Mfg. Corp. -
Page 34: Belt Removal From Drive Module
(Figure 51, item 4). For 5" (127 mm) or wider conveyor, depress both Figure 54 sides of spring-loaded shaft and remove pulley (Figure 52, item 5). Remove the conveyor belt. 2200 Series Version 2 Conveyors Dorner Mfg. Corp. 851-816 Rev. E... -
Page 35: Belt Removal For Lpz Conveyors
(Reverse steps 2 & 3 of “Mounting Brackets” section on page 21). If equipped, remove return rollers and guiding and accessories from one side of conveyor. 2200 Series Version 2 Conveyors 851-816 Rev. E Dorner Mfg. Corp. -
Page 36: Flat Belt Conveyors
Remove screw (Figure 60, item 3) and remove roller (Figure 63, item 4). bearing assembly (Figure 60, item 4) on both sides of knuckle. Figure 63 Remove belt from conveyor. Figure 63 2200 Series Version 2 Conveyors Dorner Mfg. Corp. 851-816 Rev. E... -
Page 37: Belt Installation For End Drive And Idrive Conveyors
Tension belt. Refer to “Conveyor Belt Tensioning” on page Re-install conveyor mounting brackets. Refer to If equipped, install return rollers and guiding. “Mounting Brackets” beginning on page 21, steps 3 through 5. 2200 Series Version 2 Conveyors 851-816 Rev. E Dorner Mfg. Corp. -
Page 38: Belt Installation For Center Drive Conveyors
Orient the conveyor belt so that the splice leading fingers (Figure 71, item 1) point in the direction of belt travel, indicated by the label (Figure 70, item 1). Figure 71 Figure 71 2200 Series Version 2 Conveyors Dorner Mfg. Corp. 851-816 Rev. E... - Page 39 NOTE With vertically mounted gearmotors, tension door screws (Figure 74, item 2) are installed on one side when the gearmotor mounting package is installed. 13. If equipped, replace guiding. 2200 Series Version 2 Conveyors 851-816 Rev. E Dorner Mfg. Corp.
-
Page 40: Belt Installation For Lpz Conveyors
Figure 77 Figure 75 Slide belt onto the conveyor frame assembly. Figure 77 Install guard (Figure 77, item 3) on both sides of conveyor with screws (Figure 77, item 4). 2200 Series Version 2 Conveyors Dorner Mfg. Corp. 851-816 Rev. E... -
Page 41: Flat Belt Conveyors
Install screws (Figure 82, item 1) on both sides of conveyor. Figure 82 Figure 79 Figure 82 Tension belt. Refer to “Conveyor Belt Tensioning” on page If equipped, install return rollers and guiding. 2200 Series Version 2 Conveyors 851-816 Rev. E Dorner Mfg. Corp. -
Page 42: Conveyor Belt Tensioning
If equipped, install dust covers (Figure 83, item 3). If equipped with cam tracking assemblies (Figure 83, item 7), position against head plates and adjust belt tracking. Refer to “Conveyor Belt Tracking” on page 44. Figure 83 2200 Series Version 2 Conveyors Dorner Mfg. Corp. 851-816 Rev. E... -
Page 43: Center Drive Conveyors
Figure 86 If equipped with cam tracking assemblies (Figure 86, item 7) position against head plates and adjust belt tracking. Refer to “Conveyor Belt Tracking”, next section. Figure 86 2200 Series Version 2 Conveyors 851-816 Rev. E Dorner Mfg. Corp. -
Page 44: Conveyor Belt Tracking
(Figure 88, item 2) with a 4 mm hex-key wrench to 60 in-lb (7 Nm). Figure 89 Remove two fastening screws (Figure 89, item 3). 2200 Series Version 2 Conveyors Dorner Mfg. Corp. 851-816 Rev. E... -
Page 45: B − Idrive Pulley Removal
Figure 92 See “Conveyor Belt Tensioning” on page If installed, re-position the cam assemblies against the head plates and adjust belt tracking. See “Conveyor Belt Tracking” on page Figure 92 2200 Series Version 2 Conveyors 851-816 Rev. E Dorner Mfg. Corp. - Page 46 Remove head plate (Figure 97, item 1) from frame. Figure 95 Figure 97 Figure 95 Figure 97 10. Remove and replace spindle (Figure 97, item 2). 11. Re-install in the reverse order of removal. 2200 Series Version 2 Conveyors Dorner Mfg. Corp. 851-816 Rev. E...
-
Page 47: C − Idler Pulley Removal
See “Conveyor Belt Tensioning” on page Tracking” on page 15. If installed, re-position the cam assemblies against the head plates and adjust belt tracking. See “Conveyor Belt Tracking” on page 2200 Series Version 2 Conveyors 851-816 Rev. E Dorner Mfg. Corp. -
Page 48: D − 5/16" (8 Mm) Tight Radius Nosebar Bearing Removal
Tracking” on page Figure 103 NOTE During reassembly, make certain that the tail nut bar nipple (Figure 103, item 4) is inserted into the support bar hole (Figure 103, item 5). 2200 Series Version 2 Conveyors Dorner Mfg. Corp. 851-816 Rev. E... -
Page 49: E − 5/8" (16 Mm) Nosebar Pulley Removal
Use a 4 mm hex-key wrench to tighten lower screw (Figure 107, item 1) to 30 in-lb (3.4 Nm). Leave two fastening screws (Figure 106, item 2) loose for belt tensioning. 2200 Series Version 2 Conveyors 851-816 Rev. E Dorner Mfg. Corp. -
Page 50: F − Center Drive Module Pulley Removal
111, item 1). Remove pulley shafts (Figure 111, item 2) and pulleys (Figure 111, item 3). Figure 111 Figure 113 Remove drive package. See your appropriate Drive Package manual for removal procedure. Figure 111 2200 Series Version 2 Conveyors Dorner Mfg. Corp. 851-816 Rev. E... - Page 51 10. Tighten socket head screws (Figure 114, item 1) and (Figure 116, item 1) to 60 in-lb (7 Nm). 11. Tension conveyor belt. See “Conveyor Belt Tensioning” on page 42. Figure 116 2200 Series Version 2 Conveyors 851-816 Rev. E Dorner Mfg. Corp.
-
Page 52: H − Knuckle Idler Pulley Removal
Slide idler pulley (Figure 119, item 3) to one side of the Figure 121 conveyor, remove bearing housings (Figure 119, item 4), and then remove idler pulley from knuckle plates. Figure 121 2200 Series Version 2 Conveyors Dorner Mfg. Corp. 851-816 Rev. E... -
Page 53: Replacement
Keep hands and fingers away from press and Figure 127 components during procedure. Figure 124 Figure 127 Figure 124 Loosen timing belt tension cam (Figure 127, item 2). Repeat steps 1 through 4 for each bearing. 2200 Series Version 2 Conveyors 851-816 Rev. E Dorner Mfg. Corp. -
Page 54: Knuckle Return Roller Replacement
Reinstall in reverse order of removal. (Refer to steps 12 bearing assembly (Figure 131, item 4) on both sides of and 13 of “B − iDrive Pulley Removal” on page 45 for knuckle. timing belt tensioning.) 2200 Series Version 2 Conveyors Dorner Mfg. Corp. 851-816 Rev. E... -
Page 55: Flat Belt Conveyor
E-ring clip (Figure 134, item 1) and washer (Figure 134, item 2) from one side. Remove pulley shaft (Figure 134, item 3) and pulley (Figure 134, item 4). Figure 134 Figure 134 2200 Series Version 2 Conveyors 851-816 Rev. E Dorner Mfg. Corp. -
Page 56: Tail Plate Shaft Knockout Removal
137, item 1) or long bolt to knock out slug (Figure 138, item 1) for shaft backing up tail plate with washer. Figure 137 Figure 139 Figure 140 Figure 137 Figure 140 2200 Series Version 2 Conveyors Dorner Mfg. Corp. 851-816 Rev. E... -
Page 57: Pinion Replacement
Figure 142 Figure 145 Insert pinion assembly (Figure 146, item 1) into conveyor frame. Figure 142 Figure 146 Replace worn components. Figure 143 Figure 146 Figure 143 2200 Series Version 2 Conveyors 851-816 Rev. E Dorner Mfg. Corp. - Page 58 Make sure the bent end (Figure 150, item 1) of the gear rack is NOT assembled into the conveyor frame. Figure 147 Figure 150 Figure 148 Figure 150 Figure 148 2200 Series Version 2 Conveyors Dorner Mfg. Corp. 851-816 Rev. E...
- Page 59 See “Conveyor Belt Tensioning” on page The gear racks must be aligned with each other, as shown above. Example of misaligned gear racks shown below. Figure 152 Figure 152 2200 Series Version 2 Conveyors 851-816 Rev. E Dorner Mfg. Corp.
-
Page 60: Service Parts
Service Parts NOTE For replacement parts other than those shown in this section, contact an authorized Dorner Service Center or the factory. Key Service Parts and Kits are identified by the Performance Parts Kits logo . Dorner recommends keeping these parts on hand. - Page 61 Bearing Kit (2 Pack) 22BK4 Bearing Kit (4 Pack) WW = Conveyor width reference: 02, 03, 04, 05, 06, 08, 10, 12, 14, 16, 18, 20, 22, & 24 2200 Series Version 2 Conveyors 851-816 Rev. E Dorner Mfg. Corp.
-
Page 62: Idrive Tail
Service Parts iDrive Tail 24 iDrive Tail Kit 25 Bearing Kit 2200 Series Version 2 Conveyors Dorner Mfg. Corp. 851-816 Rev. E... - Page 63 Heat Sink 831-139 Power Supply 818-164 Cord, 115V 22FDGM023 Gearmotor, 23:1 22FDGM066 Gearmotor, 66:1 805-1316 Plug 807-2006 Motor Cap, for 2"-3" wide 920312M Socket Head Screw, M3-.50 x 12 mm 2200 Series Version 2 Conveyors 851-816 Rev. E Dorner Mfg. Corp.
-
Page 64: Idler Tail
Service Parts Idler Tail 9 Idler Spindle Kit 10 Bearing Kit 2200 Series Version 2 Conveyors Dorner Mfg. Corp. 851-816 Rev. E... - Page 65 Bearing Kit (2 Pack) 22BK4 Bearing Kit (4 Pack) WW = Conveyor width reference: 02, 03, 04, 05, 06, 08, 10, 12, 14, 16, 18, 20, 22, & 24 2200 Series Version 2 Conveyors 851-816 Rev. E Dorner Mfg. Corp.
-
Page 66: 5/16" (8 Mm) Tight Radius Nosebar Tail
M6-1.00 x 16 mm 22V2L-WW Roller Kit (Includes Items 1 and 11) WW = Conveyor width reference: 02, 03, 04, 05, 06, 08, 10, 12, 14, 16, 18, 20, 22, & 24 2200 Series Version 2 Conveyors Dorner Mfg. Corp. 851-816 Rev. E... -
Page 67: 5/8" (16 Mm) Nosebar Tail
M6-1.00 x 16 mm 22V2H-WW Roller Kit (Includes Items 8 and 9) WW = Conveyor width reference: 02, 03, 04, 05, 06, 08, 10, 12, 14, 16, 18, 20, 22, & 24 2200 Series Version 2 Conveyors 851-816 Rev. E Dorner Mfg. Corp. -
Page 68: Center Drive Module
Service Parts Center Drive Module 2200 Series Version 2 Conveyors Dorner Mfg. Corp. 851-816 Rev. E... - Page 69 807−984 Gas Spring, for 8"- 10" wide Conveyors 203728 Bearing Mounting Block 807-2885 Washer 807-987 Steel Ball Joint M6 x M8 920510M Socket Head Screw, M5-.80 x 10 mm 2200 Series Version 2 Conveyors 851-816 Rev. E Dorner Mfg. Corp.
-
Page 70: Mid Drive Module
Service Parts Mid Drive Module 10 Mid Drive Spindle Kit 11 Bearing Kit 2200 Series Version 2 Conveyors Dorner Mfg. Corp. 851-816 Rev. E... - Page 71 Bearing Kit (2 Pack) 22BK4 Bearing Kit (4 Pack) WW = Conveyor Width Reference: 02, 03, 04, 05, 06, 08, 10, 12, 14, 16, 18, 20, 22, & 24 2200 Series Version 2 Conveyors 851-816 Rev. E Dorner Mfg. Corp.
-
Page 72: Frame Assembly
Service Parts Frame Assembly Single Piece Frame 2200 Series Version 2 Conveyors Dorner Mfg. Corp. 851-816 Rev. E... - Page 73 WW = Conveyor width reference: 02, 03, 04, 05, 06, 08, 10, 12, 14, 16, 18, 20, 22, & 24 LLLLL = part length in inches with 2 decimal places Example: Part length = 35.25" LLLLL = 03525 2200 Series Version 2 Conveyors 851-816 Rev. E Dorner Mfg. Corp.
-
Page 74: Flat Belt Knuckle
463041 Roller Assembly 16, 18, 20, 22, & 24 for 3" wide Conveyor 463042 Roller Assembly for 4" wide Conveyor 203635-WW Roller Assembly for 5" wide and wider Conveyors 2200 Series Version 2 Conveyors Dorner Mfg. Corp. 851-816 Rev. E... -
Page 75: Cleated Belt Lower Knuckle
Bearing Kit (2 Pack) 22BK4 Bearing Kit (4 Pack) AA = Angle 30, 45, 60 WW = Conveyor width reference: 06, 08, 10, 12, 14, 16, 18, 20, 22, & 24 2200 Series Version 2 Conveyors 851-816 Rev. E Dorner Mfg. Corp. -
Page 76: Cleated Belt Upper Knuckle
AA = Angle 30, 45, 60 914-005 Rivet WW = Conveyor width reference: 06, 08, 10, 12, 14, 16, 18, 20, 22, 920516M Socket Head Screw, & 24 M5-.80 x 16 mm 2200 Series Version 2 Conveyors Dorner Mfg. Corp. 851-816 Rev. E... -
Page 77: #04 Profile - 3.00" (76 Mm) Aluminum Side
3.00" Guides 8' long 203661 Guide Clip Assembly (Includes items 1, 2, and 3) LLLLL = part length in inches with 2 decimal places Length Example: Length = 35.25" LLLLL = 03525 2200 Series Version 2 Conveyors 851-816 Rev. E Dorner Mfg. Corp. -
Page 78: #05 Profile - 1.50" (38 Mm) Aluminum Side
1.50" Guides 8' long 203661 Guide Clip Assembly (Includes items 1, 2, and 3) LLLLL = part length in inches with 2 decimal places Length Example: Length = 35.25" LLLLL = 03525 2200 Series Version 2 Conveyors Dorner Mfg. Corp. 851-816 Rev. E... -
Page 79: #07 Profile - Low To Side Wiper
Side Wiper (per foot) 203662 Guide Clip Assembly (Includes items 1, 2, and 3) LLLLL = part length in inches with 2 decimal places Length Example: Length = 35.25" LLLLL = 03525 2200 Series Version 2 Conveyors 851-816 Rev. E Dorner Mfg. Corp. -
Page 80: #09 Profile - Low To High Side
.50" Guides 8' long 203661 Guide Clip Assembly (Includes items 1, 2, and 3) LLLLL = part length in inches with 2 decimal places Length Example: Length = 35.25" LLLLL = 03525 2200 Series Version 2 Conveyors Dorner Mfg. Corp. 851-816 Rev. E... -
Page 81: #10 Profile - .5" (13 Mm) Extruded Plastic Side
Snap-On Guides (per foot) 203661P Guide Clip Assembly (Includes items 1, 2, and 3) LLLLL = part length in inches with 2 decimal places Length Example: Length = 35.25" LLLLL = 03525 2200 Series Version 2 Conveyors 851-816 Rev. E Dorner Mfg. Corp. -
Page 82: #13, 33 & 43 Profile - Adjustable Guiding
LLLLL = part length in inches with 2 decimal places M6-1.00 x 16 mm Length Example: Length = 35.25" LLLLL = 03525 9206150M Socket Head Screw, M6-1.00 x 150 mm 2200 Series Version 2 Conveyors Dorner Mfg. Corp. 851-816 Rev. E... -
Page 83: #14, 34 & 44 Profile - Tool-Less Adjustable Guiding
206698 Knob, 12 mm LLLLL = part length in inches with 2 decimal places 206697 Knob, 150 mm Length Example: Length = 35.25" LLLLL = 03525 990601M Hex Nut 2200 Series Version 2 Conveyors 851-816 Rev. E Dorner Mfg. Corp. -
Page 84: #16, 36 & 46 Profile - Outboard Adjustable Guiding
Guide Ring LLLLL = part length in inches with 2 decimal places 206397 Clip Length Example: Length = 35.25" LLLLL = 03525 920516M Socket Head Screw, M5-.80 x 16 mm 2200 Series Version 2 Conveyors Dorner Mfg. Corp. 851-816 Rev. E... -
Page 85: #19, 39 & 49 Profile - Horizontal Adjustable Guiding
LLLLL = part length in inches with 2 decimal places 920625M Socket Head Screw, M6-1.00 x 25 mm Length Example: Length = 35.25" LLLLL = 03525 990601M Hex Nut 2200 Series Version 2 Conveyors 851-816 Rev. E Dorner Mfg. Corp. -
Page 86: #20, 40 & 50 Profile - Tool-Less Horizontal Adjustable Guiding
Assembly (Includes Items 1 through M6-1.00 x 150 mm 207155 Knob LLLLL = part length in inches with 2 decimal places 990601M Hex Nut Length Example: Length = 35.25" LLLLL = 03525 2200 Series Version 2 Conveyors Dorner Mfg. Corp. 851-816 Rev. E... -
Page 87: Cleated Profile - 1.00" (25 Mm) High Side
Multi Piece Guides 203661 Guide Clip Assembly (Includes items 1, 2, and 3) LLLLL = part length in inches with 2 decimal places Length Example: Length = 35.25" LLLLL = 03525 2200 Series Version 2 Conveyors 851-816 Rev. E Dorner Mfg. Corp. -
Page 88: Cleated Profile - 1.00" (25 Mm) High Side (Non-Reversing)
Multi Piece Guides 203661 Guide Clip Assembly (Includes items 1, 2, and 3) LLLLL = part length in inches with 2 decimal places Length Example: Length = 35.25" LLLLL = 03525 2200 Series Version 2 Conveyors Dorner Mfg. Corp. 851-816 Rev. E... -
Page 89: Cleated Profile - 2.50" (64 Mm) High Side
Multi Piece Guides 203661 Guide Clip Assembly (Includes items 1, 2, and 3) LLLLL = part length in inches with 2 decimal places Length Example: Length = 35.25" LLLLL = 03525 2200 Series Version 2 Conveyors 851-816 Rev. E Dorner Mfg. Corp. -
Page 90: Cleated Profile - 2.50" (64 Mm) High Side (Non-Reversing)
Multi Piece Guides 203661 Guide Clip Assembly (Includes items 1, 2, and 3) LLLLL = part length in inches with 2 decimal places Length Example: Length = 35.25" LLLLL = 03525 2200 Series Version 2 Conveyors Dorner Mfg. Corp. 851-816 Rev. E... -
Page 91: Cleated Lpz Profile - 2.50" (64 Mm) High Side
2.50" Mid Section Cleated Guiding Length Example: Length = 35.25" LLLLL = 03525 203661 Guide Clip Assembly (Includes items 1, 2, and 3) 207228 Guide for End 1 Section Horizontal to Incline Conveyors 2200 Series Version 2 Conveyors 851-816 Rev. E Dorner Mfg. Corp. -
Page 92: Cleated Lpz Profile - 2.50" (64 Mm) High Side (Non-Reversing)
2.50" Mid Section Cleated Guiding Length Example: Length = 35.25" LLLLL = 03525 203661 Guide Clip Assembly (Includes items 1, 2, and 3) 207228 Guide for End 1 Section Horizontal to Incline Conveyors 2200 Series Version 2 Conveyors Dorner Mfg. Corp. 851-816 Rev. E... -
Page 93: Flat Belt Mounting Brackets
Cleated Mount Assembly 920620M Socket Head Screw M6 x 20 mm 300150MK4 Drop−In Tee Bar (x4) 950616M Low Head Cap Screw M6x16 mm 605279P Washer 240838 Cleated Stand Mount Assembly 2200 Series Version 2 Conveyors 851-816 Rev. E Dorner Mfg. Corp. -
Page 94: Flat Belt Mounting Brackets For Short Conveyors
950616M Low Head Cap Screw M6 x 16 mm 2’ (610mm) Conveyor 240851 Cleated Belt Stand Mount Assembly 605279P Washer for 2’ (610mm) Conveyors 639971MK10 Drop−In Tee Bar (x10) 2200 Series Version 2 Conveyors Dorner Mfg. Corp. 851-816 Rev. E... -
Page 95: Flat Belt Mounting Brackets Assembled To The Tail
Socket Low Head Screw M6 x 20 mm Tail Mounts Connecting Assembly without Stand Mount Item Part Number Description 206520 Connecting Bar 950610M Low Head Cap Screw, M6-1.00 x 10 mm 206519 Connecting Assembly 2200 Series Version 2 Conveyors 851-816 Rev. E Dorner Mfg. Corp. -
Page 96: Flat Belt Connecting Assembly With Stand Mount
Socket Head Screw, M6-1.00 x 20 mm 240836 Cleated Stand Mount Assembly 950610M Low Head Cap Screw, 605279P Washer M6-1.00 x 10 mm 807-920 Square Nut M6 240929 Connecting Assembly 2200 Series Version 2 Conveyors Dorner Mfg. Corp. 851-816 Rev. E... -
Page 97: 2" (51 Mm) To 6" (152 Mm) Flat Belt Return Roller
M6-1.00 x 16 mm 240826 Return Roller 206523-WW Return Roller Assembly 2410WW Return Roller Rod WW.= Conveyor width reference: 08, 10, 12, 14, 16, 18, 20, 22, & 2436WW Return Roller Guard 2200 Series Version 2 Conveyors 851-816 Rev. E Dorner Mfg. Corp. -
Page 98: Cleated Belt Return Roller
Drilling Screw, 1/4-20 x 1" (2300 Series) 202004 Mounting Bracket 920612M Socket Head Screw, 205109 Washer M6-1.00 x 12 mm (2200 Series) 200830M Drop-In Tee Bar 990601M Hex Nut 2200 Series Version 2 Conveyors Dorner Mfg. Corp. 851-816 Rev. E... -
Page 99: Conveyor Belt Part Number Configuration
Figure 154 Flat Belt Part Number Configuration Cleated Belt Part Number Configuration Refer to Dorner patent plate (Figure 154). From the model Refer to Dorner patent plate (Figure 154). From the model number, determine conveyor width (“WW”), length number, determine conveyor type (”T”), width (“WW”), (“LLLL”) and belt type (“BB”). -
Page 100: Return Policy
Return Policy Returns must have prior written factory authorization or they will not be accepted. Items that are returned to Dorner without authorization will not be credited nor returned to the original sender. When calling for authorization, please have the following information ready for the Dorner factory representative or your local distributor: Name and address of customer.
Need help?
Do you have a question about the 2200 Series and is the answer not in the manual?
Questions and answers