Table of Contents
Advertisement
Copyright C
Hitachi High-Technologies Corporation 2013.
All rights reserved. Printed in Japan.
INSTRUCTION MANUAL
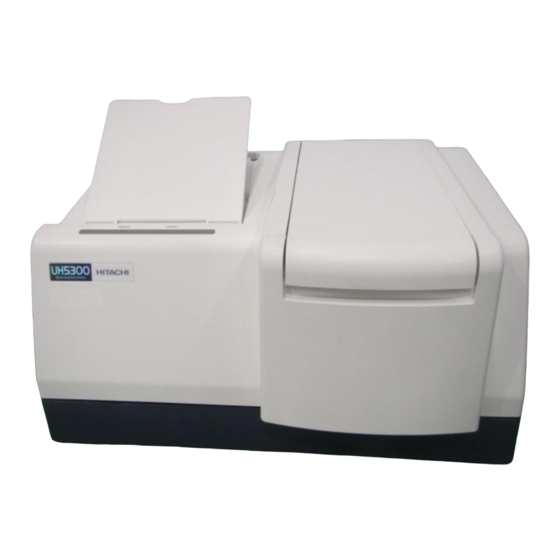
MODEL UH5300 SPECTROPHOTOMETER
Hitachi High-Technologies Corporation
24-14, Nishi-Shimbashi 1-chome, Minato-ku, Tokyo, Japan
AUTO SIPPER
FOR
1st Edition, 2013
Part No. 3J1-9021 HM-N (HMS)
Advertisement
Table of Contents

Related Manuals for Hitachi UH5300


Summary of Contents for Hitachi UH5300
- Page 1 INSTRUCTION MANUAL AUTO SIPPER MODEL UH5300 SPECTROPHOTOMETER Hitachi High-Technologies Corporation 24-14, Nishi-Shimbashi 1-chome, Minato-ku, Tokyo, Japan Copyright C Hitachi High-Technologies Corporation 2013. 1st Edition, 2013 All rights reserved. Printed in Japan. Part No. 3J1-9021 HM-N (HMS)
- Page 2 1. Information contained in this document is subject to change without notice for improvement. 2. This manual is copyrighted by Hitachi High-Technologies Corporation with all rights reserved. No part of this manual may be reproduced, transmitted...
-
Page 3: Preface
PREFACE We thank you for purchasing the Auto Sipper for the Model UH5300 Spectrophotometer. The Auto Sipper is an instrument that is used in combination with the Model UH5300 Spectrophotometer to measure the absorbance etc. of samples. Note that samples that may have been infected with bacteria or viruses are not applicable to this instrument. -
Page 4: Important
IMPORTANT Product Warranty This product is warranted to be free from defects in material or workmanship under normal use within the product specifications indicated in this manual and under conditions given below. This warranty is void if the instrument is not used according to the instruction manual. - Page 5 (d) Corrosion of the electric circuits or deterioration of the optical elements due to highly corrosive atmospheric gas. (e) Failure due to use of hardware, software or spare parts not supplied by the manufacturer. Failure due to use or usage not described in the manual or improper repair not approved by the manufacturer.
-
Page 6: Service Life Of This Instrument
(8 h/day, 20 /month)) For using the instrument beyond the useful service life, it shall be checked for safety by Hitachi High-Technologies Corporation sales representative or service office of Hitachi High-Technologies Corporation sales representative. (This safety check will be available on a chargeable basis.) -
Page 7: Installation/Relocation And After-Sale Technical Service
Installation and Relocation If you intend to install the instrument by yourself, carefully read this instruction manual and the instruction manual of the Model UH5300 Spectrophotometer before doing so. Before installation, the user shall make preparations for satisfying the installation requirements in accordance with this instruction manual. -
Page 8: Caution On Disposal Of Instrument
It may be impossible to supply the main unit components other than the maintenance parts and consumables due to the discontinuance of main-unit manufacture, etc. If the instrument becomes faulty, it might be irreparable due to lack of such components. In this case, the user is requested to stop operation and replace the instrument with a new one. -
Page 9: Safety Summary
SAFETY SUMMARY General Safety Guidelines Before using the Auto Sipper for the Hitachi Model UH5300 Spectrophotometer, be sure to read the following safety instructions carefully. The hazard warnings which appear on the warning labels on the product or in the manual have one of the following alert headings... -
Page 10: Common Safety Precautions
On occurrence of any trouble in the instrument, notify your nearest Hitachi High-Technologies Corporation sales representative or service office of Hitachi High-Technologies Corporation sales representative. When using chemicals for the instrument, be sure to provide proper ventilation of the room. Inadequate ventilation could endanger human health. - Page 11 If any item is missing or damaged or if you have any question, notify the installation personnel at site or your nearest Hitachi High-Technologies Corporation sales representative or service office of Hitachi High-Technologies Corporation sales representative.
- Page 12 For other than the replacement procedures instructed in this manual, contact your nearest Hitachi High-Technologies Corporation sales representative or service office of Hitachi High-Technologies Corporation sales representative. For reducing a risk of trouble occurrence due to physical...
-
Page 13: Safety Instructions In This Manual
SAFETY SUMMARY Safety Instructions in This Manual Shown below are safety instructions contained in this manual and their relevant sections in it. DANGER Indications The indication “ DANGER” does not apply to this product. WARNING Indications The indication “ WARNING” does not apply to this product. CAUTION Indications Injury due to Entanglement ... - Page 14 SAFETY SUMMARY NOTICE Disposal of Waste Solution Be sure to collect waste solution and treat it for proper disposal in accordance with the relevant laws and regulations regarding water pollution control and sewage treatment. Improper treatment of waste solution may result in environmental pollution. Additionally, it could lead to a penalty.
- Page 15 SAFETY SUMMARY NOTICE (Continued) Power Interruption A power failure or momentary voltage drop of the power supply due to lightning, etc. may cause failure of the personal computer used with the instrument and also damages the system software, application software and other data. To avoid such problems, it is recommended to use an AC uninterruptible power source (stated according to the Japanese Electronic Industry Development Association guidelines for...
-
Page 16: Table Of Contents
CONTENTS PREFACE ABOUT THIS INSTRUCTION MANUAL IMPORTANT ...................... IMPORTANT-1 Product Warranty ............IMPORTANT-1 Service Life of This Instrument ........IMPORTANT-3 Installation/Relocation and After-sale Technical Service ............IMPORTANT-4 Technical Seminars and Training for Customers ..IMPORTANT-5 Caution on Disposal of Instrument ....... IMPORTANT-5 Other Precautions ............ - Page 17 2 FUNCTIONS ........................2-1 Application ................2-1 Mechanism ................2-1 2.2.1 Operational Mechanism ..........2-1 2.2.2 Details of Measurement Section and Liquid Delivery Mechanism ........2-2 2.2.3 Setting Peristaltic Tube ..........2-4 2.2.4 Releasing Peristaltic Tube ......... 2-7 Details of Operation Keys, etc..........2-7 2.3.1 Sipping Lever and SIPPING Lamp ......
-
Page 18: Installation
1.1 Outline The Auto Sipper is an instrument that is incorporated in the sample compartment section of the Model UH5300 Spectrophotometer to measure the absorbance or permeability of samples. Sample liquid is sipped through the peristaltic pump into the flow cell in the Auto Sipper. - Page 19 1.2 Checking before Mounting Auto Sipper (5) Atmospheric gas (a) No corrosive gases such as acidic or alkaline gas that heavily attack metals shall exist in ambience. (b) No coating-dissolving gasses such as gas of organic solvent (particularly benzine and thinner) that dissolve coating shall exist in ambience.
-
Page 20: Checking Against Packing List
1.2.2 1.2.2 Checking against Packing List Upon completion of unpacking, check the contents of delivery against the attached packing list. If any part is missing or damaged, or if you have any question, contact the nearest sales representative or our service engineer dispatched for the installation. -
Page 21: Mounting Auto Sipper In Sample Compartment
1.3 Mounting Auto Sipper in Sample Compartment 1.3 Mounting Auto Sipper in Sample Compartment Described is the procedure of mounting the Auto Sipper in the sample compartment of the instrument. Before starting the mounting, turn off the power of the spectrophotometer, and unplug the power cord from the receptacle. -
Page 22: Removing Sample Compartment
1.3.3 (2) Loosen the fixing screw on the cell holder for reference and lift the holder to dismount. Keep the dismounted cell holder for reference to prevent from being lost. Fixing screw Fig. 1-5 External View of Cell Holder for Reference 1.3.3 Removing Sample Compartment Front Cover To use the Auto Sipper, the sample compartment front cover on the photometer main unit needs to be removed. -
Page 23: Attaching Front Cover For Accessory Device
1.3 Mounting Auto Sipper in Sample Compartment Fig. 1-7 Sample Compartment with Front Cover Removed 1.3.4 Attaching Front Cover for Accessory Device In attaching the front panel, check the tabs on the front panel and on the instrument shown in Fig. 1-8. Front view of the front Back view of the front Tabs on the front... -
Page 24: Attaching Coupling Shaft
1.3.5 NOTE: If the front panel is not attached, the measurement will not be correct because light from the outside of the instrument may enter the sample compartment. The front panel cannot be attached after the mounting of the Auto Sipper main unit; the front panel must be attached at this installation step. - Page 25 1.3 Mounting Auto Sipper in Sample Compartment To prevent the motor shaft from rotating, insert the slotted screwdriver, which is an accessory to the spectrophotometer, into the insertion slot for fixation. Slotted Insertion slot Slotted Insertion slot screwdriver for fixation screwdriver for fixation Before inserting the slotted...
-
Page 26: Mounting Auto Sipper
1.3.6 1.3.6 Mounting Auto Sipper (1) In handling the Auto Sipper, hold the handle and the upper portion of the front panel. Handle Upper portion of front panel Flow cell Fig. 1-14 Holding Portions for Lifting Auto Sipper NOTICE: 1. In handling the Auto Sipper, always hold the handle and the upper portion of the front panel. - Page 27 1.3 Mounting Auto Sipper in Sample Compartment Unclamp the main unit connection cables from the clamp and take a look at the structure of the main unit connector. Main unit connection Main unit connection Clamp Clamp cables cables Main unit connector Cable cover in a state being Main unit connector in an opened...
- Page 28 1.3.6 Lead out cables sliding through the wiring Wiring hole hole with the tenon-like convex shape portion on the main unit connector being in a state “downside being ”. If the length of cable lead out is short, plugging connector into Auto Sipper connector becomes difficult;...
- Page 29 1.3 Mounting Auto Sipper in Sample Compartment (4) Check the Auto Sipper driving shaft (the protruded portion) located direct below the peristaltic pump. Align the protruded portion of the Auto Sipper driving shaft fittingly with the incision on the coupling shaft in the sample compartment. To align, gently rotate manually the shaft of the peristaltic pump.
- Page 30 1.3.6 (6) The Auto Sipper is fixed on the main unit using guide screws. Gently lift the Auto Sipper to check the guide screws on the bottom. Also check the locating holes on the main unit sample compartment. Auto Sipper driving shaft Locating holes Guide screws...
- Page 31 1.3 Mounting Auto Sipper in Sample Compartment (8) Hold the main unit connector so that the tenon-like convex shape portion on the connector will turn to the direction “downside being ”. Plug the main unit connector fully into the connector on the Auto Sipper (Fig. 1-25). If unable to plug, check again the connection orientation of the connector shown in Fig.
- Page 32 1.3.6 (10) To fix the Auto Sipper, tighten the guide screws using the slotted screwdriver, which is an accessory to the spectrophotometer main unit. After fixing the Auto Sipper, hold the upper side of the front panel and the handle, and check if the sipper is firmly fixed without looseness.
-
Page 33: Reverse Process To Change Auto Sipper To 6 Cell Turret
1.4 Reverse Process to Change Auto Sipper to 6 Cell Turret 1.4 Reverse Process to Change Auto Sipper to 6 Cell Turret Follow the procedures below to dismount the Auto Sipper from the sample compartment section of the spectrophotometer, and mount the 6 cell turret back in place. - Page 34 1.4.2 Handle Front panel upper portion Fig. 1-29 Holding Portions for Lifting Auto Sipper (2) Place the Auto Sipper temporarily. In placing, provide a working space behind the sipper to permit unplugging the main unit connection cables from the Auto Sipper. Place the Auto Sipper at a position where the rear thereof comes approximately 10 to 15 cm ahead from the back of the sample compartment of the photometer (that is the position where the sipper can sit stably).
- Page 35 1.4 Reverse Process to Change Auto Sipper to 6 Cell Turret (3) Unplug the main unit connector from the connector on the Auto Sipper. Then, dismount the Auto Sipper from the photometer main unit. If unable to dismount, check if the guide screws are fully loosened.
-
Page 36: Detaching Coupling Shaft
1.4.3 1.4.3 Detaching Coupling Shaft Check the coupling shaft in the sample compartment. Hexagonal screw Insertion slot for fixation Axial alignment portion Fig. 1-33 Coupling Shaft To prevent the motor shaft from rotating, insert the slotted screwdriver, which is an accessory to the spectrophotometer, into the insertion slot for fixation. -
Page 37: Detaching Front Panel
1.4 Reverse Process to Change Auto Sipper to 6 Cell Turret Loosen the hexagonal screw on the coupling shaft using the hexagonal wrench which is an accessory to the spectrophotometer. Hexagonal Hexagonal wrench wrench Coupling shaft Screw loosening (side view) Screw loosening (top view) Fig. - Page 38 1.4.5 Engage tabs on the sample compartment front cover with tabs on the instrument Tabs on and slide from the instrument upper-side to fix. Tabs on sample compartment front cover Removed sample compartment front cover Fig. 1-37 Method of Attaching Sample Compartment Front Cover Engage tabs on the sample compartment front cover with tabs...
-
Page 39: Mounting Cell Holder For Reference
1.4 Reverse Process to Change Auto Sipper to 6 Cell Turret Confirm that there is no level difference at the juncture between the sample compartment front cover and the upper part of the instrument checking that the cover of the sample compartment is closable. Confirm that the sample compartment front cover is attached without level difference with the instrument at the... -
Page 40: Mounting 6 Cell Turret
1.4.7 (2) Fix the cell holder by tightening the fixing screw on the cell holder for reference. Fixing screw Fig. 1-41 External View of Sample Compartment after Mounting Cell Holder for Reference 1.4.7 Mounting 6 Cell Turret (1) Check the drive motor shaft in the sample compartment. The shaft has a slot (a hollow) thereon. - Page 41 1.4 Reverse Process to Change Auto Sipper to 6 Cell Turret (2) Hold the 6 cell turret with hands by its center and fully tighten the fixing screw to fix the 6 cell turret. With the above, the mounting of the 6 cell turret is completed. Fixing screw Fig.
-
Page 42: Functions
2.1 Application The Auto Sipper is an instrument that is incorporated in the Model UH5300 Spectrophotometer to measure the absorbance or permeability of liquid sample. The sample cell is the flow cell to which liquid sample is delivered by the peristaltic pump. -
Page 43: Details Of Measurement Section And Liquid Delivery Mechanism
2.2 Mechanism 2.2.2 Details of Measurement Section and Liquid Delivery Mechanism This section describes the details of the measurement section and the liquid delivery mechanism of the Auto Sipper. Lever Lever retainer Peristaltic pump Peristaltic tube Fig. 2-2 Upper Side View of Auto Sipper Lever retainer Lever Roller... - Page 44 2.2.2 Drain tube Flow cell Sipper nozzle Pinchcock Fig. 2-4 Right Side View of Auto Sipper Fig. 2-5 Front Side View of Auto Sipper NOTE: 1. The IN-joint is a screw type joint. To prevent it from loosening, retighten it occasionally. 2.
-
Page 45: Setting Peristaltic Tube
2.2 Mechanism (4) Drain tube The drain tube extends from the left part of the Auto Sipper front panel. This tube is used for draining the sample after completion of measurement or the used cleaning agent from the flow cell. To hold the waste liquid drained from the system, prepare a drain tank, into which the end of the drain tube can be inserted. - Page 46 2.2.3 Joint support Lightly pull the tube upward. Fit the OUT-joint on the step height in the slot of the joint support. The step height in the slot of the joint support Fig. 2-7 Placement Position of OUT-joint Fig. 2-8 Setting of OUT-joint (2) Set the peristaltic tube along the outer perimeter of the roller.
- Page 47 2.2 Mechanism Joint support IN-joint Fig. 2-11 Setting Peristaltic Tube on Roller (4) Turn the lever counterclockwise until it makes contact with the peristaltic tube. Lever Peristaltic tube Fig. 2-12 Preparation for Lever Setting (5) To fix the lever, turn the lever retainer counterclockwise while maintaining contact between the lever and the peristaltic tube.
-
Page 48: Releasing Peristaltic Tube
2.2.4 2.2.4 Releasing Peristaltic Tube Follow the procedure (1) through (5) above in reverse order, from (5) to (1) (to detach the peristaltic tube from the roller). NOTE: The peristaltic tube must be released from the set position while the Auto Sipper is not in use. Leaving the peristaltic tube set on the roller leads to early deterioration of the tube. -
Page 49: Return Key
2.3 Details of Operation Keys, etc. 2.3.2 RETURN Key This key is used to return the sample in the flow cell to a test tube again after measurement. Pressing the key turns the RETURN key light on. Pushing the sipping lever while the RETURN key light is on runs the pump in reverse direction, and the sample is drained from the sipper nozzle. -
Page 50: Operation
3 OPERATION 3.1 Preparation (1) Check that the power of the spectrophotometer is turned off, and that the Auto Sipper is correctly mounted in accordance with the procedure described in Chapter 1. (2) Set the peristaltic tube correctly in accordance with the procedure described in Section 2.2.3 Setting Peristaltic Tube. -
Page 51: Setting Measurement Conditions
Pinchcock Fig. 3-2 Method for Opening Pinchcock (5) Start up the system in reference to the section “2.2.1 Starting Up Instrument” of “INSTRUCTION MANUAL FOR MODEL UH5300 SPECTROPHOTOMETER”. 3.2 Setting Measurement Conditions 3.2.1 Selecting Measurement Item (1) After checking the above items (1) through (4), press [Measurement] button icon on the top page. -
Page 52: Setting Auto Sipper
3.2.2 (2) Select a measurement item. For the details of each measurement item, refer to the section “4.1 What the Product Can Do” of “INSTRUCTION MANUAL FOR MODEL UH5300 SPECTROPHOTOMETER”. Fig. 3-4 Measurement Item Selection Screen 3.2.2 Setting Auto Sipper Select Auto Sipper from the tabs, and set Sipping Time, Delay Time, and Air Purge. - Page 53 3.2 Setting Measurement Conditions NOTE: Sipping amount in the same Sipping Time decreases when measuring in the room temperature lower than 25C or when measuring a sample with comparatively higher viscosity. If you set the Sipping Time to be longer than 5 seconds, the influence of carry-over effects can be decreased.
-
Page 54: Measurement
3.3.1 3.3 Measurement After completion of the settings of the measurement conditions for the Auto Sipper and the spectrophotometer, move to the measurement screen for each of the measurement items described below. 3.3.1 Precautions for Measurement NOTE: The carry-over is 1% or less under the condition that the Sipping Time is 5 seconds, the Delay Time is 5 seconds, the Air Purge is 1 second, and the viscosity of sample is equivalent to that of pure water. -
Page 55: Concentration Measurement
3.3 Measurement 3.3.2 Concentration Measurement Given below is the general measurement procedure for the quantitative calculation to create calibration curves. (1) Switching to measurement screen After setting the conditions, select the [STD Measurement] button on the screen to proceed to the measurement screen. Fig. - Page 56 3.3.2 Sipping lever Fig. 3-7 Autozero Execution Window Fig. 3-8 Sipping Lever Operation (3) Standard measurement Place the sipping nozzle in a standard solution, push the sipping lever to sip the standard solution, and execute the measurement. When the air purge is to be performed during or after this standard measurement process, take out the sipping nozzle from the sample solution before starting the sipping for the air purge.
-
Page 57: Wavelength Scan
3.3 Measurement NOTE: Pressing the [START] button on the operating screen without pushing the sipping lever permits measuring the sample without sipping. (5) After the completion of the sample measurement, store or print the measurement data. 3.3.3 Wavelength Scan Given below is the general measurement procedure for wavelength scan. -
Page 58: Time Scan
3.3.4 (2) Sample measurement After the completion of the baseline correction, place the sipping nozzle in the sample, push the sipping lever to sip the sample, and execute the sample measurement. NOTE: Pressing the [START] button on the measurement screen without pushing the sipping lever permits measuring the sample without sipping. -
Page 59: Monitor Measurement
3.3 Measurement Fig. 3-13 Autozero Execution (3) Sample measurement Place the sipping nozzle in the sample, push the sipping lever to sip the sample, and execute the sample measurement. NOTE: Pressing the [START] button on the measurement screen without pushing the sipping lever permits measuring the sample without sipping. - Page 60 3.3.5 Fig. 3-14 Autozero Execution (3) Sample measurement Place the sipping nozzle in the sample, push the sipping lever to sip the sample, and execute the sample measurement. NOTE: Pressing the [START] button without pushing the sipping lever permits measuring the sample without sipping. (4) After the completion of the sample measurement, store or print the measurement data.
-
Page 61: Checking Of Sipping Amount
3.4 Checking of Sipping Amount 3.4 Checking of Sipping Amount The sipping amount is determined by the Sipping Time. However, the amount can fluctuate depending on such factors as deterioration of the peristaltic tube and changes of the ambient temperature. Therefore, check the sipping amount based on the following conditions once a week and whenever the ambient temperature changes significantly. -
Page 62: After Measurement
3.5.1 3.5 After Measurement 3.5.1 Cleaning Flow Cell After measurement, clean the flow cell in accordance with the following procedure. (1) Set pure water on the sipping nozzle then press the WASH key for 10 seconds to discharge the sample. (2) Press the WASH key for 10 seconds to sip the rinsing liquid (P/N: 775-1376) or neutral detergent. -
Page 63: Specifications
3.6 Specifications 3.6 Specifications (1) Wavelength Range: 220 to 850 nm (2) Sample Quantity Minimum: 0.6 mL (3) Photometric range: 0 to 2 Abs (4) Carry-over: 1% or less Conditions: Viscosity: Equivalent to pure water Absorbance: ≒1 Abs Sipping Time: 5 seconds Delay Time: 5 seconds Air Purge: 1 second Room Temperature: 25C... - Page 64 (8) Noise Level: ±0.0008 Abs (Peak to Peak) Conditions: Flow Cell: Pure water (sipped for 5 seconds or more) Wavelength: 260 nm Time Scan: 60 seconds Response: Standard (9) Service Temperature: 15 to 35C (10) Temperature Gradient: 5C/h (11) Operating ambient humidity: 25 to 80% RH (Condensation is not allowed.
-
Page 65: Maintenance
4.1.1 4 MAINTENANCE 4.1 Periodic Maintenance 4.1.1 Precautions for Measurement Stains inside the flow cell impairs reproducibility of measurement. Clean the flow cell in reference to the procedures below. Be sure to use the WASH key to sip the cleaning agents. The lifetime of the flow cell depends on the level of maintenance care. - Page 66 4.1 Periodic Maintenance Table 4-1 Recommended Cleaning Agents Targeted Cleaning Agent Concentration of Generic Name Substance (Brand Name) Neutral Organic Extran * 50 times dilution detergent substance (for normal stain) Isotonic detergent 20 times dilution Haemosol (for heavy stain) Alkaline fluid Inorganic Clean 99-L 5 times dilution...
-
Page 67: Maintenance Of Peristaltic Tube
3. The chemical resistance of the peristaltic tube is described in the section 4.1.5. The chemical resistance can be greatly varied depending on the contact service office of Hitachi High-Technologies Corporation sales representative. 4.2.2 Peristaltic Tube Replacement Procedure Replace the peristaltic tube in accordance with the following procedure. - Page 68 4.2 Maintenance of Peristaltic Tube (2) Detach the IN-joint from the IN-joint receptacle. As the IN-joint is screwed into the IN-joint receptacle, turn the joint to detach from IN-joint IN-joint receptacle Fig. 4-2 Removing IN-joint (3) Pull out the peristaltic tube from the OUT-joint. Peristaltic tube OUT-joint Fig.
- Page 69 4.2.2 (6) Attach the IN-joint to the peristaltic tube (by inserting the tube to the joint until it stops). Peristaltic tube IN-joint Fig. 4-5 Attaching IN-joint to Peristaltic Tube (7) Attach the OUT-joint to the peristaltic tube (by inserting the tube to the joint until it stops).
-
Page 70: Checking Chemical Resistance Of Peristaltic Tube
4.2 Maintenance of Peristaltic Tube 4.2.3 Checking Chemical Resistance of Peristaltic Tube Prior to measurement of a sample used for the first time, check the chemical resistance of the peristaltic tube against the sample. Follow the procedure below to check the chemical resistance under the same conditions (concentration and temperature) as the actual measurement. - Page 71 4.2.3 <Chemicals requiring caution> Aliphatic hydrocarbon, methyl alcohol, etc. NOTICE: When using a chemical requiring caution, wash away the chemical with pure water immediately after the use. If the tube is softened, hardened, or significantly tarnished, immediately stop using it. 4 - 7...
-
Page 72: Precautions On Using Maintenance Menu
4.3 Precautions on Using Maintenance Menu 4.3 Precautions on Using Maintenance Menu NOTE: Be sure to dismount the Auto Sipper from the system when executing WL Accuracy, WL Repeatability, or Resolution as Performance Check or Performance Check (Hg Lamp) on the maintenance menu. -
Page 73: Troubleshooting
Should an abnormal state be found in the instrument, take a corrective action, referring to Table 4-2. If the instrument still does not function normally despite implementation of such action, contact service office of Hitachi High-Technologies Corporation sales representative. Table 4-2 Troubleshooting... - Page 74 4.5 Troubleshooting Symptom Cause Action The sipping operation (1) The pinchcock is (1) Open the pinchcock attached on the drain causes the peristaltic closed. tube. pump to rotate but (2) Deterioration of the (2) Replace the peristaltic tube according to the sample is not peristaltic tube the procedure described in “4.2...
- Page 75 Periodic Maintenance” of this instruction reproducibility falls manual; and then conduct the performance out of specification. review. If the situation is still not improved, contact our service office of Hitachi The results of the – High-Technologies Corporation sales performance review representative.
Need help?
Do you have a question about the UH5300 and is the answer not in the manual?
Questions and answers