Table of Contents
Advertisement
Quick Links
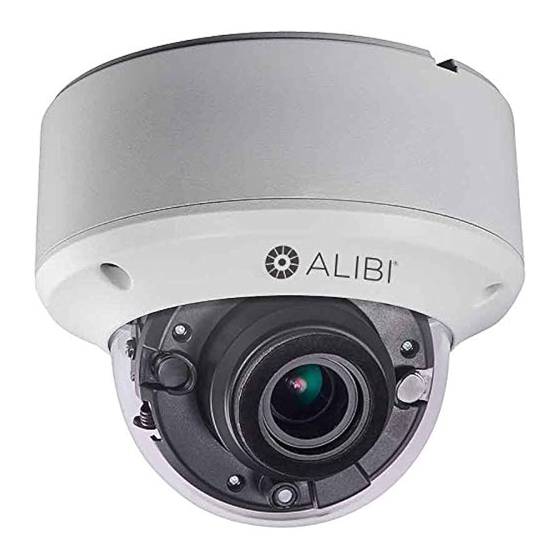
ALI-TP2118VR 8MP HD-TVI
Vandalproof Outdoor Dome Camera
Quick Installation Guide
The ALIBI ALI-TP2118VR dome camera include a high resolution CMOS array sensor with and advanced
circuit design technology. This camera features:
8 MP high performance CMOS array with resolution up to 3840 (H) × 2160 (V) pixels
•
Low illumination 0.003 Lux color illumination
•
2.8 mm − 12 mm motorized lens
•
OSD menu up-the-coax
•
260 ft IR
•
IP67 weatherproof, IK10 vandalproof enclosure
•
Requires Alibi 8 MP HD-TVI compatible recorder (HD-TVI DVR) such as the ALI-QVR5116H
•
Optional installation with wall mount bracket ALI-AB2 and flange adapter ALI-AF3
•
Camera
back
box
Captive
screw (3)
Camera
dome
assembly
Lens
Back Box internal features
Camera drop cable connectors
Foam
ring
seal
Lens
IR LED (2)
OSD
joystick
CVBS video
test port
Camera module internal features
www.observint.com
1
Cable
channel
HD-TVI video
BNC connector
12 Vdc polarity
Power Connector
CVBS video BNC connector
Hole for
camera to
back box
screws (3)
Hole for
dome
tether
screw
Hole for
dome
assembly
screws (3)
Product
label
Drop cable
Camera module back
What's in the box
Camera assembly
•
Mounting hardware
•
Video test adapter cable
•
Security L-wrench
•
Drill template
•
This instruction guide
•
Tools you need
To install the camera, you will need:
12 Vdc or 24 Vac power source. See Specifications for requirements.
•
Tools and additional fasteners (may be required) for mounting the camera
•
Caulk or other sealant for outdoor installation
•
Video and power extension cable
•
Step 1.
Install the camera
The camera includes hardware to install it directly to a mounting surface. You can also easily install the
camera onto a single- or double-gang electrical box. Camera drop cables can be routed through the
conduit port on the side of the camera back box, through the mounting surface or into an electrical box, if
used.
Before installation:
Make sure that the device is in good condition and all the assembly parts are included.
•
IR Reflection Prevention: Avoid mounting the camera near reflective surfaces. The IR light from
•
the camera can reflect back into the lens. Do not remove the plastic cover until the cover is installation
is complete.
Check the specification of the products for the installation environment.
•
Make sure that the wall or the ceiling is strong enough to withstand 3 times the weight of the camera.
•
To avoid fire or shock hazard, use only UL listed power supplies. Verify that the power supply will
•
provide the rated voltage and wattage for the camera. See the Specifications section.
ALI-TP2118VR_CQ
180409
Advertisement
Table of Contents

Subscribe to Our Youtube Channel
Summary of Contents for ALIBI ALI-TP2118VR
- Page 1 Quick Installation Guide label The ALIBI ALI-TP2118VR dome camera include a high resolution CMOS array sensor with and advanced circuit design technology. This camera features: 8 MP high performance CMOS array with resolution up to 3840 (H) × 2160 (V) pixels •...
- Page 2 You can open the OSD menu system using the built-in joystick on the camera, from either the HD-TVI DVR housing. Live View display or through remote login to the ALIBI recorder. Camera drop cable connectors are not waterproof. Seal if needed.
- Page 3 For remote access to the ALIBI HD-TVI DVR: Navigation and settings in the OSD are made through (OSD) menus” on page 4. direction keys and the Iris + and Iris - buttons in the ALIBI HD-TVI DVR PTZ control panel. See above. Opening the OSD Menu through remote login to the HD-TVI DVR The function of the directional keys and Iris buttons are defined in the table below.
- Page 4 Brightness: Brightness refers to the average brightness of the image. You can set the brightness Keys Function value from 1 (darkest) to 10 (brightest). Move to previous page, field Exposure Mode: You can set the Exposure Mode to Global, BLC, HLC, or WDR. Click the left/right Move to next page, field ( t / u ) direction buttons to show your selection.
- Page 5 D/N Threshold (Day to Night Threshold): Use the Day to Night Threshold to control the — Angle Adjustment Pan: 0° ~ 355°; Tilt: 0° ~ 75°; Rotate: 0° ~ 355° sensitivity of switching the day mode to the night mode. You can set the value from 1 (less Synchronization Internal Synchronization sensitive) to 9 (more sensitive).
- Page 6 Problem Possible Cause The screen is dark. - Adjust the contrast control of the monitor. - If you have an intermediate device, set the impedance (75 Ω /Hi-Z) properly, and check the cable connections. The camera is not working properly and - Verify that the camera is correctly connected to an appropriate regulated the surface of the camera is hot.


Need help?
Do you have a question about the ALI-TP2118VR and is the answer not in the manual?
Questions and answers