Table of Contents

Related Manuals for ALIBI ALI-NP7022RT


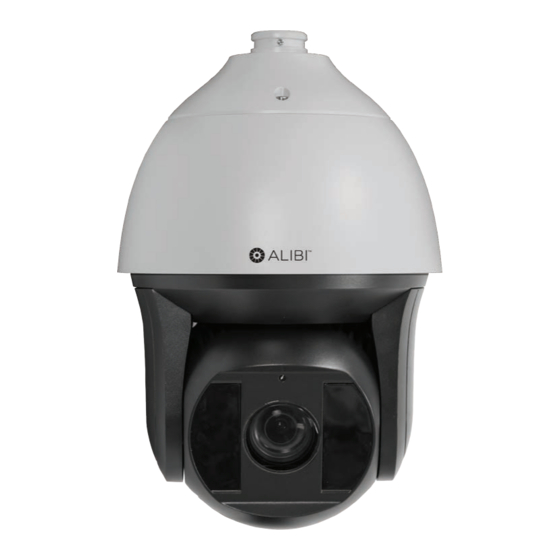
Summary of Contents for ALIBI ALI-NP7022RT
- Page 1 ALI-NP7022RT 2.1 MP 25x Low Light IP PTZ Camera Installation Guide PLEASE READ THIS MANUAL BEFORE USING YOUR CAMERAS, and always follow the instructions for safety and proper use. Save this manual for future reference. ALI-NP7022RT_CM 180904...
- Page 2 We encourage you to check and comply with all applicable local, state, and federal laws and regulations before engaging in any form of surveillance or any transmission of radio frequencies. ALIBI and the ALIBI logo are trademarks of Observint. Microsoft, Windows, and Internet Explorer are either registered trademarks or trademarks of Microsoft Corporation in the United States and / or other countries.
- Page 3 Please make sure that the power was disconnected before you wire, install or dismantle the camera. • If smoke, odors or noise rise from the device, shut off the power immediately and unplug the power cable. Please contact the • service center for assistance. ALI-NP7022RT IP PTZ Camera Installation Guide...
- Page 4 If the product does not work properly, please contact your dealer or the nearest service center. Never attempt to disassemble • the speed dome yourself. (We shall not assume any responsibility for problems caused by unauthorized repair or maintenance.) Cautions Do not drop the dome or subject it to physical shock, and do not expose it to high electromagnetism radiation.
-
Page 5: Table Of Contents
3.2 Activate Inactive Alibi device ........ - Page 6 NOTES...
-
Page 7: Overview
The ALI-NP7022RT IP PTZ Camera can capture high quality images in very low light environment with its black anti-reflective glass. The black anti-reflective glass increase the luminousness for an IR reach of up to nearly 655 feet. With the 25× optical zoom Day / Night lens, the camera offers more details over expansive areas. - Page 8 SECTION 1: OVERVIEW Min. Illumination • Color: 0.002 Lux @ (F1.5, AGC ON) B/W: 0.0002 Lux @(F1.5, AGC ON) 0 Lux with IR 25× optical zoom, 16× digital zoom • 655 foot IR range • 24 Vac and Hi-PoE powering •...
-
Page 9: What's In The Box
Hex L-wrench • Thread tape • Quick installation guide (this document) • 1.3 Accessories The following accessories are available for the ALIBI ALI-NP7022RT camera. Mounting bracket detail is shown below. Model Type ALI-PTZCL Ceiling Mount Bracket ALI-PTZCM Corner Mount PTZ Bracket... - Page 10 SECTION 1: OVERVIEW ALI-PTZCL: Ceiling Mount Bracket The Ceiling Mount Bracket is suitable for outdoor ceiling mounting. 2.24" 0.39" dia. (4) 4.57" dia. 3.52" dia.
- Page 11 SECTION 1: OVERVIEW ALI-PTZCM: Corner Mount PTZ Bracket The Corner Mount Bracket is suitable for outdoor pole mounting to a 90˚ corner. 16.52" 6.96" G 1.5" ALI-NP7022RT IP PTZ Camera Installation Guide...
- Page 12 SECTION 1: OVERVIEW ALI-PTZPM: Pole Mount PTZ Bracket The Pole Mount Bracket is suitable for outdoor pole mounting. The straps can attach to a 2.64” ~ 5.00” diameter pole. 3.94" dia. 5.63" 12.2" 4.61" G 1.5"...
- Page 13 SECTION 1: OVERVIEW ALI-PTZWB: Wall Mount Bracket The Wall Mount Bracket is suitable for indoor and outdoor wall mounting. 3.82" 12.2" 2.95" G 1.5" 0.33" dia. (4) ALI-NP7022RT IP PTZ Camera Installation Guide...
- Page 14 SECTION 1: OVERVIEW ALI-PTZWBJ: Outdoor PTZ Wall Bracket with Junction Box The Wall Mount Bracket is suitable for indoor and outdoor wall mounting. It includes a junction box for connections to extension cables. 3.0" 14" 0.35" 2.6" 5.6" 6.7"...
-
Page 15: Installation
Always carry the camera by its Safety cable. A red cable handle is provided. CAUTION 2.1 Remove the camera from the packaging 1. Remove the camera from the protective packaging. 2. Remove tape from the dome drive, if attached. Tape ALI-NP7022RT IP PTZ Camera Installation Guide... -
Page 16: Install An Micro-Sd Card In The Camera
SECTION 2: INSTALLATION 2.2 Install an micro-SD card in the camera The microSD card in the provides in-camera (local) storage for log information and locally stored video and capture files. Cameras without an SD card cannot provide camera log information, which is valuable for maintenance purposes. Your camera will accommodate a microSD card with up to 256GB of storage. - Page 17 6. Route the LAN and power cables (or LAN cable if using PoE), audio, microphone, alarm and RS-485 cables through the wall mount bracket, and then through the top cover of the camera. ALI-NP7022RT IP PTZ Camera Installation Guide...
-
Page 18: Connecting The Cables
9. Fit the mounting bracket coupling into the mounting bracket, and then tighten the lock screw. 2.3.1 Connecting the cables Drop cables connectors for the ALI-NP7022RT are shown below. Each wire is labeled with its purpose. RS-485 cable CVBS (BNC) - Page 19 RJ-45 connector is exposed to moisture or dust, apply the Ethernet drop cable seal kit provided. In some network configurations, the LAN cable can connect directly to a Network Video Recorder (NVR) with a built-in network switch. ALI-NP7022RT IP PTZ Camera Installation Guide...
-
Page 20: Ceiling Mounting
SECTION 2: INSTALLATION Power cables You can power the camera directly by applying 24 Vac power to the drop cable power screw-down connectors. Refer to “APPENDIX D 24 Vac Wire Gauge and Transmission Distance” on page 32 for more information. The LAN cable can also provide Hi-PoE to the camera. - Page 21 8. Connect the extension cables to the camera drop cables. Refer to “2.3.1 Connecting the cables” on page 12. 9. Reattach the camera top cover. Tighten the screws. 10. Fit the camera mounting bracket coupling into the mounting bracket. ALI-NP7022RT IP PTZ Camera Installation Guide...
- Page 22 SECTION 2: INSTALLATION Camera extension Ceiling cables Lock screw Coupling Safety cable 11. Tighten the lock screw to secure the camera in place.
-
Page 23: Configure Network Access
3.1 Install the Alibi Config Tool The Alibi Config Tool is a PC-based network utility for discovery of Alibi compatible devices on a network. It provides an easy way to activate devices, configure camera and recorder network configuration settings, and set device passwords. It can be installed on a Microsoft®... -
Page 24: Activate Inactive Alibi Device
3.2 Activate Inactive Alibi device When an Alibi device is first installed, or reset to its factory configuration, it must be “Activated” before it can be used. In the Alibi Configuration Tool, “Inactive” devices have a Security status of Inactive, and an IPv4 address of 192.168.1.64. A device is “Activated”... -
Page 25: Modify Network Parameters
You can change the network parameters of devices that are active. 1. In the list of devices discovered, click on the device you want to change the network settings for, and then click the select box to check it. See below. ALI-NP7022RT IP PTZ Camera Installation Guide... - Page 26 SECTION 3: CONFIGURE NETWORK ACCESS Modify Network Parameters 2. In the popup window, edit the current network parameters, and then enter the admin user password in the field at the bottom. a. Enable DHCP: You can select Enable DHCP to acquire compatible network settings from a DHCP server installed on the LAN.
- Page 27 SECTION 3: CONFIGURE NETWORK ACCESS ALI-NP7022RT IP PTZ Camera Installation Guide...
-
Page 28: Remote Login
SECTION 4: REMOTE LOGIN SECTION 4 Remote login If the camera LAN extension cable is attached to the backpanel (internal switch) of a Network Video Recorder (NVR), skip this section. NOTE Use the firmware in the NVR to configure and control the camera. Microsoft®... - Page 29 2. In the login window, enter admin for the User Name and the password you created in the Password field, the click Login. 3. If this is the first time you are logging into a camera, you may see the message in the following screen. If this appears, follow the sub-steps below. ALI-NP7022RT IP PTZ Camera Installation Guide...
- Page 30 SECTION 4: REMOTE LOGIN a. Click on the message to install the plugin. b. In the message bar at the bottom of the screen, click Run. Follow the on-screen instructions to install WebComponents. When the following screen opens, click Finish.
-
Page 31: Additional Configuration Steps
Live View image Logout button Capture, Record, Zoom icons 4.1 Additional configuration steps Refer to the document ALIBI™ IP Camera Software User Manual provided AlibiSecurity.com/Resources to customize the configuration of your camera. Additional configuration steps might include: Image adjustment •... -
Page 32: Appendix A Specifications
APPENDIX A: SPECIFICATIONS APPENDIX A Specifications Camera Image Sensor 1/1.9” Progressive Scan CMOS Resolution Up to 1920 x 1080 Signal System NTSC / PAL Effective Pixels Approx. 2.1 Megapixel Color: 0.002 Lux (F1.5, AGC On) Minimum Illumination B/W: 0.0002 Lux (F1.5, AGC On) 0 Lux with IR Zoom Optical: 25×, digital 16×... - Page 33 50 Hz: 25 fps (1920 × 1080, 1280 × 960, 1280 × 720, 704 × 576, 640 × 480, 352 × 288) Third Stream 60 Hz: 30 fps (1920 × 1080, 1280 × 960, 1280 × 720, 704 × 480, 640 × 480, 352 × 240) Supported Supported ALI-NP7022RT IP PTZ Camera Installation Guide...
- Page 34 APPENDIX A: SPECIFICATIONS Main Stream: H.265+ / H.265 / H.264+ / H.264 Sub-Stream: H.265 / H.264 / MJPEG Video Compression Third Stream: H.265 / H.264 / MJPEG H.264 with Baseline / Main / High Profile Audio compression G.711alaw / G.711ulaw / G.722.1 / G.726 / MP2L2 / PCM IPv4 / IPv6, HTTP, HTTPS, 802.1x, Qos, FTP, SMTP, UPnP, SNMP, DNS, DDNS, NTP, RTSP, RTCP, RTP, TCP/IP, DHCP, PPPoE, Protocols Bonjour...
-
Page 35: Appendix B Definitions
A time task is a preconfigured action that can be performed automatically at a specific date and time. The programmable Scheduled Task actions include: auto scan, random scan, patrol 1-8, pattern 1-4, preset 1-8, frame scan, panorama scan, tilt scan, day, night, reboot, PT adjust, Aux Output, etc. ALI-NP7022RT IP PTZ Camera Installation Guide... - Page 36 APPENDIX B: DEFINITIONS With this feature, the camera will automatically extend the exposure time in low illumination conditions to maintain clear Slow Shutter video images. The feature can be enabled or disabled. The camera allows you to edit users with different levels of permission. Multiple users are allowed to simultaneously User Management access and control the same camera through the network.
-
Page 37: Appendix C Lightning And Surge Protection
45° conical Power arrester envelope The camera should be within a 45° envelope under the lightening rod. The resistance of earthing conductor must be less than 4 Ω. Steel jacket Lightning & Surge Protection ALI-NP7022RT IP PTZ Camera Installation Guide... -
Page 38: Appendix D 24 Vac Wire Gauge And Transmission Distance
APPENDIX D: 24 VAC WIRE GAUGE AND TRANSMISSION DISTANCE APPENDIX D 24 Vac Wire Gauge and Transmission Distance The following table shows the recommended maximum distance adopted for the different wire sizes when the 24 Vac voltage loss is less than 10%. For the AC driven device, the maximum voltage loss rate allowable is 10%. For example, for a device with the rating power of 80 VA which is installed 35 feet (10 m) from the transformer, the minimum wire gauge required is 0.8000 mm. - Page 39 Table 2. Wire Gauge Standards American Wire Gauge Cross-sectional Area of Bare Wire Gauge (mm) Bare Wire (mm 0.750 0.4417 0.800 0.5027 0.900 0.6362 1.000 0.7854 1.250 1.2266 1.500 1.7663 2.000 3.1420 2.500 4.9080 3.000 7.0683 ALI-NP7022RT IP PTZ Camera Installation Guide...
Need help?
Do you have a question about the ALI-NP7022RT and is the answer not in the manual?
Questions and answers