Table of Contents
Advertisement
Quick Links
Alibi™ IP Camera
Software User Manual
Products: ALI-IPU Series and ALI-IPV Series cameras
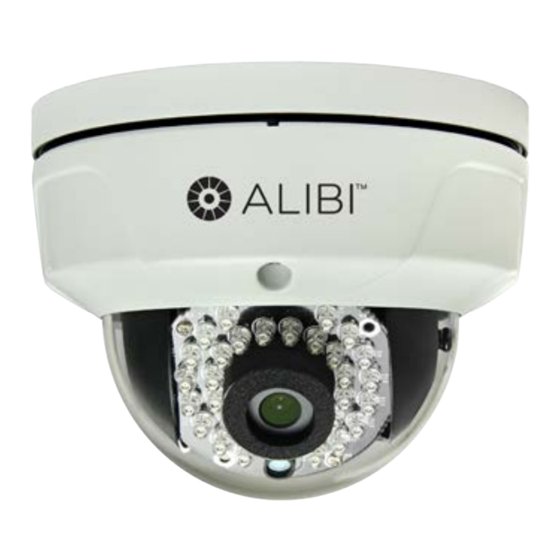
ALI-IPU3013 Series Camera
ALI-IPV3013 Series Camera
PLEASE READ THIS MANUAL BEFORE USING YOUR CAMERAS, and always follow the instructions for safety
and proper use. Save this manual for future reference.
ALI-IPU-V30xxR_CM
5/19/14
Advertisement
Table of Contents

Subscribe to Our Youtube Channel
Related Manuals for ALIBI ALI-IPU3013 Series


Summary of Contents for ALIBI ALI-IPU3013 Series
- Page 1 Alibi™ IP Camera Software User Manual Products: ALI-IPU Series and ALI-IPV Series cameras ALI-IPU3013 Series Camera ALI-IPV3013 Series Camera PLEASE READ THIS MANUAL BEFORE USING YOUR CAMERAS, and always follow the instructions for safety and proper use. Save this manual for future reference.
- Page 2 Alibi and the Alibi logo are trademarks of Observint. Microsoft, Windows, and Internet Explorer are either registered trademarks or trademarks of Microsoft Corporation in the United States and/or other countries.
- Page 3 Do not use strong or abrasive detergents when cleaning the surfaces of this product. When dirt is hard to remove, use a mild • detergent and wipe gently. Save your system configuration. • Distributing, copying, disassembling, reverse compiling, reverse engineering, and exporting, in violation of export laws, the • software provided with this product is expressly prohibited. Alibi Camera Software User Manual...
-
Page 5: Table Of Contents
2.1 Locating cameras on the network - using Alibi Discover ....... - Page 6 TABLE OF CONTENTS 4.2.9 Email ............... . .32 4.2.10 NAT .
-
Page 7: Overview
Since the Alibi camera is an IP based device, several other application configurations are also possible. Important considerations Alibi cameras do not contain internal storage for video recording. Therefore, storage for this data must be in an external device •... -
Page 8: Camera Is Managed By An Nvr
The most typical application for the camera is to be installed with a compatible NVR. With the NVR, the camera can be installed anywhere on a LAN that is accessible to the NVR. With the Alibi ALI-NVR30 Series NVRs, the camera can be either installed on the LAN, or connected directly to the NVR’s built-in Ethernet switch and be configured automatically. -
Page 9: Pc Requirements
RAM: 1GB or more • Display: 1024 × 768 resolution or higher • Internet Browser: Microsoft® Internet Explorer® 6.0 and newer, Apple® Safari® 5.02 and newer, Mozilla® Firefox 3.5 and • newer, Google Chrome™ 8 and newer Alibi Camera Software User Manual... -
Page 10: Network Connection
2.1 Locating cameras on the network - using Alibi Discover The Alibi Discover Tool is used to “discover” Alibi cameras and NVRs/DVRs installed on the LAN and change their network settings. The tool is provided on the software CD with your camera. - Page 11 5. To change the network settings of the camera to be compatible with the subnet where it is installed, do the following: a. Click the device to highlight it. Notice that the network parameters are populated in the frame on the right. Alibi Camera Software User Manual...
-
Page 12: Restore Default Password
The Alibi Discover Tool includes a feature in the lower right corner of the screen labeled Restore Default Password. This feature is a Support-only tool that allows them to reset the password if it was changed and lost. At this time, it is only used for Alibi dome- style cameras, and Alibi NVRs and DVRs. -
Page 13: Remote Access
Explorer®. If using IE 10 or higher, you must configure it for “Compatibility” mode for the IP address you are logging into. When connecting to an Alibi camera, you must enter a User Name and Password. Note that some user permissions disallow features remote access to the camera. - Page 14 2. In the login window, enter your User Name and Password in the appropriate fields, then click Login. The default User Name and Password for Alibi cameras is admin and 1111. 3. If this is the first time you are logging into a camera at this IP address AND you are using Internet Explorer 10 or newer, you must configure it for Compatibility mode: a.
- Page 15 SECTION 3: REMOTE ACCESS After clicking Add, the IP address will appear in the Websites list. Click Close. 4. If this login is the first login to an Alibi camera from your computer and browser, continue with the following sub-steps to install WebComponents: a.
- Page 16 SECTION 3: REMOTE ACCESS Some computer security software may attempt to block you from running WebComponents.exe. If necessary, open the Internet Explorer downloads list, right click on the WebComponents.exe file name, then click Run Anyway. NOTE b. In the Setup - WebComponents window opens, click Next to continue. Installing the WebComponents plugin may require that you close the browser.
-
Page 17: Remote Live View Screen
Screen select tabs Live View image Logout button Capture, Record, Enable e-PTZ icons Capture the screen or start and stop recording. Captures and recordings are saved on the local HDD as configured in Local • Setup menu. Alibi Camera Software User Manual... -
Page 18: Playback Screen
SECTION 3: REMOTE ACCESS For cameras with PTZ capability, control the Pan/Tilt/Zoom features of the camera. Clicking the e-PTZ icon opens the PTZ • control panel (see below). Each PTZ camera can be configured to include up to 128 “Presets”, each of which can be quickly set and called. Presets are used to quickly reposition the camera for specific views (pan, tilt, zoom, focus). - Page 19 In the play controls, click the Play button ( u )to begin playing video. When the video is playing, the Play button changes to • a Pause button ( ; ). Use the Audio play / mute controls to adjust the audio level (audio capable cameras only). • Alibi Camera Software User Manual...
- Page 20 SECTION 3: REMOTE ACCESS To save a portion of recorded video While playing back video, advance the playback to the beginning of the portion of the video you want to save. • Click the Start / Stop clipping icon (black scissors) . The icon will change to a Stop clipping icon (red scissors). •...
- Page 21 Click the Search button. A list of video images meeting the search criterion is shown in the window. • Check the box(es) for the image(s) you want to download, then click the Download button. The progress of the download(s) • is indicated in the column on the right. Alibi Camera Software User Manual...
-
Page 22: Remote Log Screen
SECTION 3: REMOTE ACCESS Open the image(s) you downloaded. The image(s) is saved to the location on your local HDD specified in the • Setup (tab) | Local Setup menu. See “3.5.1 Local Setup menu” on page 17 for more information. 3.4 Remote Log screen Open the Log screen by clicking Log in the screen header. -
Page 23: Local Setup Menu
• or 1GB. Save record files to: Set the saving path for the manually recorded video files. • Save downloaded files to: Set the saving path for the downloaded video files in playback mode. • Alibi Camera Software User Manual... -
Page 24: Camera Setup Menus
SECTION 3: REMOTE ACCESS Picture and Clip Settings: Set the saving paths on your PC of the captured pictures and clipped video files with the web browser. Save snapshots in live view to: Set the saving path of the manually captured pictures in Live View mode. •... -
Page 25: Camera Setup Menus
SECTION 4: CAMERA SETUP MENUS SECTION 4 Camera Setup Menus Camera Setup menus that appear when accessing Alibi cameras through a web browser present the complete set of configuration options. These options are organized in a tree of menus as shown below. Camera Setup... -
Page 26: System Menus
SECTION 4: CAMERA SETUP MENUS 4.1 System menus 4.1.1 Device Information The Device Information screen shows the basic information for the device, including the Device Name and Device No. (number), model, serial number, software versions, and other features. To open the Device Information screen, go to Setup tab | System | Device Information In the Device information screen, you can change the Device Name and number by editing the fields, then clicking Save. -
Page 27: Maintenance
After setting the time in the camera, open the DST tab to setup the Daylight Savings Time configuration for the camera. 4.1.3 Maintenance The Maintenance screen includes the camera-related maintenance functions. To open the Maintenance screen, go to Setup tab | System | Maintenance Alibi Camera Software User Manual... - Page 28 SECTION 4: CAMERA SETUP MENUS Reboot Click Reboot to restart the camera. When you reboot the camera, now configuration parameters are changed. Restore Click Restore to reset all configuration parameters, except the IP network settings and user information, to their factory default values.
- Page 29 5. Power off the camera. 6. Power on the camera again, then open the Device Information screen. Go to Setup tab | System | Device Information 7. Verify that the screen shows the new Firmware Version is installed. Alibi Camera Software User Manual...
-
Page 30: Dst (Daylight Savings Time)
SECTION 4: CAMERA SETUP MENUS 4.1.4 DST (Daylight Savings Time) Use the DST menu to configure the Daylight Savings Time mode for the camera. To setup the camera automatically adjust the clock for DST: 1. Open Time Settings interface: Go to Setup tab | System | DST 2. -
Page 31: Network Menus
• requesting a copy from the multicast group address. Before using this function, you must enable the Multicast function of your router. 3. Click Save. The camera must reboot for new settings to take effect. Alibi Camera Software User Manual... -
Page 32: Port
SECTION 4: CAMERA SETUP MENUS 4.2.2 Port You can change the HTTP, RTSP HTTPS and Server port numbers the camera will use. To change any of these settings: 1. Open Network Port settings interface: Go to Setup tab | Network | Port 2. - Page 33 Enter Server Address of DynDNS (e.g. members.dyndns.org). In the Domain text field, enter the domain name obtained from the DynDNS website. iii. Enter the User Name and Password registered on the DynDNS website. Click Save. Alibi Camera Software User Manual...
-
Page 34: Snmp
SECTION 4: CAMERA SETUP MENUS For NO-IP: — Enter Server Address field with the Server Address. In the Domain text field, enter the domain name obtained from the NO-IP website. iii. Enter the User Name and Password registered on the NO-IP website. Click Save. -
Page 35: 802.1X
RADIUS and EAP protocols. The authentication server must be configured to verify the credentials (user name and password) from the camera. 1. Open Network 802.1X settings interface: Go to Setup tab | Network | 802.1X Alibi Camera Software User Manual... -
Page 36: Qos
SECTION 4: CAMERA SETUP MENUS 1. Check the Enable IEEE 802.1X box to enable the feature. 2. Configure the 802.1X settings, including EAPOL version, user name and password. The EAPOL version must be identical with that of the router or the switch. 3. -
Page 37: Ftp
To upload the captured pictures to FTP server, you must enable continuous snapshot or event-triggered snapshot on Snapshot NOTE screen. To upload the captured pictures to FTP server, you must select Enable Timing Snapshot or Event -Triggered Snapshot on the Setup (tab) | Storage | Snapshot screen. Alibi Camera Software User Manual... -
Page 38: Upnp
SECTION 4: CAMERA SETUP MENUS 4.2.8 UPnP™ Universal Plug and Play (UPnP™) is a networking architecture that provides compatibility among networking equipment, software and other hardware devices. The UPnP protocol allows devices to connect seamlessly and to simplify the implementation of networks in the home and corporate environments. - Page 39 Choose Receiver: Select the receiver to which the email is sent. Up to 3 receivers can be configured. — Receiver: The name of the user to be notified. — Receiver’s Address: The email address of user to be notified. — Click Save. Alibi Camera Software User Manual...
-
Page 40: Nat
The NAT menu enables you to specify the external port and IP address for HTTP, RTSP and a server port. You can enable port mapping in either Auto or Manual modes. This feature is disabled in Alibi cameras for corporate network security concerns. -
Page 41: Roi
Dynamic Tracking (not Fixed Region): Dynamic tracking refers to the ROI defined by intelligent analysis such as human face • detection. You can choose the Image Quality Enhancing level for the ROI encoding. To open the ROI menu, go to Setup tab | Video/Audio | ROI Alibi Camera Software User Manual... - Page 42 SECTION 4: CAMERA SETUP MENUS To define the ROIs: 1. Click the Draw Area button. 2. Using your mouse, drag a rectangle over the region of interest on the image. 3. Click the Stop Drawing button. 4. Choose the stream type to set the ROI encoding (Main Stream or Sub Stream). 5.
-
Page 43: Image Menus
If using Scheduled Switch, set the Start Time and End Time of the switch, then open the Day/Night Switch — submenu to select the Smart IR feature ON or OFF. Also, click the Common, Day and Night tabs to set the Saturation, Hue, Brightness, Contrast and Sharpness for Day and for Night modes. Alibi Camera Software User Manual... - Page 44 SECTION 4: CAMERA SETUP MENUS Image Adjustment submenu: Open the Image adjustment submenu to set the Saturation, Hue, Brightness, Contrast and • Sharpness of the video image. Each parameter can be set to a level of 0 ~ 100 either by moving the slider or entering the value in the box on the right.
-
Page 45: Osd Settings
The Text Overlay feature enables you to add useful information, other than Camera Name and Date (see “4.4.2 OSD Settings” on page 39) to the image. To open the Text Overlay menu, go to Setup tab | Image | Text Overlay Alibi Camera Software User Manual... -
Page 46: Privacy Mask
SECTION 4: CAMERA SETUP MENUS 1. Check the box in front of the label number on the right side of the window, then enter the text field you want to display. In the image above, box 1 is checked, and the label is Ceiling Camera. 2. -
Page 47: Security Menus
To open the User menu, go to Setup tab | Security | User Change the admin password 1. To change the admin password, click the User Name admin, then click the Modify button. A Modify User window will open. Alibi Camera Software User Manual... - Page 48 SECTION 4: CAMERA SETUP MENUS 2. Enter the new admin password in the Password and Confirm fields. 3. Click OK to save the settings. Record the new password and save it in a secure location. To create a new user 1.
-
Page 49: Rtsp Authentication
To disable RTSP authentication, open the Authentication drop-down list, then select Disable. Click Save to retain this setting. 4.5.3 Anonymous Visit The Anonymous Visit feature can be enabled to allow anyone to enter the camera menus without entering a User Name and Password. Currently, this feature is not implemented in Alibi cameras. Alibi Camera Software User Manual... -
Page 50: Ip Address Filter
SECTION 4: CAMERA SETUP MENUS 4.5.4 IP Address Filter The IP Address Filter feature allows you to either restrict direct access to the camera from a browser to specific IP addresses (Allowed) or block specific access from specific IP addresses (Forbidden). To open the IP Address Filter menu, go to Setup tab | Security | IP Address Filter To use this menu: 1. -
Page 51: Events Menus
NAS (Network Attached Storage). Use this menu to perform motion detection recording when the video segments and other data is saved to an online storage device. To open the Motion Detection menu, go to Setup tab | Event | Motion Detection Alibi Camera Software User Manual... - Page 52 SECTION 4: CAMERA SETUP MENUS To use motion detection recording: 1. Check either or both boxes for Enable Motion Detection or Enable Dynamic Analysis for Motion. 2. The area of the image where motion is sensed is indicated by a red grid. For efficient utilization of the processor in the camera, select only the area of the image where motion should be sensed: a.
- Page 53 The clock in the camera must be set. See “4.1.2 Time Settings” on page 20 for more information. — The Record Schedule of the Storage device must be configured. See “4.7.1 Record Schedule” on page 51. — Alibi Camera Software User Manual...
-
Page 54: Video Tampering
SECTION 4: CAMERA SETUP MENUS 6. If you want to send an email when motion is detected, or upload a screen capture to an FTP server, check the appropriate box. Note that the Email configuration (see “4.2.9 Email” on page 32) and FTP server configuration (see “4.2.7 FTP” on page 31) must also be setup. - Page 55 The clock in the camera must be set. See “4.1.2 Time Settings” on page 20 for more information. — The Record Schedule of the Storage device must be configured. See “4.7.1 Record Schedule” on page 51. — Alibi Camera Software User Manual...
-
Page 56: Alarm Input
SECTION 4: CAMERA SETUP MENUS 8. If you want to send an email when motion is detected, check the Email box. Note that the Email configuration (see “4.2.9 Email” on page 32) must also be setup. 9. Click Save to retain your settings. 4.6.3 Alarm Input The Alarm Input feature is used to configure the camera to generate an alarm when a state change is detected on the camera alarm input terminals. - Page 57 In the example above, one period was setup for Monday, then copied to every other day of the week. 8. When finished setting up the schedule, click OK. The Arming schedule configured above is shown in the screen below. Alibi Camera Software User Manual...
-
Page 58: Alarm Output
SECTION 4: CAMERA SETUP MENUS For the Arming Schedule to be applied correctly: The clock in the camera must be set. See “4.1.2 Time Settings” on page 20 for more information. — The Record Schedule of the Storage device must be configured. See “4.7.1 Record Schedule” on page 56. —... - Page 59 4. For cameras with multiple alarm outputs, you can copy the configuration you setup for this alarm output to other alarm outputs by checking the appropriate boxes in the Copy to Alarm section. 5. In the Arming Schedule section of the window, click the Edit button. Alibi Camera Software User Manual...
- Page 60 SECTION 4: CAMERA SETUP MENUS 6. In the Edit Schedule Time window, you can arm the camera for eight periods of motion detection sensing for every day of the week. Click the Start and End Time for a day and period, then edit the field for then time. Note that periods cannot overlap. In the example above, one period was setup for Monday, then copied to every other day of the week.
-
Page 61: Exception
1. In the Exception menu, open the Exception Type drop-down list and select the condition you want to be informed of. 2. Check the Send Email box. 3. Click Save. 4. Repeat the steps above for other exception types you want to be informed of. Alibi Camera Software User Manual... -
Page 62: Storage Menus
SECTION 4: CAMERA SETUP MENUS 4.7 Storage menus 4.7.1 Record Schedule The Recording Schedule feature configures the camera to record video either continuously, when motion detection occurs, when an alarm occurs, or when motion detection and/or an alarm occurs. Also, the camera can be configured to the time before and/or the time after any recording event is scheduled. - Page 63 If you want to copy the schedule of the day you configured to other days, check the boxes for the days you want to copy the schedule to, then click Copy. d. Repeat steps a through c above, if needed. e. Click OK to save the schedule you established. Alibi Camera Software User Manual...
-
Page 64: Storage Management
SECTION 4: CAMERA SETUP MENUS In the schedule shown above, the Record Schedule was setup by clicking All Day, Motion Detection (from the drop-down list), Copy to Week checkbox, ,Copy button, OK button. 9. In the Record Schedule window, click Save. 4.7.2 Storage Management In the Storage Management menu, you can prepare external storage for use (Format), and set the percentages of Pictures (Captures) and Video recordings across the storage device. -
Page 65: Nas
Use the NAS menu to identify network storage devices the camera will use to save video and capture data. These devices can be a NFS (Network File Server) or a SMB/CIFS (Server Message Block / Common Internet File System) device. SMB/CIFS requires user authentication, whereas NFS does not. Alibi Camera Software User Manual... - Page 66 SECTION 4: CAMERA SETUP MENUS To open the NAS menu, go to Setup tab | Storage | NAS 1. To add a NAS device: a. Click an unused HDD No. in the list (see above). b. Enter the Server Address (IP address of the server), the File Path in the entry fields. c.
-
Page 67: Snapshot
Check the Enable Timing Snapshot box. b. Open the Quality drop-down list and select either Low, Medium or High. c. Select the Interval (time between snapshots). The Interval can be in milliseconds, seconds, minutes, or days. d. Click Save. Alibi Camera Software User Manual... - Page 68 SECTION 4: CAMERA SETUP MENUS 1. To enable an Event-Triggered snapshot (snapshots are when an event, such as Motion Detection occurs): a. Check the Enable Event-Triggered Snapshot box. b. Open the Quality drop-down list and select either Low, Medium or High. c.
Need help?
Do you have a question about the ALI-IPU3013 Series and is the answer not in the manual?
Questions and answers