Emerson Rosemount ET310 Quick Start Manual
Wireless permasense corrosion transmitter
Hide thumbs
Also See for Rosemount ET310:
- Quick start manual (16 pages) ,
- Quick start manual (36 pages)

Related Manuals for Emerson Rosemount ET310


Summary of Contents for Emerson Rosemount ET310
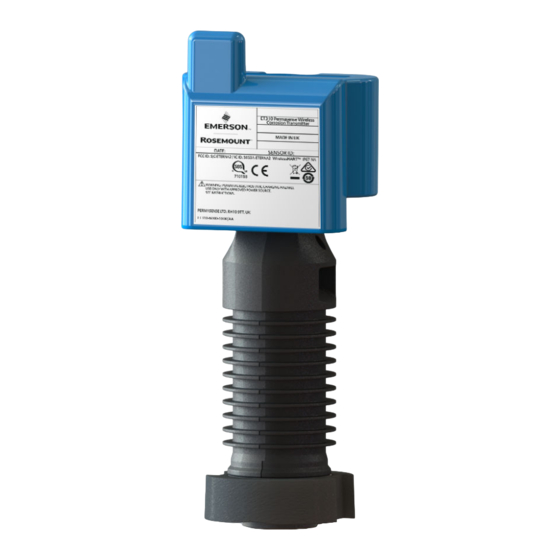
- Page 1 Quick Start Guide 00825-0100-4221, Rev AA January 2022 ™ Rosemount Wireless Permasense ET310 Corrosion Transmitter...
- Page 2 This could be intentional or unintentional and needs to be protected against. Physical security is an important part of any security program and fundamental to protecting your system. Restrict physical access by unauthorized personnel to protect end users’ assets. This is true for all systems used within the facility. Emerson.com/Rosemount...
-
Page 3: Table Of Contents
January 2022 Quick Start Guide Contents Product overview......................... 5 Preparing for installation......................8 Mounting the transmitter with a strap..................10 Mounting the transmitter with a magnetic fixture..............25 Maintenance..........................37 Product certification........................38 Adjusting the height of the magnetic unit.................. 43 Removal or repositioning of the magnetic fixture...............45 Quick Start Guide... - Page 4 Quick Start Guide January 2022 Emerson.com/Rosemount...
-
Page 5: Product Overview
January 2022 Quick Start Guide Product overview The ET310 transmitter is supplied with a choice of two mounting options. 1. When mounting transmitters on pipes up to 40 inches in diameter, use the 'T01' strap mounting hardware option. 2. When mounting transmitters on pipes or vessels over 80 inches in diameter, use the 'B01' magnetic fixture option. - Page 6 In order to install a sensor, you need the following equipment from an IK220 installation kit: • Tablet PC with installation application software • CC21 interface CAUTION The tablet PC is not intrinsically safe A site specific permit may be required for its use. Emerson.com/Rosemount...
- Page 7 Nominal Pipe Size NPS 4 to NPS 40. If the sensor is to be installed on a pipe with a smaller diameter, an alternative shoe should be ordered which is designed to fit pipes down to NPS 2. For further information, consult your Emerson representative. Quick Start Guide...
-
Page 8: Preparing For Installation
Preparing for installation Prerequisites The Emerson Wireless Gateway should be installed and functioning properly before commissioning the Rosemount ET310 and powering it with a BP20E power module. Note Wireless devices should be powered up in order of proximity from the Gateway, beginning with the closest device, then working outward from the Gateway. - Page 9 January 2022 Quick Start Guide Figure 2-1: ET310 Dimension Drawing 3. Clean the area where the sensor will touch the pipe to remove any particles that might keep the transducer away from the pipe surface or damage the face of the transducer. A permanent marker may be used to show exactly where each sensor is to be placed on the pipe.
-
Page 10: Mounting The Transmitter With A Strap
(at least 5 turns of the worm-screw are required). 3. Remove the protective cap from the sensor. Emerson.com/Rosemount... - Page 11 January 2022 Quick Start Guide CAUTION Once the protective cap is removed, the strong magnetic field at the end of the sensor can suddenly attract other objects, such as tools. This can cause injury as well as damage to the sensor. Only remove the protective cap when necessary and then take great care.
- Page 12 6. Feed the strap through the slot hole of the sensor and around the pipe. 7. If there is an excessive length of spare strap, the excess may be cut off. Lay the strap over the tensioner worm-drive and make the cut just after the screw head. Emerson.com/Rosemount...
- Page 13 January 2022 Quick Start Guide 8. Feed the free end of the strap into the other end of the strap tensioner. Using the flathead screwdriver or wrench and socket provided, turn the screw on the tensioner until the end of the strap emerges from under the worm drive (at least 5 turns of the work screw is required).
- Page 14 9. Position the strap tensioner so the strap (D) just touches the pipe (B) between the sensor (A) and the strap tensioner (C). Note For examples of correct and incorrect installation, information for pipes with different diameters and mounting multiple sensors on a single strap, refer to Strap installation considerations. Emerson.com/Rosemount...
- Page 15 January 2022 Quick Start Guide Strap installation considerations Positioning on different sized pipes The relative positions of the strap tensioner and sensor change depending on the pipe diameter. On pipes with less than a 4-inch diameter, position the sensor and tensioner on opposite sides of the pipe. The following figure displays correct placement for different sized pipes.
- Page 16 A. Correct positioning - strap is in contact with the pipe between the sensors and the tensioner B. Incorrect positioning - strap is not in contact with the pipe between the sensors and the tensioner Emerson.com/Rosemount...
- Page 17 January 2022 Quick Start Guide Use the following table below to determine the maximum number of sensors that can share the same strap for a given pipe size. Pipe size Pipe diameter NPS 2 to NPS 9 NPS 10 to NPS 22 NPS 24 to NPS 36 NPS 40 Maximum...
- Page 18 Click the Provision button. The system provides confirmation once provisioning is complete. e) Ensure the network ID of the gateway is visible in the Network Discovery panel. Note Joining the device to the network could take several minutes. Emerson.com/Rosemount...
- Page 19 January 2022 Quick Start Guide Figure 3-2: Install Tool Sensor installation Procedure 1. Click the Installation tab in the installation application software. 2. Click the Start button and wait for an ultrasonic waveform to download from the sensor. Note Waveforms are automatically downloaded every 10 seconds. When a new waveform arrives, the lines briefly become thicker.
- Page 20 Continuously check alignment while performing the following step. 6. Tighten both worm-screws with the flathead screwdriver or the wrench and socket provided, ensuring the tensioner does not slide relative to the pipe. As the worm-screws are tightened, observe the Emerson.com/Rosemount...
- Page 21 January 2022 Quick Start Guide position of the metal plate on top of the spring through the plus- shaped (+) cut -out on the side of the tensioner. The correct tension is set when the plate is aligned with wide part of the middle of the cut-out as shown in the images below.
- Page 22 Module for Wireless Corrosion Transmitter Quick Start Guide When the power module is fitted, the sensor automatically restarts ® and tries to join the WirelessHART Gateway. In a large network of 100 sensors this can often take two hours, and sometimes up to six hours. Emerson.com/Rosemount...
- Page 23 January 2022 Quick Start Guide Fitting the lanyard WARNING Use supplied lanyard to prevent sensor falling from heights, potentially causing injury Procedure 1. Wrap the lanyard around the circumference of the pipe, on top of any cladding. Note The 7 ft (2 m) lanyard is sufficient for a pipe diameter up to 20 inches. When it is not possible to wrap the lanyard around a pipe, find an alternative attachment point for the lanyard.
- Page 24 6. Feed the lanyard wire through the cable lock to minimize the slack in the wire Need help? The lanyard wire can be released from the cable lock using the release key. A. Release key 7. Sensor installation is complete. Emerson.com/Rosemount...
-
Page 25: Mounting The Transmitter With A Magnetic Fixture
January 2022 Quick Start Guide Mounting the transmitter with a magnetic fixture If using the magnetic fixture with the ET310 Wireless sensor, follow the topics in this section. Each magnetic fixture has four magnetic units attached to a frame by ball studs as displayed in Figure 4-1. - Page 26 2. Assemble the brackets to the sensor as displayed in Figure 4-3. Ensure the brackets are aligned and the fasteners are located and oriented exactly as displayed. Important Ensure bolt heads are oriented on the side of the bracket assembly displayed in the figure below. Emerson.com/Rosemount...
- Page 27 January 2022 Quick Start Guide Figure 4-3: Sensor with brackets assembled and the protective cap fitted A. Bolt heads 3. Hold the brackets in position, using a torque wrench and an allen key to tighten the fasteners to 14Nm. Commissioning the sensor for the magnetic fixture Commissioning allows the sensor to securely join a designated network and communicate with a gateway.
- Page 28 Click the Provision button. The system provides confirmation once provisioning is complete. e) Ensure the network ID of the gateway is visible in the Network Discovery panel. Note Joining the device to the network could take several minutes. Emerson.com/Rosemount...
- Page 29 January 2022 Quick Start Guide Figure 4-5: Install Tool 5. Cut the cable tie that secures the protective cap to the ET310 sensor and remove the cap from the sensor. 6. Place the sensor on the pipe or vessel in the desired location and then with someone holding it, proceed with the next section.
- Page 30 4 slot locations of the brackets as displayed in Figure 4-7 (the four red marks at the top and bottom of the sensor). Figure 4-7: Marking the position of the sensor Emerson.com/Rosemount...
- Page 31 January 2022 Quick Start Guide 6. Take the sensor off the vessel, put the protective cap back on the sensor and carefully set it aside while continuing with next set of tasks. Mounting the magnetic fixture and the sensor The magnetic fixture installs directly onto the ferromagnetic surface. A magnetic fixture can be installed on a painted surface with a paint thickness of no greater than 1mm.
- Page 32 5. Remove the protective cap from the sensor. 6. Carefully place the sensor with brackets inside the center of the frame (as shown below). One person must hold the sensor until the sensor securing bolts are fitted. A. ET310 with brackets B. Magnetic fixture Emerson.com/Rosemount...
- Page 33 January 2022 Quick Start Guide NOTICE The magnets used in the sensors have a high pull force. To avoid damage, and to get the precise location for each sensor, initially place the sensor at an angle to the vessel and then gently lower onto the surface, as displayed in the following figure.
- Page 34 Checking waveform quality. Completing the sensor installation Procedure 1. Click the Complete button. Need help? Verify the Install State is Off and Installed is selected in the footer of the application. Figure 4-8: Installation Tool Screen: Fully Provisioned Emerson.com/Rosemount...
- Page 35 January 2022 Quick Start Guide 2. Remove the CC21 and fit the power module, tightening the two power module retaining bolts. Refer to the Rosemount BP20E Power Module for Wireless Corrosion Transmitter Quick Start Guide When the power module is fitted, the sensor automatically restarts ®...
- Page 36 January 2022 Figure 4-9: Lanyard assembly 8. Fit the second lanyard be repeating steps Step 1 through Step Note The lanyard wire can be released from the lock by using the release key. 9. The sensor installation is now complete. Emerson.com/Rosemount...
-
Page 37: Maintenance
January 2022 Quick Start Guide Maintenance Service and maintenance The sensor is a sealed unit with no user-serviceable parts. Reference the Rosemount BP20E Power Module for Wireless Corrosion Transmitter Quick Start Guide if the power module requires changing. Quick Start Guide... -
Page 38: Product Certification
All wireless devices require certification to ensure that they adhere to regulations regarding the use of the RF spectrum. Nearly every country requires this type of product certification. Emerson is working with governmental agencies around the world to supply fully compliant products and remove the risk of violating country directives or laws governing wireless device usage. - Page 39 January 2022 Quick Start Guide Dangerous goods regulation The magnets in the sensor and magnetic fixture are shielded for transportation and meet the IATA Dangerous Goods Regulations for magnetic fields. The sensors are safe for air transportation. 6.7.1 I5 USA Intrinsic Safety (IS) Certificate: SGSNA/17/SUW/00281 Standards: UL 913 —...
- Page 40 Special Condition for Safe Use (X): See certificate for specific conditions of safe use. 6.12 EAC – Belarus, Kazakhstan, Russia 6.12.1 IM (EAC) Intrinsic Safety C-GB.МЮ62.В.05220 Certificate: Standards: ТР ТС 0 12/2011 Markings: 0Ex ia IIC T4..T2 Ga X Emerson.com/Rosemount...
- Page 41 January 2022 Quick Start Guide Special Condition for Safe Use (X): See certificate for specific conditions of safe use. 6.13 EU Declaration of Conformity Figure 6-1: Declaration of Conformity Quick Start Guide...
- Page 42 Quick Start Guide January 2022 6.14 China RoHS Emerson.com/Rosemount...
-
Page 43: Adjusting The Height Of The Magnetic Unit
January 2022 Quick Start Guide Adjusting the height of the magnetic unit You may need to adjust the height of the magnetic unit if the magnetic fixture is mounted on a non-spherical or uneven surface. Procedure 1. Loosen the top and bottom nut on the ball stud that holds the frame in position. - Page 44 Quick Start Guide January 2022 Emerson.com/Rosemount...
-
Page 45: Removal Or Repositioning Of The Magnetic Fixture
January 2022 Quick Start Guide Removal or repositioning of the magnetic fixture Prerequisites • Ensure you have 4 x protective caps for the magnetic fixture and the protective cap for the sensor. • One person needs to hold the sensor in position while another follows the procedure. - Page 46 Quick Start Guide January 2022 Figure B-2: Removing the magnet unit A. Magnet unit B. Flathead screwdriver 4. Turn the screw driver and lever the magnetic unit up and away from the vessel as displayed in Figure B-3. Emerson.com/Rosemount...
- Page 47 January 2022 Quick Start Guide Figure B-3: Levering the magnet unit using a flathead screwdriver 5. Slide a protective cap under the magnetic unit and remove the screwdriver as displayed in Figure B-4. CAUTION Be careful not to pinch your hands and fingers when refitting the protective cap.
- Page 48 Quick Start Guide January 2022 Figure B-4: Refitting the protective cap 6. Slide the magnetic unit all the way onto the protective cap as displayed in Figure B-5. Emerson.com/Rosemount...
- Page 49 January 2022 Quick Start Guide Figure B-5: Fitted protective caps 7. Repeat for all 4 magnetic units. 8. When the protective caps are fitted, the magnetic fixture can be either repositioned or removed. Quick Start Guide...
- Page 50 Quick Start Guide January 2022 Emerson.com/Rosemount...
- Page 51 January 2022 Quick Start Guide Quick Start Guide...
- Page 52 00825-0100-4221, Rev. AA January 2022 © 2022 Emerson. All rights reserved. Emerson Terms and Conditions of Sale are available upon request. The Emerson logo is a trademark and service mark of Emerson Electric Co. Rosemount is a mark of one of the Emerson family of companies.
Need help?
Do you have a question about the Rosemount ET310 and is the answer not in the manual?
Questions and answers