
Related Manuals for Kichler Lighting 300395


Summary of Contents for Kichler Lighting 300395
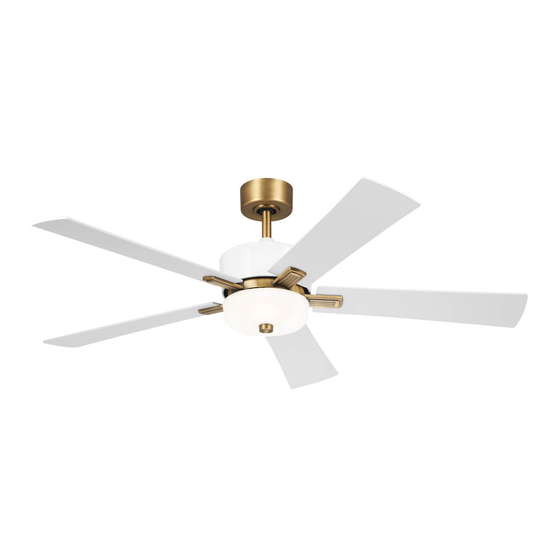
- Page 1 56” ICON CEILING FAN Product images may vary slightly from actual product. INSTRUCTION MANUAL Model #300395 READ AND SAVE THESE INSTRUCTIONS...
- Page 2 Net Weight: 8.63 kg (19.02 lb) Gross weight: 10.45 kg (23.04 lb) KICHLER.COM...
-
Page 3: Table Of Contents
TABLE OF CONTENTS SAFETY RULES INSTALLING THE LIGHT KIT FIXTURE TOOLS AND MATERIALS REQUIRED INSTALLING GLASS SHADE PACKAGE CONTENTS CONTROL SYSTEM SET-UP MOUNTING OPTIONS BUTTON INSTRUCTIONS HANGING THE FAN INSTALLING WALL PLATE INSTALLATION OF SAFETY SUPPORT INSTALLING THE TRANSMITTER (CANADA ONLY) OPERATING INSTRUCTIONS ELECTRICAL CONNECTIONS TROUBLESHOOTING... -
Page 4: Safety Rules
SAFETY RULES READ AND SAVE THESE INSTRUCTIONS WARNING: FOR CANADA, THIS FAN MUST BE SECURED 5. All wiring must be in accordance with the National DIRECTLY TO THE BUILDING STRUCTURE/CEILING Electrical Code ANSI/NFPA 70 and local electrical codes. JOIST. DON’T SECURE THIS FAN TO AN OUTLET BOX. Electrical installation should be performed by a qualified licensed electrician. - Page 5 SAFETY RULES (continued) 12. Do not use water or detergents when cleaning the fan 16. WARNING: Chemical Burn Hazard. Keep batteries or fan blades. A dry dust cloth or lightly dampened away from children.; and cloth will be suitable for most cleaning. This product contains a lithium button/coin cell 13.
-
Page 6: Package Contents
TOOLS REQUIRED PACKAGE CONTENTS • Philips screw driver Unpack your fan and check the contents. • Blade screw driver You should have the following items: • 11mm wrench a. Fan blades (5) • Step ladder b. Canopy • Wire cutters c. -
Page 7: Mounting Options
MOUNTING OPTIONS If there isn’t an existing UL (cUL for Canadian Installation) listed mounting box, then read the following instructions. Disconnect the power by removing fuses or turning off circuit breakers. Outlet box Secure the outlet box directly to the building structure. Use appropriate fasteners and building materials. -
Page 8: Hanging The Fan
HANGING THE FAN Ceiling mounting NOTE: FOR CANADA, THIS FAN MUST BE SECURED DIRECTLY bracket TO THE BUILDING STRUCTURE/CEILING JOIST. DON’T SECURE THIS FAN TO AN OUTLET BOX. (see Fig. 6A) Canopy REMEMBER to turn off the power before you begin. Fig. - Page 9 HANGING THE FAN (continued) Cross pin Hanger ball Step 5. Remove the hanger ball from the downrod assembly by loosening the set screw, unscrewing and removing the cross pin and unscrewing the ball off the rod. (Fig. 8) Downrod Step 6. Loosen the two set screws and remove the hitch pin and retaining clip from the coupling on top of the motor assembly.
- Page 10 HANGING THE FAN (continued) Cross pin Hanger ball Step 8. Slip the coupling cover, canopy cover and canopy onto the downrod. (Fig. 10) Supply wires & Safety cable Set screw Downrod Thread the hanger ball onto the downrod, insert the cross pin through the downrod and tighten.
-
Page 11: Installation Of Safety Support (Canada Only)
INSTALLATION OF SAFETY SUPPORT (Required for Canadian installation ONLY) A safety support cable is provided to help prevent the ceiling fan from falling, please install it as follows. Step 1. Attach the provided wood screw and washers to the ceiling joist next to the mounting bracket but do not tighten. -
Page 12: Electrical Connections
ELECTRICAL CONNECTIONS WARNING: Carefully read and retain this Instruction Manual for future reference. WARNING: To avoid possible electrical shock, be sure the electricity is turned off at the main panel by removing the fuse or opening the circuit breaker. WARNING: This control is designed for use with “DC Motor Ceiling Fans”... - Page 13 ELECTRICAL CONNECTIONS (continued) A. Fan wire connection (Fig. 14) Connect the orange wire from the fan to the orange wire on the receiver. Connect the brown wire from the fan to the brown wire on the receiver. Connect the grey wire from the fan to the grey wire on the receiver. Connect the blue wire from the fan to the blue wire on the receiver.
-
Page 14: Finishing The Installation
FINISHING THE INSTALLATION Step 1. Tuck all the connections neatly into the ceiling outlet box. Step 2. Slide the canopy up to the mounting bracket and place one of Outlet box the key hole slots over the mounting screw on the mounting bracket. Ceiling Rotate the canopy until the screw head locks in place at the narrow mounting... -
Page 15: Attaching The Fan Blade Arms
ATTACHING THE FAN BLADE ARMS Step 1. Fasten the blade arm to the fan motor assembly by tightening the blade arm screw onto the fan motor assembly. (Fig. 16) Step 2. Repeat this procedure for the remaining four blade arms. Blade arm Fan motor assembly Screw... -
Page 16: Installing The Light Kit Fixture
INSTALLING THE LIGHT KIT FIXTURE CAUTION: “To reduce the risk of electric shock, disconnect the electrical supply circuit to the fan before installing light kit.” Light kit pan Step 1. Remove the finial, and nut from the threaded nipple of the light kit fixture assembly. -
Page 17: Control System Set-Up
CONTROL SYSTEM SET-UP WARNING: Chemical Burn Hazard. Keep batteries away from children. WARNING: Make sure the power is completely disconnected before you begin this procedure. WARNING:Chemical Burn Hazard.Keep batteries away from children.See Manual SPECIAL NOTE: Your new Kichler® Ceiling Fan is state of the art and employs a high efficiency DC (direct current) motor with an advanced CoolTouch™... - Page 18 System programing: Read all of these steps before proceeding. Blue Light Each step must be followed exactly to properly program the control system. 1. You can leave the frequency switches at the factory setting or move them to any combination of up or down.
-
Page 19: Button Instructions
BUTTON INSTRUCTIONS Speed Buttons Figure 25 Buttons 1, 2, 3, 4, 5 and 6 are used to set the blade speed as follows: 1 = Low Speed 2 = Medium Low Speed 3 = Medium Speed 4 = Medium High Speed 5 = High Speed Fig. - Page 20 INSTALLING THE COOL TOUCH Outlet box CONTROL SYSTEM WALL PLATE Switch Wall plate Select a location to install the Wall Control System Transmitter and Wall Plate. WARNING: All wiring must be in accordance with the National Electrical Code and local electrical codes. Electrical installation should be performed by a qualified licensed electrician.
-
Page 21: Installing The Transmitter
INSTALLING THE TRANSMITTER 1. Insert the transmitter into the wall plate by inserting the bottom Release of the transmitter first and then press the top of the transmitter button into the pocket. The transmitter will fully function from this location or you can remove the transmitter and use as a “Hand Held”... -
Page 22: Operating Instructions
OPERATING INSTRUCTIONS Warm weather - Forward (counter clockwise). A downward airflow creates a cooling effect as shown in Fig. 31. This allows you to set your air conditioner on a warmer setting without affecting your comfort. Cool weather - Reverse (clockwise). An upward airflow moves warm air from the ceiling as shown in Fig. -
Page 23: Troubleshooting
TROUBLESHOOTING Problem Solution Fan will not start. Check circuit fuses or breakers. Check all electrical connections to ensure proper contact. CAUTION: Make sure the main power is OFF when checking any electrical connection. Fan sounds noisy. Make sure all motor housing screws are snug. Make sure the screws that attach the fan blade brackets to the motor are tight. -
Page 24: Fcc Information
FCC INFORMATION This device complies with part 15 of the FCC Rules. Operation is subject to the following two conditions: 1) This device may not cause harmful interference, and 2) This device must accept any interference received, including interference that may cause undesired operation. Note: This equipment has been tested and found to comply with the limits for a Class B digital device, pursuant to part 15 of the FCC Rules. - Page 25 www.kichler.com KICHLER LIGHTING LLC ® 7711 EAST PLEASANT VALLEY ROAD CLEVELAND, OHIO 44131 CUSTOMER SERVICE 866.558.5706 8:00 AM TO 5:00 PM EST, MONDAY - FRIDAY 56” ICON |...
- Page 26 VENTILATEUR DE PLAFOND ICON DE 1,42 M Les images du produit peuvent être légèrement différentes du produit réel. MODE D’EMPLOI Modèle nº 300395 VEUILLEZ LIRE ET CONSERVER CES INSTRUCTIONS...
- Page 27 Poids net : 8,63 kg (19,02 lb) Poids brut : 10,45 kg (23,04 lb) KICHLER.COM...
- Page 28 TABLE DES MATIÈRES RÈGLES DE SÉCURITÉ INSTALLATION DU LUMINAIRE OUTILS ET ÉQUIPEMENT REQUIS INSTALLATION DE L’ABAT-JOUR EN VERRE CONTENU DE L’EMBALLAGE CONFIGURATION DU SYSTÈME DE COMMANDE OPTIONS D’INSTALLATION INSTRUCTIONS DES BOUTONS SUSPENSION DU VENTILATEUR INSTALLATION DE LA PLAQUE MURALE INSTALLATION DU CÂBLE DE SUPPORT DE SÉCURITÉ INSTALLATION DE L’ÉMETTEUR (CANADA SEULEMENT) MODE D’EMPLOI...
-
Page 29: Règles De Sécurité
RÈGLES DE SÉCURITÉ VEUILLEZ LIRE ET CONSERVER CES INSTRUCTIONS AVERTISSEMENT : POUR LE CANADA, CE VENTILATEUR pour le support de luminaires ne sont pas acceptables DOIT ÊTRE FIXÉ SOLIDEMENT DIRECTEMENT SUR LA pour le support d’un ventilateur et pourraient devoir être STRUCTURE DU BÂTIMENT/SOLIVE DE PLAFOND. - Page 30 RÈGLES DE SÉCURITÉ (suite) 9. Ne placez pas d’objets dans la trajectoire des pales. 15. Toutes les vis de pression doivent être vérifiées et resserrées au besoin avant l’installation. 10. Pour éviter les blessures corporelles ou les dommages au ventilateur ou d’autres objets, faites preuve de prudence AVERTISSEMENT : POUR RÉDUIRE LES RISQUES DE en travaillant près du ventilateur ou en le nettoyant.
-
Page 31: Outils Et Équipement Requis
OUTILS REQUIS CONTENU DE L’EMBALLAGE • Tournevis cruciforme Déballez votre ventilateur et vérifiez le contenu de • Tournevis plat l’emballage. Les articles suivants devraient s’y trouver : • Clé de 11 mm a. Pales du ventilateur (5) • Escabeau b. Monture •... -
Page 32: Options D'installation
OPTIONS D’INSTALLATION Si une boîte de sortie de courant homologuée UL (cUL pour les installations au Canada) n’est pas déjà installée, veuillez lire les instructions suivantes. Coupez l’alimentation en retirant les fusibles ou en déclenchant les disjoncteurs. Boîte de sortie de courant Fixez la boîte de sortie de courant directement à... -
Page 33: Suspension Du Ventilateur
SUSPENSION DU VENTILATEUR Support de montage REMARQUE : POUR LE CANADA, CE VENTILATEUR DOIT ÊTRE au plafond FIXÉ SOLIDEMENT DIRECTEMENT SUR LA STRUCTURE DU BÂTIMENT/SOLIVE DE PLAFOND. NE FIXEZ PAS SOLIDEMENT CE VENTILATEUR SUR UNE BOÎTE DE SORTIE DE COURANT. Monture (voir la Fig. - Page 34 SUSPENSION DU VENTILATEUR (SUITE) Contre-goupille Boule de suspension Étape 5. Retirez la boule de suspension de la tige de suspension en desserrant la vis de pression, dévissant et retirant la contre-goupille et dévissant la boule pour la retirer de la tige. (Fig. 8) Tige de suspension Étape 6.
- Page 35 SUSPENSION DU VENTILATEUR (SUITE) Contre-goupille Boule de suspension Étape 8. Faites glisser le couvercle pour accouplement, le Fil d’alimentation électrique couvercle de monture et la monture sur la tige de suspension. et câble de sécurité (Fig. 10) Vis de pression Tige de suspension Vissez la boule de suspension sur la tige de suspension, insérez la Monture...
-
Page 36: Installation Du Câble De Support De Sécurité
INSTALLATION DU CÂBLE DE SUPPORT DE SÉCURITÉ (requis pour les installations au Canada UNIQUEMENT) Un câble de support de sécurité est fourni pour aider à empêcher le ventilateur de plafond de tomber; veuillez l’installer comme suit. Étape 1. Fixez la vis à bois et les rondelles fournies à la solive de plafond, à... -
Page 37: Connexions Électriques
CONNEXIONS ÉLECTRIQUES AVERTISSEMENT : Lisez ce mode d’emploi avec soin et conservez-le à titre de référence ultérieure. AVERTISSEMENT : Afin d’éviter un choc électrique éventuel, assurez-vous de couper l’alimentation électrique au panneau principal en retirant le fusible ou en déclenchant le disjoncteur. AVERTISSEMENT : Cette commande est prévue pour une utilisation avec les «... - Page 38 CONNEXIONS ÉLECTRIQUES (suite) A. Connexion des fils du ventilateur (Fig. 14) Connectez le fil orange du ventilateur au fil orange du récepteur. Connectez le fil marron du ventilateur au fil marron du récepteur. Connectez le fil gris du ventilateur au fil gris du récepteur. Connectez le fil bleu du ventilateur au fil bleu du récepteur.
-
Page 39: Terminer L'installation
TERMINER L’INSTALLATION Étape 1. Insérez toutes les connexions proprement dans la boîte de sortie de courant au plafond. Boîte de Étape 2. Faites glisser la monture vers le haut jusqu’au support de sortie de courant Support de montage et placez l’une des fentes en trou de serrure par-dessus la montage vis de montage du support de montage. -
Page 40: Installation Des Supports De Pales Du Ventilateur
INSTALLATION DES SUPPORTS DE PALES DU VENTILATEUR Étape 1. Fixez les pales sur le moteur du ventilateur en serrant la vis de support de pale sur le moteur du ventilateur. (Fig. 16) Étape 2. Répétez ces étapes pour les quatre supports de pale restants. Support de pale Moteur du ventilateur Fig. -
Page 41: Installation Du Luminaire
INSTALLATION DU LUMINAIRE ATTENTION : « Pour réduire les risques de choc électrique, débranchez le circuit d’alimentation électrique du ventilateur Bac de luminaire avant d’installer le luminaire. » Écrou Étape 1. Retirez le faîteau et l’écrou de la tige filetée du luminaire. Fig. -
Page 42: Configuration Du Système De Commande
CONFIGURATION DU SYSTÈME DE COMMANDE AVERTISSEMENT : Risque de brûlure chimique. Gardez les piles hors de la portée des enfants. AVERTISSEMENT : Assurez-vous que l’alimentation électrique est complètement coupée avant d’entamer ces étapes. WARNING:Chemical Burn Hazard.Keep batteries away from children.See Manual REMARQUE SPÉCIALE : Votre nouveau ventilateur de plafond Kichler®... - Page 43 Programmation du système : Lisez toutes ces étapes avant de continuer. Voyant bleu Il faut suivre chaque étape à la lettre, afin de programmer correctement le système de commande. 1. Vous pouvez laissez les commutateurs de fréquence au réglage en usine ou les déplacer de haut en bas pour n’importe quelle combinaison.
-
Page 44: Instructions Des Boutons
INSTRUCTIONS DES BOUTONS Boutons de vitesse Figure 25 Les boutons 1, 2, 3, 4, 5 et 6 sont utilisés pour régler la vitesses des pales comme suit : 1 = Vitesse faible 2 = Vitesse moyenne faible 3 = Vitesse moyenne 4 = Vitesse moyenne élevée 5 = Vitesse élevée Fig. -
Page 45: Installation De La Plaque Murale
INSTALLATION DE LA PLAQUE MURALE POUR Boîte de sortie de courant SYSTÈME DE COMMANDE COOLTOUCH ™ Interrupteur Plaque murale Choisissez un emplacement pour l’installation de l’émetteur et de la plaque murale du système de commande mural. AVERTISSEMENT : Tout le câblage doit être conforme aux codes électriques locaux et au Code électrique national. -
Page 46: Installation De L'émetteur
INSTALLATION DE L’ÉMETTEUR 1. Insérez l’émetteur dans la plaque murale en insérant le bas de l’émetteur en premier, puis enfoncez le haut de l’émetteur dans Bouton de la poche. L’émetteur fonctionnera entièrement à partir de cet dégagement emplacement, ou vous pouvez retirer l’émetteur et l’utiliser comme dispositif «... -
Page 47: Mode D'emploi
MODE D’EMPLOI Par temps chaud - Vers l’avant (sens antihoraire). Un débit d’air descendant crée une sensation rafraîchissante, tel qu’illustré sur la Fig. 31. Ce qui permet d’utiliser un réglage de climatisation plus élevé sans nuire au confort. Par temps frais - Vers l’arrière (sens horaire). Un débit d’air ascendant déplace l’air chaud du plafond, tel qu’illustré... -
Page 48: Dépannage
DÉPANNAGE Problème Solution Le ventilateur ne Vérifiez les fusibles ou disjoncteurs. démarre pas. Vérifiez toutes les connexions électriques pour assurer un contact adéquat. ATTENTION : Assurez-vous que l’alimentation électrique principale est COUPÉE lorsque vous vérifiez les connexions électriques. Le ventilateur est Assurez-vous que toutes les vis du boîtier du moteur sont bien serrées. -
Page 49: Informations De La Fcc
INFORMATIONS DE LA FCC Cet appareil est conforme aux dispositions prévues à l’article 15 du règlement de la FCC. Son fonctionnement est soumis aux deux conditions suivantes : 1) Ce dispositif ne doit pas causer d’interférence préjudiciable et 2) ce dispositif doit accepter tout brouillage reçu, y compris les brouillages pouvant causer un fonctionnement indésirable. - Page 50 www.kichler.com KICHLER LIGHTING LLC ® 7711 EAST PLEASANT VALLEY ROAD CLEVELAND, OHIO 44131 SERVICE À LA CLIENTÈLE 866 558-5706 ENTRE 8H00 ET 17H00, HNE, DU LUNDI AU VENDREDI ICON DE 1,42 M |...
- Page 51 VENTILADOR DE TECHO ICON DE 56” (1.4 m) Las imágenes del producto pueden diferir ligeramente del producto real. MANUAL DE INSTRUCCIONES Modelo # 300395 LEE Y GUARDA ESTAS INSTRUCCIONES...
- Page 52 Peso neto: 8.63 kg (19.02 lb) Peso bruto: 10.45 kg (23.04 lb) KICHLER.COM...
- Page 53 TABLA DE CONTENIDO NORMAS DE SEGURIDAD CÓMO INSTALAR EL KIT DE LUCES HERRAMIENTAS Y MATERIALES NECESARIOS CÓMO INSTALAR LA PANTALLA DE VIDRIO CONTENIDO DEL PAQUETE CONFIGURACIÓN DEL SISTEMA DE CONTROL OPCIONES DE MONTAJE INSTRUCCIONES DE BOTONES CÓMO COLGAR EL VENTILADOR CÓMO INSTALAR LA PLACA DE PARED CÓMO INSTALAR EL SOPORTE DE SEGURIDAD CÓMO INSTALAR EL TRANSMISOR...
-
Page 54: Normas De Seguridad
NORMAS DE SEGURIDAD LEE Y GUARDA ESTAS INSTRUCCIONES ADVERTENCIA: PARA CANADÁ, ESTE VENTILADOR ventilador, se recomienda enfáticamente que sea DEBE FIJARSE DIRECTAMENTE A LA ESTRUCTURA realizada por un electricista calificado con licencia.” DEL EDIFICIO/VIGA DEL TECHO. NO ASEGURES ESTE 5. Todo el cableado tiene que cumplir con el Código VENTILADOR A UNA CAJA ELÉCTRICA. - Page 55 NORMAS DE SEGURIDAD (continuación) 11. ADVERTENCIA: Asegúrate de que la alimentación ADVERTENCIA: PARA REDUCIR EL RIESGO DE esté desconectada antes de limpiar el ventilador. LESIONES PERSONALES, NO DOBLES LOS SOPORTES DE LAS ASPAS (TAMBIÉN LLAMADOS BRAZOS DE 12. No usar agua ni detergentes para limpiar el ventilador ASPAS) DURANTE NI DESPUÉS DE LA INSTALACIÓN.
-
Page 56: Contenido Del Paquete
HERRAMIENTAS NECESARIAS CONTENIDO DEL PAQUETE • Destornillador Phillips Desempaca tu ventilador y revisa el contenido. • Destornillador para aspas Debes tener los siguientes artículos: • Llave de 11 mm a. Aspas del ventilador (5) • Escalera de tijera b. Cubierta •... -
Page 57: Opciones De Montaje
OPCIONES DE MONTAJE De no existir una caja de montaje aprobada por UL (cUL, para instalación en Canadá), lee bien las siguientes instrucciones. Desconecta la energía retirando los fusibles o apagando los cortacircuitos. Caja eléctrica Asegura la caja eléctrica directamente a la estructura del edificio. Usa sujetadores y materiales de construcción apropiados. -
Page 58: Cómo Colgar El Ventilador
CÓMO COLGAR EL VENTILADOR Soporte de montaje NOTA: PARA CANADÁ, ESTE VENTILADOR DEBE FIJARSE en techo DIRECTAMENTE A LA ESTRUCTURA DEL EDIFICIO/VIGA DEL TECHO. NO ASEGURES ESTE VENTILADOR A UNA CAJA Cubierta ELÉCTRICA. (Ver Fig. 6A) Fig. 5 RECUERDA desconectar la corriente antes de comenzar. Tapa de la cubierta Para instalar adecuadamente tu ventilador de techo, sigue los pasos a continuación. - Page 59 CÓMO COLGAR EL VENTILADOR (continuación) Pasador transversal Paso 5. Retira la esfera de suspensión del conjunto del tubo Esfera bajante el tornillo de fijación, desenroscando y quitando el pasador de soporte transversal y desatornillando la esfera del bajante. (Fig. 8) Tubo bajante Paso 6.
- Page 60 CÓMO COLGAR EL VENTILADOR (continuación) Pasador transversal Esfera de soporte Paso 8. Desliza la cubierta del acoplamiento, la tapa de la able de alimentación y cubierta y la cubierta misma por el tubo bajante. (Fig. 10) cable de seguridad Tornillos de ajuste Enrosca la esfera de suspensión en el tubo bajante, inserta el Tubo bajante pasador transversal a través del tubo bajante y aprieta.
-
Page 61: Cómo Instalar El Soporte De Seguridad
CÓMO INSTALAR EL SOPORTE DE SEGURIDAD (Se requiere para la instalación en Canadá ÚNICAMENTE) Se incluye un cable de soporte de seguridad para prevenir que el ventilador de techo se caiga, instálalo de la siguiente manera. Paso 1. Sujeta el tornillo para madera y las arandelas suministrados a las vigas del techo junto al soporte de montaje pero no lo aprietes. -
Page 62: Conexiones Eléctricas
CONEXIONES ELÉCTRICAS ADVERTENCIA: Lee atentamente y conserva este manual de instrucciones para futuras consultas. ADVERTENCIA: Para evitar posibles descargas eléctricas, asegúrate de que la electricidad esté apagada en el panel principal quitando el fusible o abriendo el cortacircuitos. ADVERTENCIA: Este control está diseñado para usarse SOLAMENTE con “Ventiladores de techo con motor de CC”. - Page 63 CONEXIONES ELÉCTRICAS (continuación) A. Conexión del cable del ventilador (Fig. 14) Conecta el cable naranja del ventilador al cable naranja del receptor. Conecta el cable marrón del ventilador al cable marrón del receptor. Conecta el cable gris del ventilador al cable gris del receptor. Conecta el cable azul del ventilador al cable azul del receptor.
-
Page 64: Cómo Concluir La Instalación
CÓMO CONCLUIR LA INSTALACIÓN Paso 1. Coloca todas las conexiones apropiadamente en la caja eléctrica del techo. Caja Paso 2. Desliza la cubierta hacia arriba hasta el soporte de montaje eléctrica Soporte de y coloca una de las ranuras con forma de ojo de cerradura sobre el montaje tornillo de montaje en el soporte de montaje. -
Page 65: Cómo Montar Los Brazos De Las Aspas Del Ventilador
CÓMO MONTAR LOS BRAZOS DE LAS ASPAS DEL VENTILADOR Paso 1. Fija el brazo del aspa al conjunto del motor del ventilador apretando el tornillo del brazo del aspa en el conjunto del motor del ventilador. (Fig. 16) Brazo del aspa Paso 2. -
Page 66: Cómo Instalar El Kit De Luces
CÓMO INSTALAR EL KIT DE LUCES PRECAUCIÓN: “Para disminuir el riesgo de descarga eléctrica, desconecta el circuito de energía del ventilador antes de instalar Carcasa del kit de luces el kit de luces.” Tuerca Paso 1. Retira el remate y la tuerca de la boquilla roscada del Fig. -
Page 67: Configuración Del Sistema De Control
CONFIGURACIÓN DEL SISTEMA DE CONTROL ADVERTENCIA: Peligro de quemaduras químicas. Mantener las baterías alejadas de los niños. ADVERTENCIA: Asegúrate de que la electricidad esté completamente desconectada antes de comenzar este procedimiento. WARNING:Chemical Burn Hazard.Keep batteries away from children.See Manual NOTA ESPECIAL: Tu nuevo ventilador de techo Kichler® es de última generación y emplea un motor de CC (corriente continua) de alta eficiencia con un avanzado sistema de control remoto CoolTouch™. - Page 68 Programación del sistema: Lee todos estos pasos antes de continuar. Luz azul Cada paso debe seguirse exactamente para programar correctamente el sistema de control. 1. Puedes dejar los interruptores de frecuencia en la configuración de fábrica o moverlos a cualquier combinación de arriba o abajo.
-
Page 69: Instrucciones De Botones
INSTRUCCIONES DE BOTONES Botones de controles de Figura 25 velocidad Los botones 1, 2, 3, 4, 5 y 6 se utilizan para configurar la velocidad de las aspas de la siguiente manera: 1 = Velocidad baja 2 = Velocidad media baja 3 = Velocidad media 4 = Velocidad media alta 5 = Velocidad alta... -
Page 70: Cómo Instalar La Placa De Pared
CÓMO INSTALAR LA PLACA DE PARED DEL Caja eléctrica SISTEMA DE CONTROL COOL TOUCH Interruptor Placa de pared Selecciona una ubicación para instalar el transmisor del sistema de control de pared y la placa de pared. ADVERTENCIA: Todo el cableado tiene que hacerse de acuerdo con el Código Nacional de Electricidad y los códigos locales correspondientes. -
Page 71: Cómo Instalar El Transmisor
CÓMO INSTALAR EL TRANSMISOR 1. Inserta el transmisor en la placa de pared insertando primero la parte inferior del transmisor y luego presiona la parte Botón de superior del transmisor en el bolsillo. El transmisor funcionará liberación completamente desde esta ubicación o puede quitar el transmisor y usarlo como un dispositivo "de mano". -
Page 72: Instrucciones De Uso
INSTRUCCIONES DE USO Clima cálido - Hacia adelante (hacia la izquierda). Un flujo de aire hacia abajo crea un efecto de enfriamiento como se muestra en la Fig. 31. Esto te permite configurar tu equipo de aire acondicionado a una temperatura más alta sin afectar tu comodidad. -
Page 73: Solución De Problemas
SOLUCIÓN DE PROBLEMAS Problema Solución El ventilador Verifica los fusibles o cortacircuitos principales y secundarios. no enciende. Revisa todas las conexiones eléctricas para garantizar un contacto adecuado. PRECAUCIÓN: Al verificar cualquier conexión eléctrica, asegúrate de que esté desactivada la electricidad principal. El ventilador Asegúrate de que los tornillos de la carcasa del motor estén bien ajustados. -
Page 74: Información De La Fcc
INFORMACIÓN DE LA FCC Este dispositivo cumple con la parte 15 de las Normas FCC. Su operación está sujeta a las dos condiciones siguientes: 1) este dispositivo no causa una interferencia dañina, y 2) este dispositivo tiene que aceptar cualquier interferencia recibida, incluso aquella que pueda causar funcionamiento no deseado. - Page 75 www.kichler.com KICHLER LIGHTING LLC ® 7711 EAST PLEASANT VALLEY ROAD CLEVELAND, OHIO 44131 SERVICIO AL CLIENTE: 866.558.5706 DE LUNES A VIERNES, DE 8:00 AM A 5:00 PM (HORA DEL ESTE) ICON DE 56” (1.4 m) |...
Need help?
Do you have a question about the 300395 and is the answer not in the manual?
Questions and answers