
Related Manuals for Kichler Lighting Crescent 300325


Summary of Contents for Kichler Lighting Crescent 300325
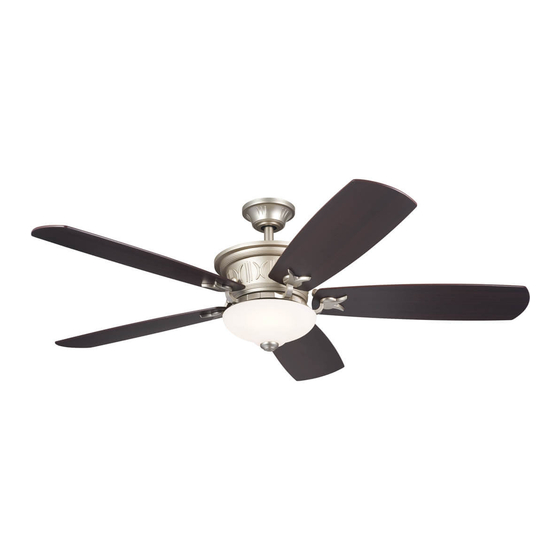
- Page 1 56" Crescent Product images may vary slightly from actual product. INSTRUCTION MANUAL Model# 300325 READ AND SAVE THESE INSTRUCTIONS...
-
Page 2: Table Of Contents
TABLE OF CONTENTS SAFETY RULES ..............3 INSTALLING THE LIGHT PLATE ......………....14 TOOLS REQUIRED ............5 INSTALLING THE LIGHT KIT AND GLASS SHADE ....15 PACKAGE CONTENTS ..........5 INSTALLING THE “COOLTOUCH” CONTROL SYSTEM WALL PLATE .................16 MOUNTING OPTIONS ..........6 INSTALLING AND REMOVING THE HANDHELD HANGING THE MOTOR ASSEMBLY ......7 TRANSMITTER ..........…......17 INSTALLATION OF SAFETY SUPPORT ....10... -
Page 3: Safety Rules
SAFETY RULES READ AND SAVE THESE INSTRUCTIONS WARNING: FOR CANADA, THIS FAN MUST BE SECURED DIRECTLY TO THE BUILDING STRUCTURE / CEILING JOIST. DON’T SECURE THIS FAN TO AN OUTLET BOX. CAUTION – RISK OF SHOCK – WARNING: Chemical Burn Hazard. Keep batteries Disconnect Power at the main circuit breaker panel away from children.;... - Page 4 SAFETY RULES The outlet box and support structure must be 15. After making the electrical connections, spliced securely mounted and capable of reliably supporting conductors should be turned upward and pushed a minimum of 15.9 kg (35 pounds). Use only cULus carefully up into outlet box.
-
Page 5: Package Contents
TOOLS AND MATERIALS REQUIRED • Phillips Screwdriver • Blade Screwdriver • 11 mm Wrench • Step Ladder • Wire Cutters PACKAGE CONTENTS Unpack your fan and check the contents . You should have the following items: A. Mounting Bracket N. Wall control Kit: B. -
Page 6: Mounting Options
MOUNTING OPTIONS If there is not an existing UL (cUL for Canadian Installation) listed mounting box, then read the following instructions. Disconnect the power by removing fuses or turning off circuit breakers. Outlet box Secure the outlet box directly to the building structure. Use appropriate fasteners and building materials. -
Page 7: Hanging The Motor Assembly
HANGING THE MOTOR ASSEMBLY REMEMBER to turn off the power before you begin installation. This is necessary for Outlet Box your safety and also the proper programming of the control system. Ceiling Mounting Bracket To properly install your ceiling fan, follow the steps below. Flat Washer Screw Step 1. - Page 8 HANGING THE MOTOR ASSEMBLY (continued) Clevis Pin Hairpin Step 4. Carefully feed fan wires and safety cable up through the downrod. Downrod Thread the downrod onto the motor coupling until the clevis pin holes are aligned. Next, replace the clevis pin and hairpin, then tighten both set screws.
- Page 9 HANGING THE MOTOR ASSEMBLY (continued) Step 6. Now lift the motor assembly into position and place the hanger ball into the mounting bracket. Rotate until the check tab has dropped into the registration slot and seats firmly. ( Fig. 10) The entire motor body should not rotate if this is done correctly.
-
Page 10: Installation Of Safety Support
INSTALLATION OF SAFETY SUPPORT (required for Canadian installation ONLY) Flat Washer A safety support cable is provided to help prevent the ceiling fan from faIling, please Wood Screw Support Brace install it as follows. Spring Washer Ceiling Outlet Box Step 1. Drive a wood screw and washers into the side of the brace that holds the outlet box. -
Page 11: Electrical Connections
ELECTRICAL CONNECTIONS Mounting Bracket Receiver WARNING: To avoid possible electrical shock, be sure you have turned off the power at the main circuit panel before wiring. Follow the steps below to connect the fan to your household wiring. Use the wire connectors supplied with your fan. -
Page 12: Completing The Motor Installation
ELECTRICAL CONNECTIONS Mounting Step 4. If your outlet box has a ground wire (green or bare copper) connect Bracket it to the fan ground wires. Otherwise, connect the fan ground wire to the Shoulder mounting bracket. Secure the wire connection with a plastic nut provided. Screw Canopy After connecting the wires, spread them apart so that the green and white... -
Page 13: Attaching The Fan Blades
ATTACHING THE FAN BLADES Blade Screw CAUTION: To Reduce The Risk Of Electric Shock, Disconnect The Electrical Blade Cover Supply Circuit To The Fan Before Installing Fan Blades. Step 1. Position the blade over the blade bracket with the threaded post showing. -
Page 14: Installing The Light Kit And Glass Shade
INSTALLING THE LIGHT PLATE Mounting Plate Step 2. Place the two slot holes on the light plate over the 2 screws previously loosened from the mounting plate. Rotate the light plate until it locks in place at the narrow end of the key holes. Secure by tightening the 2 screws previously loosened and the one previously removed. - Page 15 INSTALLING THE LIGHT KIT AND GLASS SHADE Step 2. Remove and retain the manual nut, metal washer and silicone washer from the threaded rod on the light kit. (Fig. 23) Step 3. Lift the glass shade up to the light kit, allowing the threaded rod to go through the center hole in the bottom of the glass shade.
-
Page 16: Installing The "Cooltouch" Control System Wall Plate
INSTALLING THE COOLTOUCH CONTROL SYSTEM WALL PLATE ™ CAUTION: MAKE SURE THE ELECTRICITY IS TURNED OFF AT THE MAIN JUNCTION Outlet Box BOX OR THE CORRECT FUSE HAS BEEN PULLED OFF AT THE MAIN JUNCTION BOX Switch BEFORE CONTINUING. Wall Plate WARNING: All wiring must be in accordance with the National Electrical Code local electrical codes. -
Page 17: Installing And Removing The Handheld Transmitter
INSTALLING AND REMOVING THE HANDHELD TRANSMITTER Step 1. To place the transmitter in the wall plate, put the bottom end in first and then press the top into the wall plate. The transmitter is now held in the wall plate and will function from here. - Page 18 OPERATING INSTRUCTIONS NOTE: Each handset control carries a unique ID code to facilitate communication between paired devices. The ID code is set by factory and is not user changeable. However, you will be required to perform an ID code learning process manually under these circumstances: •...
-
Page 19: Reverse Function
REVERSE FUNCTION To operate the reverse function on this fan, press the “Reverse” button while fan is running. Speed setting for warm or cool weather depends on factors such as the room size, ceiling height, number of fans and so on. Warm Weather Operation: Warm Weather Operation: Forward (counter clockwise).A downward... -
Page 20: Troubleshooting
TROUBLESHOOTING Problem Problem Solution Solution Fan will not start. Fan will not start. 1. Check circuit fuses or breakers. 1. Check circuit fuses or breakers. 2. Check all electrical connections to ensure proper contact. 2. Check all electrical connections to ensure proper contact. CAUTION: Make sure the main power is OFF when checking CAUTION: Make sure the main power is OFF when checking any electrical connection. - Page 22 KICHLER LIGHTING LLC 7711 EAST PLEASANT VALLEY ROAD CLEVELAND, OHIO 44131 CUSTOMER SERVICE 866.558.5706 8:00 AM TO 5:00 PM EST, MONDAY - FRIDAY REV. 04-MAR-2022 © Kichler Lighting LLC. All Rights Reserved.
- Page 23 Crescent 142,24 cm (56 po) Les images du produit peuvent varier légèrement par rapport au produit réel. MANUEL D'INSTRUCTIONS Modèle n° 300325 LISEZ ET CONSERVEZ CES INSTRUCTIONS...
- Page 24 TABLE DES MATIÈRES LES RÈGLES DE SÉCURITÉ ........3 INSTALLATION DE LA PLAQUE D’ÉCLAIRAGE ....14 OUTILS NÉCESSAIRES ..........5 INSTALLATION DU KIT D'ÉCLAIRAGE ET DU VERRE ..15 CONTENU DU COLIS ...........5 INSTALLATION DE LA PLAQUE MURALE DU SYSTÈME DE COMMANDE « COOLTOUCH » .......16 OPTIONS DE MONTAGE ..........6 INSTALLATION ET DÉMONTAGE DE L'ÉMETTEUR SUSPENDRE L'ENSEMBLE MOTEUR .....7...
- Page 25 RÈGLES DE SÉCURITÉ LISEZ ET CONSERVEZ CES INSTRUCTIONS AVERTISSEMENT : POUR LE CANADA, CE VENTILATEUR DOIT ÊTRE FIXÉ DIRECTEMENT À LA STRUCTURE DU BÂTIMENT OU À LA SOLIVE DE PLAFOND. NE PAS FIXER CE VENTILATEUR À UNE BOÎTE DE SORTIE. ATTENTION : RISQUE DE CHOC : AVERTISSEMENT : Risque de brûlure chimique.
- Page 26 RÈGLES DE SÉCURITÉ La boîte de sortie et la structure de support doivent 15. Après avoir effectué les raccordements électriques, les être solidement montées et capables de supporter de conducteurs raccordés doivent être tournés vers le haut manière fiable un minimum de 15,9 kg (35 lb). Utilisez et poussés avec précaution dans le boîtier de sortie.
-
Page 27: Contenu Du Colis
OUTILS ET MATÉRIAUX NÉCESSAIRES • Tournevis cruciforme • Tournevis à lame • Clé de 11 mm • Escabeau • Pinces coupantes CONTENU DU COLIS Déballez votre ventilateur et vérifiez le contenu. Vous devriez avoir les éléments suivants : A. Support de montage N. -
Page 28: Options De Montage
OPTIONS DE MONTAGE S'il n'y a pas de boîtier de montage homologué UL (cUL pour installation canadienne), lisez les instructions suivantes. Débranchez l'alimentation en retirant les fusibles ou en désactivant les disjoncteurs. Boîtier de sortie Fixez le boîtier de sortie directement à la structure du bâtiment. Utilisez des fixations et des matériaux de construction Fig. -
Page 29: Suspendre L'ensemble Moteur
SUSPENDRE L'ENSEMBLE MOTEUR RAPPELEZ-VOUS de couper l'alimentation avant de commencer l'installation. Boîtier de sortie Ceci est nécessaire pour votre sécurité et également pour la bonne programmation du système de commande. Support de montage au plafond Rondelle plate Pour installer correctement votre ventilateur de plafond, suivez les étapes ci-dessous. Étape 1. - Page 30 SUSPENDRE L'ENSEMBLE MOTEUR (suite) Axe de chape Épingle Étape 4. Faites passer avec précaution les fils du ventilateur et le câble Tige descendante de sécurité à travers la tige descendante. Vissez la tige descendante sur l'accouplement du moteur jusqu'à ce que les trous des broches de la chape soient alignés.
- Page 31 SUSPENDRE L'ENSEMBLE MOTEUR (suite) Étape 6. Soulevez maintenant l’assemblage du moteur et placez la boule de suspension dans le support de montage. Tournez jusqu'à ce que la languette de contrôle soit tombée dans la fente d'enregistrement et soit fermement en place.
-
Page 32: Installation Du Support De Sécurité
INSTALLATION DU SUPPORT DE SÉCURITÉ (requis pour l'installation canadienne UNIQUEMENT) Rondelle plate Vis à bois Renfort de soutien Rondelle à ressort Un câble de support de sécurité est fourni pour aider à empêcher le ventilateur de Plafond Boîtier de sortie plafond de tomber, veuillez l'installer comme suit. - Page 33 RACCORDEMENTS ÉLECTRIQUES Support de montage Récepteur AVERTISSEMENT : Pour éviter tout risque d'électrocution, assurez-vous d'avoir coupé l'alimentation au panneau de circuit principal avant de procéder au câblage. Suivez les étapes ci-dessous pour raccorder le ventilateur à votre câblage domestique. Utilisez les connecteurs de fils fournis avec votre ventilateur. Fixez les connecteurs avec du ruban isolant.
-
Page 34: Terminer L'installation Du Moteur
RACCORDEMENTS ÉLECTRIQUES Support de Étape 4. Si votre boîtier de sortie a un fil de terre (cuivre vert ou nu), montage raccordez-le aux fils de terre du ventilateur. Sinon, connectez le fil de terre du Vis à ventilateur au support de montage. Fixez le raccord du fil avec un écrou en épaulement Monture plastique fourni. -
Page 35: Fixation Des Pales Du Ventilateur
FIXATION DES PALES DU VENTILATEUR Vis de pale ATTENTION : Pour réduire le risque de choc électrique, débranchez le Couvre pale circuit d'alimentation électrique du ventilateur avant d'installer les pales du ventilateur. Étape 1. Positionnez la pale sur le support de pale avec la tige filetée visible. Assurez-vous que le bord inférieur de la pale repose entièrement contre le Pale support de pale. -
Page 36: Installation Du Kit D'éclairage Et Du Verre
INSTALLATION DE LA PLAQUE D'ÉCLAIRAGE Plaque de montage Étape 2. Placez les deux trous de fente sur la plaque d’éclairage sur les 2 vis précédemment desserrées depuis la plaque de montage. Faites pivoter la plaque d’éclairage jusqu'à ce qu'elle se verrouille en place à l'extrémité étroite Plaque des trous de clé. - Page 37 INSTALLATION DU KIT D'ÉCLAIRAGE ET DU VERRE Étape 2. Retirez et conservez l'écrou manuel, la rondelle métallique et la rondelle en silicone de la tige filetée du kit d'éclairage. (Fig. 23) Étape 3. Soulevez l'abat-jour en verre jusqu'au kit d'éclairage, permettant à...
-
Page 38: Installation De La Plaque Murale Du Système De Commande Cooltouch
INSTALLATION DE LA PLAQUE MURALE DU SYSTÈME DE COMMANDE COOLTOUCH ™ ATTENTION : ASSUREZ-VOUS QUE L’ÉLECTRICITÉ EST COUPÉE AU NIVEAU DE LA Boîtier de sortie BOÎTE DE RACCORDEMENT PRINCIPALE OU QUE LE FUSIBLE CORRECT A ÉTÉ RETIRÉ Changer AU NIVEAU DE LA BOÎTE DE RACCORDEMENT PRINCIPALE AVANT DE CONTINUER. Plaque murale AVERTISSEMENT : Tout le câblage doit être conforme au National Electrical Code et aux codes électriques locaux. -
Page 39: Portatif
INSTALLATION ET RETRAIT DE L'ÉMETTEUR PORTATIF Étape 1. Pour placer l'émetteur dans la plaque murale, insérez d'abord l'extrémité inférieure, puis appuyez sur le haut dans la plaque murale. L'émetteur est maintenant maintenu dans la plaque murale et fonctionnera à partir d'ici. (Fig.26) Étape 2. - Page 40 INSTRUCTIONS D'UTILISATION REMARQUE : Chaque télécommande porte un code d'identification unique pour faciliter la communication entre les appareils couplés. Le code d'identification est défini en usine et n'est pas modifiable par l'utilisateur. Cependant, vous devrez effectuer manuellement un processus d'apprentissage du code d'identification dans ces circonstances : •...
-
Page 41: Fonction Inverse
FONCTION INVERSE Pour activer la fonction d'inversion sur ce ventilateur, appuyez sur le bouton « Inversion » pendant que le ventilateur fonctionne. Le réglage de la vitesse par temps chaud ou frais dépend de facteurs tels que la taille de la pièce, la hauteur du plafond, le nombre de ventilateurs, etc. -
Page 42: Dépannage
DÉPANNAGE Problème Problème Solution Solution Le ventilateur ne Le ventilateur ne 1. Vérifiez les fusibles ou les disjoncteurs. 1. Vérifiez les fusibles ou les disjoncteurs. démarre pas. démarre pas. 2. Vérifiez tous les raccordements électriques pour assurer un bon contact. 2. - Page 43 KICHLER LIGHTING LLC 7711 EAST PLEASANT VALLEY ROAD CLEVELAND, OHIO 44131 SERVICE À LA CLIENTÈLE 866.558.5706 8 h à 17 h EST, DU LUNDI AU VENDREDI RÉV. 04-MAR-2022 © Kichler Lighting LLC. Tous droits réservés.
- Page 44 56” Crescent Las imágenes del producto pueden diferir ligeramente del producto real. MANUAL DE INSTRUCCIONES Número de modelo 300325 LEER Y GUARDAR ESTAS INSTRUCCIONES...
- Page 45 ÍNDICE REGLAS DE SEGURIDAD..........3 INSTALACIÓN DE LA PLACA DE LUZ........14 HERRAMIENTAS NECESARIAS........5 INSTALACIÓN DEL KIT DE LUZ Y PANTALLA DE VIDRIO ...15 CONTENIDO DEL PAQUETE........5 INSTALACIÓN DE LA PLACA DE PARED DEL SISTEMA DE CONTROL “COOLTOUCH”........16 OPCIONES DE MONTAJE..........6 INSTALACIÓN Y EXTRACCIÓN DEL TRANSMISOR CÓMO COLGAR EL CONJUNTO DEL MOTOR ..7 DE MANO ............…......17 INSTALACIÓN DE SOPORTE DE SEGURIDAD ..10...
-
Page 46: Reglas De Seguridad
NORMAS DE SEGURIDAD LEER Y GUARDAR ESTAS INSTRUCCIONES ADVERTENCIA: PARA CANADÁ, ESTE VENTILADOR DEBE FIJARSE DIRECTAMENTE A LA ESTRUCTURA DEL EDIFICIO/VIGA DEL TECHO. NO ASEGURE ESTE VENTILADOR A UNA CAJA DE DISTRIBUCIÓN. PRECAUCIÓN - RIESGO DE CHOQUE - ADVERTENCIA: Peligro de quemaduras químicas. Desconecte la energía en el panel del disyuntor Mantenga las baterías fuera del alcance de los niños;... - Page 47 NORMAS DE SEGURIDAD La caja de salida y la estructura de soporte deben 15. Después de realizar las conexiones eléctricas, los estar montadas de manera segura y ser capaces conductores empalmados deben girarse hacia arriba de soportar de manera confiable un mínimo de y empujarse con cuidado hacia la caja de distribución.
-
Page 48: Herramientas Necesarias
HERRAMIENTAS Y MATERIALES REQUERIDOS • Destornillador Phillips • Destornillador plano • Llave de 11 mm • Escalera de mano • Cortadores de alambre CONTENIDO DEL PAQUETE Desempaque su ventilador y verifique el contenido. Debería tener los siguientes elementos: A. Soporte de montaje N. -
Page 49: Opciones De Montaje
OPCIONES DE MONTAJE Si no existe una caja de montaje con certificación UL (cUL para la instalación canadiense), lea las siguientes instrucciones. Desconecte la energía quitando los fusibles o apagando los disyuntores. Caja de salida Fije la caja de distribución directamente a la estructura del edificio. -
Page 50: Cómo Colgar El Conjunto Del Motor
CÓMO COLGAR EL CONJUNTO DEL MOTOR RECUERDE desconectar la alimentación antes de comenzar la instalación. Esto es Caja de salida necesario para su seguridad y también para la programación adecuada del sistema de control. Soporte de montaje del techo Arandela plana Para instalar correctamente su ventilador de techo, siga los pasos a continuación. - Page 51 CÓMO COLGAR EL CONJUNTO DEL MOTOR (continuación) Pasador de horquilla Horquilla Paso 4. Pase con cuidado los cables del ventilador y el cable de seguridad Varilla de hacia arriba a través de la varilla de extensión. Enrosque la varilla de extensión extensión en el acoplamiento del motor hasta que los orificios del pasador de horquilla estén alineados.
- Page 52 CÓMO COLGAR EL CONJUNTO DEL MOTOR (continuación) Paso 6. Ahora levante el conjunto del motor a su posición y coloque la bola de suspensión en el soporte de montaje. Gire hasta que la lengüeta de retención haya caído en la ranura de registro y se asiente firmemente. (Figura 10) Todo el cuerpo del motor no debe girar si se hace correctamente.
-
Page 53: Instalación De Soporte De Seguridad
INSTALACIÓN DEL SOPORTE DE SEGURIDAD (requerido para la instalación canadiense SOLAMENTE) Arandela plana Tornillo para madera Soporte de apoyo Arandela de resorte Se proporciona un cable de soporte de seguridad para ayudar a evitar que el ventilador Techo Caja de salida de techo se caiga;... -
Page 54: Conexiones Eléctricas
CONEXIONES ELÉCTRICAS Soporte de montaje Receptor ADVERTENCIA: Para evitar posibles descargas eléctricas, asegúrese de haber desconectado la energía en el panel del circuito principal antes de realizar el cableado. Siga los pasos a continuación para conectar el ventilador al cableado de su hogar. Utilice los conectores de cable suministrados con su ventilador. -
Page 55: Completar La Instalación Del Motor
CONEXIONES ELÉCTRICAS Soporte de Paso 4. Si su caja de salida tiene un cable de tierra (de cobre verde o desnudo) montaje conéctelo a los cables de tierra del ventilador. De lo contrario, conecte el Tornillo de cable de tierra del ventilador al soporte de montaje. Fije la conexión del cable resalto Dosel con una tuerca de plástico proporcionada. -
Page 56: Colocación De Las Aspas Del Ventilador
COLOCACIÓN DE LAS ASPAS Tornillo de aspa DEL VENTILADOR Cubierta del aspa PRECAUCIÓN: Para reducir el riesgo de descarga eléctrica, desconecte el circuito de suministro eléctrico al ventilador antes de instalar las aspas. Paso 1. Coloque el aspa sobre el soporte con el poste roscado hacia afuera. Asegúrese de que el borde inferior del aspa esté... -
Page 57: Instalación De La Placa De Luz
INSTALACIÓN DE LA PLACA DE LUZ Placa de Paso 2. Coloque los dos orificios de la ranura en la placa de luz sobre los dos montaje tornillos que aflojó previamente de la placa de montaje. Gire la placa de luz hasta que encaje en su lugar en el extremo estrecho de los orificios de llave. -
Page 58: Instalación Del Kit De Luz Y Pantalla De Vidrio
INSTALACIÓN DEL KIT DE LUZ Y LA PANTALLA DE VIDRIO Paso 2. Quite y guarde la tuerca manual, la arandela de metal y la arandela de silicona de la varilla roscada en el kit de luces. (Figura 23) Paso 3. Levante la pantalla de vidrio hasta el kit de luces, lo que permite que la varilla roscada pase por el orificio central en la parte inferior de la pantalla Figura 23 de vidrio. -
Page 59: Sistema De Control "Cooltouch
INSTALACIÓN DEL SISTEMA DE CONTROL COOLTOUCH CON LA PLACA DE PARED ™ PRECAUCIÓN: ASEGÚRESE DE QUE LA ELECTRICIDAD ESTÉ APAGADA EN Caja de salida LA CAJA DE CONEXIONES PRINCIPAL O QUE SE HAYA APAGADO EL FUSIBLE Interruptor CORRECTO EN LA CAJA DE CONEXIONES PRINCIPAL ANTES DE CONTINUAR. Placa de pared ADVERTENCIA: Todo el cableado debe instalarse de acuerdo con el Código Eléctrico Nacional y los códigos eléctricos locales. -
Page 60: Instalación Y Extracción Del Transmisor De Mano
INSTALACIÓN Y EXTRACCIÓN DEL TRANSMISOR DE MANO Paso 1. Para colocar el transmisor en la placa de pared, coloque primero el extremo inferior y luego presione la parte superior en la placa de pared. El transmisor ahora está sujeto a la placa de pared y funcionará desde aquí. (Figura 26) Paso 2. - Page 61 INSTRUCCIONES DE FUNCIONAMIENTO NOTA: Cada control remoto lleva un código de identificación único para facilitar la comunicación entre dispositivos emparejados. El código de identificación viene configurado de fábrica y el usuario no puede cambiarlo. Sin embargo, se le pedirá que realice un proceso de aprendizaje del código de identificación manualmente en estas circunstancias: •...
-
Page 62: Función Inversa
FUNCIÓN DE RETROCESO Para operar la función de retroceso en este ventilador, presione el botón “Retroceso” mientras el ventilador está funcionando. El ajuste de velocidad para climas cálidos o fríos depende de factores como el tamaño de la habitación, la altura del techo, la cantidad de ventiladores, etc. Operación en clima cálido: Operación en clima cálido: Avance (en sentido contrario a las agujas... -
Page 63: Resolución De Problemas
RESOLUCIÓN DE PROBLEMAS Problema Problema Solución Solución El ventilador no El ventilador no 1. Verifique los fusibles o disyuntores del circuito. 1. Verifique los fusibles o disyuntores del circuito. arranca. arranca. 2. Verifique todas las conexiones eléctricas para asegurar un contacto adecuado. 2. - Page 64 KICHLER LIGHTING LLC 7711 EAST PLEASANT VALLEY ROAD CLEVELAND, OHIO 44131 SERVICIO AL CLIENTE 866.558.5706 8:00 AM A 5:00 PM EST, DE LUNES A VIERNES REV. 04-MAR-2022 © Kichler Lighting LLC. Todos los derechos reservados.
Need help?
Do you have a question about the Crescent 300325 and is the answer not in the manual?
Questions and answers