Table of Contents
Advertisement
Advertisement
Table of Contents

Related Manuals for AND EK-ilEW-i Series


Summary of Contents for AND EK-ilEW-i Series
- Page 1 1WMPD4000465B...
- Page 2 Please note that this equipment generates, uses and can radiate radio frequency energy. This equipment has been tested and has been found to comply with the limits of Class A computing device pursuant to Subpart J of Part 15 of FCC rules. These rules are designed to provide reasonable protection against interference when the equipment is operated in a commercial environment.
-
Page 3: Table Of Contents
3. PART NAMES AND FUNCTIONS ...................4 4. SETTING UP ........................5 4-1. Setting up your balance .........................5 4-2. Power source..........................5 5. OPERATION........................6 5-1. Turning the power ON and OFF.....................6 5-2. LCD backlight ..........................6 5-3. Units ..............................7 5-4. Selecting a weighing unit .......................8 5-5. Basic operation ..........................8 5-6. - Page 4 11. OPTIONS........................30 11-1. OP-04 Comparator relay output and buzzer ................30 11-2. OP-07 Underhook assembly ......................31 11-3. OP-09 Rechargeable battery pack (Ni-MH) ................32 11-4. OP-12 Carrying case .........................32 12. MAINTENANCE ......................33 12-1. Notes on maintenance.......................33 12-2. Error codes ..........................33 13. SPECIFICATIONS .......................35 13-1.
-
Page 5: Introduction
1. INTRODUCTION This manual describes how this balance works and how to get the most out of it in terms of performance. The EK-i and EW-i series balances have the following features: The EK-i series are high resolution type electronic balances having a resolution of 1/6,000 ~ 1/60,000. -
Page 6: Part Names And Functions
3. PART NAMES AND FUNCTIONS Outputs the weight data to Turns the power on or off. a printer or computer, or enters a unit weight, 100% weight or other setting Held down to enter the function values to the balance. -
Page 7: Setting Up
3. Calibrate your balance before use. (See “7. CALIBRATION”) Balance location To measure correctly, to keep the balance in good condition, and to prevent hazards, observe the following: Do not install the balance in locations that are subject to excessive dust, breezes, vibration, large temperature fluctuations, condensation, or that may have magnetic fields. -
Page 8: Operation
(About units: Only the units available will be displayed.) The display turns off except for a weighing unit and the decimal point. The balance waits for the weight data to become stable, and zero will be displayed with the ZERO mark (power-on zero). -
Page 9: Units
The units and the order they appear in the display are as follows: Pound Ounce (avoir) -
Page 10: Selecting A Weighing Unit
+2% of the weighing Stability mark capacity, it will be subtracted to zero as a tare weight. In this case the ZERO and NET marks turn on. Precautions during operation Make sure that the stability mark is on whenever reading or storing a value. -
Page 11: Weighing Range For The Ew-I Series
5-6. Weighing range for the EW-i series The EW-i series have three weighing ranges, and the display shows which range the weight value belongs to with the mark R1, R2 or R3. There is a function setting to select how the weighing range changes. -
Page 12: Counting Mode (Pcs)
5-7. Counting mode (pcs) Determines the number of objects in a sample. Calculates the reading, using the basic sample unit weight, and determines how many pieces are contained. Selecting the counting mode 1. Press the MODE key to select :pieces) Storing the sample unit 2. -
Page 13: Percent Mode (%)
ACAI mark will turn on. (Add more than three pieces. The mark will not turn on for the number of samples beyond the ACAI range.) 9. The ACAI mark will blink and the balance re-calculates the unit weight. Do not touch the balance or samples on the pan until the ACAI mark turns off. -
Page 14: Comparator
= the smallest display division e.g.: 4d=four display divisions The upper limit and lower limit numerical values are common to each of the weighing, counting and percent mode. An example for the EK-1200i/2000i/3000i is as follows. Upper limit value “001010”: “101.0g” “1010pcs” “101.0%”... - Page 15 Entering the upper and lower limit values Cp Hi 6. With Cp Hi displayed, press the PRINT key. Enter the upper limit value using the following keys. SAMPLE key To select the digit blinking to change. RE-ZERO key To set the value of the digit 000000 selected.
-
Page 16: Calibration
1. Warm up the balance for at least half an hour with Press and hold the CAL switch. nothing on the pan. 2. Press and hold the calibration (CAL) switch until appears, and release the switch. Release 3. The balance displays Cal 0 . - Page 17 If the balance is to be moved to other places, set the gravity acceleration value of the area where the calibration using a weight is to be done, and calibrate the balance according to the procedure above. See the next section to set the value.
-
Page 18: Gravity Acceleration Correction
Press and hold 1. Press and hold the calibration (CAL) switch until Cal the CAL switch. appears, and release the switch. 2. The balance displays Cal 0 . -
Page 19: Functions
Cancels the operation and turns off the balance. Item key Selects a class and an item. In the weighing mode, press and hold the key to enter the function setting mode. Enter key Proceeds to the selected class. Stores the settings per class and goes to the next class. -
Page 20: Setting Example
8-3. Setting example To set auto power-off function to “Enabled”, and the ACAI function to “Disabled”. 1. Press and hold the SAMPLE key to display Press and hold func func 2. Press the PRINT key. The balance displays poff 0 . -
Page 21: Storing Weighing Units
5-3. Unit 5. Press the RE-ZERO key to store the weighing unit. To store 6. Repeat steps 4. and 5. to store all weighing units to be used. 7. Press the PRINT key. To confirm appears after end 8. -
Page 22: Function List
Buzzer sounds at OK and LO. Buzzer sounds at HI. Buzzer sounds at HI and LO. Buzzer sounds at HI and OK. Buzzer sounds at HI, OK and LO. Command and stream modes Auto-print A: + data Data output... - Page 23 Param- Class Item Description eter func btpr 7 bits, even parity Data and parity 7 bits, odd parity 8 bits, non parity aCai ACAI disabled If “0” is set, no additional samples ACAI function ACAI enabled required. Umin d = the minimum...
-
Page 24: Rs-232C Serial Interface
Command mode Controls the balance using commands from a computer. Set the parameters of the data format (bps and btpr) and data output mode (prt), as necessary. Use a D-sub 9 pin cable (straight type) to connect with a computer. -
Page 25: Data Format
US : Unstable weight data (including count and %) OL : Out of weighing range (Over) The data is normally 9 digits including a decimal point and a sign. There are 11 types of units: g : Weight data “gram”... -
Page 26: Command Mode
The balance transmits the weight data when the display is stable (the stability mark is on) and the data is greater than +4d (of the lowest range for EW-i series) or less than - The next output can be obtained after the display returns between -4d and +4d. -
Page 27: Id Number And Glp
RS-232C interface. The result of calibration (“Calibration report”) The result of calibration test (“Calibration test report”) The “Start block” and “End block” for GLP data 10-1. Setting the ID number Press and hold 1. Press and hold the SAMPLE key to display... -
Page 28: Glp Report
The serial number attached to the lateral side of the balance may have a form “#Q1234567” (# = I, E and so on). In this case, the first letter “#” is ignored as a GLP data and output data has a form “Q1234567”. - Page 29 The calibration test mode is used to compare a calibration test weight with the calibration test data weighed by the balance. This test does not perform calibration and this mode is available even after sealing the calibration (CAL) switch. 1. Press and hold the SAMPLE and PRINT Press and hold both keys.
- Page 30 Line feed, ASCII 0Dh Output of “Title block” and “End block” When a weight value is recorded as the GLP report, “Title block” and “End block” are added at the beginning and at the end of a group of weight values.
- Page 31 End block 3. Press and hold the PRINT key. Release the Press and hold PRINT key when recend is displayed. The balance outputs the “End block”. recend To output appears. Press the MODE key to “End block” return to the weighing mode.
-
Page 32: Options
It is possible to sound a buzzer according to the comparison result. See the function “bep” to set which result will make a buzzer sound. The comparator function on/off, the comparison mode and comparator buzzer output can be selected using the function settings. -
Page 33: Underhook Assembly
OP-04 Installation 1. Remove the cover of the option slot on the rear of balance by pressing and lowering it down. 2. Insert the option into the slot and secure it with the screws attached. 11-2. OP-07 Underhook assembly By attaching the underhook assembly to the bottom of the balance, large objects that are difficult to load on the weighing pan can be weighed in suspension, and the specific gravity of objects may be measured. -
Page 34: Rechargeable Battery Pack (Ni-Mh)
The battery life will vary depending on how the balance is used, ambient temperature and so on. Charging the battery pack Connect the AC adapter to the balance and turn the power off, then charging starts. It will take approximately 15 hours to reach full charge. If “... -
Page 35: Maintenance
10 - become large, the balance will prompt you to use a larger number of samples. Place the displayed number of samples on the pan and press the PRINT key to store 25 - the unit weight. Note: Pressing the... - Page 36 The balance detects error state in the internal processing. error# With nothing on the weighing pan, turn the power off and on again. If the error persists, request service. If you cannot cancel an error or other errors have occurred, request service from...
-
Page 37: Specifications
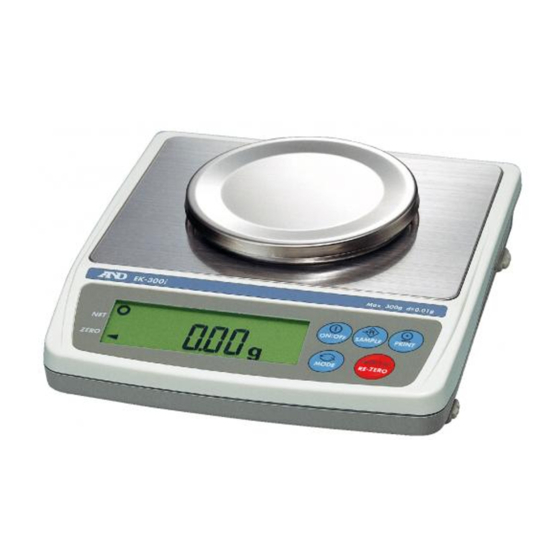
13. SPECIFICATIONS 13-1. EK-i series MODEL EK-120i EK-200i EK-300i EK-600i Weight capacity 120 g 200 g 300 g 600 g Min. display “d” 0.01 g 0.01 g 0.01 g 0.1 g No. of samples 5, 10, 25, 50 or 100 pieces Max. -
Page 38: Ew-I Series
MODEL EK-410i EK-610i EK-4100i EK-6100i Weight capacity 400 g 600 g 4000 g 6000 g Min. display “d” 0.01 g 0.01 g 0.1 g 0.1 g No. of samples 5, 10, 25, 50 or 100 pieces Max. count *) 40,000 pcs 60,000 pcs 40,000 pcs 60,000 pcs... -
Page 39: Other Weighing Units
13-3. Other weighing units MODEL EK-120i EK-200i EK-300i EK-600i EK-12Ki 1200i 2000i 3000i 6000i Capacity 4.2330 7.0550 10.5820 21.165 42.330 70.550 105.820 211.65 423.30 Min. display 0.0005 0.0005 0.0005 0.005 0.005 0.005 0.005 0.05 0.05 Capacity ----- ----- ----- 1.3230 2.6455 4.4090 6.6140... -
Page 40: Dimensions
13-4. Dimensions EK-120i / EK-200i / EK-300i EK-600i / EK-1200i / EK-2000i EK-3000i / EK-6000i / EK-12Ki EK-410i / EK-610i EK-4100i / EK-6100i EW-150i EW-1500i / EW-12Ki... -
Page 41: Gravity Acceleration Map
GRAVITY ACCELERATION MAP Values of gravity at various locations Amsterdam 9.813 m/s Manila 9.784 m/s Athens 9.800 m/s Melbourne 9.800 m/s Auckland NZ 9.799 m/s Mexico City 9.786 m/s Bangkok 9.783 m/s Milan 9.807 m/s Birmingham 9.813 m/s Moscow 9.816 m/s Brussels 9.811 m/s New York... - Page 42 World map...
- Page 43 3-23-14 Higashi-Ikebukuro, Toshima-ku, Tokyo 170-0013 JAPAN Telephone: [81] (3) 5391-6132 Fax: [81] (3) 5391-6148 A&D ENGINEERING, INC. 1756 Automation Parkway, San Jose, California 95131 U.S.A. Telephone: [1] (408) 263-5333 Fax: [1] (408)263-0119 A&D INSTRUMENTS LIMITED <UK Office> Unit 24/26 Blacklands Way, Abingdon Business Park, Abingdon, Oxfordshire OX14 1DY United Kingdom Telephone: [44] (1235) 550420 Fax: [44] (1235) 550485 A&D INSTRUMENTS LIMITED...
Need help?
Do you have a question about the EK-ilEW-i Series and is the answer not in the manual?
Questions and answers