Table of Contents
Advertisement
Quick Links
GX-AE series
GX-124AE/GX-224AE/GX-324AE
GX-A series
GX-124A/GX-224A/GX-324A
GX-203A/GX-303A/GX-403A/GX-603A/GX-1003A/GX-1603A
GX-2002A/GX-3002A/GX-4002A/GX-6002A/GX-10002A
GX-6001A/GX-10001A
GF-A series
GF-124A/GF-224A/GF-324A
GF-123A/GF-203A/GF-303A/GF-403A/GF-603A/GF-1003A/GF-1603A
GF-1202A/GF-2002A/GF-3002A/GF-4002A
GF-6002A/GF-10002A/GF-6001A/GF-10001A
GX-AWP series
GX-203AWP/GX-403AWP/GX-603AWP
GX-2002AWP/GX-4002AWP/GX-6002AWP
GX-6001AWP
GF-AWP series
GF-203AWP/GF-403AWP/GF-603AWP
GF-2002AWP/GF-4002AWP/GF-6002AWP
GF-6001AWP
1WMPD4003475F
Advertisement
Table of Contents

Related Manuals for AND GX-AE Series


Summary of Contents for AND GX-AE Series
- Page 1 GX-AE series GX-124AE/GX-224AE/GX-324AE GX-A series GX-124A/GX-224A/GX-324A GX-203A/GX-303A/GX-403A/GX-603A/GX-1003A/GX-1603A GX-2002A/GX-3002A/GX-4002A/GX-6002A/GX-10002A GX-6001A/GX-10001A GF-A series GF-124A/GF-224A/GF-324A GF-123A/GF-203A/GF-303A/GF-403A/GF-603A/GF-1003A/GF-1603A GF-1202A/GF-2002A/GF-3002A/GF-4002A GF-6002A/GF-10002A/GF-6001A/GF-10001A GX-AWP series GX-203AWP/GX-403AWP/GX-603AWP GX-2002AWP/GX-4002AWP/GX-6002AWP GX-6001AWP GF-AWP series GF-203AWP/GF-403AWP/GF-603AWP GF-2002AWP/GF-4002AWP/GF-6002AWP GF-6001AWP 1WMPD4003475F...
- Page 2 A&D Company Ltd. The contents of this manual and the specifications of the instrument covered by this manual are subject to change for improvement without notice. Windows, Word and Excel are registered trademarks of the Microsoft Corporation.
-
Page 3: Table Of Contents
About The Models ..........................8 About The GX-AE Series ........................8 Compliance ............................9 About Communication Manual ......................9 2. Part Names, Installation And Precautions ..............10 Installing The Balance ........................14 Precautions ............................14 During Use ............................15 Precautions After Use ......................... 17 Power Supply ............................. - Page 4 GLP Report............................88 11. Data Memory ......................93 Data Memory For Weighing Data ..................... 93 Data Memory For Sensitivity Adjustment And Calibration Test ............97 12. Statistical Calculation Mode ..................100 How To Use The Statistical Calculation..................100 Statistical Calculation Mode (Example Of Use) ................105 13.
- Page 5 Minimum Weighing Value Comparison ................... 115 Input And Output Of The Minimum Weighing Value ................ 115 15-2-1 Procedure To Set In The Function Table (With Balance Software Version 1.200 To 1.220) ....115 15-2-2 Procedure To Set In The Weighing Display (With Balance Software Version 1.200 To 1.220) ....116 15-2-3 Procedure To Set In The Function Table (With Balance Software Version 1.300 Or Later) .....
- Page 6 26-1-1 Function ............................ 149 26-1-2 Size/Weight ..........................149 Individual Specifications ......................... 150 26-2-1 0.0001g Models ........................150 26-2-2 0.001g Models ........................151 26-2-3 0.01g Models ......................... 152 26-2-4 0.1g Model ..........................153 27. External Dimensions ....................154 Options And Peripheral Instruments ....................157...
-
Page 7: Introduction
The balance has a self-check function that inspects the balance itself using electronically controlled load (ECL) and evaluates performance. □ The balance can detect impact applied to its mass sensor and display the level of that impact. ISD (Impact Shock Detection). □... -
Page 8: About The Models
In general, when the ambient humidity is less than 45%RH, nonconductors such as powders, paper, and plastics easily become charged with static electricity. The influence of static electricity may cause a weighing error of several milligrams. The ionizer neutralizes this electrical charge. -
Page 9: Compliance
Please note that this equipment generates, uses and can radiate radio frequency energy. This equipment has been tested and has been found to comply with the limits of a Class A computing device pursuant to Subpart J of Part 15 of FCC rules. -
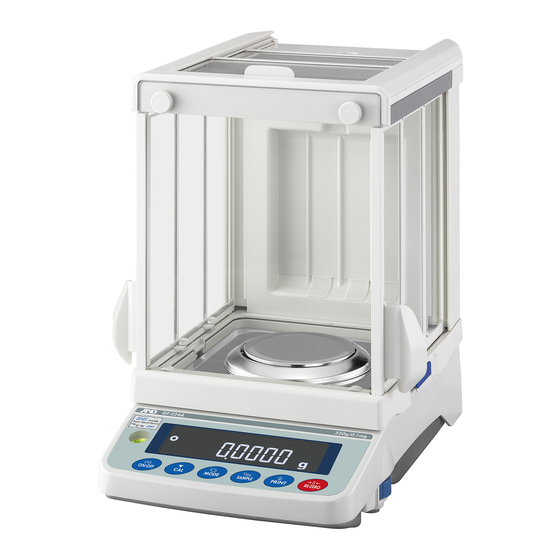
Page 10: Part Names, Installation And Precautions
Pull out the left and right locking handles. USB cable (approx. 1.8m) Breeze break ring Weighing pan Bubble spirit level Display Main unit Keys Press the left and right locking handles Leveling foot to secure the breeze break to the balance. - Page 11 AC adapter ID labels Note □ Please confirm that the AC adapter type is correct for your local voltage and receptacle type. □ Please use the dedicated AC adapter specified for the balance. □ Do not use the AC adapter provided with the balance for other models or equipment with which the AC adapter may not be compatible.
- Page 12 (Approx. 1.8 m) Note □ Please confirm that the AC adapter type is correct for your local voltage and receptacle type. □ Please use the dedicated AC adapter specified for the balance. □ Do not use the AC adapter provided with the balance for other models or equipment with which the AC adapter may not be compatible.
- Page 13 (Approx. 1.8 m) Note □ Please confirm that the AC adapter type is correct for your local voltage and receptacle type. □ Please use the dedicated AC adapter specified for the balance. □ Do not use the AC adapter provided with the balance for other models or equipment with which the AC adapter may not be compatible.
-
Page 14: Installing The Balance
Step 4. Confirm that the adapter type is correct for the local voltage and power receptacle type. Step 5. Insert the AC adapter into the AC adapter jack on the rear of the balance, and then plug the AC adapter into an outlet. -
Page 15: During Use
If the measured value is not stable or repeatability is poor, remove the small breeze break and try again. Wipe the transparent plates with a damp cloth to remove static electricity to solve the problem of them becoming charged. - Page 16 Before weighing, allow the pressure fluctuations to settle. □ If water droplets or powder remains on the waterproof diaphragm and the pan support boss, the performance of the balance may be impaired. Please clean the balance before using it.
-
Page 17: Precautions After Use
This is a normal state and does not harm the balance. For accurate weighing, keep the AC adapter connected to the balance and AC power unless the balance is not to be used for a long period of time. Please warm up the balance for at least 30 minutes (one hour for 0.0001g models). -
Page 18: Display Symbols And Key Operation
Unit display Stabilization indicator Gross zero mark USB connecting mark Interval output mode Standby indicator standby indicator Displays weighing value, stored data, and item name Blinking display contents Data number being displayed Processing indicator Interval output mode Automatic sensitivity active indicator... - Page 19 Key operation Key operations affect how the balance functions. Normal key operation during measurement is “Press and release the key immediately” or “Press the key”. Please do not “Press and hold the key (for 2 seconds)” unless required. Press the key Press and hold the key (Press and release the key immediately.)
-
Page 20: Weighing
Programmable-unit (No unit displayed. For details, refer to "17. Programmable-Unit".) A unit or mode can be selected and stored in the function table as described on page 23. If a weighing mode (or unit of weight) has been turned off, that mode or unit will be missing in the sequence. - Page 21 For details about the units and modes, see the table below: Function table Conversion factor Name (unit, mode) Abbrev. Display (Storing mode) 1 g = Gram Milligram 0.001 g Counting mode Percent mode Ounce (Avoir) 28.349523125 g Pound 453.59237 g...
- Page 22 The tables below indicate the weighing capacity and the readability for each unit, depending on the balance model. GX-124AE GX-224AE GX-324AE Readability GX-124A GX-224A GX-324A Unit GF-124A GF-224A GF-324A Capacity Gram 0.0001 Milligram 122000 220000 320000 Ounce ( Avoir 4.30 7.05...
- Page 23 GX-2002A GX-4002A GX-6002A GX-3002A GX-10002A GX-2002AWP GX-4002AWP GX-6002AWP GF-2002A GF-4002A GF-6002A Readability GF-1202A GF-3002A GF-10002A Unit GF-2002AWP GF-4002AWP GF-6002AWP Capacity Gram 1220 2200 3200 4200 6200 10200 0.01 Ounce ( Avoir 43.0 77.6 112.8 148.1 218.6 359.7 0.0005 Pound 2.68 4.85 7.05 9.25...
- Page 24 Storing Units The units or modes can be selected and stored in the function table. The sequence of displaying the units or modes can be arranged to fit the frequency of use. The units are stored in non-volatile memory, even if the AC adapter is removed.
- Page 25 Specify 8. Press the CAL key to exit the function table. Then the balance returns to the weighing mode with g, the unit selected first. Store 9. Press the MODE key to switch between g and pcs (g→pcs).
-
Page 26: Basic Operation
The weighing data can be stored in memory. For details, refer to “11. Data Memory”. □ When the ON:OFF key is pressed with a container placed on the weighing pan and weighing is started, the balance automatically cancels the weight (tare) and displays... - Page 27 RE-ZERO key will automatically determine whether zero or tare operation is performed. The condition for determining which is used is "zero range", and when zero range is exceeded, the tare subtraction operation is performed. About measurement range For the balance, the range that can be weighed is determined by model.
-
Page 28: Counting Mode (Pcs)
This is the mode to check the number of pieces. Based on the unit mass of the reference sample (weight of one piece), the balance calculates and displays how many pieces are weighed. The smaller the variation in the unit mass, the more accurate the count (the number of pieces). In addition, the ACAI function described later can be used to further improve the counting accuracy while weighing. - Page 29 For details about the communication, download "Communication manual" from our website (https://www.aandd.jp) and refer to it. □ The read unit mass can output by ″ ?UW″ command and can be changed by ″UW: ″ command. Caution □ ACAI is not applicable to the read unit mass.
-
Page 30: Percent Mode (%)
Percent Mode (%) The percent mode displays the weighting value in percentage compared with a reference mass as 100%. This is useful for target weighing or sample variance check. Selecting Percent Mode 1. Press the key to select the unit (percent mode). -
Page 31: Animal Weighing Mode (Hold Function)
The hold function allows the average weight of the animal to be displayed. To use the hold function, set the function in the function table. Refer to "9. Function Table" and "9-3 Description Of The Class Environment Display" for details. -
Page 32: Impact Shock Detection Function
Especially when incorporating the balance in a production line, etc. and weighing by means such as an automated system, impact to the sensor may be applied greater than expected. When designing automatic systems and the like, it is recommended that you minimize the impact level as much as possible while checking the shock indicator. -
Page 33: Recording Impact History
Recording Impact History Impacts of impact level 3 or higher are stored on the balance with data and time (up to 50 instances). When the password lock function is ON ( ), the login user information is added when outputting the impact history. (Balance software version 1.211 or later.) Note □... - Page 34 With balance software version 1.211 or later Date, time, impact level, login and login user information are output together on one line. The login user information varies depending on the setting of the login user and the setting of Lock in the function table when receiving impact.
-
Page 35: Response Adjustment / Self Check Function
Response Adjustment / Self Check Function Disturbances such as drafts and vibration at the place where the balance is installed affect weighing. In the response adjustment settings, the response characteristics of the balance can be set in three stages according to the disturbance. With the self check function, the balance itself inspects balance operation and checks balance performance. -
Page 36: Self Check Function / Automatic Setting Of Minimum Weighing Value By Ecl
It is also possible to display and register the minimum weighing value (reference value) using repeatability data. For details of the minimum weighing value, refer to the technical information on our... -
Page 37: With Balance Software Version 1.200 To Version 1.220
6-2-1 With Balance Software Version 1.200 To Version 1.220 1. Press and hold the MODE key for 2 seconds in weighing mode. 2. Release the key when the RESPONSE display blinks. appears, and the self check function starts. "ECL" will be displayed in a few seconds. -
Page 38: With Balance Software Version 1.300 Or Later
1. Press and hold the MODE key for 2 seconds in weighing mode. 2. Release the key when the RESPONSE display blinks. appears, and the self check function starts. "ECL" will be displayed in a few seconds. If the MODE key is pressed with displayed, changes in weighing values in the repeatability measurement with the electronically controlled load (ECL) can be seen. - Page 39 Step 5 Step 6 Press and hold for Press and hold 2 seconds for 2 seconds Batch output Resister the minimum weighing value When MW-CP is set to 0, automatically set to 1 and comparator function is available.
-
Page 40: Sensitivity Adjustment / Calibration Test
)". Refer to "9. Function Table". The time and date can be added to the GLP/GMP report. If the time/date is not correct, you need to adjust it. Refer to "9-7 Clock and Calendar Function". The calibration test is a function that is active only when the output of maintenance records compatible with GLP/GMP, etc. - Page 41 Caution when using your external weight □ The accuracy of the weight used in sensitivity adjustment affects the accuracy of the balance after sensitivity adjustment. □ Select the mass to be used for sensitivity adjustment and calibration tests from the table below. Factory Adjustable...
-
Page 42: Automatic Sensitivity Adjustment (Gx-Ae/Gx-A/Gx-Awp Series Only)
Interval time can be set from 0.5h to 24h with function setting C i nt. Caution If something is on the weighing pan, the balance itself will judge that it is in use and will not perform automatic sensitivity adjustment. -
Page 43: Inputting The Set Time
7-1-1 Inputting The Set Time 1. Press and hold the SAMPLE key (for 2 seconds) to 0.00 display bA5fnc . Press and hold (for 2 seconds) 2. Press the SAMPLE key several times to display Auto CAL . bA5Fnc 3. Press the PRINT key to display CFnc . -
Page 44: Clearing The Set Time
7-1-2 Clearing The Set Time Refer to steps 1 to 5 on the previous page 12. Refer to steps 1 to 5 of ”Inputting the set time” on the previous page to display CtiME 1 . Ct iME 1 13. Press the PRINT key to display the currently set time. TM 1 12:34 14. -
Page 45: Setting The Interval Time
7-1-3 Setting The Interval Time 1. Press and hold the SAMPLE key (for 2 seconds) to display bA5fnc . 0.00 Press and hold (for 2 seconds) bA5Fnc 2. Press the SAMPLE key several times to display Auto CAL . Press several times 3. - Page 46 Correspondence table between the set value and interval time of the item “C int”. Item Parameter Description 0.5-hour interval time 1.0-hour interval time 1.5-hour interval time 2.0-hour interval time 2.5-hour interval time 3.0-hour interval time 3.5-hour interval time 4.0-hour interval time 4.5-hour interval time...
-
Page 47: Sensitivity Adjustment Using The Internal Mass (Gx-Ae/Gx-A/Gx-Awp Series Only)
(GX-AE/GX-A/GX-AWP Series Only) Sensitivity adjustment using the internal mass can be performed with one key press. 1. Connect the AC adapter and warm up the balance for at least 30 minutes with nothing on the weighing pan. 2. Press the CAL key. The balance displays CAL in 3. -
Page 48: Sensitivity Adjustment Using An External Weight
Sensitivity Adjustment Using An External Weight This function adjusts the sensitivity of the balance using an external weight. 1. Connect the AC adapter and warm up the Press and hold for 2 seconds balance for at least 30 minutes with nothing on the weighing pan. -
Page 49: How To Set The External Weight Value
3000. 0 0 SAMPLE key ····· Switches the display between "all digits blinking" (external weight selection mode) and "last four digits blinking" (instrumental error adjustment mode). RE-ZERO key ··· (+) Changes the instrumental error. (When the digits reach positive 9999, 3000. -
Page 50: Correcting The Internal Mass Value Of The Gx-Ae/Gx-A/Gx-Awp Series
Note □ Internal mass value correction cannot be performed by default. Refer to "8. Function Switch And Initialization" or the following setting procedure and enable function setting change and internal mass value correction. Setting procedure 1. Press the ON:OFF key to turn off the display. -
Page 51: Correcting The Internal Mass Value Of The Gx-Ae/Gx-A/Gx-Awp Series (Auto)
Value Of The GX-AE/GX-A/GX-AWP Series" and enable function setting change and internal mass value correction. Press and hold for 2 seconds In weighing mode, press and hold the SAMPLE key for 2 seconds to display bA5Fnc . Press 2. Press the SAMPLE key several times until C5 in appears. -
Page 52: Correcting The Internal Mass Value Of The Gx-Ae/Gx-A/Gx-Awp Series (Manual)
7-5-2 Correcting The Internal Mass Value Of The GX-AE/GX-A/GX-AWP Series (Manual) The balance can correct the stored internal mass value within a certain range, and the value can be adjusted according to the weight you have. The correction reference value (internal mass conversion value) and correction range are as shown in the table below. - Page 53 Setting procedure The internal mass value correction cannot be performed by default. Refer to the setting procedure in "7-5 Correcting The Internal Mass Value Of The GX-AE/GX-A/GX-AWP Series" and enable function table change and internal mass value correction. Press and hold the SAMPLE key for 2 seconds to display bA5fnc .
-
Page 54: Calibration Test Using The Internal Mass (Gx-Ae/Gx-A Series 0.0001G Models Only)
1. Connect the AC adapter and warm up the balance for at least one hour with nothing on the weighing pan. 2. Press and hold the CAL key for 2 seconds until is displayed. CC in 3. The zero point is checked. Do not apply vibration and the like. -
Page 55: Calibration Test Using An External Weight
Calibration Test Using An External Weight This function tests the weighing accuracy using an external weight and outputs the result. This is available only when the GLP/GMP output parameter is set (dout info 1 or ). (Calibration test does not perform sensitivity adjustment) 1. -
Page 56: Function Switch And Initialization
"Function selection switch" is provided to protect such data and to select "Change prohibited" or "Changeable (usable)". When "Change prohibited" is set, the function mode cannot be entered, so inadvertent change can be prevented. - Page 57 Example of GX-AE/GX-A series A-0 1 1 1 1 The display shown left indicates the factory settings. Function table To inhibit changes to the function table. To permit changes to the function table. Sensitivity adjustment using the internal mass Balance software version 1.00 to 1.200 To inhibit sensitivity adjustment using the internal mass.
- Page 58 Example of GF-A series A-00 10 1 The display shown left indicates the factory settings. Function table To inhibit changes to the function table. To permit changes to the function table. No function Sensitivity adjustment using an external weight Balance software version 1.00 to 1.200 To inhibit sensitivity adjustment using an external weight.
-
Page 59: Initializing The Balance
Setting procedure 1. Press the key to turn off the display. ON:OFF 2. While holding down the PRINT key and the SAMPLE key, press the ON:OFF key to display P5 . 3. Press the key to display CLr . SAMPLE 4. -
Page 60: Function Table
The function table reads or rewrites the parameters that are stored in the balance. These parameters are stored in non-volatile memory, even if the AC adapter is removed. The function table menu consists of two layers. The first layer is the "Class" and the second layer is the "Item". - Page 61 Setting Example This example shows how to set " Stores the weighing data and sensitivity adjustment history (dAtA 2)" of "Data memory (dAtA)", and "1 minute (int 5)" of "Interval time (int)". Step1 Step1 Press and hold for 2 seconds...
-
Page 62: Details Of The Function Table
(Valid for balance software Impact shock version 1.300 or later) detection Confirms and sets the time [01] See "9-7 Clock And Calendar Function" Cl adj and date. The time and date Clock are added to output data. Factory setting Note: "Digit" is a unit of readability. - Page 63 Class Item Description Parameter No comparison [02] Cp fnc Comparison when stable value or overloaded Comparator mode Comparator Continuous comparison Cp-t 3 stage comparator HI, OK, LO Number of comparator 5 stage comparator HH, HI, OK, LO, LL stages Also compare near zero ±...
- Page 64 The number in [ ] is the classification number. It is output as an identifier when outputting function table information in batch. Refer to "9-10 Output The Function Table Information". *1 Download "Communication manual" from our website (https://www.aandd.jp) and refer to it.
- Page 65 The number in [ ] is the classification number. It is output as an identifier when outputting function table information in batch. Refer to "9-10 Output The Function Table Information". *1 Download "Communication manual" from our website (https://www.aandd.jp) and refer to it.
- Page 66 The number in [ ] is the classification number. It is output as an identifier when outputting function table information in batch. Refer to "9-10 Output The Function Table Information". *1 Download "Communication manual" from our website (https://www.aandd.jp) and refer to it.
- Page 67 Class Class Item Item Description Description Parameter Parameter Normal weighing mode [10] Refer to Application Capacity indicator "9-9 Description Of ap fnc mode Application" Statistical calculation mode Application function Flow measurement mode Gross, Net, Tare mode Number of data, sum 5taf Number of data,sum,max,min,range(max-min),average Statistical function...
- Page 68 Note. “Digit” is a unit of readability. □ The number in [ ] is the classification number. It is output as an identifier when outputting function table information in batch. Refer to "9-10 Output The Function Table Information". *2 GX-AE/GX-A/GX-AWP series only. *3 GX-AE series only.
-
Page 69: Description Of The Class Environment Display
This function is used to weigh a moving object such as an animal. When the weighing data is over the weighing range from zero and the display fluctuation is within the stabilization range for a fixed period of averaging time, the processing indicator illuminates and the balance displays the average weight of the animal. - Page 70 Tare value record (P-ZEro) After turning on the power supply, the display will not be automatically set to zero, and it will start from the previous weighing value. This is useful when a hopper, etc. is attached to the weighing pan and the power needs to be turned off while weighing discharge.
-
Page 71: Description Of The Data Output
Description Of The Data Output Download "Communication manual" from our website (https://www.aandd.jp) and refer to it. Description Of The Data Format Download "Communication manual" from our website (https://www.aandd.jp) and refer to it. Output Example Of The Data Format Download "Communication manual" from our website (https://www.aandd.jp) and refer to it. -
Page 72: Clock And Calendar Function
Clock And Calendar Function The balance is equipped with a clock and calendar function. When the Clock and Calendar function (dout, 5-td) is set, the time and date are added to the output data. Set or confirm the time and date as follows: Operation 1. - Page 73 Note Do not enter invalid values such as a non-existing date when setting the time and date. The balance displays when the clock backup battery has been depleted, but It only affects rtc PF the clock and calendar function.
-
Page 74: Comparator Function
For comparison using the comparator function, either 3-stage or 5-stage can be selected (CP Fnc, CP- t). The 3-stage comparator is selected by default, and the HI / OK / LO indicator will be displayed according to the result of comparison. When the 5-stage comparator is selected, HH and LL become available with the HI and LO indicators respectively displayed blinking. - Page 75 Selecting the comparator (3-stage/5-stage) 1. Press and hold the SAMPLE key for 2 seconds until Press and Hold bA5Fnc of the function table is displayed. for 2 seconds Press several times 2. Press the SAMPLE key several times to display CP Fnc .
- Page 76 Selecting a comparison method (operating range, comparison criteria, and value input) (Setup procedures starting from the factory default setting) (with the 3-stage comparator, comparison when stable or overloaded excluding near zero ± 10 digits, 1000.50g at maximum and 999.50g at minimum) 1.
- Page 77 SAMPLE key ··· Selects the digit to change the value. RE-ZERO key · Changes the value of the selected digit. MODE key ···· Reverses the polarity. PRINT key ···· Stores the new value and goes to step 10. CAL key ········ Cancels the new value and goes to step 10.
- Page 78 Setting example 2 Continuous comparison except near zero ± 20 digits. Reference / tolerance. Digital input. Selecting a comparison method (operating range, comparison criteria, and value input) (with the 3-stage comparator) 1. Press and hold the SAMPLE key for 2 seconds until bA5Fnc of the function table is displayed.
- Page 79 MODE (-) key ······ Changes the value of the selected (blinking) digit. PRINT key ·········· Stores the new value and goes to step 15. CAL key ·············· Cancels the new value and goes to step 15. 15. Press the CAL key twice to return to the weighing mode.
- Page 80 Setting example 3 Comparison when stable or overloaded including near zero. Upper/lower limits. Weighing input. Selecting a comparison method (operating range, comparison criteria, and value input) (with the 3-stage comparator) 1. Press and hold the SAMPLE key for 2 seconds until bA5Fnc of the function table is displayed.
- Page 81 12. Press the RE-ZERO key, 0.00 is displayed. Place a sample of the weight of the upper limit on the balance and press the PRINT key. (Register the upper limit value.) 13. When finished, CP Lo is displayed. (Replace a sample of the weight of the upper limit from the balance.)
- Page 82 Sounding the built-in buzzer according to the comparison result. 1. Press and hold the SAMPLE key for 2 seconds until bA5Fnc of the function table is displayed. Press and Hold for 2 seconds 2. Press the SAMPLE key several times to display CP bEEP .
-
Page 83: Description Of Application
Description of the gross, net, and tare mode (APF 4). Zero setting and taring can be performed separately, and gross (total amount), net (net amount), and tare (tare amount) data can be output. For details, refer to "14. Gross Net Tare Function". -
Page 84: Output The Function Table Information
With function table, you can set the balance's operation to that appropriate for how it is used. In the menu structure of the function table, setting items are included in each class, and a parameter is registered for each item. The function table information can be output in batch by the following operation so that the settings when the balance is used can be recorded. - Page 85 1. Connect the balance and the printer. When using the AD-8127, set the print mode to "DUMP". For details about the settings and print mode, refer to the instruction manual of the printer. For connection between the balance and the printer, refer to "Communication manual"...
-
Page 86: Id Number And Glp Report
The ID number can be used as an identification number for the balance during maintenance of the balance. □ The ID number is stored in non-volatile memory even if the AC adapter is removed, and is valid until a new registration is made. □... -
Page 87: Setting The Id Number
SAMPLE key ·························· Selects the digit to blink. RE-ZERO key, MODE key ···· Changes the character of the selected (blinking) digit. PRINT key ····························· Stores the new ID number and displays PA55wd . CAL key ································ Cancels the new ID number and displays PA55wd . -
Page 88: Glp Report
GLP Report To output GLP/GMP data and the like with an AD-8127 multi-printer or PC, set to " " (output the inFo 1 clock data built into the balance) or " " (output the clock data of the external device) in the function inFo 2 table. - Page 89 The function to output the clock data of external devices can be used with devices that have a clock □ function and can output the date and time in response to <ESC>D and <ESC>T. (e.g. AD-8127 multi printer, RsCom [WinCT]) For sensitivity adjustment history storage of the data memory function, the clock data built into the □...
- Page 90 Calibration test report using the internal mass (0.0001g models only) This is the GLP report when checking the weighing accuracy of the balance with the internal mass. (Adjustment is not performed). When "inFo 1" is set. Printer format (AD-8127) PC format (RsCom) Manufacturer A &...
- Page 91 Sensitivity adjustment report using an external weight This is the GLP report when the sensitivity of the balance is adjusted using an external weight. When “ info 1 “ is set. Printer format (AD-8127) PC format (RsCom) Manufacturer <TERM> A & D A & D Model <TERM>...
- Page 92 Title block and End block Application / Operation “Title block” and “End block” can be added before and after a series of weighing values for data management. Pressing and holding the PRINT key for 2 seconds outputs "Title block" and "End block" alternately.
-
Page 93: Data Memory
Stored data can be displayed on the balance for data confirmation. □ Stored data can be output in batch (to a PC or optional printer). The output format and whether to add a data number, time/date, and ID number can be selected with the function table. - Page 94 Enabling data memory function 1. Press and hold the SAMPLE key for 2 seconds until Press and hold for 2 seconds bA5Fnc is displayed. 2. Press the SAMPLE key several times to display dout . Press several times 3. Press the PRINT key.
- Page 95 5- id Displaying the stored weighing results Note Confirm that the "Data memory (dAtA)" parameter is set to "Stores the weighing data and sensitivity adjustment history (dAtA 2)". 1. Press and hold the PRINT key for 2 seconds until Left of the display RECALL is displayed.
- Page 96 Press the CAL key to return to the weighing mode. Deleting the stored weighing results in batch Press and hold 1. Press and hold the PRINT key for 2 seconds until for 2 seconds RECALL is displayed. 2. Press the SAMPLE key several times to display Press CLEAR .
-
Page 97: Data Memory For Sensitivity Adjustment And Calibration Test
And Calibration Test Features □ The results of sensitivity adjustment (with the internal mass/an external weight) results and calibration test results can be stored in the internal memory of the balance. □ The stored results can be output (to an optional printer or personal computer) in batch. - Page 98 Outputting sensitivity adjustment history 1. In the weighing mode, press and hold the CAL key Press and hold for 2 seconds. When CAL Hi5 is displayed, release for 2 seconds your finger from the key. out appears. If there is no sensitivity adjustment history, No dAtA...
- Page 99 Deleting sensitivity adjustment history 1. Press and hold the key for 2 seconds. When CAL Hi5 is displayed, release the key. Press and hold for 2 seconds out appears. Release 2. Press the key to display CLEAR . SAMPLE 3. Press the...
-
Page 100: Statistical Calculation Mode
□ The wrong data input can be canceled by the key operation, if immediately after the input. □ Turning the balance off will delete the statistical data. □ The standard deviation, coefficient of variation, and relative error are obtained by the equation below:... - Page 101 Note Selecting the unit using the MODE key is not available after the data is entered. In this case, clear the data as described in "Clearing the statistical data" on page 104 and select the unit using the MODE key.
- Page 102 RE-ZERO key ..Sets the display to zero in weighing mode. PRINT key ..Outputs the data number and the weight data and includes the weight data to statistical calculation in the weighing mode. (Output is not in the same data format as specified in “type”...
- Page 103 Press several times Deleting the latest data When the wrong data is entered, it can be deleted and excluded from statistical calculation. Only the latest data can be deleted. 1. In the weighing mode, press the MODE key to display CANCEL .
- Page 104 Clearing the statistical data All the statistical data will be deleted and the number of data will be zero. 1. In the weighing mode, press the MODE key. 2. The statistical data is displayed. Press the MODE key several times to display CLEAR .
-
Page 105: Statistical Calculation Mode (Example Of Use)
2 seconds of formula ingredients such as chemicals is described. The mixing process is recorded using the balance and the printer. In the example, the GX-303A and the AD-8127 are connected using the RS-232C serial interface. Press several times... - Page 106 Container(tare value) weight value of formula ingredient 1) The weight value data is output when the peripheral ST,+0005.637 output equipment is connected. 4. Weigh formula ingredient 2 and press the PRINT key. The balance displays . (Storing the weight 0.000 Formula...
-
Page 107: Flow Measurement
13. Flow Measurement The balance has "flow rate mode" for calculating the amount of change in weighing values over time. For details, please download "FRD Addendum" from the A&D website (https://www.aandd.jp) and refer to it. □ Densities can be registered when the unit of flow rate is set to mL/*. Up to 10 densities can be stored. - Page 108 8. Press the CAL key to return to the calculation display. Selecting manual/automatic setting of flow rate calculation time Ct There are two ways to set the flow rate calculation time Ct: automatic setting according to flow rate and manual setting of fixed value.
- Page 109 Note In place of " * " of "g / * " and " mL / * ", the set time unit (second [s], minute [m], or hour [h]) is displayed. For setting guideline, refer to "GX-A/GF-A Series Flow Measurement Function Supplementary Manual".
- Page 110 When the flow unit is mL/*, up to 10 densities can be registered. To register a new density, select an unused density number and then register a value according to the flow rate calculation time or flow rate calculation accuracy setting procedure.
-
Page 111: Gross Net Tare Function
14. Gross Net Tare Function Zero setting and tare operation can be performed separately, and gross weight, net weight, and tare weight data can be output. When the gross net tare function is selected, the key operations are changed as follows. - Page 112 "Gross zero" means that the gross weight readability is in the range of zero when the unit is "g". (The state in which the gross zero indicator is lit.) Note To turn off the display of the balance, press and hold the ON:OFF key for about two seconds.
-
Page 113: Usage Example Of The Gross Net Tare Function
Output Pressing the PRINT key outputs the net weight, gross weight, and tare weight in that order. The following output formats are supported with the balance software version. Balance software version Supported format A&D standard format 1.200 or later DP format CSV format Output example (A&D standard format) -
Page 114: Minimum Weighing Warning Function
The minimum weighing value is the minimum sample weight required to perform correct quantitative analysis taking the measurement error of the balance used into account. If the sample amount is too small, the proportion of the measurement error in the measured value increases, and the reliability of the analysis result thus may drop. -
Page 115: Minimum Weighing Value Comparison
MODE (-) key ········ Changes the value of the selected (blinking) digit. SAMPLE key ········· Selects the digit to blink. PRINT key ············ Stores the set value and goes to the next item. CAL key Goes to the next item without storing ················... -
Page 116: Procedure To Set In The Weighing Display (With Balance Software Version 1.200 To 1.220)
PRINT key ············ Stores the set value and goes to the next item. Note that the parameter is automatically set to “ 1 “ (excluding near zero) when ”MW-CP“ is set to “ 0 “, and the minimum weighing value comparison function is enabled. CAL key Goes to the next item without storing the ················... - Page 117 7. With MW displayed, press the PRINT key to display KEY in . 8. Press the SAMPLE key to display. Ext MA55 . 9. Press the PRINT key. 5tARt , READY , and weighing display appear, and then LoAD is displayed requesting the first load for repeatability.
- Page 118 19. When the output is completed, appears. MW 23.20 20. Press and hold the SAMPLE key for 2 seconds to store the minimum weighing value and return to MW 23.20 Note that the parameter is automatically set to “ 1 “ (excluding near zero) when ”MW-CP“ is set to “...
-
Page 119: Procedure To Set In The Weighing Mode (Balance Software Version 1.300 Or Later)
The set minimum weighing value and repeatability result can be output in batch. 1. With KEY in or Ext MA55 displayed, press and hold the PRINT key for 2 seconds. 2. Pressing the REZERO key toggles between "No" and "Go" of the out display. - Page 120 [Example of batch output of the set minimum weighing value] The output content depends on the minimum weighing value setting method. Set with KEY in Set with EXT MA55 Set with ECL...
-
Page 121: Setting Measurement Tolerance Of Minimum Weighing Value
For balance software version 1.300 or later, in order to perform setting, refer to "Input using repeatability with an external weight" in "15-2 Input And Output Of The Minimum Weighing Value" or refer to "6-2 Self Check Function / Automatic Setting Of Minimum Weighing Value By ECL". -
Page 122: Data Output When Less Than Minimum Weighing Value
Output of data below the minimum weighing value can be switched ON/OFF with the ” Min out“ setting of the function table. This function is available with balance software version 1.200 or later. Setting procedure Press and hold the SAMPLE key for 2 seconds to display bA5Fnc of the function setting. Press and hold for 2 seconds Press the SAMPLE key several times to display MW Fnc . -
Page 123: Underhook
16. Underhook The built-in underhook is used for underhook weighing such as measurement of magnetic materials or density measurement. To use the underhook, open the cap on the bottom of the balance as shown below. Caution □ Do not apply excessive force to the underhook part. □... -
Page 124: Programmable Unit
If the coefficient set is beyond the range, an error is displayed and the balance returns to the coefficient setting mode, prompting to enter an appropriate value. A coefficient of 1 was set at the factory. - Page 125 CAL key ·············· Cancels the new value and goes to step 6. Quitting the operation 6. The balance displays . Press the CAL key to exit the programmable unit function and Unit return to the weighing mode. Using the function Press the MODE key to select the programmable unit (no display on the unit section).
-
Page 126: Density (Specific Gravity) Measurement
Density of a liquid The density of a liquid can be obtained according to the weight of the float in air, the weight of the float in a liquid, and the known volume of the float. A: Weight of the float in air ρ... - Page 127 In density display, the 3 digits (4 digits for 0.0001g models) after the decimal point are fixed. The readability cannot be changed with the SAMPLE key. In density measurement, the density is fixed and displayed according to weight in air measurement and weight in liquid measurement.
- Page 128 MODE (-) key ..Changes the value of the selected (blinking) digit. (9 appears next to 0.) SAMPLE key ..Selects the digit to blink. PRINT key ..... Stores the set value and enters density display mode. (To step 5 on the previous page) CAL key Enters density mode without storing the set value.
- Page 129 In density display, the 3 digits (4 digits for 0.0001g models) after the decimal point are fixed. The readability cannot be changed with the SAMPLE key. In density measurement, the density is fixed and displayed according to float weight in air measurement and float weight in liquid measurement.
- Page 130 MODE (9 appears next to 0.) key .... Selects the digit to blink. SAMPLE key ....Stores the set value and enters density display mode. (To step 5 on the PRINT previous page.) CAL key ....Enters density display mode without storing the set value. (To step 5 on the...
-
Page 131: Password Lock Function
19. Password Lock Function With the password lock function, it is possible to restrict the use and functions of the balance, which is effective in preventing falsification of date and time settings and also preventing internal setting change by the user. -
Page 132: Balance Software Version 1.211 Or Later
(No password lock function) Lock 0 The password lock function is not used. All functions of the balance can be used by anyone in weighing operation and settings can be changed. (Password required at the start of weighing) Lock 1 Administrator (ADM1N) can limit the users of the balance by setting individual passwords. -
Page 133: Enabling Password Lock Function
Press and hold “Enabled (ALL)“, and “Enabled (Fnc)”. for 2 seconds 1. In the weighing mode, press and hold the SAMPLE key Press several times for 2 seconds to display bA5Fnc . 2. Press the SAMPLE key several times to display PA55wd . -
Page 134: Entering The Password At The Start Of Weighing
Password is incorrect administrator level to , which is set by pressing ZZZZ the RE-ZERO key four times.) If the password is incorrect, FAiL is displayed and the buzzer sounds three times, and then the display Weighing display Display off turns off. -
Page 135: Logging Out
ZZZZ in : ADM ZERO key four times.) Password mismatch If the password is incorrect, FAiL is displayed and the buzzer sounds three times, and then the display turns off. Display weighing Display off Note With the balance software version 1.200, the login level is not displayed at logging in. -
Page 136: Registering (Changing) Password
Registering (Changing) Password The password can be changed with "Password (PA55 no.)" of the function table. 1. In weighing mode, press and hold the SAMPLE key for 2 seconds to display bA5Fnc . 2. Press the key several times until PA55wd is... -
Page 137: Changing Password
Note □ Be sure to record and keep the registered password. If the password is forgotten or lost, the balance cannot be used. □ The password that is already registered as the administrator ( ADM1N ) password cannot be registered as the user ( 01 to 10) password . -
Page 138: Deleting Password (U5Er 01 To 10)
Deleting Password (U5ER 01 to 10) Refer to 1. Refer to "19-7 Changing Password" to select the user "19-7 Changing Password" 01 to 10 ) whose password you want to delete and U5ER display the password entry display. Press and hold 2. -
Page 139: Repeatability Check Function (Gx-Ae/Gx-A/Gx-Awp Series Only)
With the repeatability check function, the balance obtains 10 measurement results using the internal mass and displays its standard deviation. It is possible to use this function with the installed balance in order to check the repeatability in the installation environment. -
Page 140: Interface Specification (Standard)
21. Interface Specification (Standard) Download "Communication manual" from our website (https://www.aandd.jp) and refer to it. -
Page 141: Maintenance
22. Maintenance Treatment Of The Balance □ Clean the balance with a lint free cloth that is moistened with warm water and a mild detergent. □ Do not use organic solvents or chemical cleaning cloths to clean the balance. □ Do not disassemble the balance. -
Page 142: Troubleshooting
Is there any strong electrical or magnetic noise source such as a motor near the balance? Weighing method □ Is the weighing pan set so that it does not touch other parts such as the breeze break and dust plate frame? (Is it installed correctly?) □... -
Page 143: Error Codes
Internal mass error EC, E16 Applying the internal mass does not yield a change in the mass value as specified. Confirm that there is nothing on the pan and perform the operation from the beginning again. Internal mass error EC, E17 The internal mass application mechanism does not function properly. - Page 144 Clock battery error The clock backup battery has been depleted. Press any key and set the time and date. Even if the clock backup battery is depleted, the clock and calendar function works normally as long as the balance is powered with the AC adapter.
- Page 145 Display Error code Description Not ready EC, E02 The received command cannot be executed. (e.g.) Q command was received when not in the weighing mode. (e.g.) Q command was received while rezeroing. Adjust the delay time to transmit a command. Timeout error EC, E03 With the timeout parameter set to "...
-
Page 146: Other Display
The balance is a precision instrument. Use much care when handling the balance and observe the following when transporting the balance. □ Use the original packing material for transportation. □ Remove the weighing pan, pan support, breeze break ring and dust plate from the main unit. -
Page 147: Connection With Peripheral Device
24. Connection With Peripheral Device Download "Communication manual" from our website (https://www.aandd.jp) and refer to it. Command Download "Communication manual" from our website (https://www.aandd.jp) and refer to it. Key Lock Function This function restricts the key operation of the balance by sending a specified command to the balance. -
Page 148: How To Check The Software Version Of The Balance
25. How To Check The Software Version Of The Balance Specifications may vary depending on the balance software version. Check the software version as follows. 1. Insert the AC adapter into the balance again. displays blinking. LEVEL L E V E L is displayed. -
Page 149: Specifications
Readability mode (Automatically changed by 100% mass) Interface RS-232C, USB Confirm that the adapter type is correct for the local voltage and AC adapter power receptacle type. Power consumption: Approx. 30 VA (supplied to the AC adapter) Current consumption DC12V, approx. 0.3A (excluding the AC adapter and options) *1 The mass of the internal mass may change due to corrosion or other damage caused by the operating environment, or it may change due to aging. -
Page 150: Individual Specifications
Individual Specifications 26-2-1 0.0001g Models GX-124AE GX-224AE GX-324AE GX-124A GX-224A GX-324A GF-124A GF-224A GF-324A Weighing capacity 122g 220g 320g Maximum display 122.0084g 220.0084g 320.0084g Readability 0.0001g Repeatability 0.0002g (300g) 0.0001g (Standard deviation) 0.0001g (200g) Linearity ± 0.0002g ± 0.0003g Stabilization time Approx. -
Page 151: Models
100g 100g 100g 100g (100g (100g (100g (100g (100g interval) interval) interval) interval) interval) *1 The operating environment is free from the effects of sudden changes in temperature and humidity, vibration, wind, magnetism, and static electricity. *2 Compliant with IP65... -
Page 152: Models
1000g 1000g (1000g interval) (1000g interval) (1000g interval) (1000g interval) 500g 500g 500g 500g *1 The operating environment is free from the effects of sudden changes in temperature and humidity, vibration, wind, magnetism, and static electricity. *2 Compliant with IP65... -
Page 153: Model
6000g External sensitivity adjustment 10000g weight 1000g 1000g (1000g interval) (1000g interval) 500g 500g *1 The operating environment is free from the effects of sudden changes in temperature and humidity, vibration, wind, magnetism, and static electricity. *2 Compliant with IP65... -
Page 154: External Dimensions
27. External Dimensions GX-124AE / GX-224AE / GX-324AE GX-124A /GX-224A / GX-324A GF-124A /GF-224A / GF-324A 190 (*3) 172 (*2) 190.5 94.7 Approx.45(*7) Opening height of side sliding door 224 (*6) Maximum width when side sliding door is open (Unit: mm) Inside dimension Height of weighing pan Height from the weighing pan to the top of the sliding door of the glass breeze break... - Page 155 GX-203A / GX-303A / GX-403A / GX-603A / GX-1003A / GX-1603A GF-123A /GF-203A / GF-303A / GF-403A / GF-603A / GF-1003A / GF-1603A GX-203AWP / GX-403AWP / GX-603AWP GF-203AWP / GF-403AWP / GF-603AWP (Unit: mm) Opening width when transparent plate is removed. Inside dimension Weighing pan size Height from the weighing pan to the lid of the breeze break.
- Page 156 GX-2002A / GX-3002A / GX-4002A / GX-6002A / GX-10002A/ GX-6001A/ GX-10001A GF-1202A / GF-2002A / GF-3002A / GF-4002A / GF-6002A / GF-10002A/ GF-6001A / GF-10001A GX-2002AWP / GX-4002AWP / GX-6002AWP / GX-6001AWP GF-2002AWP / GF-4002AWP / GF-6002AWP / GF-6001AWP (Unit: mm) Weighing pan size Area under the floor weighing platform.
-
Page 157: Options And Peripheral Instruments
□ External contact input terminal that can operate PRINT and RE-ZERO key. Three assembled stereo plugs are included. Note: In order to use, it is necessary to solder the attached plug and the switch prepared by the customer. GXA-24: USB host interface (factory-installed / dealer option) □... - Page 158 GXA-27: Output to Bluetooth® □ Weighing value can be entered into computers, tablets, and smartphones that have Bluetooth®, with an HID device being connected. □ AD8541-PC-JA, which is a dongle for connecting to computers, enables wireless communication with computers by commands.
- Page 159 Peripheral devices AD-8920A: Remote Display □ This option can be connected to the balance using the RS-232C interface or current loop and displays the weighing data transmitted by the balance. AD-8922A: Remote Controller □ This option can be connected to the balance using the RS-232C interface and can control the balance remotely.
- Page 160 • Back cover: A&D Global A&D Company, Limited 3-23-14 Higashi-Ikebukuro, Toshima-ku, Tokyo 170-0013, JAPAN Telephone: [81] (3) 5391-6132 Fax: [81] (3) 5391-1566 A&D ENGINEERING, INC. 1756 Automation Parkway, San Jose, California 95131, U.S.A. Telephone: [1] (408) 263-5333 Fax: [1] (408)263-0119 A&D INSTRUMENTS LIMITED Unit 24/26 Blacklands Way, Abingdon Business Park, Abingdon, Oxfordshire OX14 1DY United Kingdom Telephone: [44] (1235) 550420...
Need help?
Do you have a question about the GX-AE Series and is the answer not in the manual?
Questions and answers