Advertisement
Quick Links
Advertisement

Related Manuals for Lilliput BM230


Summary of Contents for Lilliput BM230
- Page 1 User Guide...
- Page 2 IMPORTANT SAFETY INSTRUCTIONS The device has been tested for conformance to safety regulations and requirements, and has been certified for international use. However, like all electronic equipment, the device should be used with care. Please read and follow the safety instructions to protect yourself from possible injury and to minimize the risk of damage to the unit.
-
Page 3: Table Of Contents
Ultra HD 4K screens containing 8.3 million pixel (3840×2160), so the resolution is four times that of Full HD. 3D LUT for Accurate Color Reproduction and Color space display (Native/Rec.709/User1~User3). Support to upload 3D LUT table via USB port. ... - Page 4 6. TROUBLE SHOOTING ................28...
-
Page 5: Product Description
1. PRODUCT DESCRIPTION Front 1. Speaker 2. SDI Signal switch to SDI mode when light on. 3. HDMI 1 ~ 4 Signal switch to HDMI mode when light on. 4. DVI Signal switch to DVI mode when light on. 5. VGA Signal switch to VGA mode when light on. - Page 6 6. MENU Press to enter menu. Press to enter option in the menu. 7. ◄ Select option in the menu. Decrease the option value. Before enter the menu, single press to activate volume, press again to decrease the volume. 8. ► Select option in the menu.
- Page 7 Back...
- Page 8 1. Handle (Only available for BM230/BM280) 2. VESA 75×75 & VESA 100×100 mounting port 3. USB port 4. TALLY port 5. VGA input port 6. DVI input port 7. HDMI input port×4。 HDMI 1 & HDMI 2 : HDMI2.0, support 4K 60Hz HDMI 3 &...
-
Page 9: Sun Shade Installation
④ +15V 11. Power switch "II" is battery power, "o" is power off, "I" is DC power. 2. SUN SHADE INSTALLATION 1. Put the sun shade on the suitcase, and match the magnets on both sides. 2. As shown below after finished. -
Page 10: Menu Setting
3. MENU SETTING Please check whether the device is connected well or not. 3-1. F1~F4 user definable shortcut buttons Long keep pressing any one of the 4 buttons for 3-5 seconds to activate shortcut menu setting. Option selected will be highlighted as white. option will be highlighted as yellow, unavailable option will be highlighted as gray. - Page 11 Aspect Marker Aspect Underscan Check Field Freeze Pixel to Pixel Peaking False Color Exposure (Only available under SDI mode) Histogram(Only available under SDI mode) Time Code (Only available under SDI mode) Display Mode Disp Mirror Color Space Default options: F1:Color Space F2:Display Mode F3:Safety Marker F4:Aspect...
- Page 12 Press the "MENU" button to select Volume, Brightness, Contrast, Saturation, Hue, Sharpness. 3-3. MENU Operation When power on, press "MENU" on the device, the menu of function setting will display on the screen. Press "◄ / ►" button to choose menu; Then press "MENU"...
- Page 13 Brightness 0~100 Contrast 0~100 Saturation 0~100 0~100 Sharpness Color Space Native/Rec.709/User1~User3 Picture Off/Auto/HDR10 Backlight Mode Standard/Outdoor/User Backlight 0~100 Temperature 9300/7500/6500/5800/User Red Gain 0~256 Note: Available only under Green Gain 0~256 “User” mode. Blue Gain 0~256 Brightness Adjust the general brightness of the LCD. For example, if it uses outside in bright conditions, increase the LCD brightness to make it easier to view.
- Page 14 Color Space Selects the color space from among [Native], [Rec.709] [User1~User3]: Saturation/Hue/Color Temperature is only available under Native mode. Select [AUTO] or [HDR10] mode under HDR function, the color space will be saved as Native mode automatically. It can be only changed to other color space mode by hand.
- Page 15 Automatically recognize whether the input HDMI signal supports HDR. If it supports, the input signal shows as the HDR10 performance. If it doesn’t, HDR function is disabled. It’s suggested select [Auto] when use HDR function. [HDR10] Do not recognize whether the input HDMI signal supports HDR, it will activate the HDR function enforcedly when input signal.
- Page 16 Center Marker Select On, it will appear "+" marker on center of screen. Safety Marker Use this setting to set off the safety marker or choose the one of the safety markers: [OFF], [95%], [93%], [90%], [88%], [85%], [80%]. Aspect Marker Display the different aspect of the displayed image.
- Page 17 In [16:9] mode, images are scaled to fill the entire screen if the device aspect is 16:9. Underscan If the image shows size error, use this setting to zoom in/out pictures automatically when receiving HDMI signals Pixel to Pixel The pixel to pixel is a monitor set to 1:1 pixel mapping with native fixed pixels, which avoids loss of sharpness due to scaling artifacts and normally avoids incorrect aspect ratio due to stretching.
- Page 18 achieved without the use of costly, complicated external equipment. Exposure & Exposure Level The exposure feature helps the user achieve optimum exposure by displaying diagonal lines over areas of the image that exceed the setting exposure level. The exposure level can be set to 0~100. Note: Only available when under SDI mode.
- Page 19 code (VITC). The time code display on the monitor is synchronizing with that of Full HD camcorder’s. It displays the duration of the clips in hours: minutes: seconds: frames. It’s very useful for identifying specific frame in film and video production.
- Page 20 Display Rotate and Display Mirror This setting support to flip the image to 0°, 90°, 180°, 270° modes. It is only available when single display. Display mirror This setting displays two different input signals to Light/Right or Up and Down, the user can choose it to view the images according to the requirement.
- Page 21 Main/Sub/Full Display mode 2P PIP 1P In/1P Out/2P In/2P Out/3P Display mode 4P In/3P Out/4P In/4P Out/4P full Note: This Menu is enabled for audio source selection. It is only available when under multi-picture and picture-in-picture mode. Activate the corresponding EN source to select the needed audio and picture under Audio Source function.
- Page 22 Volume 0~100 NOTE: Only available Level Meter OFF/ON Audio when under SDI mode Audio Analog/Digital region 1~4 Source Digital region 2~4 is only available under multi-displays mode and must activate the corresponding Region under Select Region function at the same time. 3-3-8.
- Page 23 H Position 0~100 V Position 0~100 Clock Phase 0~100 3-3-9. System Reset Press to confirm after selected. Menu Time 10~60s OSD H Position 0~100 (To set menu display area) OSD V Position 0~100 (To set menu display area) Language English, Chinese System Transparency 0~255 (To set menu transparency)
- Page 24 OSD H Position and OSD V Position Move OSD horizontally or vertically. Language Switch between English and Chinese. Transparency Set Menu transparency. Increase the value, the more transparent it will be. OSD Rotate Flip OSD to three modes. Border Width and Border Color Information To display current information.
-
Page 25: Accessories
4. ACCESSORIES... - Page 26 1. Folding sun shade cover 1 piece 2. TALLY connector (in bulk) 1 piece 3. V-mount or Anton Bauer mounts Power cable 1 piece 4. V-mount or Anton Bauer mount 1piece 5. Manual 1 copy 6. Carry-on suitcase 1 piece 7.
-
Page 28: Parameters
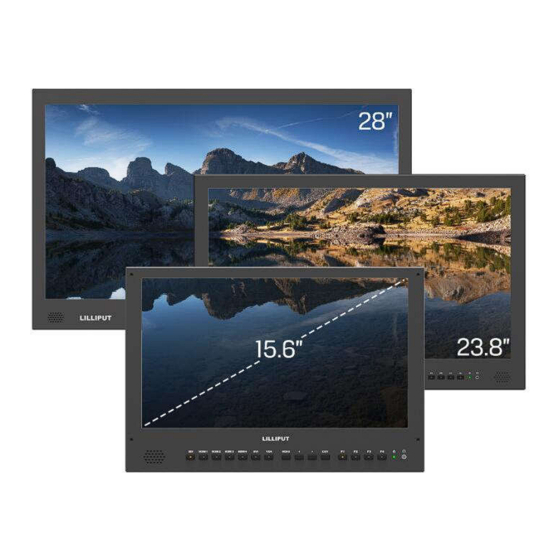
5. PARAMETERS Display Screen 15.6” 8bit IPS 23.8” IPS 28” IPS Physical 3840×2160 3840×2160 3840×2160 Resolution Aspect Ratio 16:9 16:9 16:9 Brightness 330cd/㎡ 300cd/㎡ 300cd/㎡ Contrast 1000: 1 1000: 1 1000: 1 Viewing Angle 176°/ 176°(H/V) 178°/ 178°(H/V) 170°/ 160°(H/V) DC12~24V DC 12~24V DC12~24V... - Page 29 6. TROUBLE SHOOTING 1. Only black-and-white display. Check whether the color saturation is properly setup or not. 2. Power on but no pictures. Check whether the cables of HDMI, VGA,DVI and 3G-SDI are correctly connected or not. Please use the standard power adapter coming with the product package.
- Page 30 Note: Due to constant effort to improve products and product features, specifications may change without notice. Appendix 1 3D LUT of Loading Manual BM-4KS supports 3DLUT to load the color calibration document and the User Log by using flash disk Format Requirement:...
- Page 31 It can be transformed by using Lut Converter (V1.3.30). 2-1. Activate Lut Converter One individual Product ID for one computer. Please send the ID number to Lilliput to get an Enter Key. Then the computer gets the permission of Lilliput Lut Converter after inputting the Enter Key.
- Page 32 2-3. Click Input File, then select *LUT 2-4. Click Output File, and then select the file name as required format. Such as: Rec709.cube, 3D Size: 17 Data Order:RGB, Table Order:RGB. Please note:The format which shown in Red Box above should be selected to RGB. 2-5.
- Page 33 Copy needed files to the root directory of the USB flash drive. Please note that the system only supports updating one LUT table at a time. Therefore, only a single file to be loaded can be copied to the USB flash drive. If it needs to update more LUT tables, please delete other files in USB flash disk and repeat the above steps.
Need help?
Do you have a question about the BM230 and is the answer not in the manual?
Questions and answers