Table of Contents
Advertisement
Quick Links
Advertisement
Table of Contents

Related Manuals for Lilliput Q7


Summary of Contents for Lilliput Q7
-
Page 1: User Guide
User Guide... -
Page 2: Table Of Contents
IMPORTANT SAFETY INSTRUCTIONS: Please read User Guide before using this product. Please keep User Guide for future reference. Please read the cautions to prevent possible danger and loss of property. FEATURES: High resolution: 1920×1200; Wide voltage: DC 7-24V; ... -
Page 3: Product Description
1. PRODUCT DESCRIPTION 1.Power ON/OFF: “○” is power OFF; “|” is power ON. 2.MENU Dial: Turn the dial to adjust volume; Menu function: press to activate menu displayed on screen when power on. Option function: select option via dialing to the left or right. Confirm function: press to confirm after option selected. -
Page 4: Dv Battery Mount Plate
2. DV BATTERY MOUNT PLATE Standard mounts process Following three types of battery plates are suitable for this device, model F970, QM91D, DU21 & LP-E6 (choose 2 out of 4). MODEL: F-970 MODEL: QM91D MODEL: DU21 MODEL: LP-E6 DV Battery Mount Plate: DV Battery Mount Plate Specification: Model DU21 for battery of Panasonic DV: NV-GS/PV-GS/DZ-MV/GS/H28/H258/H288GK series, comply with... - Page 5 V-mount battery plate (optional): Please refer to GP-L130AB type battery specifications. V-mount Battery Plate Plate Bracket Anton Bauer mount battery plate (optional): Please refer to GP-L130B type battery specifications. Anton Bauer Mount Battery Plate Plate Bracket...
-
Page 6: Menu Setting
3. MENU SETTING Before setting the functions, please make sure the device is connected correctly. 3-1. Shortcut keys: 3-1-1. the image menu Dialing to the left or right when power on, brightness will appear at the bottom of the screen, then press the dial to switch among of brightness, sharpness, contrast, saturation, volume, tint, MENU and Exit. - Page 7 ITEMS OPTIONS 0 – 100 Brightness 0 – 100 Contrast 0 – 100 Saturation 0 – 100 Tint 0 – 100 Sharpness 5500ºK /6500ºK/7500 ºK/9300 ºK/User 0 – 255 Red Gain Note: Available only under “User” 0 – 255 Green Gain 0 –...
- Page 8 3-2-3、Function ITEMS OPTIONS Scan Zoom, Aspect, Pixel TO Pixel (Options can be adjusted only under scan mode.) Aspect Full, 16:9, 1.85:1, 2.35:1, 4:3, 3:2 Underscan OFF, ON H/V Delay OFF, H, V, H/V Check Field OFF, Red, Green, Blue Zoom 10%~90% (step value is 10%) Freeze...
- Page 9 False Color OFF, ON Exposure OFF, ON 0 – 100 Exposure Level Histogram Y, RGB, Color Time Code OFF, LTC, VITC (available under SDI mode only.) 3-2-5、AUDIO ITEMS OPTIONS 0 – 100 Volume Level Meter OFF, ON (default as on under waveform multi function.) Audio Ch Ch1&Ch2, Ch3&Ch4, Ch5&Ch6, Ch7&Ch8,...
-
Page 10: Accessories
HDMI/SDI Convert OFF, ON Color Bar OFF, 100%, 75% OSD Timer 10s, 20s, 30s Image Flip OFF, H, V, H/V 0 – 100 Back Light Low, High Reset OFF, ON *HDMI/SDI cross conversion function can realize signal transmits from SDI input to HDMI output and from HDMI input to SDI output. -
Page 11: Parameters
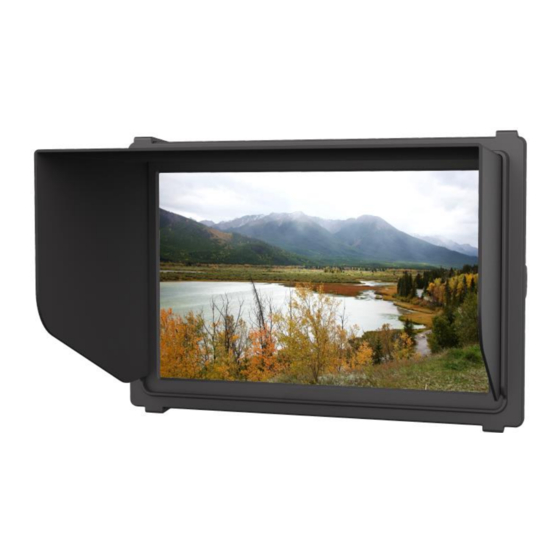
8. PARAMETERS Panel 7” Aspect Ratio 16:10 Physical Resolution 1920×1200 (324ppi) Brightness 500 cd/㎡ Contrast 1000: 1 Viewing Angle 170°/ 170°(H/V) Input Voltage DC 7-24V Input Signal 3G-SDI, HDMI ≤13W Power Consumption Operating Temperature -20℃~60℃ Storage Temperature -30℃~70℃ Dimension (LWD) 182×124×22mm Weight 405g...
Need help?
Do you have a question about the Q7 and is the answer not in the manual?
Questions and answers