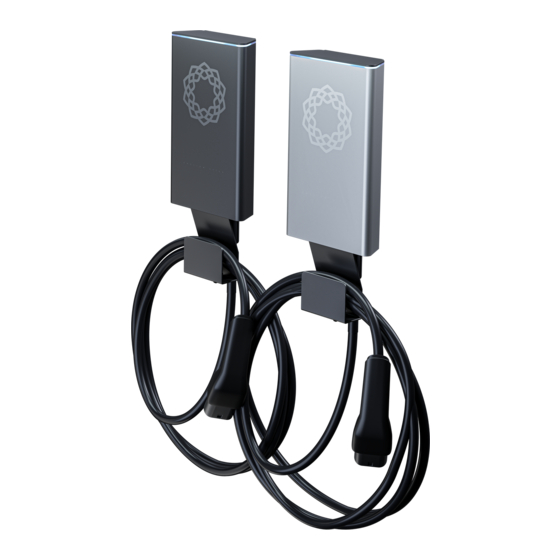
Enelion Stilo Quick Manual
Hide thumbs
Also See for Stilo:
- Getting started (2 pages) ,
- Full manual (18 pages) ,
- Assembly manual (22 pages)
Advertisement
Quick Links
Stilo
Quick Guide
Congratulations on your purchase of Enelion Stilo charger and thank you for
trusting us. Before the installation make sure that the box contains all ac-
cessories: Enelion Stilo charger, a short version of the User Manual, a RFID
card, Torx T25 bit, wall mounting template.
The current version of the manual and installation
guide is available at
http://enelion.com/en/help/
Introductory information
Enelion Stilo weights 4850 g.
The device is not provided with wall an-
chors/screws. These should be selected according to the device weight and
the holes in the wall.
The device should be mounted onto a flat vertical, using the 4 holes with
5,5 mm diameter at the back of the device. Use countersunk screws only.
The device is accompanied by a template to enable easy mounting and mark-
ing the mounting points. The manufacturer is not liable for damages resulting
from incorrect installation of the device on the wall. Installation should be
carried out by a competent person who has read the requirements of this
manual and is equipped with the tools necessary for proper installation.
Preparing the wiring system
Power service connection for the charging terminal must be equipped with a
proper overcurrent circuit breakerwhich is proper for the available power ca-
pacity in the connection, the charger configuration and the power supply. The
overcurrent circuit breaker also functions as the charging station main switch.
The wire cross-section must be selected based on the current configured in
the charger and the wire length.
To be compliant with the PN-EN IEC 61851-1: 2019-10 standard, each charg-
ing point must also be protected against type A or B residual current. This
requirement must be met by one of the below:
1. RCD type B ( 30 mA/40 A) or RCD EV (30 mA/40 A) in the switch-
board,
2. RCD typu A ( 30 mA/40 A) in the switchboard with the application of
Enelion RCM B - attached to the charging terminal.
The charger's supply line connected directly to the counter should be sepa-
rated from other devices.
Opening the device
The device comes in a closed casing. In order to open the device it is neces-
sary to use a Torx T25 bit provided with the device. Closing of the device is
performed by repeating the steps in the reverse order.
1. Locate the device closing bolt and remove it, using the torx T25 bit
(included) and a screw driver.
2. Hold the casing and slide it up the guiding grooves to remove it.
3. Store the casing in a safe place.
WARNING
Be careful not to crimple the signal tape while fitting the
front panel.
Mounting the device
1. Determine the target position of the device using the attached tem-
plate and the level and mark the mounting holes.
2. Make mounting holes in the wall and install wall expansion bolts.
3. Put the wall anchor to the holes and fix it with bolts.
4. Make sure there is no voltage on the power supply cable and prepare
it according to the instruction.
5. Open the charging terminal according to the instructions in Section
Opening the device.
6. Put the open device to its final position by threading the power cord
through the gland of the down side of the housing (hole A) and hook
it on the previously installed anchor.
WARNING
Cables connection should be done according to the dia-
gram. Pay attention to the order of phases, according to
the description at connectors.
7. Optionally Insert the length of at least 35cm of the communication
cables into the device.
8. Fix the device to the wall anchor with a mounting screw.
9. Screw on the power cable gland ensuring tightness.
10. Secure the hook of the charging cable with the fastening screws.
11. Push from up side closing the aluminum housing onto the device from
the top and secure it from the side with an anti-theft screw, according
;
to the information in the section Opening the device.
WARNING
The connection must be made by a person with the right
qualifications.
Advertisement

Subscribe to Our Youtube Channel
Summary of Contents for Enelion Stilo
- Page 1 Before the installation make sure that the box contains all ac- 2. Make mounting holes in the wall and install wall expansion bolts. cessories: Enelion Stilo charger, a short version of the User Manual, a RFID card, Torx T25 bit, wall mounting template.
- Page 2 Technical data The instruction may be changed as the product develops. There is no guarantee as to the accuracy of the provided information. All More detailed information is in the Stilo Assembly Manual. rights reserved. Mechanic specifications Document version: V 1.2...


Need help?
Do you have a question about the Stilo and is the answer not in the manual?
Questions and answers