Table of Contents
Advertisement
Quick Links
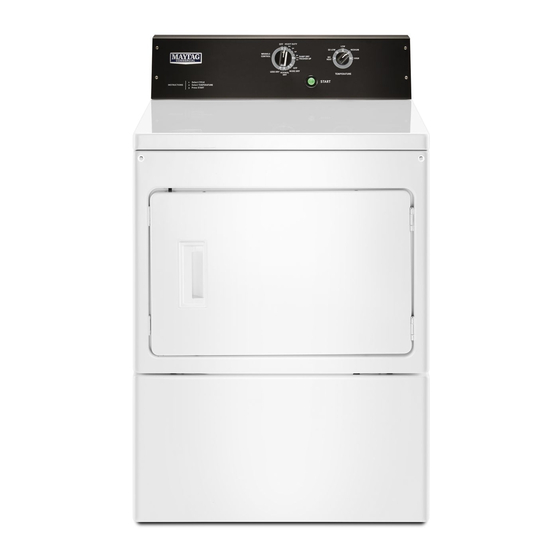
ELECTRIC DRYER INSTALLATION INSTRUCTIONS
27" WIDE MODELS - U.S.A. ONLY
Para obtener acceso al manual de uso y cuidado en español, o para obtener información
Tenga listo su número de modelo completo. Puede encontrar el número de modelo
adicional acerca de su producto, visite: www.maytag.com
y de serie dentro de la cavidad superior de la puerta.
Table of Contents
DRYER SAFETY ......................................................................... 2
INSTALLATION REQUIREMENTS ............................................. 3
Tools and Parts ...................................................................... 3
LOCATION REQUIREMENTS .................................................... 4
ELECTRICAL REQUIREMENTS ................................................ 6
INSTALL LEVELING LEGS ......................................................... 7
ELECTRICAL CONNECTION .................................................... 7
VENTING ................................................................................... 13
Venting Requirements ......................................................... 13
Plan Vent System ................................................................. 14
Venting Kits .......................................................................... 15
Install Vent System .............................................................. 15
Connect Vent ........................................................................ 16
LEVEL DRYER .......................................................................... 16
COMPLETE INSTALLATION CHECKLIST .............................. 17
REVERSE DOOR SWING (OPTIONAL) ................................... 17
TROUBLESHOOTING .............................................................. 19
INSTALLATION NOTES
________________________________
Date of purchase:
_______________________________
Date of installation:
_______________________________________
Installer:
__________________________________
Model number:
___________________________________
Serial number:
W11045669A
W11045670A-SP
1
Advertisement
Table of Contents

Related Manuals for Maytag Commercial MEDP575GW


Summary of Contents for Maytag Commercial MEDP575GW
-
Page 1: Table Of Contents
ELECTRIC DRYER INSTALLATION INSTRUCTIONS 27" WIDE MODELS – U.S.A. ONLY Para obtener acceso al manual de uso y cuidado en español, o para obtener información adicional acerca de su producto, visite: www.maytag.com Tenga listo su número de modelo completo. Puede encontrar el número de modelo y de serie dentro de la cavidad superior de la puerta. -
Page 2: Dryer Safety
DRYER SAFETY... -
Page 3: Installation Requirements
INSTALLATION REQUIREMENTS Tools and Parts Gather the required tools and parts before starting installation. Read and follow the instructions provided with any tools listed here. Adjustable wrench that Utility knife Tools needed: opens to 1" (25 mm) or hex-head socket wrench Flat-blade screwdriver #2 Phillips screwdriver Tape measure... -
Page 4: Location Requirements
Dryer Dimensions Parts needed: Check local codes. Check existing electrical supply and venting, Back View and read “Electrical Requirements” and “Venting Requirements” before purchasing parts. Mobile home installations require metal exhaust system 27" hardware, available for purchase from the dealer from whom (686 mm) you purchased your dryer. - Page 5 Minimum spacing for recessed area Mobile home – Additional installation requirements or closet installation This dryer is suitable for mobile home installations. The The dimensions shown following are for the minimum spacing installation must conform to the Manufactured Home allowed. Construction and Safety Standard, Title 24 CFR, Part 3280 (formerly the Federal Standard for Mobile Home Construction Additional spacing should be considered for ease of...
-
Page 6: Electrical Requirements
ELECTRICAL REQUIREMENTS If your outlet looks like this: Then choose a 4-wire power supply cord It is your responsibility: with ring or spade terminals and UL Listed To contact a qualified electrical installer. strain relief. The 4-wire power supply cord, ■... -
Page 7: Install Leveling Legs
INSTALL LEVELING LEGS ELECTRICAL CONNECTION Power Supply Cord Prepare dryer for leveling legs To avoid damaging oor, use a large at piece of cardboard from dryer carton; place under entire back edge of dryer. Electrical Connection Options Firmly grasp dryer body (not console panel) and gently lay dryer down on cardboard. - Page 8 Power Supply Cord Connection Direct Wire Power supply cord strain relief Attach power supply cord strain relief Fire Hazard Use 10 gauge copper wire. Use a UL listed strain relief. Disconnect power before making electrical connections. Connect neutral wire (white or center wire) to center terminal.
- Page 9 4-Wire Power Supply Cord Connection Connect ground wire IMPORTANT: A 4-wire connection is required for mobile homes and where local codes do not permit the use of 3-wire connections. 4-wire receptacle 4-prong plug (NEMA type 14-30R) Connect ground wire (F) (green or bare) of power supply cord to external ground conductor screw (A).
- Page 10 Direct Wire Connection Remove center screw Direct wire strain relief Attach direct wire strain relief Remove center terminal block screw (B). Connect neutral wire Unscrew the removable conduit connector (A) and any screws from a 3/4" (19 mm) UL Listed strain relief. Put the threaded section of the strain relief (C) through the hole below the terminal block opening (B).
- Page 11 4-Wire Direct Wire Connection Connect ground wire IMPORTANT: A 4-wire connection is required for mobile homes and where local codes do not permit 3-wire connections. Prepare your 4-wire cable for direct connection Connect ground wire (green or bare) (F) of direct wire cable to external ground conductor screw (A).
- Page 12 Optional 3-Wire Connection Remove center screw IMPORTANT: You must verify with a qualifi ed electrician that this grounding method is acceptable before connecting. Prepare to connect neutral ground wire and neutral wire Remove center terminal block screw (B). Connect neutral wire Remove center terminal block screw (B).
-
Page 13: Venting
Rigid metal vent: Connect external ground wire Recommended for best drying performance and to avoid ■ crushing and kinking. Flexible metal vent: (Acceptable only if accessible to clean) Must be fully extended and supported in fi nal dryer location. ■ Remove excess to avoid sagging and kinking that may result ■... -
Page 14: Plan Vent System
Clamps: Optional exhaust installations: Use clamps to seal all joints. ■ Exhaust can be converted out the right side, left side, or through the bottom (4-way vent kit). Each kit includes step-by-step Exhaust vent must not be connected or secured with screws ■... -
Page 15: Venting Kits
Venting Kits Determine vent length and elbows needed for best drying performance: For more information, call 1-800-344-1274, or visit us Use following Vent System Chart to determine type of vent ■ at www.maytagreplacementparts.com. material and hood combinations acceptable to use. NOTE: Do not use vent runs longer than those specifi ed Part Number Descriptions... -
Page 16: Connect Vent
LEVEL DRYER Connect vent to exhaust hood Level dryer Vent must fi t over the exhaust hood. Secure vent to exhaust hood with 4" (102 mm) clamp. Run vent to dryer location using straightest path possible. Avoid 90° turns. Use clamps to seal all joints. -
Page 17: Complete Installation Checklist
COMPLETE INSTALLATION REVERSE DOOR SWING CHECKLIST (OPTIONAL) ❑ NOTE: Magnetized screwdriver is helpful. Check that all parts are now installed. If there is an extra part, go back through steps to see what was skipped. 27" Wide Model Side-Swing Door ❑... - Page 18 Remove screws from hinges Flip door over Flip door over so handle side is down. Attach door hinges Remove screws attaching hinges to door. Remove screws from door Remove screws at top, bottom, and side of door (six screws). Keep door screws separate from hinge screws as they are different sizes.
-
Page 19: Troubleshooting
TROUBLESHOOTING Insert screws in hinge holes See the Use and Care Guide or visit our website and reference on dryer cabinet “Frequently Asked Questions” to possibly avoid the cost of a service call. NOTE: Two people may be needed to reinstall door. Insert screws into the bottom holes on left side of dryer cabinet. - Page 20 NOTES W11045669A W11045670A–SP ©2017 Maytag. All rights reserved. 05/17 ®...
Need help?
Do you have a question about the MEDP575GW and is the answer not in the manual?
Questions and answers