Asko TLS752 XXL Operating Instructions Manual
Asko tls752xxl: user guide
Hide thumbs
Also See for TLS752 XXL:
- Mode d'emploi (51 pages) ,
- Instrucciones de funcionamiento (51 pages)
Table of Contents
Advertisement
Operating Instructions
Tumble Dryer
Save these instructions for future reference
Dear Customer,
Thank you for choosing this quality product from ASKO.
We hope it will meet all of your expectations and fulfill your
needs for many years to come. The Scandinavian design is a
combination of clean lines, everyday functionality and high
quality. These are the hallmarks for all of our products and
this is why they are so highly appreciated all over the world.
To get the most out of your new ASKO product, we
recommend that you read the installation and operating
instructions before using the machine.
ASKO TLS752 XXL
1
Customer Care Center
1-800-898-1879
www.askousa.com
Advertisement
Table of Contents

Related Manuals for Asko TLS752 XXL


Summary of Contents for Asko TLS752 XXL
-
Page 1: Tumble Dryer
These are the hallmarks for all of our products and this is why they are so highly appreciated all over the world. To get the most out of your new ASKO product, we recommend that you read the installation and operating instructions before using the machine. - Page 2 Customer Care Center 1-800-898-1879 www.askousa.com...
-
Page 3: Gas Dryer
Important Safety Instructions For Gas Dryer Caution! For your safety, the information in this manual must be followed to minimize the risk of fire or explosion, or to prevent property damage, personal injury, or death. A qualified service person or company must perform installation and service of this appliance. -
Page 4: Table Of Contents
Contents Important safety instruction for gas dryer Before using your machine for the first time Important safety instructions Grounding instruction Interrupting a program Packing material Recycling California Safe Drinking Water and Toxic Enforcement Act Child safety Description of the tumble dryer Front panel Advice and tips before you tumble dry... -
Page 5: Before Using Your Machine For The First Time
Befere Using Your Machine For The First Time Do not tumble dry Certain materials are not suitable for tumble drying. Always check and follow the Instructions on each item’s laundry label. You can find more information in the “Advice and tips before you tumble dry” chapter. -
Page 6: Important Safety Instructions
• The interior of the machine should be cleaned periodically by an authorized ASKO service agent. • Do not place items exposed to cooking oils in your dryer. Items contaminated with cooking oils may contribute to a chemical reaction that could cause a load to catch fire. -
Page 7: Grounding Instruction
Important Safety Instructions Caution! This appliance must be properly grounded. Grounding instruction A) Grounding instructions for a grounded, cord-connected appliance: In the event of malfunction or breakdown, grounding will reduce the risk of electric shock by providing a path of least resistance for electric current. -
Page 8: California Safe Drinking Water And Toxic Enforcement Act
Important Safety Instructions Caution! California Safe Drinking Water and Toxic Enforcement Act This act requires the governor of California to publish a list of substances known to the state to cause cancer, birth defects or other reproductive harm and requires businesses to warn customers of potential exposure to such substances. -
Page 9: Child Safety
Child Safety Caution! Do not allow children to play with the Tumble dryer. The tumble dryer does not start automatically when the door closes (for example, if a child closes the door from inside). The tumble dryer has a door lock, which allows the door to be opened from the inside. -
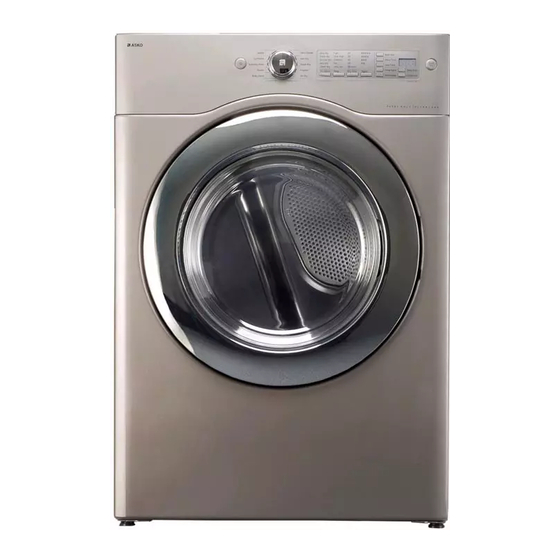
Page 10: Description Of The Tumble Dryer
Description Of The Tumble Dryer 1. Top plate 2. Program panel 3. Front cabinet 4. Lint filter holder 5. Fan (behind the front cabinet) 6. Adjustable legs 7. Glass door 8. Outer door Accessories Dryer Rack Stacking Kit Purchased Separately Pedestal Purchased Separately * Design of pedestal is subject to change without manufactures notice. -
Page 11: Front Panel
Front Panel 1. Main power button 2. Program selector 3. Display window 4. Setting buttons 5. Option buttons 6. Start/Stop button Customer Care Center 1-800-898-1879 www.askousa.com... -
Page 12: Advice And Tips Before You
Advice And Tips Before You Tumble Dry Here are some tips that may help you before you begin tumble drying. Have the clothes been through a spin cycle? Items to be tumble dried should be spun at 1000 rpm or faster. Higher spin speeds save both energy and drying time. -
Page 13: Operating Instructions
Operating Instructions Caution! To reduce the risk of electric shock or injury, read the “Important Safety Instructions” selection before operating this appliance. Below are step-by-step instructions to help you achieve the best possible tumble drying results. Sort your fabrics. You will achieve the most uniform drying results if the items are made of the same type of material. -
Page 14: Sensor Dry Preset Program Chart
Operating Instructions Sensor Dry Preset Program chart Sensor Dry Programs Temperature Load Type Bulky Items (Bulky, Heavy weight) Towels (Towel, Heavy weight) Everyday Wear Mid. High (Towel, Denim pants) Synthetics (Prem. press, Synthetic) Gentle (Lingerie, Blouses) Ultra Gentle (Race, workout clothes, Spandex) Iron Dry (Shear, Workout wear,... -
Page 15: Manual Dry Preset Program Settings
Operating Instructions Air Dry This program is used for items that require drying without heat such as rubber, plastic and heat-sensitive fabrics. When using Air Dry This chart shows examples of items that can be dried using Air Dry. Type of Load Foam rubber-pillows, padded bras, stuffed toys Plastic shower curtains, tablecloths... -
Page 16: Programmed Setting And Options Guide
Operating Instructions Programmed setting and options guide Cycles Default Bulky items Select Default Towels Select Default Everyday wear Select Default Synthetic Select Default Gentle Select Default Ultra gentle Select Default Iron dry Select Default Quick dry Select Default Steam Breeze Select Default Air dry... -
Page 17: Loading Or Removing Laundry
Operating Instructions Press the Start button Remaining drying time The remaining drying time will be shown on the display. For example, 1:35 means it will take approximately 1 hour and 35 minutes for the load to dry. If the Anti- crease option has been selected, the drum will rotate until you press the Power button or Start/Stop button. -
Page 18: Selecting Settings
Selecting Settings Dry Sensor • Use these buttons to set the desired dry level. • First, select the Sensor Dry program. • Select the dry level to adjust how much you want to dry the load. As the program runs, the control senses the dryness of the load and adjusts the time automatically based on the selected dryness level. -
Page 19: Selecting Options
Selecting Options Rack Dry Rack Dry is designed to use for items which are not suitable for tumble drying such as sweaters, silk and lingerie. This option may be used for drying sneakers Note! During the Rack Dry cycle • Time remaining goes to 55 min. -
Page 20: Damp Signal
Selecting Options Note! Time change is available only with Manual dry, Dry Time and Rack dry programs. Damp Signal When you select the Damp Signal option, a beep will alert you when your load is just damp enough for ironing or pressing. This notice will allow you to remove lightweight items that are dry or other items that you may wish to iron. -
Page 21: Care And Maintenance Instruction
Care And Maintenance Instruction Cleaning the lint filter Clean the filter after each use and check it before use. Not cleaning or emptying the filter will increase drying time and energy consumption, potentially shortening the dryer life expectancy. 1. Open the door and pull the filter straight 2. -
Page 22: Troubleshooting Guide
Troubleshooting Guide Save time and money! Review the charts on the following pages first and you may not need to call for service. 1. Problem: My dryer won’t start. Question • Is the dryer plugged in? • Is the fuse blown, or is the circuit breaker tripped? 2. -
Page 23: There Is Lint On My Clothes
Troubleshooting Guide 5. Problem: There is lint on my clothes. Question • Is your lint filter full? Please refer to the manual section on cleaning the lint filter, and please confirm that the lint filter is clean. It is important that the lint filter is clean before each new load of laundry. -
Page 24: It Takes Too Long For My Clothes To Dry
Troubleshooting Guide 9. Problem: It takes too long for my clothes to dry. Question • Did you properly sort your loads of laundry? • Are you drying large loads of heavy fabrics? • Are the dryer controls properly set? • Is the lint filter clean before each new load of laundry? •... -
Page 25: Steam
Troubleshooting Guide 12. Problem : Steam Question • Water drips from nozzle This is normal condensation. The dripping will stop soon.. when Steam cycle starts. • Steam doesn’t generate but Check if the cord of dryer is connected. If the steam isn’t generated even no error code is shown with the dryer plugged in, call the service center. -
Page 26: Installation Instructions
Installation Instructions Caution! Risk of Fire Dryer installation must be performed by a qualified installer. • Install the dryer according to the manufacturer’s instructions and local codes. • Do not install a dryer with flexible plastic venting materials. If flexible metal (foil type) duct is installed, it must be UL certified for use with clothes dryers. - Page 27 Installation Instructions Minimum clearances on top, rear, and sides of the unit as show below are required. Those required minimum clearances are set forth in the picture below. Please keep the following instructions in mind when installing in a closet or recessed area : •...
- Page 28 Installation Instructions Once in position, adjust the leveling legs of the dryer until it is level from left to right and front to back. Be sure to tighten the leveling leg lock nuts against the bottom of the dryer. The leveling legs must remain firmly on the floor and the dryer should not rock.
-
Page 29: Connecting The Exhaust System
Installation Instructions Step 2. Connecting the exhaust system Caution! • To reduce the risk of fire this appliance MUST BE EXHAUSTED OUTDOORS. • The appliance shall not be exhausted into a chimney, a wall, a ceiling, an attic, a crawl space, or a concealed space of building. -
Page 30: Alternate Exhaust Directions
Installation Instructions Alternate exhaust directions 1. Insert the 90° Elbow (4”) into the end of the exhaust duct on the rear panel in the correct direction. * Duct materials are not supplied with unit. 2. Connect the straight exhaust duct into the end of the 90°... -
Page 31: Connection Of Gas Supply
Installation Instructions Step 3. Connection of gas supply (Gas dryer only). In addition to the following, please refer to manual section on Gas Requirements and Instructions. 1. New stainless steel flexible connector. Use this type of connector only if allowed by local codes. -
Page 32: Electrical Plug Connections
Installation Instructions Step 4. Electrical plug connections The following instructions apply to U.S. electrical dryer model: The following steps are several warnings and instructions concerning making the electrical connection for electric dryers. More detailed information concerning the electrical connection is provided in the manual section entitled Electrical Requirements for Electric Dryer. -
Page 33: Dryer Airflow
Installation Instructions Step 7. Dryer airflow Effective dryer operation requires appropriate dryer airflow. The adequacy of the airflow can be measured by evaluating the static pressure. Static pressure in the exhaust duct can be measured with a manometer, placed on the exhaust duct approximately 1 ft. -
Page 34: Additional Instructions For Installation Of Your Dryer In A Manufactured Or Mobile Home
Installation Instructions Step 9. Additional instructions for installation of your dryer in a manufactured or mobile home The following instructions are applicable to installations of the dryer in a manufactured or mobile home. Any installation in a manufactured or mobile home must comply with the Manufactured Home Construction and Safety Standards Title 24 CFR, Part 32-80 or Standard CAN/CSA0Z240 MH... -
Page 35: Gas Requirement
Installation Instructions Gas requirements Following are some important instructions and informations concerning the requirements for the gas supply and service for gas dryers. Caution! The gas supply and service for a gas dryer must comply with all local codes and ordinances. In the absence of any local codes or ordinances in your area, the gas supply and service for your gas dryer must comply with the latest edition... -
Page 36: Gas Connections
Installation Instructions Gas connections Caution! • Connect the dryer to the type of gas shown on the data plate. • Use a new AGA or CSA approved gas supply line. • Use new flexible stainless steel connectors. • Install a shut-off valve. •... -
Page 37: Electrical Requirements For Dryer
Installation Instructions Electrical requirements for dryers Caution! To help prevent fire, electric shock, serious injury or death, the wiring and grounding must conform to the latest edition of the National Electrical Code, ANSI/NFPA 70 (for the US) or the Canadian Electrical Code CSA C22.1 (for the Canada) and all applicable local regulations. -
Page 38: Electrical Connections
Installation Instructions Electrical connections Before operating or testing, follow all grounding instructions in the Grounding section. An individual branch (or separate) circuit serving only your dryer is recommended. Do not use an extension cord. Gas dryer – U.S. and Canada A 120 volt, 60 Hz AC approved electrical service, with a 15 amp fuse or circuit breaker is required. -
Page 39: Electrical Requirements
Electrical Requirements Review the following options to determine the appropriate electrical connection for your Home: Use the instructions in this section if your home has a 4-wire receptacle (NEMA type 14-30R) and you will be using a U.L. listed, 120/240V 30amp, dryer power supply cord. 4-wire receptacle (NEMA type14-30R) If this type is available at your home, you... - Page 40 Electrical Requirements 4-wire connection: Direct wire Caution! Grounding through the neutral conductor is prohibited for 1. New branch-circuit installations. 2. Mobile homes. 3. Recreational vehicles 4. Areas where local codes prohibit grounding through the neutral conductor. Prepare minimum 5 ft. (1.52 m) of length in order for dryer to be replaced.
-
Page 41: 3-Wire Connection : Direct Wire
Electrical Requirements 3-wire connection : Direct wire Caution! Grounding through the neutral conductor is prohibited for 1. New branch-circuit installations 2. Mobile homes. 3. Recreational vehicles. 4. Areas where local codes prohibit grounding through the neutral conductor. Prepare minimum 5 ft. (1.52 m) of length in order for dryer to be replaced. -
Page 42: Option 1: 4-Wire Connection With A Power Supply Cord
Electrical Requirements Option 1: 4-wire connection with a power supply cord • lf your local codes or ordinances do not allow the use of a 3-wire connection, or you are installing your dryer in a mobile home, you must use a 4-wire connection. -
Page 43: Option 2: 3-Wire Connection With A Power Supply Cord
Electrical Requirements Option 2: 3-Wire connection with a power supply cord • lf your local codes or ordinances permit the connection of a frame-grounding conductor to the neutral wire, use these instructions. • If your local codes or ordinances do not allow the connection of a frame- grounding conductor to the neutral wire, use the instructions under Section 1:... -
Page 44: Exhaust Requirements
Exhaust Requirements Following are important instructions and information concerning the exhaust requirements for your dryer. Caution! To reduce the risk of fire, electric shock, or injury to person, read the IMPORTANT SAFETY INSTRUCTIONS before operating this appliance. To reduce the risk of fire, combustion, or accumulation of combustible gases, DO NOT exhaust dryer air into an enclosed and unventilated area, such as an attic, wall, ceiling, crawl space, chimney, gas vent, or concealed space of a building. -
Page 45: User-Maintenance Instructions
User-Maintenance Instructions Exhaust requirements and instructions: 1. Venting materials are not provided with the dryer and you should obtain the necessary venting materials. For example, the outer end of exhaust pipe must have a weather hood with hinged dampers to prevent back draft when the dryer is not in use. -
Page 46: Cleaning The Lint Screen
User-Maintenance Instructions Cleaning the lint screen 1. Clean the lint filter once either before or after drying each load. Always make sure the lint filter is clean before starting a new load, because a clogged lint filter may increase drying times. 2. -
Page 47: Reversing The Door
Reversing The Door Door hanging The tumble dryer comes with the door hinged on the right. However, it is possible to change the door to be hinged on the left. Following these instructions: 1. Open the door and remove the two bolts holding the hinge. -
Page 48: Technical Information
Technical Information Technical data Dimension (inches) Unit Weight (lb.) Cylinder volume: Max. drying capacity: Speed: Rated power: Drum material: Outer casing material: Setup 27” (68.6 cm) x 32 (81.2 cm) x 40 3/8” (102.5 cm) x 52 (132 cm) W x D x H x Depth with door open 129 lb. -
Page 49: Service And Guarantee
Service And Guarantee Asko Appliances Inc. will not pay for: Service calls to: 1. Correct the installation of the appliance. 2. Repair damage due to shipment, delivery, installation, misuse or abuse. 3. Instruct how to use the appliance. 4. Replace house fuses or correct house wiring. - Page 50 After unpacking the washer, thoroughly check the unit for cosmetic damage. Asko Appliances Inc. will pay for: ASKO replacement parts and/or repair labor to correct defect in materials or workmanship.
-
Page 51: Quick Guide
Quick Guide Sort your Fabrics • Dry fabrics of the same type together to ensure they dry as evenly as possible. Turn on the main power button Open the door, load the items and then close the door Select a program •...
Need help?
Do you have a question about the TLS752 XXL and is the answer not in the manual?
Questions and answers