
Related Manuals for MRC UT-200A


Summary of Contents for MRC UT-200A
- Page 1 Operation Manual UT-200A Microplate Reader PLEASE READ THIS MANUAL CAREFULLY BEFORE OPERATION Hagavish st. Israel 58817 Tel: 972 3 5595252, Fax: 972 3 5594529 mrc@mrclab.com MRC.1.22...
- Page 2 Version modification Record: Version No. Date Modification Description Initial Release V1.0 2019.12.16 Revised performance parameters and V2.0 2020.5.11 add accessories included...
-
Page 3: Opening Check
Foreword Thank you for purchasing our Microplate Reader. This user manual describes how the instrument works and the operation guide, please read carefully before operation and keep for future reference. Opening check Please check the instruments as well as all accessories with packing list when you first open it. -
Page 4: Safety Warning And Guidelines
Safety Warning and Guidelines 1. Important information for safe use Users should have a clear main idea on how to use this instrument before operate, do read this user manual carefully. Any improper operation without reading manual is forbidden, otherwise there will be risks in cause accidental injury or electrical shock. - Page 5 The operator should not open or repair the Instrument by himself, which will result in losing the qualification of repair guarantee or occur accident. If there is some wrong with the Instrument, please contact manufacturer for repair. Before power on, guarantee the voltage used should be accordant to the voltage needed, and the rated load of electrical outlet should not lower than the demand.
-
Page 6: Table Of Contents
Contents Foreword..............................I Opening check............................I Safety Warning and Guidelines......................II 1. Important information for safe use................... II 2. Safety Tips........................... II Chapter 1 Brief Introduction........................ 1 Chapter 2 Features..........................2 Chapter 3 Instrument Structure......................3 Chapter 4 Installation..........................4 1. Opening check..........................4 2. -
Page 7: Chapter 1 Brief Introduction
Chapter 1 Brief Introduction Chapter 1 Brief Introduction This automatic microplate reader UT-200A is professional instrument for hetELISA , measuring concentration, absorbance, positive or negative of - Linked antibody and antigen in the sample by testing the color of the Enzyme Immunosorbent Assay (ELISA). -
Page 8: Chapter 2 Features
Microplate Reader Operation Manual Chapter 2 Features Chapter 2 Features Working conditions: Ambient temperature: 10C~40C The relative humidity: 30%~80%(No condensation) Power: AC100-240V 50-60Hz 2A Parameters: Model UT-200A Parameter Light source Xenon flash lamp >10 flashes Wavelength 200~1000nm Bandwidth ≤ 2.5nm... -
Page 9: Chapter 3 Instrument Structure
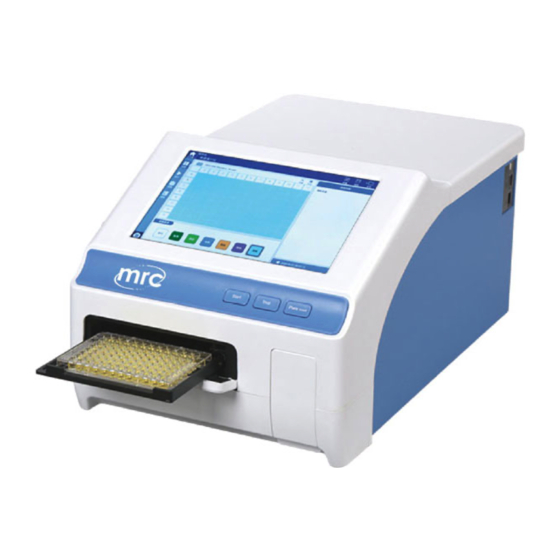
Microplate Reader Operation Manual Chapter 3 Instrument Structure Chapter 3 Instrument Structure Structure Rear cover Touch screen Roof cover Front door Extension module Plate holder External Button B-type USB Port USB Port LAN Port Air outlet Power Socket Switch ─ ─... -
Page 10: Chapter 4 Installation
Chapter 4 Installation Chapter 4 Installation Opening check .1 Each UT-200A is thoroughly tested before shipping, but please check again when you :receive the instrument and contact your local distributor or manufacturer if • The outer package is damaged ... - Page 11 Microplate Reader Operation Manual Chapter 4 Installation Note: Attention to the interface of the power adapter, please connect it to the power according to the direction of the above picture. Switch “I/O” button to “I” to turn on the instrument, the front panel will cycle through a start-up and self-test screen.
-
Page 12: Chapter 5 Operation Guide
Microplate Reader Operation Manual Chapter 5 Operation Guide Chapter 5 Operation Guide 1. Instrument self-check This chapter introduces default protocol operation,beginning with self-check after power on. Refer to the picture below: Fig 2 User login interface will appear after self-checking, see Fig 3. Fig 3 ─... -
Page 13: System Settings
Microplate Reader Operation Manual Chapter 5 Operation Guide Table 1 Creation User type Default password Permission Export Method For all files of Can not be Admin “123456” Admin, User and deleted Guest All can be Created by Default is “123456” or User exported Admin... -
Page 14: Protocol Management
Microplate Reader Operation Manual Chapter 5 Operation Guide Fig 5 Note: 1. The instrument need to be restarted after date and time settings finished. 2. The function of maintenance is only for manufacturer use, does not open for users. 3. Click “Home” button on top left corner for the main interface. 3. - Page 15 Microplate Reader Operation Manual Chapter 5 Operation Guide Protocol name can be modified by clicking it directly. The default name of a new protocol is the system time, and it can be modified by manual. A hint will pop-up when a modified protocol not saved.
-
Page 16: Read A Microplate
Microplate Reader Operation Manual Chapter 5 Operation Guide When the protocol list is in unfold state, users can do below operations: Search: Enter keyword to carry out searching automatically. Sorting: protocols can be sorted according to “Name”, “Date” and “State”. “demo1”, “demo2”... - Page 17 Microplate Reader Operation Manual Chapter 5 Operation Guide Meanwhile, the switching bar will turn out to be type select which includes 6 sample types, as well as clear option. Choose the right sample type, the optional bar will change accordingly, then click corresponding wells of the main display area to finish the settings. Note: the whole plate can be set if clicking the blank area on top left corner of the main display area.
- Page 18 Microplate Reader Operation Manual Chapter 5 Operation Guide For clearing sample well settings. Fig 9 Note: Elisa plate layout can be carried out before or after testing, for example, users can set all wells as “unknown”, do absorbance test, then layout of plate. The test data and layout are separated, users can modify or analyze the layout of historical data in real time.
- Page 19 Microplate Reader Operation Manual Chapter 5 Operation Guide Meanwhile the switching bar will turn out to be controller which mainly includes below functions: Incubator: this function can make the plate detection chamber up to specified temperature, the temperature displays is the real time temperature. ...
- Page 20 Microplate Reader Operation Manual Chapter 5 Operation Guide Table 2 Endpoint Kinetic Spectrum ┗ Selected Parameters ┗ Selected Parameters ┗ Selected Parameters ┗ Wavelength ┗ Wavelength ┗ Wavelength ┗Mode ┗Mode ┗Mode ┗Fast ┗Fast ┗Fast ┗Precision ┗Precision ┗Precision ┗ Wavelength ┗ Wavelength ┗...
- Page 21 Microplate Reader Operation Manual Chapter 5 Operation Guide 4.3 Detect a Elisa plate Click “ ” on screen or “Plate in/out” on the front of the enclosure, place an Elisa plate on the plate holder, attention to the direction please, see Fig 11. Fig 11 Click button “...
-
Page 22: Result Processing
Microplate Reader Operation Manual Chapter 5 Operation Guide 5. Result processing The interface will stay in “Run” interface after detecting samples in “Run” interface and displays the original absorbance measured under the current protocol. If users want results been analyzed, just switch to “Result” interface in the side bar, see Fig 13. Fig 13 Result displayed different according to different layout of protocol settings and detection modes, the above Fig 13 is results of endpoint. - Page 23 Microplate Reader Operation Manual Chapter 5 Operation Guide Basic Calculation”: the four basic arithmetics “+”, “-”, “x”, “/” can be performed for “ the absorbance at different wavelengths of the same well. “Standard Curve”: Based on the concentration of the standard well and measured absorbance, the instrument will generate corresponding standard curve according to standard sample sequence for sample concentration calculation, see Fig 14.
- Page 24 Microplate Reader Operation Manual Chapter 5 Operation Guide by concentration conversion and absorbance conversion, UT-200A supports four types :as below Linear/Linear (Linear fitting of absorbance value and corresponding concentration) Linear/Log (Linear fitting of absorbance value and the logarithm of the concentration) ...
- Page 25 Microplate Reader Operation Manual Chapter 5 Operation Guide Fig 16 Note: protocol layout interface must be set with “Quality” well, otherwise, this button will be not available. 5.2 Kinetics As Fig 17 shows, the main display area is not absorbance values, but kinetic curves. Fig 17 Choose the target well, click “Graph”...
- Page 26 Microplate Reader Operation Manual Chapter 5 Operation Guide Fig 18 “Calculation” area turns out four types: “Raw Data”, “Blank Subtraction”, “Basic Calculation” and “Kinetic Analysis” as the above Fig 18 shows. For functions and algorithms of “Raw Data”, “Blank Subtraction” and “Basic Calculation”, please see Fig 5.1.
- Page 27 Microplate Reader Operation Manual Chapter 5 Operation Guide Fig 19 5.3 Spectral Analysis See Fig 20, select target wells, click “Graph” button to enlarge the spectral curve, the absorbance of each wavelength shown on the curve. Users can click “Back” button to the graphic main interface.
- Page 28 Microplate Reader Operation Manual Chapter 5 Operation Guide criterion. Ration within Spectrum:set two wavelength values λ1 and λ2, calculate the value of λ1/λ2. Select Wavelength Range : read measurement values within a set wavelength range. Select Single Wavelength :read the measurement value of a single wavelength. Fig 21 Description of each button on the upper right corner of the main display area: Print the current content of the main display area...
-
Page 29: Report Exporting
Microplate Reader Operation Manual Chapter 5 Operation Guide 6. Report exporting Both processed data and raw data can be exported, click “Report” button on the left side to the main interface of reports, see Fig 22. Fig 22 Choose the right format on “File Type” area, four formats are available: ... -
Page 30: Chapter 6 Maintenance, Storage, Transportation
Microplate Reader Operation Manual Chapter 6 Maintenance, storage, transportation Chapter 6 Maintenance, storage, transportation 1. Maintenance Keep storage environment dry and clean to prevent moisture, corrosion, away from strong electromagnetic interference sources. Instrument already calibrated before leave factory. User is not allowed to disassembly and make adjustment. -
Page 31: Chapter 7 Trouble Shooting
Microplate Reader Operation Manual Chapter 7 Troubleshooting Chapter 7 Trouble shooting Trouble description Possible reason Solution a. Check the if the instrument The Microplate Reader energized. Power supply failure can not be started b. If the power plug loose c. Check the voltage “Communication Restart the instrument and try again;... -
Page 32: Chapter 8 Accessories
Microplate Reader Operation Manual Chapter 8 Accessories Chapter 8 Accessories Item Type Unit Remarks Power cord Adapter 24V 160W Mouse Logitech Performance test statement Operation Manual Packing List U-Disk Certification...
Need help?
Do you have a question about the UT-200A and is the answer not in the manual?
Questions and answers