Fri-Jado BS3-i User Manual
Hide thumbs
Also See for BS3-i:
- Service manual (88 pages) ,
- Service manual (49 pages) ,
- Service manual (48 pages)

Subscribe to Our Youtube Channel
Related Manuals for Fri-Jado BS3-i


Summary of Contents for Fri-Jado BS3-i
- Page 1 USER MANUAL BS3-i BS5-i BS8-i BS10-i WARNING Read the instructions before using the machine. EN (Original Instruction) 9124182 / 1503...
- Page 2 KEEP THIS USER MANUAL FOR FUTURE USE © 2015 Fri-Jado BV, Etten-Leur, The Netherlands. We advise you to contact your supplier for the guarantee period and conditions. Further we refer to our General Terms and Conditions for Sales and Delivery that are available upon request.
- Page 3 Empty page. 3 / 36...
-
Page 4: Table Of Contents
CONTENTS INTRODUCTION ......................6 1.1. General ........................6 1.2. Identification of the unit ....................6 1.3. Pictograms and symbols .................... 6 1.4. Safety instructions ..................... 7 1.4.1. General ....................... 7 1.4.2. Moving ........................ 7 1.5. Hygiene ........................8 1.6. Service and technical support ..................8 1.7. - Page 5 6.1. General ........................19 6.2. Information ....................... 19 6.2.1. Access ......................19 6.2.2. Overview ......................19 6.3. Manager ........................20 6.3.1. Access ......................20 6.3.2. Overview parameters ..................20 6.4. Service Menu ......................21 PROGRAM ........................22 7.1. General ........................22 7.2.
-
Page 6: Introduction
INTRODUCTION 1.1. General This manual is intended for the user of the BS (Bake Star). The features and controls are being described, along with directions for the safest and most efficient use, in order to guarantee a long life of the unit. All pictograms, symbols and drawings in this manual apply to all BS-i models. -
Page 7: Safety Instructions
1.4. Safety instructions WARNING The outside of the unit can be very hot. WARNING The maximum load on top of the unit may never exceed 50 kg (110 lbs). WARNING Risk of slippery floor: Spills may cause slippery surfaces, clean-up promptly 1.4.1. -
Page 8: Hygiene
1.5. Hygiene The quality of a fresh product always depends on hygiene. Hands or tools that have been in contact with raw meat, must be cleaned thoroughly. 1.6. Service and technical support The electrical schematics of your unit is included. In case of malfunctions you can contact your dealer/service agent. -
Page 9: Description Of The Unit
The oven has an assist cleaning program for cleaning the oven after injection of the cleanser. Communication through USB enables easy read-out, re-work and creating of programs via a PC. For this, special software is available at Fri-Jado. 2.2. Intended use The hot air oven is designed solely for the rising and baking of bread or the heating of snack products. -
Page 10: Parts
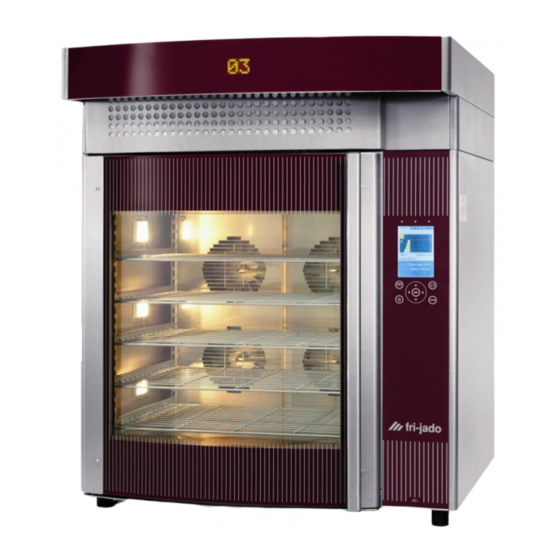
2.4. Parts 2.4.1. Overview of the BS A. Control panel B. Door C. Baking tray guide strip D. Lighting E. Baking sheet/rack F. Exhaust hood (optional) 10 / 36... -
Page 11: Installation And First Use
INSTALLATION AND FIRST USE All packing materials used for this unit are suited for recycling. After unpacking, check the state of the unit. In case of damage, store the packing material, and contact the transporter within fifteen working days after receiving the goods. 3.1. -
Page 12: First Use
3.3. First use When using the unit for the first time, clean the interior thoroughly and heat up the unit, see section 3.3.1. After commissioning discoloration of the cooking area can occur. 1. Thoroughly clean the outside, the removable parts and the accessories with soapsuds. Follow the cleaning instructions, see section 8. -
Page 13: Operation And Use
OPERATION AND USE WARNING At the end of the baking process the door may open automatically! This depends on the setting that you have chosen in the manager menu. Hold onto the door handle while operating the door knob WARNING Never touch the interior or the accessories in the oven area with bare hands when the unit is hot. -
Page 14: Switching-On The Unit
Rotation pad This pad is used for: Navigating through the menu-items in the screen. Changing the settings. Changing the settings quickly Increase value: rub the pad clock-wise with one finger. Decrease value: rub the pad counter-clock-wise with one finger. Screen The following tabs are present: ... -
Page 15: Taking Out The Products
4.5. Taking out the products WARNING After the baking, the interior of the unit and the glass panes are very hot. Always use oven gloves. The program goes to standby after having performed the program. An alarm signal will sound if this has been set. This signal can be stopped by pressing OK. 4.6. -
Page 16: Operate
OPERATE 5.1. Starting a program 1. Press the left-hand selection button 2. Select the required program. The total duration of the program is shown in minutes next to the name of the program. 3. Press START/PAUSE. Use the rotation pad or arrow buttons to toggle between the programs. ... -
Page 17: While Baking
5.3. While baking During the baking process, the display shows a graph with the planned temperature trajectory (orange line) and the current temperature (light orange field). Under the graph, the program name and the total time is shown. In the bottom of the screen, the current temperature inside the unit and the remaining time are given. -
Page 18: Interrupt A Program
5.5. Interrupt a program Interrupt temporarily: 1. Press START/PAUSE. 2. Press START/PAUSE again to resume the program. Interrupt definitely: 1. Press STOP/CANCEL. 2. Select “yes”. 3. Press OK. 5.6. Set the timer (optional) This function allows the user to automatically start a program on a pre-determined date and time. To enable this function, the “timer function”... -
Page 19: Settings
SETTINGS 6.1. General The settings of the unit can be changed by using the control panel. There are three kinds of settings: Information Manager Service 6.2. Information 6.2.1. Access 1. Activate the settings menu (right selection button). 2. -
Page 20: Manager
6.3. Manager The Manager menu is used to set the parameters. 6.3.1. Access 1. Activate the settings menu (right selection button). 2. Select “manager”. 3. Press OK. When a pin code has been set: 1. Use the rotation pad to enter the pin code. 2. -
Page 21: Service Menu
Open for cooling This parameter indicates whether the oven door can be opened in the following situations: - During cooling for the cleaning program. - When a program is started and the temperature in the oven is above the set temperature. - When the oven has been switched off and the temperature in the oven is above 80°C. -
Page 22: Program
PROGRAM 7.1. General Your dealer has programs that are loaded into the unit by means of a USB stick. These programs vary with the composition of the product and the customer‟s desire, and are customer dependent. You can protect the cooking programs and the „secured settings‟ by changing pin code “0000” in the menu, into any other pin code. -
Page 23: Programming Baking Step
7.2.2. Programming baking step The table on the screen contains the following columns: Time duration Temperature Fan speed Steam mode Number of steam pulses Steam valve position Row 1 shows step 1, row 2 shows step 2, etc. There can be no more than 9 steps. -
Page 24: Keeping Warm (Hold)
Set the steam input 14. Choose the cell in the fourth column, by moving the Steam modes arrow to the right. 15. Press OK. 16. Set the steam mode. (0, 1 or 2) using the turning knob. • 0 = Set number of pulses at the beginning of a baking step with a 3 second interval. -
Page 25: Edit Programs
7.3. Edit programs 1. Select “Edit program”. 2. Press OK. 3. Select the required program. 4. Press OK. Edit the program name 1. Select the position of the character. 2. Change the character using the rotation pad. 3. Use a „blank‟ to erase a character. 4. -
Page 26: Deleting Programs
7.4. Deleting programs Deleting of a program cannot be undone. 1. Select “delete program”. 2. Press OK. 3. Select the program. 4. Press OK. 5. Check whether the program name matches the program you wish to delete. 6. Select “yes” if this is the case. Select “no” if not. 7. -
Page 27: Sorting Programs
7.6. Sorting programs This function allows you to sort programs alphabetically. 1. Select “sorting alphabetically”. 2. Press OK. 3. Use arrows to select “yes”. 4. Press OK. 27 / 36... -
Page 28: Cleaning And Maintenance
Lift these up slightly and move them inward. Clean the guide strips and girder holders with hot water and Fri-Jado clean. Put back all parts. Be sure that the height distribution is correct; see section 3.3. -
Page 29: Interior
Be sure that the unit is connected to the water supply Preferably use no other cleaning agent than “Fri-Jado Clean”. Fri-Jado has carefully selected and tested the cleaning agent Prepare the cleaning agent in the proper proportions; see the package 1. -
Page 30: Cleaning The Rear Panel
2. Pull the rear wall a bit forwards and lift it. 3. Remove the rear wall from the oven. 4. Clean the rear wall with hot water and Fri-Jado clean. In case of heavy contamination, spray with Fri-Jado Clean, let it soak and rinse thoroughly. -
Page 31: Cleaning Guidelines For Non-Stick Coated Surfaces
8.4. Cleaning guidelines for non-stick coated surfaces Several parts of your rotisserie may have a non-stick coating surface. Abrasion and caustic chemicals reduce the life of the coating. With proper care, the non-stick coating surface should provide a long life of easy-to-clean service. DO NOT do the following: Do not use scouring pads, steel wool, Scotch-Brite pads, plastic wash pads, or other abrasive cleaning aids (abrasive pads remove the coating over time significantly reducing the life of the... -
Page 32: Malfunctions And Service
MALFUNCTIONS AND SERVICE Before you contact your supplier/dealer in case of a malfunction, there are some items you can check yourself: Is the power supply working properly? Check fuses and differential switch. Has the timer clock been properly set? Item Malfunction Possible action... -
Page 33: Open The Door Manually
9.2. Open the door manually WARNING Remove the plug from the wall socket. In case of a power failure or a defective door lock the oven door can always be opened manually. There are two unlocking pins on the top of the oven for this purpose. For an oven with an exhaust hood first carry out point 1: 1. -
Page 34: 10. Technical Specifications
10. TECHNICAL SPECIFICATIONS WARNING Consult the identification plate to get the proper specifications of the unit. The electrical data may vary from country to country. BS 3-i BS 5-i BS 8-i BS 10-i Model Dimensions Width 910 mm 910 mm 910 mm 910 mm Depth... -
Page 35: 11. Accessories
11. ACCESSORIES The following accessories are available: Stainless steel exhaust hood Stainless steel exhaust hood with integrated condenser Standard base Base in matching design Water filter system built into the base (not in standard base) ... - Page 36 Fri-Jado BV Oude Kerkstraat 2 4878 AA Etten-Leur The Netherlands Tel: +31 (0) 76 50 85 400 Fax: +31 (0) 76 50 85 444 36 / 36...
Need help?
Do you have a question about the BS3-i and is the answer not in the manual?
Questions and answers