Advertisement
Quick Links
Advertisement

Summary of Contents for gofanco HDbitTv2
- Page 1 HDMI HDbitT CAT5e/6 Extender with IR - 120m User's Guide P/N: HDbitTv2 G4-0104A...
- Page 2 Thank you for purchasing from gofanco. Our products aim to meet all your connectivity needs wherever you go. For optimum performance and safety, please read the instructions carefully and keep this User’s Guide for future reference. If you need more information about our products, please visit www.gofanco.com.
- Page 3 • Shut off power and make sure environment is safe before installation • Do not plug the HDMI cables and IR cables in/out when the device is in use to avoid cable damage. Make sure they are plugged into the correct ports •...
- Page 4 Supports resolutions up to 1080p@60Hz • Direct one-to-one connection or one-to- multiple over your Gigabit Ethernet switch - additional RXs, part number HDbitTv2- RX, sold separately • Supports IR signal extension - control a media player from a remote location with...
-
Page 5: Product Layout
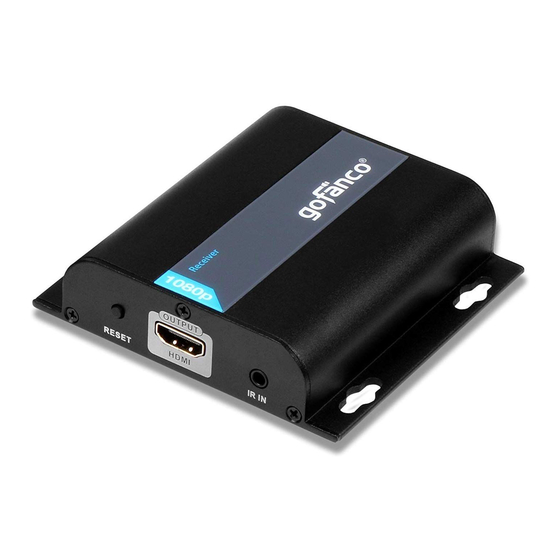
Product Layout Figure 1: Transmitter (TX) Reset: Press to reset the Transmitter HDMI In: Connects to your HDMI source with an HDMI cable (cable not included) IR Out: Connects to the IR Blaster cable Power Jack: Connects to the included power adapter Power LED: On when the Transmitter is powered... - Page 6 Figure 2: Receiver (RX) Reset: Press to reset the Receiver HDMI Out: Connects to your HDMI display with an HDMI cable (cable not included) IR In: Connects to the IR Receiver cable Power Jack: Connects to the included power adapter Power LED: On when the Receiver is powered RJ45 In: Connects to the RJ45 of the...
- Page 7 CAT Cable Wiring We suggest both RJ45 connectors be wired identically using T568B wiring standard for the best performance and compatibility. Hardware Installation Power off all devices including your HDMI source and HDMI display(s). Connect your HDMI source device to the Transmitter's HDMI Input connector with an HDMI cable (HDMI cable not included).
- Page 8 Optional: Connect the IR Blaster cable to the Transmitter's IR Output port. Face the eye towards your HDMI source device's IR window. This connection is needed only if you need to control your HDMI source from the remote location. Plug your CAT5e/6 cable between the Transmitter's RJ45 Output and Receiver's RJ45 Input.
- Page 9 Application 1-to-1 Connection Direct connection between the TX and RX or through a Gigabit LAN via a Dedicated Gigabit Switch. If deployed within an existing network, create a VLAN to segregate our devices (TX and RX) from the rest of the network devices. 1-to-1 Direct Connection 1-to-1 LAN Connection...
- Page 10 Notes: - Many-to-Many Connection: A Smart Switch is required. Create a separate VLAN for each TX and its corresponding RX's. Each VLAN can only have 1 TX. - Additional RXs, part number HDbitTv2-RX, sold separately.
- Page 11 FAQ & Solutions What if my display shows “Waiting for connection...”on the bottom right corner? 1) Please check if the power adapters of Transmitter (TX) and Receiver (RX) are connected and powered on. 2) Check the network cable (CAT5e/6) is firmly connected between the TX and RX.
-
Page 12: Specifications
Specifications Item Specifications HDMI Signal HDMI 1.3 and HDCP 1.4 compatible 480i@60Hz, 480p@60Hz, 576i@50Hz, Resolution 576p@50Hz, 720p@50/60Hz, 1080i@50/60Hz, 1080p@50/60Hz Low resistance, oxygen free, 100% Network Cable copper (Cat5e/Cat6/Cat6A/Cat7) Transmission Distance Up to 394ft (120m) @ 1080p60Hz Supportss 20-60KHz wide frequency IR Remote Control remote control Operating Temperature... - Page 13 Blank Page...
- Page 14 Blank Page...
- Page 15 Disclaimer The product name and brand name may be registered trademarks of related manufacturers. TM and ® may be omitted on the user’s guide. The pictures on the user’s guide are just for reference, and there may be some slight differences with the actual products.
- Page 16 Thank you for choosing gofanco www.gofanco.com...


Need help?
Do you have a question about the HDbitTv2 and is the answer not in the manual?
Questions and answers