
Subscribe to Our Youtube Channel
Related Manuals for Badger Meter MN-MR100


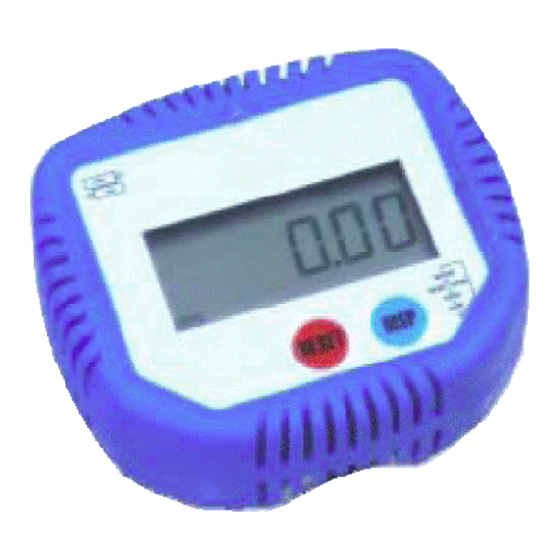
Summary of Contents for Badger Meter MN-MR100
- Page 1 ® Badger Meter Europa GmbH MN-MR100 Electronic register SUPPLEMENTARY MANUAL November 2005 IND_MNMR100_Bedienungsanleitung_0703_e.doc...
-
Page 2: Table Of Contents
1. GENERAL INFORMATION..................1 2. Operation....................... 1 Display button......................1 Reset button .......................1 Flowrate........................1 Sleep mode ........................1 Battery replacement ....................1 3. Register maintenance ..................2 To remove the register ....................2 To replace the register ....................2 To rotate the register ....................2 Parts list........................3 4. -
Page 3: General Information
Operation page 1/11 1. GENERAL INFORMATION Please read and retain this instruction manual to assist you in the operation and maintenance of this electronic register. This manual assists you in operating and maintaining your new electronic LCD register. The information contained will help you ensure many years of dependable performance and trouble free operation. -
Page 4: Register Maintenance
Register maintenance page 2/11 3. Register maintenance Refer to the exploded diagram (fig. 2) for a full parts breakdown and a list of available spare parts. To remove the register Remove the protective boot (item 9). Loosen the two grub screws (item 1) using a 3mm AF Hex key until the register can be lifted from the two bollards (item 7). -
Page 5: Parts List
Electronic register page 3/11 Parts list Order for replacement Item Part n° N° off Part / Set Description N411 N411s incl items 1,5 & 7 Grub screw Meter register assy IM066 IM066s Battery set IM060A IM060A s Battery cover set BS133 O´ring MS115... - Page 6 Electronic register page 4/11 1. METER MODEL MEtr1 11 meter model (N/A) Factory set 2. TOTALS 21 change batch total (units) 23 change resettable accumulative total (units) totL2 24 change resettable accumulative total (decimal point) 25 change non-resettable accumulative total (units) 26 change non-reset accumulative total (decimal point) 22 change batch total (decimal point) 27 change “K”...
-
Page 7: Meter Model
Electronic register page 5/11 Meter model 11 meter model MEtr1 NOTE: The meter model is factory set and cannot be changed. To return the meter to the operating mode press the RESET button for 5 seconds. Totals 21 BATCH TOTAL = unit 21 (set units) totL2 a) Press and hold down RESET for 5 seconds until “MEtr1”... -
Page 8: Flowrate
Electronic register page 6/11 Press and hold down RESET until “program” disappears to accept setting. g) Press RESET for five seconds to return the meter to the operating mode. 25 NON-RESET ACCUM TOTAL = unit 25 (set units) a) Press and hold down RESET for 5 seconds until “MEtr 1” appears. b) Press the DISP button to reach “totL 2”. - Page 9 Electronic register page 7/11 d) Press and hold down RESET for 2 seconds (program will appear). e) Press RESET to scroll through the settings (ltr, gal, qrt) to the desired units. Press and hold down RESET until “program” disappears to accept setting. g) Press RESET for five seconds to return the meter to the operating mode.
-
Page 10: Display
Electronic register page 8/11 e) Press DISP to go to the next digit. To change press RESET. Note : Total number 999.9. Press and hold down RESET until “program” disappears to accept setting. g) Press RESET for five seconds to return the meter to the operating mode. Display 41 SLEEP MODE = SLP 41 (set sleep mode) diSP4... -
Page 11: Calibration
Electronic register page 9/11 45 LIGHT = LitE 45 N/A (turn back light on or off) Note: The back light is not used with this model meter 46 TIME = tiME 46 N/A (set back light time) Note: The back light is not in use with this model meter Calibration CALI5 Note: Provides calibration adjustment up to +/- 5% of reading. -
Page 12: Diagnostics
Electronic register page 10/11 Diagnostics 71 DIAGNOSTICS = dIA 7 (diagnostic mode) dIA7 a) Press and hold down RESET for 5 seconds until “MEtr 1” appears. 71 DIAGNOSTICS = dIA 7 (diagnostic mode) b) Press the DISP button 6 times to reach “dIA 7”. Press RESET “dIA 71”... -
Page 13: Warranty
(the ‘warranty period’) PROVIDED THAT, during the warranty period: 1. Badger Meter receives notice setting out full details of any defect in any product and details of the time and place of purchase of the product and 2. - Page 14 Hotline Tel. +49-7025-9208-0 or -31 Fax +49-7025-9208-15 Badger Meter Europa GmbH ® Subsidiary of Badger Meter, Inc., USA Nürtinger Str. 76 72639 Neuffen (Germany) E-mail: badger@badgermeter.de www.badgermeter.de...
Need help?
Do you have a question about the MN-MR100 and is the answer not in the manual?
Questions and answers