Table of Contents
Advertisement
Quick Links
Advertisement
Table of Contents

Related Manuals for EF HB BI 584 FA


Summary of Contents for EF HB BI 584 FA
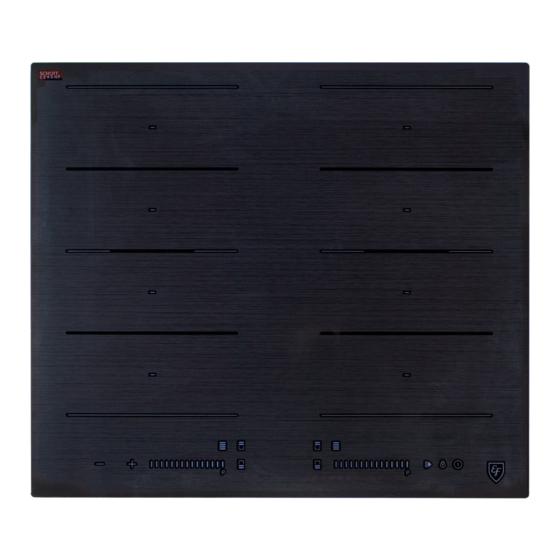
- Page 1 BUILT-IN INDUCTION HOB Model: HB BI 584 FA EMBRACING FINEST MOMENT USER MANUAL...
-
Page 2: Safety Guidelines
Dear Customer, Thank you for having purchased and given your preference to our product. This manual provides a means to make full use of the features of this product. The safety precautions and recommendations are also featured in this manual. We recommend that you read this manual for best performance and to extend the life of your appliance. - Page 3 Important Safety Instructions • After having unpacked the appliance, check to ensure that it is not damaged. • No combustible material or products should be placed on this appliance at any time. • In order to avoid hazard, this appliance must be installed according to the instructions for installation.
- Page 4 Health Hazard • This appliance complies with electromagnetic safety standards for domestic cooking. It should not interfere with other electronic unit. • WARNING: Persons with cardiac pacemakers or any other electrical implants must check with their doctor if they can use the induction cooking system.
- Page 5 • Do not use a steam cleaner to clean your cooktop as the moisture can get into the appliance therefore making it unsafe • Do not place or drop heavy or sharp objects on the glass ceramic hob • Do not use pans with jagged edges or drag pans across the glass surface as this can scratch the glass.
-
Page 6: Product Overview
PRODUCT OVERVIEW HB BI 584 FA Power Booster Heating Zone (9*) (P*) 1,2,3,4 1800W 2400W Flexi Zone (L/R) 3000W 3600W CONTROL PANEL 1. ON/OFF Key 2. Power Level Selection 3. Timer Key/Display 4. Key Lock 5. Heating Zone Selection 6. Flexible Zone Selection 7. -
Page 7: Use Of Induction Hob
USE OF INDUCTION HOB Before using the induction hob, read this manual carefully and take note on the “Safety Guidelines” section. Remove any protective film that may still be on the induction hob. Induction Cooking System Induction cooking is a safe, advanced, efficient, and economical cooking technology. When cooking zone is selected, the electromagnetic circuit produce induced currents that instantly heat the bottom of the cookware which then transfer heat directly to the food. - Page 8 symbol “ ” does not appear on the display and the water is heating, the pan is suitable. • The cooking zone will not operate if the cookware diameter is too small (the symbol “ ” will appear on the display. Follow the recommended cookware diameter given in the following table to correctly use the cooking zone.
- Page 9 Some induction cookware doesn’t have a complete ferromagnetic base: If the material of the bottom of the cookware contains aluminum, the ferromagnetic area will also be reduced. This may mean that the cookware will not become hot enough or even be detected. Touch Control The hob is fitted with induction cooking zones.
-
Page 10: Operation
OPERATION TO START COOKING Turn on the main power supply, the buzzer beeps once and all the indicators light up for 1 second then goes off, indicating that the hob has entered the state of standby mode. Touch the ON/OFF key. -
Page 11: Booster Function
Turn the cooking zone off by sliding the power selector towards left or directly jump to power level to “0”. Make sure the display shows “0”. Turn the whole cooktop off by touching the ON/OFF control. Note: Beware of hot surfaces “H”... - Page 12 FLEXIBLE ZONE FUNCTION The zone may be used as a single zone or two individual zones depending on the cooking needs in each situation. It is made of four independent inductors that can be controlled separately. When the flexible zone is selected, only the zone covered by the cookware is activated (pan detection function).
- Page 13 To use as independent zone, select the symbol “ “ or “ ” for the 4 different zones Two Independent Zone The front and rear heating zones have two inductors and can be used independently Select the required heat setting for each of the heating zone.
-
Page 14: Pause Function
PAUSE FUNCTION When at least one cooking zone is in operation, the cooking can be paused temporarily by touching the pause function key “ ” 1. Select the pause function , all the heating zones stop working and the power level display show“||” for all zones. 2. -
Page 15: Overheat Protection
OVERHEAT PROTECTION When overheating occurs, the cooking zone will display error code: E6 – Overheating of cooking zone E9 – Overheating of IGBT sensor The induction hob will stop heating and no power will be delivered to the cooking zone. Let the cooking zone cool down before using. - Page 16 ECO MODE CONFIGURATION INSTRUCTION IMPORTANT: PART FOR QUALIFIED INSTALLERS ONLY. ECO Mode Configuration This hob can be connected to a 13, 16, 25 or 32Amp supply and configured to work on any of these power settings. The hob is preset to be connected to a 13Amp supply, all four zones are selected at the same time the hob will limit the maximum power consumed so that the 2.8kW power supply cannot be exceeded.
- Page 17 Configuration should follow the method of connections as shown below. • When you use the power cord of three cores, you need to connect the power cord with terminal plates. (Fig.1) • When you use the power cord of five cores, you only need to connect the power cord.
- Page 18 WARNING Never let the hob operates on 3.6/6.0/7.2kW mode with pre-assembly 13Amp cable & plug. Exceeding power consumption will blow the fuse and may damage the hob & causing other issues To configure the hob into ECO Mode Touch ON/OFF key to switch on the power supply. The buzzer beeps once, all displays show “–...
-
Page 19: Timer Function
Touch the relevant zone keys again, timer display stop flashing and the previously selected zone key will show “o” indicating that the setting is ok. Touch the ON/OFF to switch off. Then switch on and the hob is configured ready to use at the ECO Mode you set for. - Page 20 As an automatic switch off timer - to turn one or more cooking zones off after the set time is up. In both ways, the timer can be set from “01” to “99” minutes. Using Timer as Minute Minder The minute minder can be activated if there is no cooking zone selected Make sure that the cooktop is turned on.
- Page 21 If the timer is set on multiple cooking zones: It is possible to set the cooking timer for multiple cooking zones simultaneously. To program the timer on another cooking zone, repeat the steps as described above. When multiple timer is activated, there will be red dot shown on each relevant cooking zone.
-
Page 22: Heat Setting
HEAT SETTING Heat Setting Suitability • delicate warming for small amounts of food 1 - 2 • melting chocolate, butter and food that burn quickly • gentle simmering • reheating 3 - 4 • simmering • slow boiling 5 - 6 •... -
Page 23: Care And Maintenance
CARE AND MAINTENANCE Problem Action Remarks Switch off the main power of • When the power of the cooktop is the cooktop off. switched off, there will be no ‘hot Apply a cooktop cleaner while surface’ indication but the cooking the glass is still warm (but not zone may still be hot! Take extreme Soiling on glass... -
Page 24: Troubleshooting
TROUBLE SHOOTING Problem Possible causes Action • Make sure the cooktop is connected to the power The cooktop cannot be • No power. supply and is switched on. turned on. • Check whether there is power outage • Unlock the controls. See The touch controls are not •... -
Page 25: Failure Display And Inspection
NOTE: Please do not disassemble the unit by yourself to avoid any dangers and damages to the induction hob. TECHNICAL SPECIFICATION Induction Hob HB BI 584 FA Cooking Zones 4 Zones Supply Voltage 220-240V~ Installed Electric Power... -
Page 26: Advice For The Installer
Incorrect installation, for which the manufacturer accepts no responsibility, may cause personal injury of damage. • Always disconnect the cooktop from main power supply before carrying out any maintenance operations or repairs Product Dimensions Fig.1 L(mm) W(mm) H(mm) D(mm) A(mm) B(mm) X(mm) Min 50 HB BI 584 FA... - Page 27 Selection of Installation Equipment • The cooktop must be housed in heat-resistant work surface to avoid large deformation caused by the heat radiation. • Cut the work surface according to the dimension shown in the above table (Fig.1) • A minimum of 50mm space shall be kept around the hole (refer to “X” in Fig.1) •...
- Page 28 • There is adequate air flow for the cooktop to fully function – the base of the cooktop must have direct unrestricted ventilation to the room where the cooktop is installed. To use heat-resistant and easy-to-clean finishes (such as ceramic tiles) for the wall •...
-
Page 29: Electrical Connection
ELECTRICAL CONNECTION The power supply should be connected in compliance with the relevant standard, or a single- pole circuit breaker. The method of connection is shown below. • Electric power connection shall be carried out only by a qualified personnel •... - Page 30 This appliance is labeled in compliance with European directive 2012/19/EU for Waste Electrical and Electronic Equipment (WEEE). By ensuring that this appliance is disposed of correctly, you will help prevent any possible damage to the environment and to human health, which might otherwise be caused if it were disposed of in the wrong way.
-
Page 31: Warranty And Service
WARRANTY AND SERVICE To activate your warranty, please register your appliance. Warranty registration can be done via our website or scan the QR code below Website https://shop.casa.sg/E-Warranty QR Code Scan the QR Code below. It will redirect straight to our “Warranty Registration” page. Casa (S) Pte Ltd.
Need help?
Do you have a question about the HB BI 584 FA and is the answer not in the manual?
Questions and answers