Advertisement
Quick Links
6T H G E N BR ON CO
R OOF R AC K
IN S TAL L I NSTRU C TIO NS
Please read the mounting instructions below carefully before attempting to install.
Check out the install video on the product page for factory rack disassembly.
Thank you for purchasing from JcrOffroad! Checkout our website, www.jcroffroad.com for other great off-road
products. Be sure to rate and review our product online. If you have any questions or are missing parts, please
don't hesitate to call us at 269-353-1184!
Advertisement

Subscribe to Our Youtube Channel
Summary of Contents for JCROffroad BR6TD
- Page 1 Check out the install video on the product page for factory rack disassembly. Thank you for purchasing from JcrOffroad! Checkout our website, www.jcroffroad.com for other great off-road products. Be sure to rate and review our product online. If you have any questions or are missing parts, please...
-
Page 2: Includ Ed Hardwar E
INCLUD ED HARDWAR E 4 DOOR 5/16”-18 X 5/8” 5/16”-18 Button Head Serr. Flange Nut 1/4"-20 X 3/8" Button Head M8 X 1.25mm Nylock Nut 1/4"-20 X 1" Hex Head 1/4” ID Washer 5/16” 1/2” Rubber USS Washer Push-in Bumper Long Short Hinge Spacer... - Page 3 INCLUD ED HARDWAR E 2 DOOR 5/16”-18 X 5/8” 5/16”-18 Button Head Serr. Flange Nut 1/4"-20 X 3/8" Button Head M8 X 1.25mm Nylock Nut 1/4"-20 X 1" Hex Head 1/4” ID Washer 5/16” 1/2” Rubber USS Washer Push-in Bumper Long Short Hinge Spacer...
-
Page 4: Included Parts
I NC LU D E D PA RTS 4 DOOR 1L/1R 1L/1R 1L/1R... - Page 5 I NC LU D E D PA RTS 2 DOOR 1L/1R 1L/1R...
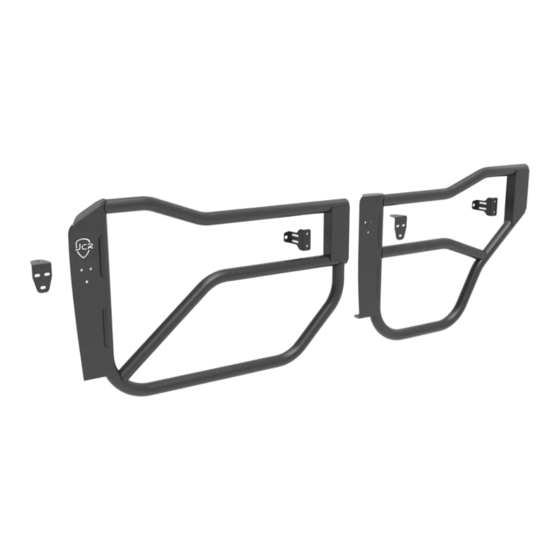
- Page 6 A SS E M BLY The installation for each door is essentially the same. Start by loosely mounting the hinge latch bracket to the inside of the front of the door using the 5/16”-18 X 5/8” button heads and 5/16”-18 serr. flange nuts. Next, loosely mount the latch bracket to the inside of the rear of the door using the same hardware.
- Page 7 A SS E M BLY With the latch bracket loosely in place, you can loosely mount the latch to it using the 1/4” X 1” hex head bolts and 1/4” washers. The latch should be oriented so that the catch is towards the inside and the lever is on the top towards the front of the door as shown below.
- Page 8 AS SE M BLY Once everything is loosely in place on the door, install a spacer onto each hinge. The taller spacer goes on the top hinge and the counter sunk side should go down against the hinge. Next, you can begin installing the doors. Set the hinge brackets onto the top of the spacers.
- Page 9 AS SE M BLY Once the door is in place, you can begin tightening everything into place. To start, lift the back of the door until it is parallel with the factory body line behind it (2 door) or the top tubes on the front and back doors are parallel (4 door).


Need help?
Do you have a question about the BR6TD and is the answer not in the manual?
Questions and answers