Table of Contents
Advertisement
Quick Links
JEEP CHEROKEE DIY
WINCH BUMPER
INSTRUCTIONS
HARDWARE
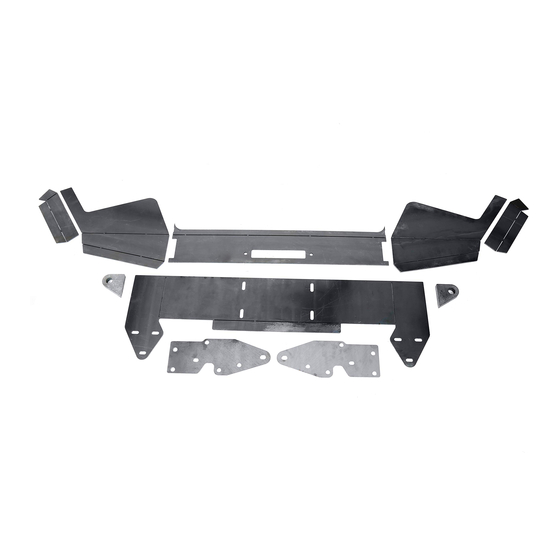
XJDIY01: Center Section/ Front Face
XJDIY02: Side Wings
XJDIY03: Side Protection
XJDIY04: Winch Plate/Frame Mounts
XJDIYUNF: UNF Frame Plates
DIY-DRT: Dring Tabs
JcrOffroad can not be held responsible for miss-assembly or faulty assembly. It is your
responsibility to be able to properly weld this product together. Extreme care should be taken to
ensure that the person welding is duly qualified and has experience with the process.
Please read the mounting instructions below
carefully before attempting to install.
ASSEMBLY
Advertisement
Table of Contents

Subscribe to Our Youtube Channel
Related Manuals for JCROffroad DIY-XJ-F-WN


Summary of Contents for JCROffroad DIY-XJ-F-WN
- Page 1 XJDIYUNF: UNF Frame Plates DIY-DRT: Dring Tabs JcrOffroad can not be held responsible for miss-assembly or faulty assembly. It is your responsibility to be able to properly weld this product together. Extreme care should be taken to ensure that the person welding is duly qualified and has experience with the process.
- Page 2 The first piece you will want to bend will be the (1) front Center Section. You will be bending one 90* angle. It doesn’t matter which side you make the front. Clamping the Center Section to a table, bend up the first 90° angle. (see figure 1a) You may can clamp it either way, figure 1b shows the other option.
- Page 3 Set the bent Winch Plate (1) off to the side. Next you will need to bend the two Bumper Wings Both the top bend and bottom bend both will be bent to 90°. You will need to bend a Right and Left, which will end up having two wings that are opposites. Clamp one of the Bumper Wings to the table.
- Page 4 With all the parts bent, you will now start to tack the bumper together. First you will want to tack together the Winch Plate (1) and Front Center Section (2). The bend on the Center Section (2) will be the top of the bumper. With the center of the bumper tacked together, you will now tack on the outer Wings (3) Lay the center of the bumper top down on the table.
- Page 5 Position one wing to the center section and tack weld it in place. (Figure 6b) Repeat on other side. Be sure to only tack the bumper together at this point. Once you have the wings tacked on, carefully flip the bumper over. With the bumper right side up, you will need to position the top of the Bumper wings and tack them in place The next parts to be tack on will be the Side Protection caps (4).
- Page 6 After every part is securely tacked , it would be wise to test fit the bumper on your Jeep before final welding, grinding, and finishing. With the bumper tacked together and fit checked, it is now time to fully weld the bumper together.
- Page 7 After the bumper has cooled off some, this is where we recommending doing the grinding. You may want to do preliminary grinding here and finish grinding at the end, but the shell of the bumper is easier to grind before the d-ring tabs are welded in. With the bumper welded together and ground, it is now time to install in the D ring tabs.
Need help?
Do you have a question about the DIY-XJ-F-WN and is the answer not in the manual?
Questions and answers