
Related Manuals for JCROffroad BR6RK-HT


Summary of Contents for JCROffroad BR6RK-HT
- Page 1 TA BL E OF CONT E NTS 6TH GEN B R ONCO 4 DO OR SHORT R AC K ......2 6TH GEN B R ONCO 2 DO O R S HORT R AC K ......9...
-
Page 2: Install Instructions
Check out the install video on the product page for factory rack disassembly. Thank you for purchasing from JcrOffroad! Checkout our website, www.jcroffroad.com for other great off-road products. Be sure to rate and review our product online. If you have any questions or are missing parts, please... -
Page 3: I Nclu D E D Hardware
I NCLU D E D HARDWARE 1/4"-20 X 3/4" 1/4"-20 Button Head Serr. Flange Nut 1/4” ID Washer... -
Page 4: Included Parts
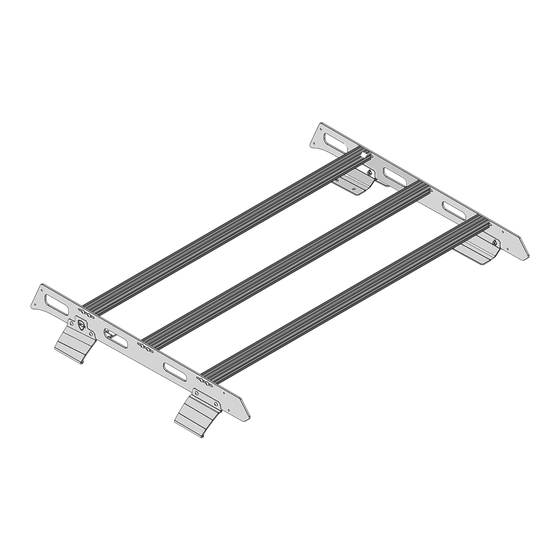
INCLUDE D PARTS 1L/1R 1L/1R 1L/1R 1L/1R... - Page 5 A SS E M BLY Start by mounting three crossbars between the side rails. For this, use the 1/4”-20 X 3/4” button head bolts and the 1/4” ID washers (2 per bar per side). Make sure the machined slot in the rail of the crossbar is facing up so you can easily add t-nuts to mount your gear.
- Page 6 A SS E M BLY Next, find the inner mounts labeled M and R. The inner mounts are the ones with the sharper angles. Apply one of the provided rubber sheets to the bottom of each of them, making sure that the rubber hugs the bracket tightly across the entire bottom.
- Page 7 A SS E M B LY Next, find the outer R and M mounts and apply the remaining rubber sheets the bottom of each, similar to the inner mounts. Be sure to cover the top of the hook flange as well. For visual aid on this step, check out 5:20 in the instruction video at the bottom of the rack’s product page.
- Page 8 D I M E NS IO NS...
- Page 9 Check out the install video on the product page for factory rack disassembly. Thank you for purchasing from JcrOffroad! Checkout our website, www.jcroffroad.com for other great off-road products. Be sure to rate and review our product online. If you have any questions or are missing parts, please...
- Page 10 I NCLU D E D HARDWARE 1/4"-20 X 3/4" 1/4"-20 Button Head Serr. Flange Nut 1/4” ID Washer...
- Page 11 INCLUDE D PARTS 1L/1R 1L/1R 1L/1R 1L/1R...
- Page 12 ASSE M BLY Start by mounting four crossbars between the side rails. For this, use the 1/4”-20 X 3/4” button head bolts and the 1/4” ID washers (2 per bar per side). Make sure the machined slot in the rail of the crossbar is facing up so you can easily add t-nuts to mount your gear.
- Page 13 A SS E M BLY Next, find the inner mounts labeled R and M. The inner mounts are the ones with the sharper angles. Apply one of the provided rubber sheets to the bottom of each of them, making sure that the rubber hugs the bracket tightly across the entire bottom.
- Page 14 AS SE M BLY Next, find the outer R mounts and attach more of the rubber sheets the bottom of each, similar to the inner mounts. Be sure to cover the top of the hook portion as well. For visual aid on this step, check out 5:20 in the instruction video at the bottom of the rack’s product page.
- Page 15 ASSEMBLY Finally, with the rack secured into position, find the outer M mounts and attach the remaining rubber sheets the bottom of each. On these mounts, do not cover the hooked portion with the rubber because it will not fit into position if you do so.
- Page 16 DI M E N SI O NS...
Need help?
Do you have a question about the BR6RK-HT and is the answer not in the manual?
Questions and answers